Advertisement
Table of Contents
Advertisement
Table of Contents

Related Manuals for Planet PAX A920 Pro


Summary of Contents for Planet PAX A920 Pro
- Page 1 PAX A920 Pro Setup Guide 2023 weareplanet.com...
-
Page 2: Table Of Contents
PAX A920 Pro Setup and User Guide Table of contents A920 Pro box contents ..........................2 A920 Pro terminal details ..........................3 A920 Pro charging cradle ........................... 4 Network configuration ..........................5 Checking IP connection settings ......................10 Viewing software version ........................... 11 Downloading software/firmware ........................ -
Page 3: A920 Pro Box Contents
PAX A920 Pro Setup and User Guide 1. A920 Pro box contents Each A920 Pro is supplied with the following items: 1 x A920 Pro terminal 1 x Tactile Sticker 1 x Tactile Sticker Guide 1 x Charger 1 x USB-A to USB-C cable adapter for power supply... -
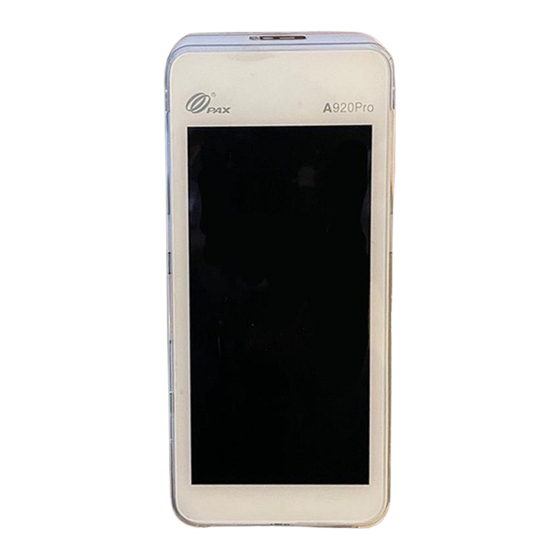
Page 4: A920 Pro Terminal Details
PAX A920 Pro Setup and User Guide 2. A920 Pro terminal details Power us supplied via a 5150mAh battery. The battery can be charged using the USB cable provided by connecting it to the charger or by purchasing a charging cradle. -
Page 5: A920 Pro Charging Cradle
PAX A920 Pro Setup and User Guide 3. A920 Pro charging cradle Planet may supply the A920 Pro individually or with a charging cradle. In case the customer wants to purchase the cradle separately at a later point, they can get them directly from local suppliers: EMEA: Secure Retail USA &... -
Page 6: Network Configuration
4. Network configuration Wi-Fi setup - (DHCP) 1. To enter the IntegraTE_Pax menu, you will need to press and hold the ‘Planet' icon at the top of the screen. 2. When “Please Enter Password” is displayed, enter password and press the green Enter button. - Page 7 PAX A920 Pro Setup and User Guide At this stage, Android will take over and you will see the following screen. 7. Ensure the “Wi-Fi” option is set to “On”. The terminal will display all available Wi-Fi networks. 8. At this stage, select the Wi-Fi network of your choice.
- Page 8 PAX A920 Pro Setup and User Guide Wi-Fi setup - (Static) 1. To enter the IntegraTE_Pax menu, you will need to press and hold the ‘Planet' icon at the top of the screen. 2. When “Please Enter Password” is displayed, enter password 1235789 and press the green Enter button.
- Page 9 10. Next, select “Security”. 11. From the dropdown list, select the security type related to your Wi-Fi network. From a Security perspective Planet recommend using WPA/WPA2 PSK. 12. Then, enter the Wi-Fi password. Select the “Show Password” option should you wish to view the password being entered.
- Page 10 PAX A920 Pro Setup and User Guide 15. When prompted, enter the following information: IP Address Gateway IP Address Network Prefix Length (if applicable) Scroll down using the bar on the right-hand side of the screen to reveal further options.
-
Page 11: Checking Ip Connection Settings
PAX A920 Pro Setup and User Guide 5. Checking IP connection settings 1. To enter the IntegraTE_Pax menu, you will need to press and hold the ‘Planet' icon at the top of the screen. 2. When “Please Enter Password” is displayed, enter password and press the green Enter button. -
Page 12: Viewing Software Version
1. To view the Software version on your terminal you will need to enter the IntegraTE_Pax menu, you will need to press and hold the ‘Planet' icon at the top of the screen. 2. When “Please Enter Password” is displayed, enter password and press the green Enter button. -
Page 13: Downloading Software/Firmware
1. To view the Software version on your terminal you will need to enter the IntegraTE_Pax menu, you will need to press and hold the ‘Planet' icon at the top of the screen. 2. When “Please Enter Password” is displayed, enter password and press the green Enter button. - Page 14 PAX A920 Pro Setup and User Guide 9. On the “Enter TMS TID” screen, the user must enter the unique terminal ID provided by Planet. This ID will consist of 8 digits. There is only ONE TMS TID per pin pad.
-
Page 15: Downloading Configuration
1. To complete a configuration download the user will need to enter the IntegraTE_Pax menu, you will need to press and hold the ‘Planet' icon at the top of the screen. 2. When “Please Enter Password” is displayed, enter password and press the green Enter button. - Page 16 PAX A920 Pro Setup and User Guide 8. Should your Terminal not have any configuration updates available it will display “No new configuration available”. weareplanet.com...
-
Page 17: Sim Card Setup
Before proceeding, please ensure Wi-Fi is disabled from within the IntegraTE menu. 1. You will need to press and hold the ‘Planet' icon at the top of the screen. 2. When “Please Enter Password” is displayed, enter password and press the green Enter button. - Page 18 PAX A920 Pro Setup and User Guide 7. Then, select “Mobile Networks or Cellular Networks” when prompted. 8. You will be displayed with the following screen. 9. Toggle on Mobile Network and Data Roaming. 10. Select your appropriate APN. weareplanet.com...
- Page 19 PAX A920 Pro Setup and User Guide 11. You can add an APN by selecting the “+” symbol in the top right-hand corner. Name: You can insert the APN name of your choice. APN: Please add the necessary APN provided to you by the SIM provider.
- Page 20 PAX A920 Pro Setup and User Guide 17. Now, select the soft square button across the bottom of the terminal screen. 18. Proceed by closing the “APNs” screen and the “Data Usage” screen 19. This will take you back to the home screen.
-
Page 21: Contact Us
PAX A920 Pro Setup and User Guide 10. Contact us Need help? If you have a technical issue or need support troubleshooting, please check the relevant portal for assistance. Our Global Support Team will be glad to help. Visit www.weareplanet.com/support Disclaimer: The procedures included in the document are only valid for brand new terminals.
Need help?
Do you have a question about the PAX A920 Pro and is the answer not in the manual?
Questions and answers