Table of Contents
Advertisement
Quick Links
AGROWtEK
Technology to Help You Grow
Specifi cations
Input Power
Max Switching Current
Max Switching Voltage
HP Rating
Status Indicators
Limit Inputs
Limit Type
Enclosure Knock-Outs
Enclosure Rating
Interface
Relay Ratings
Relay Cycle Counters
Contents
KEEP THESE INSTRUCTIONS
1
Intelligent Reversing Motor Controller
for 230V 1-Phase & 3-Phase AC Motors
2 W @ 12-24Vdc
Class II / Limited Energy Power Supply
8A @ 230Vac ~
230 Vac ~
2 HP
Red LEDs, Forward/Reverse
(1) Forward, (1) Reverse
Dry Contact Switch
(2) dia. 7/8"
TYPE 12K NEMA
GrowNET™, MODBUS
100,000 cycles
Up to 4 billion cycles per relay
© Agrowtek Inc. | www.agrowtek.com | Technology to Help You Grow™
© Agrowtek Inc. | www.agrowtek.com | Technology to Help You Grow™
2
2
2
3
3
4
5
6
6
7
8
8
9
INSTRUCTION MANUAL
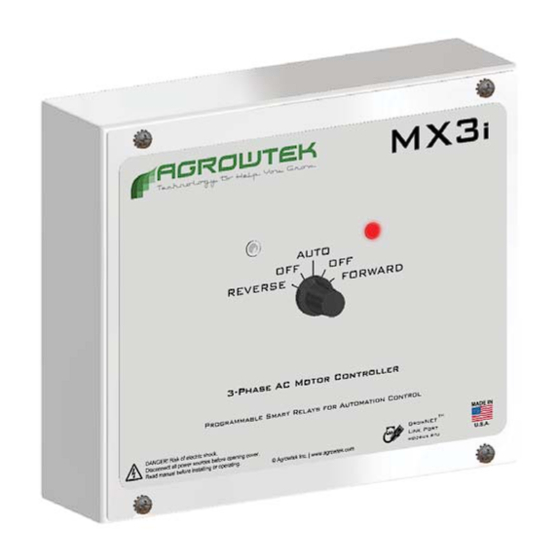
MX3i
10
10
11
11
12
12
12
12
13
13
13
13
13
Advertisement
Table of Contents

Related Manuals for Agrowtek MX3i


Summary of Contents for Agrowtek MX3i
-
Page 1: Table Of Contents
Single Phase Connection Maintenance & Service Three Phase Connection Storage and Disposal Limit Switch Wiring Warranty KEEP THESE INSTRUCTIONS © Agrowtek Inc. | www.agrowtek.com | Technology to Help You Grow™ © Agrowtek Inc. | www.agrowtek.com | Technology to Help You Grow™... -
Page 2: Introduction
MX3i by the GCX control system on the device confi guration page (see confi guration.) The position is stored in the MX3i’s local memory every time the travel stops. In the event that an operator changes the position by using the manual knob on the front of the unit, the position will continue to be tracked and stored accurately in the MX3i’s memory. -
Page 3: Installation Instructions
.agr owt ek.c om mod bus rtu U.S .A. 1. Manual Knob Manaully operate and disable the MX3i outputs, or set to Auto mode. 2. LED’s Indicate forward/reverse output is active. 3. Cover Screws Loosen bottom and remove top screws. -
Page 4: Dimensions
Dimensions Mounting holes: dia. 0.201” 5.5” 2.1” BACK 7.0” © Agrowtek Inc. | www.agrowtek.com | Technology to Help You Grow™... -
Page 5: Mounting The Relay
Mounting the Relay The MX3i intelligent relay is to be securely installed to a vertical wall surface using the four mounting holes provided in the rear of the enclosure. Removing the front cover is required to mount and wire the relay. -
Page 6: Internal Component Locations
2.1mm DC barrel jack and included power supply, or c) the Vin terminal block on the circuit board for DIN rail power supplies. DC Power In DC Barrel Jack RJ45 Terminal Block GrowNET Port © Agrowtek Inc. | www.agrowtek.com | Technology to Help You Grow™... -
Page 7: Motor Wiring
PCB. Conduit is recommended for wiring connections. REPLACE FUSE MAX 10A FROM MOTOR CIRCUIT BREAKER Use 300V or higher rated multi-conductor cable for limit switch connections if run in conduit with AC conductors. © Agrowtek Inc. | www.agrowtek.com | Technology to Help You Grow™... -
Page 8: Single Phase Connection
MAX 10A Three Phase Connection Three phase 230Vac can be switched on the MX3i motor controller. The controller will swap phases A and C to reverse the motor. All phases are off when the motor controller is stopped. AC INPUT:... -
Page 9: Limit Switch Wiring
To ‘invert’ the limit switches to “normally open” type (limit when closed) press the reset button momentarilly. The limit switches will now work in the opposite manner. Reset Button © Agrowtek Inc. | www.agrowtek.com | Technology to Help You Grow™... -
Page 10: Connection To Growcontrol™ Gcx
Non-conductive grease is designed to prevent corrosion from moisture in electrical connectors. • Loctite LB 8423 • Dupont Molykote 4/5 • CRC 05105 Di-Electric Grease • Super Lube 91016 Silicone Dielectric Grease • Other Silicone or Lithium based insulating grease © Agrowtek Inc. | www.agrowtek.com | Technology to Help You Grow™... -
Page 11: Connection To Usb Agrowlink
Connection to USB AgrowLINK Agrowtek’s intelligent relays may be connected to the LX1 USB AgrowLINK for fi rmware updates, commu- nication protocol confi guration, addressing and manual operation. Standard drivers automatically install in Windows for the LX1 USB AgrowLINK. GrowNET API is available for custom software applications. -
Page 12: Supported Commands
32 bit, unsigned 49001 Relay Closure Count Relay 2 49003 A request to read or write a register that is not available will return an illegal address error (0x02). © Agrowtek Inc. | www.agrowtek.com | Technology to Help You Grow™... -
Page 13: Technical Information
Warranty Period. In no event or circumstance shall Agrowtek Inc. be liable to any third party or the claimant for damages in excess of the price paid for the product, or for any loss of use, inconvenience, commercial loss, loss of time, lost profi ts or savings or any other incidental, consequential or special damages arising out of the use of, or inability to use, the product.
Need help?
Do you have a question about the MX3i and is the answer not in the manual?
Questions and answers