Table of Contents
Advertisement
Advertisement
Table of Contents

Related Manuals for Belkin RX7500


Summary of Contents for Belkin RX7500
- Page 1 User Guide AX1800 Range Extender Model RX7500...
-
Page 2: Table Of Contents
Access Control ............................19 Troubleshooting ....................20 You cannot get your range extender connected ............... 20 You cannot access your range extender ..................20 You have intermittent connection problems ................22 Specifications ....................... 23 RX7500 ..............................23 Environmental ............................23... -
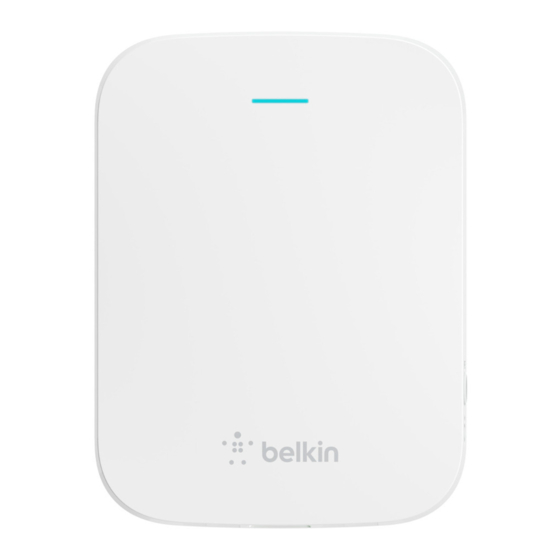
Page 3: Product Overview
Product Overview Front view The light on the front of the range extender gives you information about power, updating and signal strength. Power Light Status/ description Blinking Blue Starting up. • Resetting to factory defaults. • Upgrading firmware. • Solid Blue Ready to use. -
Page 4: Side View
Side view WPS™ Button—Use Wi-Fi Protected Setup to automatically and securely add compatible wireless devices to your network with Push Button Connect. Refer to Using WPS on page 5. Reset Button—Press and hold until the power light on the front of the range extender blinks to reset to factory defaults. -
Page 5: How To Install The Range Extender
Ethernet cable. Both scenarios require a router with a working Internet connection. Before starting setup, decide whether you want to use your RX7500 as a wireless range extender or as a wired range extender (access point). Instructions for both setups are in this user guide. - Page 6 2. Wait for the light on the front of your range extender to blink orange before going to step 3. This can take up to a minute. 3. Extend your 2.4 GHz network. Within the next two minutes complete step a.
- Page 7 4. Extend your 5 GHz network. You may skip this step if your router does not have a 5 GHz network or if you don't want to extend that network. a. Press the WPS button on the side of your router again. Within the next two minutes complete step 4b.
- Page 8 Browser-based setup Use this setup method if you don’t have a WPS button on your router, or if you don’t want to use WPS to set up your RX7500. 1. Plug in the range extender Plug in the range extender midway between your router and the area without Wi-Fi. Using your mobile device or laptop, be sure you have at least two bars (around 50%) of your router’s Wi-Fi signal at that location.
- Page 9 2. Wait for the light on the front of your range extender to blink orange. This can take up to a minute 3. Connect to range extender setup network. On a computer, phone or tablet, connect to the Wi-Fi network: Linksys Extender Setup - XXX.
-
Page 10: Setting Up As Wired Range Extender (Access Point)
4. Launch setup. Enter http://extender.belkin.com (or try http://192.168.1.1) in a browser to complete setup. Follow the on-screen instructions: Note—If you are not connected to your range extender’s setup network you will get a page alerting you that you haven’t connected to the extender. The page will ask whether you are trying to set up a new range extender or access settings on a range extender you already set up. - Page 11 On a computer, phone, or tablet, connect to the Wi-Fi network Linksys Extender Setup – XXX, where XXX are the last 3 digits of your range extender’s MAC address. 6. Launch setup. Enter http://extender.belkin.com (or try http://192.168.1.1) in a browser to complete setup.
-
Page 13: How To Access The Settings Interface
XXX are the last 3 digits of your range extender’s MAC address. You can find the MAC address on the back of your RX7500. (You might have to unplug your range extender to see the MAC address label. Plug it back in and make sure the light is solid blue before accessing the URL.) - Page 14 If you changed your range extender’s name, you can access the settings interface by entering the new name in a browser. For example: if you named your extender MyExtender, enter http://MyExtender (Windows) or http://MyExtender.local (Mac OS X or iOS). You can also enter your range extender’s IP address in a browser. Find the IP address on your router’s administrative interface.
-
Page 15: Using Range Extender Settings
Using Range Extender Settings Click Help on the right side of the screen for additional information on the screen’s options. Changes to settings will not be effective until you click Save at the bottom of the screen. You also can click Cancel to clear any changes. -
Page 16: Wps
WPS makes it easy to connect your extender to your network and connect other devices to your network through the extender. Connecting the range extender to an existing access point or wireless router (see p. 5) Connecting devices to your network through the range extender Repeat the instructions for each client device that supports WPS. - Page 17 a) Enter the PIN from the client device in the field on the extender’s WPS screen. b) Click Register on the extender’s WPS screen. When the connection is complete, the light on the front of the range extender will be solid blue for 10 seconds.
-
Page 18: Site Survey
Site Survey Site Survey gives a snapshot of all access points and wireless routers within range of the extender. Log in to the settings interface (see “How to Access the Settings Interface” on page 13). Wireless Site Survey Click the tab. -
Page 19: Qos (Quality Of Service)
QoS (Quality of Service) RX7500 supports WMM (Wi-Fi Multimedia), which enhances the quality of service (QoS) on a network. QoS prioritizes data packets according to four traffic classes: voice, video, best effort, and background. We recommend keeping the default QoS settings. -
Page 20: Troubleshooting
Troubleshooting Your range extender works on 2.4GHz and 5 GHz networks. You cannot get your range extender connected Check the position of your router and extender. For first-time setup, you may need to place the extender closer to the router. After you’ve •... - Page 21 3. If you are prompted to enter a network security key, type your password (security key) into the network security key field. Click OK. 4. Your computer will connect to the extended network, and you should be able to access the range extender’s settings interface.
-
Page 22: You Have Intermittent Connection Problems
3. Click the extended network name of your range extender (Damaged_Beez2.4_Ext in the example). 4. Type your wireless network password (Security Key) into the Password field. Click OK You have intermittent connection problems Plug in the range extender midway between your router and the area without Wi-Fi. Be sure you have at least 50% of your router’s Wi-Fi signal at that point on the device you used for setup. -
Page 23: Specifications
Specifications RX7500 Description AX1800 Range Extender Standards IEEE 802.11ac, 802.11a, 802.11n, 802.11g, 802.11b, 802.3ab Ports Gigabit Ethernet Buttons Reset, Wi-Fi Protected Setup™ Lights Power, Ethernet (link, activity) Wireless Security Wi-Fi Protected Access™ 2 (WPA2), Wi-Fi Protected Access™ (WPA), WEP Environmental... - Page 24 Visit belkin.com/support/RX7500 for award-winning 24/7 technical support. BELKIN, LINKSYS and many product names and logos are trademarks of the Belkin group of companies. Third-party trademarks mentioned are the property of their respective owners. Licenses and notices for third party software used in this product may be viewed here: http://support.linksys.com/en-us/license.
Need help?
Do you have a question about the RX7500 and is the answer not in the manual?
Questions and answers