Table of Contents
Advertisement
Quick Links
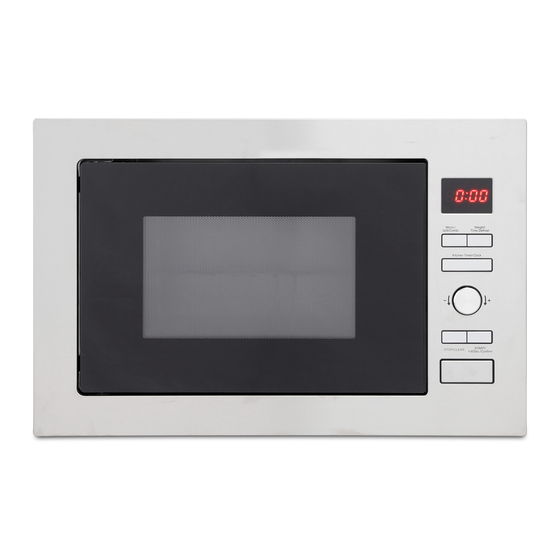
Integrated 25ltr Microwave & Grill
MWBI72X - Stainless Steel
Please read these instructions carefully before attempting to install or use this appliance.
We recommend that you keep these instructions in a safe place for future reference.
THE PERFECT BALANCE OF FUNCTION AND STYLE
LAUNDRY - DISHWASHING - COOKING - COOLING
Installation and Operating Instructions
Advertisement
Table of Contents

Related Manuals for montpellier MWBI72X


Summary of Contents for montpellier MWBI72X
- Page 1 Installation and Operating Instructions Integrated 25ltr Microwave & Grill MWBI72X - Stainless Steel Please read these instructions carefully before attempting to install or use this appliance. We recommend that you keep these instructions in a safe place for future reference.
- Page 2 Welcome Thank you for choosing this Montpellier Integrated Microwave & Grill. Our Microwaves have been designed to provide you with the best combination of style, reliability and performance to give you years of trouble-free use. You may be familiar with a similar product, but please take time to read these instructions carefully before installing or using your Integrated Microwave to ensure you get the most from your purchase.
-
Page 3: Precautions To Avoid Possible Exposure To Excessive Microwave Energy
If the apparatus is not maintained in a good state of cleanliness, its surface could be degraded and affect the lifespan of the apparatus and lead to a dangerous situation. Specifications Model: MWBI72X 230V~50Hz Rated Voltage: 1450W Rated Input Power(Microwave):... -
Page 4: Important Safety Instructions Warning
IMPORTANT SAFETY INSTRUCTIONS WARNING To reduce the risk of fire, electric shock, injury to persons or exposure to excessive microwave oven energy when using your appliance, follow basic precautions, including the following: 1. Read and follow the specific:"PRECAUTIONS TO AVOID POSSIBLE EXPOSURE TO EXCESSIVE MICROWAVE ENERGY". - Page 5 6. WARNING: It is hazardous for anyone other than a competent person to carry out any service or repair operation that involves the removal of a cover which gives protection against exposure to microwave energy. 7. WARNING: Liquids and other foods must not be heated in sealed containers since they are liable to explode.
- Page 6 16.Only use the temperature probe recommended for this oven.(for ovens provided with a facility to use a temperature-sensing probe.) 17.The microwave oven must be operated with the decorative door open. (for ovens with a decorative door.) 18.This appliance is intended to be used in household and similar applications such as: -staff kitchen areas in shops, offices and other working environments;...
-
Page 7: Read Carefully And Keep For Future Reference
23. The microwave oven is intended to be used built-in. 24. Steam cleaner is not to be used. 25. Surface of a storage drawer can get hot. 26. WARNING: The appliance and its accessible parts become hot during use. Care should be taken to avoid touching heating elements. -
Page 8: To Reduce The Risk Of Injury To Persons
To Reduce the Risk of Injury to Persons Grounding Installation DANGER Consult a qualified electrician or serviceman if Electric Shock Hazard the grounding instructions Touching some of the are not completely internal components can understood or if doubt exists cause serious personal as to whether the appliance injury or death. -
Page 9: Utensils Caution
CLEANING Be s ure to unplug the appliance from the power supply. 1. Clean the cavity of the oven after using with a slightly damp cloth. 2. Clean the accessories in the usual way in soapy water. 3. The door frame and seal and neighbouring parts must be cleaned carefully with a damp cloth when they are dirty. -
Page 10: Materials You Can Use In Microwave Oven
Materials you can use in microwave oven Utensils Remarks Aluminum foil Shielding only. Small smooth pieces can be used to cover thin parts of meat or poultry to prevent overcooking. Arcing can occur if foil is too close to oven walls. The foil should be at least 1 inch (2.5cm) away from oven walls. -
Page 11: Names Of Oven Parts And Accessories
SETTING UP YOUR OVEN Names of Oven Parts and Accessories Remove the oven and all materials from the carton and oven cavity. Your oven comes with the following accessories: Glass tray Turntable ring assembly Instruction Manual A) Control panel B) Turntable shaft C) Turntable ring assembly D) Glass tray E) Observation window... -
Page 12: Installation And Connection
Installation and connection 1.This appliance is only intended for domestic use. 2.This oven is intended for built-in use only. It is not intended for counter-top use or for use inside a cupboard. 3.Please observe the special installation instructions. 4.The appliance can be installed in a 60cm wide wall- mounted cupboard. -
Page 13: Installation Instructions
Installation Instructions Please Read the Manual Carefully Before Installation Please note Electrical connection The oven is fitted with a plug and must only be connected to a properly installed earthed socket. The socket must only be installed and the connecting cable must only be replaced by a qualified electrician, and in accordance with the appropriate regulations. - Page 14 A: Built in Furniture...
- Page 15 B: Preparing the Cabinet 1. Read the instruction on the BOTTOM CABINET TEMPLATE , put the template on the bottom plane of cabinet. Holes ""a" PN:261800316968 2. Make the marks on the bottom plane of cabinet according to marks"a" of the template 3.
- Page 16 C .Install the oven 4. Install the oven to the cabinet - Make sure the back of the oven is locked by mounting plate . - Do not trap or kink the power cord. Mounting Plate 5. Open the door, fix the oven to the cabinet with Screw B , at the installation hole. Then fix the Trim-kit plastic cover to the installation hole.
- Page 17 Operation Instructions 1. Clock Setting When the microwave oven is electrified, the screen will display "0:00", buzzer will ring once. 1) Press " " twice to select clock function, the hour figures will flash. Kitchen Timer/Clock 2) Turn " " to adjust the hour figures, the input time should be within 0--23. 3) Press "...
- Page 18 Note: the step quantities for the adjustment time of the coding switch are as follow: 0---1 : 5 seconds 1---5 : 10 seconds 5---10 min : 30 seconds 10---30 min : 1 minute 30---95 min : 5 minutes " Micro./Grill/Combi." Pad instructions Microwave Grill Display...
- Page 19 1) Press " " once, the screen display " s P100 ". Micro./Grill/Combi. 2) Press " " repeatedly or turn " " to choose combi. 1 mode. Micro./Grill/Combi. Start/+30Sec./Confirm 3) Press " " to confirm, and the screen displays "C-1". 4) Turn "...
- Page 20 7. Kitchen Timer (1) Press " Kitchen Timer/Clock " once , the screen will display 00:00. (2) Turn " " to enter the correct time. (The maximum cooking time is 95 minutes.) (3) Press " " to confirm setting. Start/+30Sec./Confirm (4) When the kitchen time is reached, the buzzer will ring 5 times.
- Page 21 The menu chart: Menu Display Weight 200 g Pizza 400 g 250 g 350 g Meat 450 g 200 g 300 g Vegetable 400 g 50g(with 450 ml cold water) Pasta 100g(with 800 ml cold water) 200 g 400 g Potato 600 g 250 g...
- Page 22 9. Multi-section cooking At most 2 sections can be set for cooking. In multi-section cooking, if one section is defrosting, then defrosting shall be placed in the first section. Example: If you want to defrost food for 5 minutes and then cook with 80% microwave power for 7 minutes, operate it as the following: 1) Press "...
-
Page 23: Troubleshooting
Trouble shooting It is forbidden to run the unit without any food inside. It is very dangerous. According to Waste of Electrical and Electronic Equipment (WEEE) directive, WEEE should be separately collected and treated. If at any time in future you need to dispose of this product please do NOT dispose of this product with household waste. - Page 24 Your 2 year Manufacturer’s guarantee THIS DOES NOT AFFECT YOUR STATUTORY RIGHTS. Your new Montpellier appliance carries a free guarantee which protects you against the cost of repairs during the first 24 months from date of purchase provided that: Any claim is accompanied by evidence of the model reference, model serial number and proof of purchase, such as a Sales Receipt, showing that the appliance was purchased within the 24 months prior to the date of claim.
- Page 25 Montpellier Domestic Appliances Ltd. Unit 1, Tewkesbury Retail Park, Northway Lane, Tewkesbury, Gloucestershire GL20 8JU www.montpellier-appliances.com The symbol on the product or on its packaging indicates that this product may not be treated as household waste. Instead it shall be handed over to the applicable collection point for the recycling of electrical and electronic equipment. By ensuring this product is disposed of correctly, you will help prevent potential negative consequences for the environment and human health, which could otherwise be caused by inappropriate waste handling of this product.
Need help?
Do you have a question about the MWBI72X and is the answer not in the manual?
Questions and answers