Table of Contents
Advertisement
Quick Links
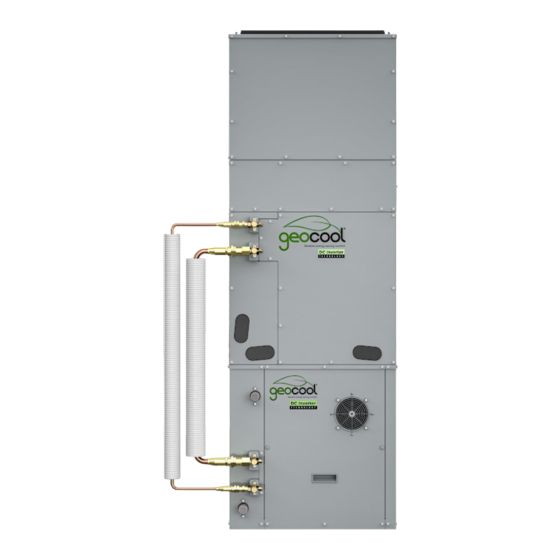
GeoCool
DC Inverter
Geothermal Heat Pump
Installation &
Owner's Manual
MODELS:
GCSHPM*IN (COMPRESSOR)
GCSBLM* (BLOWER)
GCSAM*GN (A-COIL)
GCSAR* (AIR RETURN)
Read this manual carefully before installation and keep it where
the operator can easily find it for future reference.
Due to updates and constantly improving performance, the
information and instructions within this manual are subject to
change without notice.
Version Date: 07/24/2023
Please visit www.mrcool.com/documentation
to ensure you have the latest version of this manual.
®
Advertisement
Table of Contents

Related Manuals for MrCool GeoCool GCSHPM IN Series


Summary of Contents for MrCool GeoCool GCSHPM IN Series
- Page 1 Due to updates and constantly improving performance, the information and instructions within this manual are subject to change without notice. Version Date: 07/24/2023 Please visit www.mrcool.com/documentation to ensure you have the latest version of this manual.
-
Page 2: Table Of Contents
Post Installation ..........................58 5.1 Post-Install Item Review ....................58 5.2 Fan Performance Data ....................59 5.3 Trial Run ..........................59 5.4 Air Filter Installation ......................60 Maintenance ..........................60 6.1 Troubleshooting ........................60 6.2 Error Codes ........................61 6.3 Daily Maintenance ......................63 6.4 Unit Maintenance ......................64 mrcool.com... -
Page 3: Safety
Please refer to the MRCOOL website for updated documentation. Exception Clauses: MRCOOL will bear no responsibilities when personal injury or property loss is caused for the following reasons: 1. Damage to the product due to improper use or misuse of the product. - Page 4 Failure to follow this warning could result in personal injury or death. • Before installing, modifying, or servicing the system, the main electrical disconnect switch must be • in the OFF position. There may be more than 1 disconnect switch. Lock out and tag switch with a suitable warning label. mrcool.com...
- Page 5 16. When installing or re-installing the unit, keep the refrigerant circuit away from substances other than the specified refrigerant, such as air. Any presence of foreign substances will cause abnormal pressure change or even explosion, resulting in injury. mrcool.com...
-
Page 6: Product Information
Heating 21.2°F (-6°C) ~ 89.6°F (32°C) Inlet Water Temperature 44.6°F (7°C) ~ 107.6°F (42°C) 39.2°F (4°C) ~ 84.2°F (29°C) Ambient Temperature 50°F (10°C) ~ 100.4°F (38°C) 50°F (10°C) ~ 80.6°F (27°C) Return Air Temperature 60.8°F (16°C) ~ 89.6°F (32°C) mrcool.com... -
Page 7: Dimensions & Diagrams
24-13/16 22-7/16 25-3/16 29-1/2 29-5/16 23-5/8 24-3/4 25-11/16 (630) (570) (639) (635) (749) (745) (600) (628) (653) Dimensions 28-9/16 27-9/16 3-15-16 16-5/8 8-11/16 14-5/8 12-9/16 (725) (700) (100) (422) (220) (407) (372) (319) mrcool.com... - Page 8 PRODUCT INFORMATION A-Coil Module Dimensions 24-13/16 22-7/16 31-5/16 24-13/16 25-13/16 3-15/16 Dimensions (630) (570) (795) (630) (655) (100) Blower Module Dimensions mrcool.com...
- Page 9 (644) (101) (420) Note: If the unit configuration includes the return air box and is being stored in an unconditioned space, the return air box will need to be insulated. All the insulation must meet the fire prevention requirement. mrcool.com...
-
Page 10: Packing List & Optional Accessories
Ensures a tight connection to the A-Coil Module Blower for vertical downflow Accessory installation (Factory Mounted) Optional Accessories Name Appearance Quantity Usage For integral installation in a Return Vertical Upflow (Side Return Air Box Air) configuration (Optional) (Sold Separately) mrcool.com... -
Page 11: Installation Preparation
• responsibility of the carrier. Verify that the model number, specifications, and accessories are correct prior to installing. • MRCOOL will not accept claims from dealers for transportation damage or installation of incorrectly shipped • units. 3.2 Pre-Installation Requirements Carefully read all instructions for the installation prior to installing the product. Make sure each step •... -
Page 12: Location Dimensions
(Note: If the unit configuration includes the return air box and is being stored in an unconditioned space, the return air box will need to be insulated.) 47-1/4 23-5/8 23-5/8 7-7/8 Dimensions (1200) (600) (600) (200) mrcool.com... - Page 13 The rear side of the device should have at least 7-7/8 inches (200mm) reserved. Vertical Upflow is shown in the following figure: 23-5/8 23-5/8 23-5/8 7-7/8 Dimensions (600) (600) (600) (200) mrcool.com...
-
Page 14: Unit Installation
1a: Horizontal Return Air and Vertical Upflow (Integral Unit with Return Air Box) 1b: Bottom Return Air and Vertical Upflow (Integral Unit without Return Air Box) 1c: Bottom Return Air and Vertical Upflow (Split Unit without Return Air Box) *Note: 1a can also be configured as a split unit if desired.* mrcool.com... - Page 15 KH: Knockout Hole A: A-Coil Module B: Blower Module C: Compressor Module R: Return Air Box Unit: Inch mrcool.com...
- Page 16 Step 3: If the unit configuration includes the return air box and is being stored in an unconditioned space, the return air box will need to be insulated. All the insulation must meet the fire prevention requrement. The reference positions of hte insulation are shown below. mrcool.com...
- Page 17 Step 9: Remove the Blower Accessory from the Blower Module and re-secure the screws. Turn over the Blower Module and ensure the supply air flange is upward. See figure below. The Blower Accessory is not required in this configuration. Refer to the direction of flow arrows located on the module. mrcool.com...
- Page 18 NOTE: It is recommended to seal each joint with insulation with a thickness of at least .39 inches (10mm) and a width of 3.15 inches (80mm) to avoid the risk of condensation due to inadequate installation or other unexpected situation. The insulation used must meet the fire prevention requirements. mrcool.com...
- Page 19 1b. Bottom Return Air and Vertical Upflow (Integral Unit without Return Air Box) From bottom to top, this configuration is the Compressor Module, the A-Coil Module, and the Blower Module. KH: Knockout Hole A: A-Coil Module B: Blower Module C: Compressor Module mrcool.com...
- Page 20 Step 2: Remove the cover on the Compressor Module and remove panel C1 and C2 from the Compressor Module. Remove two screws located on the front side of the compressor, remove the two compressor gaskets, and then re-secure the screws. mrcool.com...
- Page 21 NOTE: It is recommended to seal each joint with insulation with a thickness of at least .39 inches (10mm) and a width of 3.15 inches (80mm) to avoid the risk of condensation due to inadequate installation or other unexpected situation. The insulation used must meet the fire prevention requirements. mrcool.com...
- Page 22 From bottom to top, the configuration is the A-Coil Module, and the Blower Module. This configuration can also be used with a Return AIr Box. From bottom to top, the configuration would include the Return AIr Box, the A-Coil Module, and the Blower Module. The configuration would remain split from the compressor. mrcool.com...
- Page 23 Step 3: Remove the Blower Accessory from the Blower Module and re-secure the screws. Turn over the Blower Module and ensure the supply air flange is upward. See figure below. The Blower Accessory is not required in this configuration. Refer to the direction of flow arrows located on the module. mrcool.com...
- Page 24 NOTE: It is recommended to seal each joint with insulation with a thickness of at least .39 inches (10mm) and a width of 3.15 inches (80mm) to avoid the risk of condensation due to inadequate installation or other unexpected situation. The insulation used must meet the fire prevention requirements. mrcool.com...
- Page 25 UNIT INSTALLATION 2. Vertical Downflow There is ONE option for Vertical Downflow. mrcool.com...
- Page 26 2a. Top Return Air and Vertical Downflow (Integral Unit without Return Air Box) From bottom to top, the configuration is the Compressor Module, the Blower Module, and the A-Coil Module. KH: Knockout Hole A: A-Coil Module B: Blower Module C: Compressor Module R: Return Air Box mrcool.com...
- Page 27 Run the return air temperature sensor wire along the pipeline and use three cable zip ties to re-secure the wire. Use the removed lock nut and put the temperature sensor through the hole and secure it in the new position. mrcool.com...
- Page 28 Step 6: Place the Blower Module vertically above the Compressor Module. Ensure that the Blower Module is aligned with the Compressor Module, as well as the two fixing holes. Step 7: Secure the two parts together using a M6 screw bolt through the fixing holes. mrcool.com...
- Page 29 3.15 inches (80mm) to avoid the risk of condensation due to inadequate installation or other unexpected situation. The insulation used must meet the fire prevention requirements. 3. Horizontal There is ONE option for Horizontal installation. Blower A-Coil Module Module mrcool.com...
- Page 30 UNIT INSTALLATION 3a. Horizontal Return Air and Horizontal Supply Air (Split Unit without Return Air Box) *Note: This configuration can include the optional Return Air Box if desired with appropriate modifications by the installer.* mrcool.com...
- Page 31 Step 3: Remove the Blower Accessory from the Blower Module and re-secure the screws. Turn over the Blower Module and ensure the supply air flange is upward. See figure below. The Blower Accessory is not required in this configuration. Refer to the direction of flow arrows located on the module. mrcool.com...
- Page 32 NOTE: It is recommended to seal each joint with insulation with a thickness of at least .39 inches (10mm) and a width of 3.15 inches (80mm) to avoid the risk of condensation due to inadequate installation or other unexpected situation. The insulation used must meet the fire prevention requirements. mrcool.com...
-
Page 33: Ductwork Installation
If the attic ductwork is not covered with cellulose, it can lose a significant amount of its heating and cooling capacity into the attic area. Ductwork that is inadequately insulated will cause poor system performance and customer dissatisfaction. mrcool.com... - Page 34 If the unit is connected to existing ductwork, a previous check should have been made to insure that the ductwork has the capacity to handle the airflow required for the unit. All existing ductwork should be checked for leaks and register sizing is crucial for proper air delivery andthrow while maintaining acceptable sound levels. mrcool.com...
- Page 35 (78) (256) (353) (59) (139) 1b. Bottom Return Air and Vertical Upflow (Integral Unit without Return Air Box) Page 16 Unit: inch(mm) 12-9/16 8-11/16 6-5/8 1-7/16 10-1/16 13-7/8 2-5/16 5-1/2 Dimensions (319) (220) (168) (37) (256) (353) (59) (139) mrcool.com...
- Page 36 (134) (55) (256) (353) (59) (139) 2a. Top Return Air and Vertical Downflow (Integral Unit without Return Air Box) Page 21 Unit: inch(mm) 18-11/16 1-7/8 1-7/8 8-11/16 12-9/16 1-7/16 6-5/8 Dimensions (534) (474) (48) (48) (220) (319) (37) (168) mrcool.com...
-
Page 37: Condensate Removal & Water Connection
2. The input power should be less than 600W. 3. The flow rate of the water should be in the range listed on the following chart. Units Dimensions Minimum Flow Rate GPM (m³ /h) 5.3in (1.2mm) Maximum Flow Rate GPM (m³ /h) 19.8in (4.5mm) mrcool.com... - Page 38 The anti-freeze protection measures of the pipeline must be determined according to the geographical location and should be professionally designed. mrcool.com...
- Page 39 When installing the water system, it is necessary to use the discharge valve to empty the air in the pipeline, otherwise it may cause the water flow switch protection during operation. mrcool.com...
- Page 40 Failure to do so will void the warranty of the heat pump system and will limit liability for damage caused by leaks or system failure. mrcool.com...
- Page 41 Plumbing/HVAC codes. The installation must include a “P” style trap that is located closely to the evaporator coil. Do not over-tighten the drain connection as it may cause possible damage to the evaporator drain pan. See the following figure for details of a typical condensate line “P” trap. mrcool.com...
-
Page 42: Connection Pipe Installation
As shown in Figure 4.4b, use a sharp tool to cut the heat insulating layer around the pipe and bend it once the pipe is exposed. After bending, place the heat insulating later back on the Figure 4.4b pipeline and secure it with adhesive tape. mrcool.com... - Page 43 The gas pipe and liquid pipe connection method is a screw connection. If the No-Vac® Quick Connect® lineset is used, ensure the lineset used matches the unit’s configuration and matches up to the cut-off valves. Pipe Diameter (inch) Tightening Torque (Nm) Φ3/8 35-40 Φ3/4 70-75 mrcool.com...
- Page 44 F2 connections with the gray insulating sleeve to help and/or damage the other wrench to tighten 3/8” 5 mm to the unit. the line set connector. prevent condensation. 3/4” 8 mm mrcool.com...
- Page 45 Note that the gas and liquid valve can be opened fully only after the manifold valve assembly is removed. 9. Place the caps back on the liquid valve, gas valve, and also the service port. mrcool.com...
-
Page 46: Electrical Installation
Make sure the wires are not clamped too tight. 12. The wire gauge of the power cord should be large enough. Damaged power cords or other wires must be replaced by specialized wires. Wiring work must be done according to national wiring rules and regulations. mrcool.com... - Page 47 High Voltage Wires Low Voltage Wires • Blower Power Supply • Thermostat Wire • Compressor Module • Thermostat Wire Wire • Communication Wire Power Supply Wire • Communication Wire • A-Coil Module Power • Blower Control Wire Supply Wire mrcool.com...
- Page 48 1b. Bottom Return Air and Vertical Upflow (Integral Unit) 1c. Bottom Return Air and Vertical Upflow (Split Unit) *Note: This 3a. Horizontal Return Air and Horizontal Supply Air (Split Unit) configuration can include the optional Return Air Box if desired with appropriate modifications by the installer.* mrcool.com...
- Page 49 4. Locate the round terminal conduit. Use a screwdriver to replace it and tighten the terminal screw. Figure 4.5a 3. How to Connect the Thermostat Wires and Power Cords Lead the thermostat wires and power cords through the insulation tube. Then, attach the wires with wire clamps. (As shown in Figure 4.5b below.) Figure 4.5b mrcool.com...
- Page 50 4. Connect live wire to the L1 terminal on the terminal block XT1. (#3 on Figure below.) 5. Connect neutral wire to the L2 terminal on the terminal block XT1. (#3 on Figure below.) 6. Connect the ground wire to the grounding terminal. (#3 on Figure below.) mrcool.com...
- Page 51 3. Pass wires through the rubber ring on the right side under the electrical box. 4. Connect the live wire to the L1 terminal on the terminal block XT1. 5. Connect the neutral wire to the L2 terminal on the terminal block XT1. 6. Connect the ground wire to the grounding terminal. mrcool.com...
- Page 52 3. Pass the fan control wire through the rubber ring on the left side under the Electrical Box. 4. Insert the combined power cord into the corresponding terminals according to the wiring diagram. 5. Insert the fan control wire into the corresponding terminals according to the wiring diagram. mrcool.com...
- Page 53 3. Pass wires through the rubber ring on the left side under the Electrical Box. 4. Connect the thermostat wires to the terminal block XT3 and communication wire to the motherboard terminal according to the wiring diagram on page 55. mrcool.com...
- Page 54 UNIT INSTALLATION Blower Module A-Coil Module Compressor Module mrcool.com...
- Page 55 7. The units should comply with applicable local and national rules and regulations on power consumption. 8. When connecting the power cords, make sure the phase sequence of the power supply matches with the corresponding terminals, otherwise the compressor will get reversed and operate abnormally. mrcool.com...
- Page 56 UNIT INSTALLATION A-Coil Wiring Diagram: mrcool.com...
- Page 57 UNIT INSTALLATION Compressor Module Wiring Diagram: mrcool.com...
- Page 58 Level 4 Level 5 DIP Switch Air Flow Directions Vertical Upflow/Horizontal Return Air Vertical Downflow Module Ground Water Open Loop GCSHPM024036IN GCSHPM048060IN Ground Loop Closed Loop Note: 0 means dip switch to “on”, 1 means dip switch to number. mrcool.com...
-
Page 59: Post Installation
Check for cracks among the air return and It may cause air leakage, vibration, and supply pipe. noise. It may cause air leakage, vibration, and Check if the panel is mounted firmly. condensation. mrcool.com... -
Page 60: Fan Performance Data
Power on the unit and press ON/OFF button to activate. c. After compressor starts up, immediately stop the unit if an abnormal sound is emitted. d. Perform trial runs under several modes and check if the unit operates normally. mrcool.com... -
Page 61: Air Filter Installation
Put curtains or louvers in front of the Unit is exposed under direct sunshine. windows. There are too many heat sources in the Remove unnecessary heat sources. room. Filter is blocked or dirty. Request a professional to clean the filter. mrcool.com... -
Page 62: Error Codes
1. If there are abnormal occurrences (awful smell, etc.), stop the unit immediately and disconnect the power. Then, contact MRCOOL® technical support at (270) 366-0457. If the unit continues to run during these abnormal situations, it may become damaged and cause electric shock or fire hazard. - Page 63 Power protection Current protection IPM protection PFC protection High Driver Module Temperature Protection DC Bus Under-Voltage Protection or DC Bus Voltage Drop Error DC Bus Over-Voltage Protection Charging Circuit Error Chip error High-pressure sensor error Capacity DIP Switch Setting Error mrcool.com...
-
Page 64: Daily Maintenance
Passivation treatment: Exposure to air for 3-4h, or purging for 2 hours. Forming an oxidation passivation layer on the surface of the tube. Water washing: After alkali washing, use clean softened water. Rinse the heat exchanger repeatedly for 0.5 hour, and thoroughly rinse the residue in the heat exchanger. mrcool.com... -
Page 65: Unit Maintenance
2. Clean the dust and sundries in the unit. 3. Check if the air filter screen is properly installed. 3. If the unit is rusty, coat the rusty location with paint to prevent expansion. 4. Check if the installation of the unit is firm. mrcool.com... - Page 66 GeoCool DC Inverter Geothermal Heat Pump MODELS: GCSHPM*IN (COMPRESSOR) GCSBLM* (BLOWER) GCSAM*GN (A-COIL) GCSAR* (AIR RETURN) The design and specifications of this product and/or manual are subject to change without prior notice. Consult with the sales agency or manufacturer for details.
Need help?
Do you have a question about the GeoCool GCSHPM IN Series and is the answer not in the manual?
Questions and answers