Table of Contents
Advertisement
Quick Links
Advertisement
Table of Contents
Troubleshooting

Related Manuals for Princeton Instruments PIXIS System


Summary of Contents for Princeton Instruments PIXIS System
- Page 1 4411-0106 Version 2.C July 2, 2013 *4411-0106*...
- Page 2 The information in this publication is believed to be accurate as of the publication release date. However, Princeton Instruments does not assume any responsibility for any consequences including any damages resulting from the use thereof. The information contained herein is subject to change without notice.
-
Page 3: Table Of Contents
Table of Contents Chapter 1 Introduction ..................9 PIXIS ..........................9 ® eXcelon ..........................9 Advanced Design ........................ 9 Grounding and Safety ....................... 10 Precautions ........................10 UV Coating ........................10 Cleaning ..........................11 Repairs ..........................11 About this Manual ......................11 Chapter 2 System Component Descriptions .......... - Page 4 PIXIS System Manual Version 2.C Chapter 6 Advanced Topics ................67 Introduction ........................67 Timing Modes ........................68 Fast and Safe Modes ......................74 LOGIC OUT Control ......................76 Kinetics Mode ........................77 Custom Modes ........................80 Chapter 7 Troubleshooting ................83 Introduction ........................
- Page 5 Figure 10. Adjustable C- to Spectroscopy-Mount Kinetics Adapter ....... 32 Figure 11. Acton Series Spectrograph Entrance Slit Mount ..........33 Figure 12. Block Diagram of PIXIS System ..............35 Figure 13. Available Devices Area .................. 45 Figure 14. Experiment Devices Area ................46 Figure 15.
- Page 6 PIXIS System Manual Version 2.C Figure 23. WinX Detector Temperature dialog .............. 57 Figure 24. Array Terms for a CCD with a Dual Output Amplifier ........ 59 Figure 25. Full Frame at Full Resolution ................. 60 Figure 26. 2 × 2 Binning ....................61 Figure 27.
- Page 7 Table of Contents Tables Table 1. USB Driver Files and Locations ................ 26 Table 2. Example of Controller Gain {Analog Gain} vs. Readout Port ......64 Table 3. Camera Timing Modes ..................68 Table 4. Focal Plane Distances ..................93 Table 5.
- Page 8 PIXIS System Manual Version 2.C This page intentionally left blank.
-
Page 9: Chapter 1 Introduction
Chapter 1 Introduction PIXIS Thank you for purchasing a PIXIS camera system from Princeton Instruments. For over two decades Princeton Instruments has been the legendary name behind the most revolutionary spectroscopy and imaging products for cutting edge research. PIXIS represents the most advanced camera design and utilizes years of experience and expertise in low-light detection. -
Page 10: Grounding And Safety
PIXIS System Manual Version 2.C Grounding and Safety Before turning on the power supply (air-cooled system or liquid-cooled system with a CoolCUBE circulator), the ground prong of the power cord plug must be properly connected to the ground connector of the wall outlet. The wall outlet must have a third prong, or must be properly connected to an adapter that complies with these safety requirements. -
Page 11: Cleaning
Repairs Because the PIXIS camera system contains no user-serviceable parts, repairs must be performed by Princeton Instruments. Should your system need repair, contact Princeton Instruments customer support for instructions. For contact information, refer to page 132 of this manual. - Page 12 Declaration of Conformity contains the Declarations of Conformity for the Small Format PIXIS System and the Large Format PIXIS System Warranty & Service contains the warranty and customer support contact information.
-
Page 13: Chapter 2 System Component Descriptions
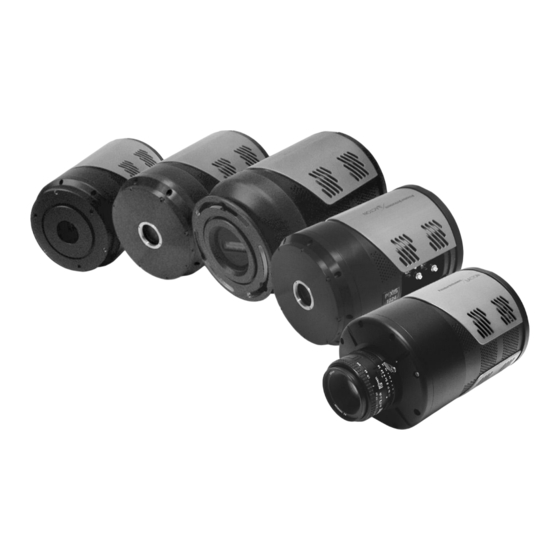
System Components Standard Components A typical air-cooled PIXIS system consists of the camera with a Certificate of Performance, a power supply, a USB 2.0 interface cable for your computer system, MCX to BNC adapter cables, and the user manual. A typical liquid-cooled PIXIS system... -
Page 14: Pixis Camera
Only scientific-grade devices are used in order to ensure the highest image fidelity, resolution, and acquisition flexibility required for scientific imaging. Princeton Instruments has developed exclusive CCDs with unmatched quantum efficiency and low noise to offer the utmost in sensitivity. -
Page 15: Power Supply
Quick-disconnects that mate to the PIXIS’s coolant ports have been installed on one end of each hose. Refer to your coolant circulator’s specifications regarding circulator- compatible hose fittings. If a Princeton Instruments CoolCUBE circulator is ordered with the camera, hoses are supplied with appropriate connectors on both ends. -
Page 16: Cables
MCX to BNC Adapter Cables: Two MCX to BNC adapter cables are provided with the PIXIS system. These mount to the EXT SYNC and the LOGIC OUT connectors on the rear of the PIXIS. Certificate of Performance Each PIXIS camera has a Certificate of Performance. -
Page 17: Optional Components
PICam : The standard 64-bit software interface for cooled CCD cameras from Princeton Instruments. PICam is an ANSI C library of camera control and data acquisition functions. Currently, the interface supports Windows Vista and Windows 7. Note: PIXIS may also be operated by several other third-party software packages. - Page 18 PIXIS System Manual Version 2.C Internal Shutter Optional 25 or 45 mm internal shutter (dependent on CCD array size). Shutters are mechanical devices with a finite lifetime, typically of the order of a million cycles, although some individual shutters may last a good deal longer. How long a shutter lasts in terms of experimental time will, of course, be strongly dependent on the operating parameters.
-
Page 19: Chapter 3 Initial System Verification
Chapter 3 Initial System Verification The list and diagrams below briefly describe the sequence of actions required to install your system and prepare to gather data. Refer to the indicated references for more detailed information. Action Reference 1. If the system components have not already been unpacked, unpack Chapter 4 System Setup, them and inspect their carton(s) and the system components for page 23... -
Page 20: Figure 2. Typical Imaging Experiment Layout (Air-Cooled Camera)
PIXIS System Manual Version 2.C Action Reference 14. Adjust the focus for the best image or spectral lines. If you are using Chapter 5 Operation, WinSpec/32, you may want to use the Focus Helper function for page 45 or page 48 spectroscopy applications. -
Page 21: Figure 4. Typical Imaging Experiment Layout
Chapter 3 Initial System Verification Figure 4. Typical Imaging Experiment Layout (Liquid-cooled Camera with CoolCUBE Figure 5. Typical Spectroscopy Experiment Layout (Liquid-cooled Camera with CoolCUBE... - Page 22 PIXIS System Manual Version 2.C This page intentionally left blank.
-
Page 23: Chapter 4 System Setup
The CCD and coating you ordered have been installed in the camera head. Keep all of the original packing materials so you can safely ship the PIXIS system to another location or return it for service if necessary. If you have any difficulty with any step of the instructions, call Princeton Instruments Customer Support. -
Page 24: Checking The Equipment And Parts Inventory
PIXIS System Manual Version 2.C Checking the Equipment and Parts Inventory Confirm that you have all of the equipment and parts required to set up the PIXIS system. A complete system consists of: Standard System: Camera and Power Supply ... - Page 25 Chapter 4 System Setup Ventilation: Allow at least one inch clearance for the side air vents. Where the camera is inside an enclosure, > 30 cfm air circulation and heat dissipation of 100W is required. Power: The PIXIS camera receives its power from the supplied power supply which in turn plugs into an AC power source.
-
Page 26: Software Installation
3. Reboot the computer. 4. At bootup, Windows will detect the Princeton Instruments USB2 Interface hardware in the PIXIS. You may be prompted to enter the directory path(s) for the apausbprop.dll and/or the apausb.sys file(s), either by keyboard entry or by using the browse function. -
Page 27: Making The Camera-Circulator Connections For A Coolcube
Figure 7. LightField Installation Wizard dialog 3. After the installation finishes, reboot the computer. 4. Connect the PIXIS system components to your computer and power them on. 5. Start LightField, activate it, and begin setting up your experiment. Making the Camera-Circulator Connections for a CoolCUBE... - Page 28 PIXIS System Manual Version 2.C Notes: 1. Make sure that there are no kinks in the hoses that impede the coolant flow. Lack of sufficient flow can seriously harm the detector and any resulting damage is not covered under warranty.
-
Page 29: Entering The Default Camera System Parameters
1. Make sure the PIXIS is connected to the host computer and that it is turned on. 2. Run the WinX application. The Camera Detection wizard will automatically run if this is the first time you have installed a Princeton Instruments WinX application (WinView/32, WinSpec/32, or WinXTest/32) and a supported camera. Otherwise, if you installing a new camera type, click on the Launch Camera Detection Wizard…... -
Page 30: Attaching Lenses To C- And F-Mount Adapters
C-mount adapter, or an integral F-mount adapter. Other mounts may be available. Consult the factory for specific information relating to your needs. See page 132 for Information on accessing the Princeton Instruments Customer Support Dept. Attaching to a C-Mount Adapter C-mount lenses simply screw into the front of these cameras. -
Page 31: Mounting The Adjustable C- To Spectroscopy-Mount Kinetics Adapter
Chapter 4 System Setup Attaching to an F-Mount Adapter F-mount adapters use the Nikon bayonet format. To mount the lens on the camera: 1. Locate the large indicator dot on the side of the lens. 2. Note the corresponding dot on the front side of the adapter. 3. -
Page 32: Mounting The Camera To A Spectrograph
PIXIS System Manual Version 2.C 6. When you have finished with focusing and rotational alignment, secure the sliding tube in place with the spectrograph setscrews. 7. If they have already been installed, loosen the adapter’s two recessed locking setscrews (use a 0.050 hex key). If they have not been installed, insert the setscrews into the holes at the sides of the adapter and screw them in a couple of turns. -
Page 33: Connecting An External Shutter
Typically, cameras for spectroscopy applications do not incorporate internal shutter. However, for cameras without an internal shutter, there is provision for connecting an external 25 or 45 mm shutter (supplied by Princeton Instruments) at the Shutter connector on the rear of the PIXIS. - Page 34 PIXIS System Manual Version 2.C Overexposure Protection Cameras that are exposed to room light or other continuous light sources will quickly become saturated. This most often occurs when operating without a shutter. If the camera is mounted to a spectrograph, close the entrance slit of the spectrograph to reduce the incident light.
-
Page 35: Chapter 5 Operation
In WinX and LightField, the data collection operations Figure 12. Block Diagram of use the Experiment Setup parameters to establish the PIXIS System exposure time (the period when signal of interest is allowed to accumulate on the CCD). Focus {Preview} is more likely to be used in setting up the system (see the "First Light"... -
Page 36: System On/Off Sequences
PIXIS System Manual Version 2.C The remainder of this chapter provides "First Light" procedures (these provide step-by- step instruction on how to initially verify system operation) and discusses factors that affect exposure, readout, and digitization of the incoming signal. By understanding the exposure, readout, and digitization factors and making adjustments to software settings you can maximize signal-to-noise ratio. - Page 37 Chapter 5 Operation Getting Started 1. Mount a test target in front of the camera. 2. Power ON the camera (i.e., switch the power supply ON). Note: The camera must be turned on before WinX is opened, and WinX must be closed before the camera is turned off.
- Page 38 PIXIS System Manual Version 2.C Experiment Setup Main tab (Acquisition|Experiment Setup…): Exposure Time: 100 ms Accumulations & Number of Images: 1 Experiment Setup ROI tab (Acquisition|Experiment Setup…): Use this function to define the region of interest (ROI). ...
- Page 39 Chapter 5 Operation Spectroscopy The following paragraphs provide step-by-step instructions for operating PIXIS in a spectroscopy setup for the first time. The intent of this simple procedure is to help you gain basic familiarity with the operation of your system and to show that it is functioning properly.
- Page 40 PIXIS System Manual Version 2.C Internal Slit Shutter: A shutter mounted internally has an external shutter connector in the sidewall of the spectrograph. Connect a shutter cable from the PIXIS Shutter connector to that connector. 6. Power ON the camera (i.e., switch the power supply ON).
- Page 41 Chapter 5 Operation Experiment Setup Main tab (Acquisition|Experiment Setup…): Exposure Time: 100 ms Accumulations & Number of Images: 1 Experiment Setup ROI tab (Acquisition|Experiment Setup…): Use this function to define the region of interest (ROI). Spectroscopy Mode: Selected ...
- Page 42 If both the camera and the spectrograph have shutters, the entrance slit shutter will have to be removed or a Princeton Instruments SHC-EXT Shutter Control Box may be used to control the opening and closing of the entrance slit shutter.
- Page 43 Chapter 5 Operation 2. With the spectrograph properly connected to the camera, turn the power on, wait for the spectrograph to initialize. 3. Select Define from the Spectrograph menu, click on Install/Remove Spectrograph , highlight the appropriate spectrograph name (for example, Acton SP300i for an Acton SP-2300i spectrograph) in the Supported Spectrographs list, and click on Install Selected Spectrograph .
- Page 44 PIXIS System Manual Version 2.C Note: When aligning other accessories, such as fibers, lenses, optical fiber adapters, first align the spectrograph to the slit. Then align the accessory without disturbing the camera position. The procedure is identical to that used to focus the spectrograph (i.e., do the focus and alignment operations while watching a live image).
-
Page 45: Lightfield First Light Instructions
Chapter 5 Operation LightField First Light Instructions Imaging This section provides step-by-step instructions for acquiring an imaging measurement in LightField for the first time. The intent of this procedure is to help you gain basic familiarity with the operation of your system and to show that it is functioning properly. Once basic familiarity has been established, then operation with other operating configurations, ones with more complex timing modes, can be performed. -
Page 46: Figure 14. Experiment Devices Area
PIXIS System Manual Version 2.C 1. After LightField opens, you should see an icon representing your camera in the Available Devices area. In the figure above, the camera is a PIXIS:512B ® eXcelon 2. Drag the icon into the Experiment Devices area. -
Page 47: Figure 15. View Area
Chapter 5 Operation Figure 15. View Area to start Preview mode. In this mode, images will 3. Click on the Run button be continuously acquired and displayed. Figure 16. View Area Displaying an Image 4. Adjust the lens aperture, intensity scaling, and focus for the best image as viewed on the computer monitor. - Page 48 PIXIS System Manual Version 2.C Check the brightest regions of the image to determine if the A/D converter is at full-scale. A 16-bit A/D is at full scale when the brightest parts of the image reach an intensity of 65535. Adjust the aperture to where it is just slightly smaller (higher f-stop) than the setting where maximum brightness on any part of the image occurs.
-
Page 49: Figure 17. Available Devices Area
If both the camera and the spectrograph have shutters, the entrance slit shutter will have to be removed or a Princeton Instruments SHC-EXT Shutter Control Box may be used to control the opening and closing of the entrance slit shutter. -
Page 50: Figure 18. Experiment Devices Area
PIXIS System Manual Version 2.C 1. After LightField opens, you should see icons representing your camera and the spectrograph in the Available Devices area. In the figure above, the camera is a ® PIXIS:400BR eXcelon and the spectrograph is an SP-2356. - Page 51 If the camera and spectrograph both have shutters, permanent damage to the shutter driver may occur. You can either disconnect and remove the entrance slit shutter or control it via a Princeton Instruments SHC-EXT Control Box. To disconnect and remove an entrance slit shutter: ...
-
Page 52: Figure 19. View Area
PIXIS System Manual Version 2.C Focusing The detector mounting hardware provides two degrees of freedom: focus and rotation. In this context, focus means to physically move the detector back and forth through the focal plane of the spectrograph. The approach taken is to slowly move the detector in and out of focus and adjusting for optimum while watching a live display on the monitor, followed by rotating the detector and again adjusting for optimum. -
Page 53: Figure 20. Spectrometer Alignment: Before Rotational Alignment
Chapter 5 Operation 6. Make sure that the spectroscopy-mount adapter moves freely at the spectrograph. 7. Select Align Spectrometer… from the Experiment Options menu. Review the displayed information and then click on the Begin button. Typically, this feature creates three 1-row high ROIs (one near the top of the array, one in the middle, and one near the bottom) and begins data acquisition. -
Page 54: Figure 21. Spectrometer Alignment: After Rotational Alignment
PIXIS System Manual Version 2.C 9. Next adjust the rotation. You can do this by rotating the camera while watching a live display of the line (you may need to loosen two setscrews securing the spectrograph adapter). Click on the peak you want to monitor during the rotational alignment. - Page 55 IsoPlane. If both the camera and spectrograph have shutters, the IsoPlane shutter will have to be removed or a Princeton Instruments SHC-EXT Shutter Control Box can be used to control the opening and closing of the IsoPlane’s internal shutter.
-
Page 56: Exposure And Signal
PIXIS System Manual Version 2.C Exposure and Signal Introduction The following topics address factors that can affect the signal acquired on the CCD array. These factors include array architecture, exposure time, CCD temperature, dark charge, and saturation. CCD Array Architecture Charge coupled devices (CCDs) can be roughly thought of as a two-dimensional grid of individual photodiodes (called pixels), each connected to its own charge storage “well.”... -
Page 57: Figure 23. Winx Detector Temperature Dialog
Chapter 5 Operation Continuous Exposure (No Shuttering) For full-frame imaging CCDs, the standard PIXIS camera for imaging is equipped with an integral shutter. However, inasmuch as it is possible to order the camera without a shutter, the following general discussion of unshuttered operation is provided. Slow scan scientific cameras require a shutter to prevent "smearing"... - Page 58 WARNING! If you observe a sudden change in the baseline signal, there may be excessive humidity in the camera vacuum enclosure. Turn off the camera and contact Princeton Instruments Customer Support. See page 132 for contact information. Saturation When signal levels in some part of the image are very high, charge generated in one pixel may exceed the "well capacity"...
-
Page 59: Readout
Chapter 5 Operation For signal levels low enough to be readout-noise limited, longer exposure times, and therefore longer signal accumulation in the CCD, will improve the S/N ratio approximately linearly with the length of exposure time. There is, however, a maximum time limit for on-chip accumulation, determined by either the saturation of the CCD by the signal or the loss of dynamic range due to the buildup of dark charge in the pixels. -
Page 60: Figure 25. Full Frame At Full Resolution
PIXIS System Manual Version 2.C Full Frame Readout The upper left drawing in Figure 25 represents a CCD after exposure but before the beginning of readout. The capital letters represent different amounts of charge, including both signal and dark charge. This section... -
Page 61: Figure 26. 2 × 2 Binning
Chapter 5 Operation The readout time is approximately given by: where is the smaller dimension of the CCD is the larger dimension of the CCD is the time needed to shift one pixel out of the shift register is the time needed to digitize a pixel is the time needed to shift one line into the shift register A subsection of the CCD can be read out at full resolution, sometimes dramatically... - Page 62 PIXIS System Manual Version 2.C pixels, the binning of large sections may result in saturation and “blooming”, or spilling of charge back into the image area. Figure 26 shows an example of 2 2 binning. Each pixel of the image displayed by the software represents 4 pixels of the CCD array.
-
Page 63: Figure 27. Binning And Array Orientation
Chapter 5 Operation Figure 27. Binning and Array Orientation Note: You can easily switch between these orientations by rotating the camera 90° and changing the binning parameters in the application software. Output Amplifier {Quality} Selection The output amplifier amplifies the collected charge from the output node and outputs it as electrons/count. -
Page 64: Table 2. Example Of Controller Gain {Analog Gain} Vs. Readout Port
PIXIS System Manual Version 2.C Controller Gain Controller gain (a function of the preamplifier) is software-selectable and is used to change the relationship between the number of electrons acquired on the CCD and the Analog-to-Digital Units (ADUs or counts) generated. Selecting the amount of gain is done on the Acquisition|Experiment Setup…|ADC tab { Analog to Digital... -
Page 65: Digitization (Rate)
2. The ADC Offset is pre-set at the factory and is not user-changeable. WARNING! If you observe a sudden change in the baseline signal, there may be excessive humidity in the camera vacuum enclosure. Turn off the camera and contact Princeton Instruments Customer Support. See page 132 for contact information. - Page 66 PIXIS System Manual Version 2.C This page intentionally left blank.
-
Page 67: Chapter 6 Advanced Topics
Chapter 6 Advanced Topics Introduction Previous chapters have discussed setting up the hardware and the software for basic operation. This chapter discusses topics associated with experiment synchronization. Synchronization is set up on the Experiment Setup|Timing tab in WinX and on the Shutter and Trigger expanders in LightField. -
Page 68: Timing Modes
PIXIS System Manual Version 2.C Timing Modes Overview The basic PIXIS timing modes are Free Run {No Response}, External Sync {Readout Per Trigger}, and External Sync {Readout Per Trigger} with Continuous Cleans {Clean Until Trigger}. These timing modes are combined with the Shutter options to provide the widest variety of timing modes for precision experiment synchronization. -
Page 69: Figure 28. Free Run {No Response} Timing Chart, Part Of The Chart In Figure 36
Chapter 6 Advanced Topics Free Run {No Response} In the Free Run {No Response} mode the camera does not synchronize with the experiment in any way. The shutter opens as soon as the previous readout is complete, and remains open for the exposure time, t . -
Page 70: Figure 30. Chart Showing Two External Sync Timing Options
PIXIS System Manual Version 2.C External synchronization depends on an edge trigger (negative- or positive-going) which must be supplied to the EXT SYNC connector on the back of the camera. The type of edge must be identified in the application software to ensure that the shutter opening is initiated by the correct edge (in WinX, this is done on the Experiment Setup|Timing tab, in LightField on the Trigger expander). -
Page 71: Figure 31. Timing Diagram For External Sync Mode (+ Edge Trigger)
Chapter 6 Advanced Topics The PreOpen {Open Before Trigger} mode is useful in cases where an External Sync pulse cannot be provided 8 ms or ~ 20 ms (the length of time the 25 mm or 45 mm mechanical shutter takes to open) before the actual signal occurs. Its main drawback is that the CCD is exposed to any ambient light while the shutter is open between frames. -
Page 72: Figure 32. Continuous Cleans {Clean Until Trigger} Flowchart
PIXIS System Manual Version 2.C Figure 32. Continuous Cleans {Clean Until Trigger} Flowchart Once the External Sync pulse is received, cleaning of the array stops as soon as the current row is shifted, and frame collection begins. With Normal Shutter {Normal} operation the shutter is opened for the set exposure time. -
Page 73: Figure 33. Winx Continuous Cleans Timing Diagram
Chapter 6 Advanced Topics Figure 33. WinX Continuous Cleans Timing Diagram Figure 34. LightField Clean Until Trigger (CUT) Timing Diagram EXT SYNC Trigger Input The selected Timing Mode {Trigger Response} determines how the camera will respond to an External Sync pulse that is input at the EXT SYNC connector on the rear of the camera. -
Page 74: Fast And Safe Modes
PIXIS System Manual Version 2.C Fast and Safe Modes Introduction The PIXIS has been designed to allow the greatest possible flexibility when synchronizing data collection with an experiment. The fundamental difference between the Fast and Safe modes is how often the acquisition start and acquisition stop commands are sent by the computer for a data collection sequence. -
Page 75: Figure 36. Chart Of Safe And Fast Mode Operation
Chapter 6 Advanced Topics Figure 36. Chart of Safe and Fast Mode Operation... -
Page 76: Logic Out Control
PIXIS System Manual Version 2.C LOGIC OUT Control The TTL-compatible logic level output (0 to +3.3 V) from the LOGIC OUT connector on the rear panel can be used to monitor camera status and control external devices. By default, the logic output level is high while the action is occurring. The timing of the... -
Page 77: Kinetics Mode
Chapter 6 Advanced Topics Kinetics Mode In the past, Kinetics Mode was a purchased option for WinView/32. Kinetics Mode is now included in the standard LightField and WinX applications. Introduction Kinetics mode uses the CCD to expose and store a limited number of images in rapid succession. -
Page 78: Figure 39. Hardware Setup Dialog
PIXIS System Manual Version 2.C Kinetic Timing Modes and Shutter Control Kinetics mode operates with three timing modes: Free Run {No Response}, Single Trigger {Readout Per Trigger}, and Multiple Trigger {Shift Per Trigger}. Free run {No Response} mode is used for experiments that do not require any synchronization with the experiments. -
Page 79: Figure 43. Free Run Timing Diagram
Chapter 6 Advanced Topics Window Size. Integrate signals (SHUTTER {Shutter Open}) or Readout signals (NOT SCAN {Not Reading Out}) are provided at the LOGIC OUT connector for timing measurements. Example: Referring to the readout shown in Figure 38, there are 6 pixels perpendicular to the shift register and the Window Size is 2 pixels high. -
Page 80: Custom Modes
PIXIS System Manual Version 2.C In multiple trigger mode, the shutter is opened when Acquire or Focus {Run} is clicked and each “exposure-shift” cycle in the acquisition is triggered independently by a pulse applied at the EXT SYNC connector. This mode is useful when each subframe needs to be synchronized with a pulsed external light source such as a laser. -
Page 81: Figure 46. Winx: Custom Chip Tab
Chapter 6 Advanced Topics Software Settings Princeton Instruments does not encourage users to change these parameter settings. For most applications, the default settings will give the best results. We strongly advise contacting the factory for guidance before customizing the chip definition. -
Page 82: Figure 48. Lightfield: Custom Timing
PIXIS System Manual Version 2.C Custom Timing Notes: 1. This mode is standard with LightField for full frame CCD cameras. 2. This option is fully supported by WinX Version 2.5.18.1 (and higher). 3. This option is not supported by WinX for 5 MHz systems.. -
Page 83: Chapter 7 Troubleshooting
Chapter 7 Troubleshooting WARNING! Do not attach or remove any cables while the camera system is powered on. Introduction The following issues have corresponding troubleshooting sections in this chapter. Acquisition Started but Viewer Contents Do Not Update Page 84 Baseline Signal Suddenly Changes Page 84 Camera Stops Working Page 84... -
Page 84: Acquisition Started But Viewer Contents Do Not Update
If the camera has an internal shutter and you hear 2 clicks separated by 1 second (shutter opening then closing), the shutter is working. Call Princeton Instruments Customer Support for further instructions. If the system still does not respond, contact Princeton Instruments Customer Support. -
Page 85: Camera1 (Or Similar Name) In Camera Name Field
Chapter 7 Troubleshooting Camera1 (or similar name) in Camera Name field Figure 51. Camera1 in Camera Name Field When the Camera Detection Wizard installs a new camera, the camera is automatically named “Camera#” (where # = 1, 2 , or 3.., depending on the number of cameras detected) This name will appear in the Hardware Setup title bar and as the active camera on the Hardware Setup|Controller/Camera tab. -
Page 86: Controller Is Not Responding
PIXIS System Manual Version 2.C Controller Is Not Responding If this message pops up when you click on OK after selecting the "Interface Type" during Hardware Setup (under the WinX Setup menu), the system has not been able to communicate with the camera. Check to see if camera has been turned ON and if the USB 2.0 interface card, its driver, and the USB cable have been installed. -
Page 87: Cooling Troubleshooting
Chapter 7 Troubleshooting Cooling Troubleshooting Temperature Lock Cannot be Achieved or Maintained. Possible causes for not being able to achieve or maintain lock could include: Ambient temperature greater than +23°C. This condition affects TE-cooled cameras. If ambient is greater than +23°C, you will need to cool the camera environment or raise the set temperature. -
Page 88: Data Loss Or Serial Violation
PIXIS System Manual Version 2.C Gradual Deterioration of Cooling Capability While unlikely with the PIXIS camera (guaranteed permanent vacuum for the life of the camera), if you see a gradual deterioration of the cooling capability, there may be a gradual deterioration of the camera’s vacuum. This can affect temperature performance such that it may be impossible to achieve temperature lock at the lowest temperatures. -
Page 89: Data Overrun Has Occurred Message
Chapter 7 Troubleshooting Data Overrun Has Occurred message Because of memory constraints and the way that USB transfers data, a "Data overrun has occurred" message may be displayed during data acquisition. If this message is displayed, take one or more of the following actions: 1. -
Page 90: Device Is Occupied
PIXIS System Manual Version 2.C Cancel the load. Cancelling a load means that the last used experiment will not be loaded automatically when LightField opens. However, you can load the experiment after all the devices are available, you can start a new experiment design, or you can load a different experiment that matches the devices you are using. -
Page 91: Program Error Message
Chapter 7 Troubleshooting Program Error message Figure 56. Program Error dialog This dialog may appear if you have tried to acquire a test image, acquire data, or run in focusing mode and the DMA buffer size is too small. To correct the problem: 1. -
Page 92: Serial Violations Have Occurred. Check Interface Cable
PIXIS System Manual Version 2.C Serial violations have occurred. Check interface cable. Figure 57. Serial Violations Have Occurred dialog This error message dialog will appear if you try to acquire an image or focus the camera and either (or both) of the following conditions exists: ... -
Page 93: Appendix A Basic Specifications
Appendix A Basic Specifications Note: This appendix provides some of the basic specifications of a PIXIS system. If the information you are looking for is not here, it may be available in Appendix B, "Outline Drawings" or on the appropriate data sheet. Data sheets can be downloaded from the Princeton Instruments website (www.princetoninstruments.com). -
Page 94: Shutter
PIXIS:2048: Internal, windowless, 1.8 in (45 mm) aperture, ~ 20 ms open time, ~48 ms close time Typically, PIXIS cameras for spectroscopy applications do not have an installed internal shutter. An optional Princeton Instruments-supplied 25 or 45 mm external shutter can be ordered if the camera has no internal shutter. Camera Cooling: Thermoelectric;... -
Page 95: Table 5. Typical Deepest Operating Temperature
Appendix A Basic Specifications USB 2.0 (USB B Female): Data link to computer via USB cable inserted at this connector. Cable length of 5 meters is standard. Other lengths may be available. Contact Customer Support for more information. USB A/B cable supplied with system. -
Page 96: Coolcube Ii Circulator With Pixis-Compatible Hoses (Pn 7567-0002)
PIXIS System Manual Version 2.C CoolCUBE Circulator with PIXIS-compatible Hoses (PN 7567-0002) Closed loop system Hoses: CoolCUBE and PIXIS-Compatible 3/8" ID, with no-drip quick disconnects at the circulator ends and 1/4” CPC quick disconnects at the camera ends. Coolant: 50:50 ethylene glycol and water at 23°C (DI water recommended). -
Page 97: Appendix B Outline Drawings
Appendix B Outline Drawings NOTE: Dimensions are in inches [mm]. PIXIS Camera: C-mount (Air-Cooled) Figure 58. Adjustable C-Mount: Internal Shutter (Air-cooled) -
Page 98: Figure 59. Fixed C-Mount: Internal Shutter (Air-Cooled)
PIXIS System Manual Version 2.C Figure 59. Fixed C-Mount: Internal Shutter (Air-cooled) -
Page 99: Pixis Camera: C-Mount (Liquid-Cooled)
Appendix B Outline Drawings PIXIS Camera: C-mount (Liquid-Cooled) Figure 60. Adjustable C-Mount: Internal Shutter (Liquid-cooled) -
Page 100: Figure 61. Fixed C-Mount: Internal Shutter (Liquid-Cooled)
PIXIS System Manual Version 2.C Figure 61. Fixed C-Mount: Internal Shutter (Liquid-cooled) -
Page 101: Pixis Camera: F-Mount (Air-Cooled)
Appendix B Outline Drawings PIXIS Camera: F-mount (Air-Cooled) Figure 62. F-Mount: Internal Shutter (Air-cooled) -
Page 102: Pixis Camera: F-Mount (Liquid-Cooled)
PIXIS System Manual Version 2.C PIXIS Camera: F-mount (Liquid-Cooled) Figure 63. F-Mount: Internal Shutter (Liquid-cooled) -
Page 103: Pixis Camera: 2048 F-Mount (Air-Cooled)
Appendix B Outline Drawings PIXIS Camera: 2048 F-mount (Air-Cooled) Figure 64. F-Mount: 2048x2048, Internal Shutter (Air-cooled) -
Page 104: Pixis Camera: 2048 F-Mount (Liquid-Cooled)
PIXIS System Manual Version 2.C PIXIS Camera: 2048 F-mount (Liquid-Cooled) Figure 65. F-Mount: 2048x2048, Internal Shutter (Liquid-cooled) -
Page 105: Pixis Camera: Spectroscopy Mount (Air-Cooled)
Appendix B Outline Drawings PIXIS Camera: Spectroscopy mount (Air-Cooled) Figure 66. Spectroscopy-Mount: No Internal Shutter, 3.60 bolt circle (Air-cooled) -
Page 106: Pixis Camera: Spectroscopy Mount (Liquid-Cooled)
PIXIS System Manual Version 2.C PIXIS Camera: Spectroscopy mount (Liquid-Cooled) Figure 67. Spectroscopy-Mount: No Internal Shutter, 3.60 bolt circle (Liquid-cooled) -
Page 107: Figure 68. Spectroscopy-Mount: Internal Shutter (3.60" And 3.88" Bolt Circles) (Air-Cooled)
Appendix B Outline Drawings Figure 68. Spectroscopy-Mount: Internal Shutter (3.60" and 3.88" bolt circles) (Air-cooled) -
Page 108: Coolcube Ii Circulator
PIXIS System Manual Version 2.C CoolCUBE Circulator Figure 69. CoolCUBE Circulator... -
Page 109: Appendix C Adapter Adjustment And Focusing Procedures
Appendix C Adapter Adjustment and Focusing Procedures Adjustable C-Mount Adapter PIXIS cameras are now available with an adjustable C-mount adapter. The camera is adjusted at the factory for standard C-mount focusing distance. However, you may want to adjust the focusing distance for your application. Tools Required ... -
Page 110: F-Mount Adapter Focusing Procedure
PIXIS System Manual Version 2.C F-Mount Adapter Focusing Procedure Note: This procedure sets the focus for the F-mount adapter, not the lens. Once set, it should not need to be disturbed again. 1. The lens should be mounted to the camera as described in Chapter 4. -
Page 111: Lens Focusing Procedure
Appendix C Adapter Adjustment and Focusing Procedures Lens Focusing Procedure Except for the lens mount focus procedure that applies to F-mount lenses as described above, there is no difference between focusing considerations for an F-mount lens and a C-mount lens. Simply use the focusing ring on the lens to produce the sharpest image at full aperture. - Page 112 PIXIS System Manual Version 2.C This page intentionally left blank.
-
Page 113: Appendix D Spectrograph Adapters
Appendix D Spectrograph Adapters Princeton Instruments offers a variety of spectrograph adapters for PIXIS systems. The mounting instructions for these adapters are organized by spectrograph model, detector type, and adapter kit number. The table below cross-references these items with the page number for the appropriate instruction set. -
Page 114: Acton Series Spectrograph (Pixis With Flange)
PIXIS System Manual Version 2.C Acton Series Spectrograph (PIXIS with Flange) Description Screw, 10-32 1/2, Hex Head, Stainless Steel 2826-0120 Assembly Instructions 1. Make sure that the shipping cover has been removed from the detector port on the spectrograph. -
Page 115: Acton Series Spectrograph (Pixis With 3.60/3.88 Bolt Circles)
Appendix D Spectrograph Adapters Acton Series Spectrograph (PIXIS with 3.60/3.88 Bolt Circles) Description Screw, 10-32 1/4, Button Head Allen Hex, Stainless Steel 2826-0127 Assembly Instructions 1. Make sure that the shipping cover has been removed from the detector port on the spectrograph. -
Page 116: Acton Series Spectrograph (Pixis With C-Mount)
PIXIS System Manual Version 2.C Acton Series Spectrograph (PIXIS with C-Mount) Description 1 8401-071-01 Adapter Plate 1 8401-071-02 Threaded C-Mount Adapter Screw, 10-32 1/4, Button Head Allen Hex, Stainless Steel 2826-0127 Assembly Instructions 1. Make sure that the shipping cover has been removed from the detector port on the spectrograph. -
Page 117: Acton Sp-2350/Sp-2550 Adjustable C- To Spectroscopy-Mount Adapter (Adapter Kit 7050-0104)
Appendix D Spectrograph Adapters Acton SP-2350/SP-2550 Adjustable C- to Spectroscopy-Mount Adapter (Adapter Kit 7050-0104) Description Adapter Plate 1.25”-32 Threaded Insert 2518-1284 Assembly Instructions 1. Make sure that the shipping cover has been removed from the detector port on the spectrograph. 2. -
Page 118: Acton Sp-2150/Sp-2750 Adjustable C- To Spectroscopy-Mount Adapter (Adapter Kit 7050-0107)
PIXIS System Manual Version 2.C Acton SP-2150/SP-2750 Adjustable C- to Spectroscopy-Mount Adapter (Adapter Kit 7050-0107) Description Adapter Plate 1.25”-32 Threaded Insert 2518-1284 Assembly Instructions 1. Make sure that the shipping cover has been removed from the detector port on the spectrograph. -
Page 119: Isoplane Sct-320 (Pixis With Flange)
Appendix D Spectrograph Adapters IsoPlane SCT-320 (PIXIS with Flange) Description Screw, 10-32 1/2, Hex Head, Stainless Steel 2826-0120 Assembly Instructions 1. Make sure that the shipping cover has been removed from the detector mounting plate on the IsoPlane. 2. Leaving 1/4" of thread exposed, screw the three (3) hex head screws into the mounting plate. - Page 120 PIXIS System Manual Version 2.C This page intentionally left blank.
-
Page 121: Appendix E Cross-Referencing Of Winx And Lightfield Terms
Appendix E Cross-Referencing of WinX and LightField Terms WinX-to-LightField WinX LightField Active Rows Parallel to Shift Register Active Height Active Shift Register Columns Active Width ADC Rate Speed ADC Resolution Bit Depth Continuous Cleans Clean Until Trigger Controller Gain Analog Gain Custom Chip Custom Sensor Custom Timing... - Page 122 PIXIS System Manual Version 2.C WinX LightField Minimum Block Size Final Section Height Multiple Trigger (Kinetics) Shift Per Trigger (Kinetics) Normal Shutter Normal (Shutter) Number of Blocks Final Section Count Number of Cleans Number of Clean Cycles Number of Strips per Clean...
-
Page 123: Lightfield-To-Winx
Appendix E Cross-Referencing of WinX and LightField Terms LightField-to-WinX LightField WinX Active Area: Bottom Margin Post-Dummy Rows Parallel to Shift Register Active Area: Left Margin Pre-Dummy Shift Register Columns Active Area: Right Margin Post-Dummy Shift Register Columns Active Area: Top Margin F.T. - Page 124 PIXIS System Manual Version 2.C LightField WinX Output Signal: Not Reading Out Logic Out: Not Scan Output Signal: Shutter Open Logic Out: Shutter Preview Focus Quality Readout Port Readout Per Trigger External Sync Readout Per Trigger (Kinetics) Single Trigger (Kinetics)
-
Page 125: Declaration Of Conformity
Declaration of Conformity This section of the PIXIS system manual contains the Declaration(s) of Conformity for PIXIS systems. - Page 126 PIXIS System Manual Version 2.C...
- Page 127 Declaration of Conformity...
- Page 128 PIXIS System Manual Version 2.C This page intentionally left blank.
-
Page 129: Warranty & Service
(1) year after shipment. During this period, Princeton Instruments will repair the product or, at its sole option, repair or replace any defective part without charge to you. You must deliver the entire product to the Princeton Instruments factory or, at our option, to a factory-authorized service center. - Page 130 / or workmanship under normal use for a period of one (1) year from shipment. Princeton Instruments does not warrant that the function of the software will meet your requirements or that operation will be uninterrupted or error free.
- Page 131 (1) year limited warranty and/or any other warranty, expressed or implied. 3. All warranty service must be made by the Princeton Instruments factory or, at our option, an authorized service center. 4. Before products or parts can be returned for service you must contact the Princeton Instruments factory and receive a return authorization number (RMA).
-
Page 132: Contact Information
In no event shall Princeton Instruments' liability exceed the cost of the repair or replacement of the defective product or part. -
Page 133: Index
Index Binning (cont.) resolution loss 61, 62 A/D converters 65, 95 software AC power requirements effect on S/N ratio Accessories, alignment of 44, 54 high light level measurements Acquisition started, viewer contents do not update 84 shot-noise limited measurements Adapter instructions 114, 115, 116 well capacity Acton Series spectrographs 114, 115, 116, 117, 118... - Page 134 PIXIS System Manual Version 2.C Connectors External Sync See Also Readout Per Trigger EXT SYNC background subtraction external shutter 14, 94 dark charge accumulation LEMO EXT SYNC connector LOGIC OUT input pulse power 14, 95 pulse characteristics 14, 95 shutter synchronization...
- Page 135 Index LEMO connector Readout Lenses, mounting binning LightField hardware LOGIC 0 output level 76, 94 software LOGIC 1 output level 76, 94 subsection of array Logic Out levels time Always High Readout Per Trigger 69, See also External Sync Always Low Readout rate Busy control of...
- Page 136 PIXIS System Manual Version 2.C Troubleshooting (cont.) temperature lock Technical support vacuum deterioration Temperature control problems operating specifications thermal cutout switch USB 2.0 Temperature control cable effect of vacuum deterioration data overrun Temperature lock Vacuum deterioration Thermal cutout switch Ventilation requirements...
Need help?
Do you have a question about the PIXIS System and is the answer not in the manual?
Questions and answers