Advertisement
Available languages
Available languages
Quick Links
T-series
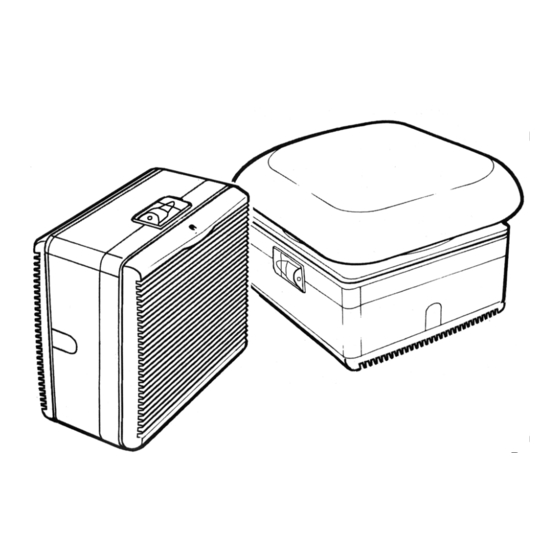
Window & Roof Models
Installation & User Instructions
Note:- Darkroom and in-line models are variants of these models
220-240V~50Hz
PLEASE READ INSTRUCTIONS IN CONJUNCTION WITH ILLUSTRATIONS
READ AND SAVE THESE INSTRUCTIONS
Advertisement

Summary of Contents for Vent-Axia TX7WW
- Page 1 T-series Window & Roof Models Installation & User Instructions Note:- Darkroom and in-line models are variants of these models 220-240V~50Hz PLEASE READ INSTRUCTIONS IN CONJUNCTION WITH ILLUSTRATIONS READ AND SAVE THESE INSTRUCTIONS...
- Page 2 (It may be necessary when using The motor in this Vent-Axia product is fitted with some 3-core cables to reverse the cable clamp to ensure sealed-for-life bearings and therefore does not require VOLTAGE that the cable is securely retained.
- Page 3 CABLAGE DU SOCLE DU CONNECTEUR l'installation. fonctionne. Le moteur de ce produit Vent-Axia est équipé de paliers scellés I UN CONTROLEUR SERIE DOIT ETRE UTILISE UN CABLAGE A F9.Enlever le couvercle du dessus du socle du connecteur en à...
- Page 4 Glasscheiben eingebaut gelb/grüne Kabel (Erdung) an Klemme E/G in der werden soll, ist eine dickere Verglasung erforderlich – wenden Anschlussbuchse an. Verbinden Sie Klemme L3 mit Klemme Sie sich in diesem Fall an Ihr Vent-Axia Absatz-, Service- und Vertriebszentrum. F14.Rasten Klemmenteil Unterteil D.Die Mindestdicke der Glasscheibe für normale Bedingungen...
- Page 5 KAMER MET EEN GEÏNSTALLEERD BAD OF DOUCHE OPGELET: DIT TOESTEL MOET GEAARD ZIJN. BEVINDEN. HET BEDRADEN VAN DE De motor in dit product van Vent-Axia is uitgerust met 7.DIT TOESTEL MOET GEAARD ZIJN. levenslang dichte lagers en behoeft bijgevolg geen smering. AANSLUITINGSCONTACTDOOS 8.LEES...
- Page 6 DIn condizioni normali, per lo spessore minimo del vetro PULIZIA vedere la fig. D. Oltre a eliminare gli odori, la ventola Vent-Axia estrae anche le PREPARAZIONE PER L'INSTALLAZIONE impurità presenti nell'aria come lo sporco, la polvere e il grasso. Smontaggio...
- Page 7 Os ventiladores localizado no topo da grelha. Vent-Axia da 'Série T' foram concebidos para uma limpeza e E2Remover a grelha. Desapertar parcialmente os dois parafusos manutenção fáceis. Assim, para garantir sempre o melhor de segurança das linguetas na face da caixa.
- Page 8 (véase A) través de la abrazadera. (Podría ser necesario, si utiliza alma de El motor de este producto de Vent-Axia está dotado de cable- 3 que doblara la abrazadera para cerciorarse de que el cojinetes herméticamente sellados durante la vida útil del...
- Page 9 Sæt først den nederste kant ind og tryk så den øverste på plads. ventilatorens funktion. Stram holdeskruen øverst på risten. AFBRYDER, SOM ER FORSYNET MED EN 3 AMP. SIKRING (KUN STORBRITANNIEN). Motoren i dette Vent-Axia produkt er udstyret med lejer, som er 6.DEN DOBBELTPOLEDE AFBRYDER ELLER STIKKET ADVARSEL: DETTE APPARAT SKAL VÆRE...
- Page 10 λειτουργία του ανεμιστήρα. και συνδέστε τα με τον κατάλληλο ρευματολήπτη (φις) 3 ΠΑΧΟΣ ΥΑΛΟΠΙΝΑΚΑ Ο κινητήρας σε αυτό το προϊόν της Vent-Axia διαθέτει ακίδων ή σούκο. Εάν η σύνδεσή του θα είναι μόνιμη, θα πρέπει Οι ανεμιστήρες μπορούν να στερεωθούν στους περισσότερους...
- Page 11 SIZE SIZE EØ EØ...
- Page 12 F2ii F3i/F3ii...
- Page 13 EXTRACT INTAKE...
- Page 16 SALES ENQUIRIES: Tel: 0344 8560590 Fax: 01293 565169 TECHNICAL SUPPORT: Tel: 0344 8560594 Fax: 01293 532814 For details of the warranty and returns procedure please refer to www.vent-axia.com or write to Vent-Axia Ltd, Fleming Way, Crawley, RH10 9YX 442610C 0521...


Need help?
Do you have a question about the TX7WW and is the answer not in the manual?
Questions and answers