
Related Manuals for Canon LX-P1300


Summary of Contents for Canon LX-P1300
- Page 1 LX-P1300 LX-D1300 COLOR LABEL PRINTER Basic Operation Guide Please read this guide before operating this product. When nished reading, store it in a safe place for future reference.
- Page 2 About Instruction Manuals Thank you for purchasing the Canon LX-P1300/LX-D1300 Color Label Printer. The following manuals come with this product. ⨋ Getting Started Guide • This manual describes the procedures for installing and making preparations for using this product. • Read this manual first.
-
Page 3: Table Of Contents
Table of Contents Before You Begin ........... 1 Troubleshooting ..........35 Conventions .............. 1 Status Lamp Lights up Orange ....35 Sample Screens ............1 Status Lamp Is Flashing Orange ....36 Trademarks ..............1 Power Does not Turn on ........37 Abbreviations ............2 Printing Does not Start/Complete ....37 Request to the Customer ........ -
Page 4: Before You Begin
Instructions including notes for operation and additional explanations.. Sample Screens The sample LX-P1300 printer driver screens displayed in this manual were created with Windows 10. Trademarks • Canon and the Canon logo are registered trademarks of Canon Inc. -
Page 5: Abbreviations
Reproduction of such items may be subject to criminal prosecution. • Please note that intellectual property protected by copyright may not be reproduced without the express permission of the copyright holder except for personal or household use under limited circumstances. ■ Product Name LX-P1300 LX-D1300... - Page 6 Before You Begin ■ FCC (Federal Communications Commission) This device complies with Part 15 of the FCC Rules. Operation is subject to the following two conditions: (1) This device may not cause harmful interference, and (2) this device must accept any interference received, including interference that may cause undesired operation.
-
Page 7: Important Safety Instructions
Important Safety Instructions Prior to using this printer, please read this section ("Important Safety Instructions") thoroughly. Warnings and important matters are described here to ensure safe use of the product. Do not attempt to operate this printer in any way other than those mentioned in the manual. ■... - Page 8 Important Safety Instructions A location exposed to oily smoke or steam; e.g., near a countertop or humidifier. A location exposed to rain or snow. A location exposed to salty wind. A location subject to high temperatures A location near open flames •...
- Page 9 Important Safety Instructions or pull the AC cord and the AC adapter. This could cause power leakage from the damaged portion, resulting in a fire or electric shock. • Do not stress the base of power cord such as wrapping it around the AC adapter. This could cause power leakage from the damaged portion, resulting in a fire or electric shock.
- Page 10 Important Safety Instructions • When abnormal sound, smoke, excessive heat, or strange odor is detected, turn the printer off immediately, disconnect the power plug from the power outlet and contact your place of purchase. Using the printer continuously could cause a fire or electric shock. Do not attempt to repair the printer by yourself.
- Page 11 Important Safety Instructions • Do not directly paste labels printed with this printer onto fruits and vegetables. When pasting labels on food products, paste them onto wrap or other packaging. IMPORTANT • Do not open the ink tank cover or transport unit lever, turn the printer off, or remove the power plug from the power outlet while the printer is operating.
- Page 12 Important Safety Instructions Moving parts: Keep body parts away from moving parts NOTE: Some of symbols shown above may not be affixed depending on the product. ■ Moving CAUTION • Before moving the printer, turn it off, remove the power plug from the power outlet, and disconnect the interface cable.
- Page 13 Important Safety Instructions • Check the power cord, power plug and AC adapter regularly. If the following conditions occur, contact your place of purchase, as the condition may cause a fire: There are burn marks on the power plug. The blade on the power plug is deformed or broken. The power goes OFF and ON when the power cord is bent.
-
Page 14: Names And Functions Of Components
Names and Functions of Components External View Transport Unit (P.13) USB Connector Pull out this unit when setting paper. Connect a USB cable to this connector. Ejection Slot LAN Connector Printed paper is ejected through this slot. Connect a LAN cable to this connector. Operation Panel (P.14) Power Socket... -
Page 15: Internal View
Names and Functions of Components Internal View Maintenance Cartridge Ink used to clean print head is collected in this cartridge. -
Page 16: Transport Unit
Names and Functions of Components Transport Unit Transport Unit Lever Paper Set Lever Open this lever to pull out the transport unit. Secure paper to the transport unit using this lever. Transport Area Roll Holder Transports paper here. Set paper here. Clean the transport area when stained with paper dust and ink. -
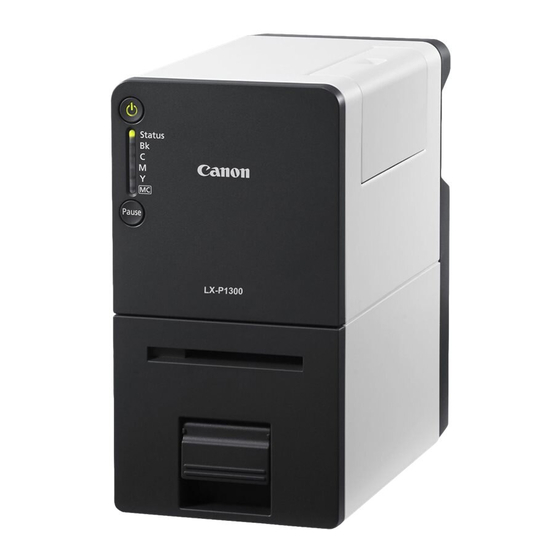
Page 17: Operation Panel
Names and Functions of Components Operation Panel Power Key/Lamp Ink Lamps (Bk/C/M/Y) Press this key to turn on/off the printer. This lamp lights Each lamp lights up or blinks when there is no ink up or blinks depending on the power supply status. available for printing or the ink tank is low. -
Page 18: Turning The Printer On/Off
Turning the Printer On/Off How to Turn the Printer On Press the power key. The status lamp blinks (green), and then lights NOTE • About the Sleep Timer The printer will automatically enter sleep mode when a predetermined amount of time elapses without printing. -
Page 19: Turning The Printer Off
Turning on/off the Printer How to Turn the Printer Off Make sure the printer is not operating. When the status lamp is blinking (green), the printer is operating. Make sure the status lamp lights up (green) before turning the printer off. Press and hold the power key until the status lamp goes out. -
Page 20: Loading The Paper
Loading the Paper IMPORTANT • When replacing paper after the printer has run out, peel off the tape affixed at the end of the remaining paper. Removing the remaining paper through the ejection slot without peeling off the tape could cause a printing failure. - Page 21 Loading the Paper Make sure the power lamp is lit. If the power lamp is off, press the power key to turn the printer on. (P.15) Pull the transport unit out of the printer. 1. Raise the transport unit lever. 2.
- Page 22 Loading the Paper 3. Pull the transport unit out with both hands as shown in the figure. CAUTION • When pulling the transport unit out of the printer, hold it securely with both hands so that it does not fall down.
- Page 23 Loading the Paper Remove the roll holder from the transport unit. ● When setting paper for the first time: (Refer to P.20) ● When replacing paper after the printer has run out of paper: (Refer to P.21) ● When replacing with paper of a different type or size: (Refer to P.23) ●...
- Page 24 Loading the Paper ● When replacing paper after the printer has run out of paper 1. Open the paper set lever. 2. Peel off the tape affixed at the end of the remaining paper. 3. Pull the remaining paper out through the paper ejection slot.
- Page 25 Loading the Paper 4. Remove the roll holder. IMPORTANT • When replacing paper before the printer has finished printing, ensure that the new paper is the same type and size of the paper to be replaced. Using new paper of a different type or size could cause a printing error.
- Page 26 Loading the Paper ● When replacing with paper of a different type or size 1. Open the paper set lever. 2. Pull the paper set out between the paper guides onto the roll holder. 3. Remove the roll holder.
- Page 27 Loading the Paper IMPORTANT • Before removing the roll holder, be sure to pull the paper out of the paper guides. Removing the roll holder with paper still set between the paper guides could damage the paper guides or sensor. Remove paper or a paper core from the roll holder.
- Page 28 Loading the Paper Set new paper. 1. Attach roll stoppers to paper. Attach the roll stoppers to paper so that paper is fed as indicated by the mark on the roll stopper (L). Push the roller stoppers until they are pressed against paper without clearance.
- Page 29 Loading the Paper Set the paper guide. While pressing on the top of the paper guide (A), move it to the paper width index (B) corresponding to the paper width. For example, in the illustration shown on the left, the guide has been moved to the guide position “54 mm.”...
- Page 30 Loading the Paper Set paper. 1. Pass the paper leading edge under the sensor (C), and align it with the paper alignment line (D). Check that paper does not float above the paper guides (A and E). If it is hard to feed paper in, check whether the paper guide is positioned properly.
- Page 31 Loading the Paper 3. Make sure the rollers (F) are firmly pressed onto the paper surface, close the paper set lever. If the rollers are not firmly pressed onto the paper surface, the paper set lever can not be closed.
- Page 32 Loading the Paper 2. Push the transport unit lever until it clicks. CAUTION • When returning the transport unit back inside the printer, be careful not to get your fingers caught between the transport unit and the inside of the printer. IMPORTANT ...
-
Page 33: How To Print
Open the document you want to print and then the [Print] dialog box. Select [Print] from the [Files] menu (or the toolbar) of the application software. Open the printer driver setup window. Select [Canon LX-P1300] (or [Canon LX-D1300]), and then click [Preferences] or [Properties]. - Page 34 How to Print Set the paper size and type. 1. Select the paper size. Select [2×3 label/gap]. 2. Select the paper type. Select [Matte]. 3. Click IMPORTANT • Selecting the wrong paper size could stain the transport area and paper guides. For how to clean the transport area and paper guides, refer to “Cleaning the Printer”...
- Page 35 How to Print blackout occurs), do not draw out the transport unit immediately. Turn the printer on again before performing any operation. Drawing out the transport unit forcibly without turning the printer on again could cause a machine failure. • If the application software and printer driver have the same setting items such as Paper Size, Orientation, and Copies, the settings made by the application software may be given priority.
-
Page 36: Cancel Printing
How to Print • Displaying Help Topics Displaying help topics from the Settings screen of the printer driver allows you to read descriptions of functions and setting procedure. - To read detailed descriptions of functions and setting procedure When you want to read detailed description of printer driver functions and setting procedure, click [Help] on the Settings screen of the printer driver. -
Page 37: How To Check The Printer Status
How to Check the Printer Status The status monitor allows you to check the current status of the printer, print status, ink information, and maintenance cartridge information. NOTE • Select the message displayed in the [Status Information] field, and then click [Display details of selected status]. Another screen opens, allowing you to know details of the message and the error handling instruction. -
Page 38: Troubleshooting
Troubleshooting If problems persist after trying these procedures, contact your place of purchase. Status Lamp Lights up Orange When an error occurs in the printer that requires attention, the status lamp on the operation panel will light up orange (operator call error). The error details and actions required can be confirmed with the Status Monitor. -
Page 39: Status Lamp Is Flashing Orange
Troubleshooting IMPORTANT • For information on the details of the messages displayed on the Status Monitor and how to deal with errors, refer to “List of Error Messages/Warning Messages” (User’s Guide). • When error messages are displayed, the printer will automatically go offline. Depending on the type of error, even after handling the error, there are cases where it will not go online automatically. -
Page 40: Power Does Not Turn On
Troubleshooting Power Does not Turn on Points to Confirm Solution Is the AC adapter and power cord After confirming that the AC adapter and power cord are properly properly connected? connected, insert the power plug firmly into the power outlet. Is the power outlet supplying Try plugging in other electric appliances. - Page 41 Troubleshooting Points to Confirm Solution Is the computer's configuration Selecting "Never" in the Microsoft Windows Power Saver or Power for suspend or sleep state set to Option settings will prevent the computer from entering a sleep state. something other than “Never”? Refer to Microsoft Windows product documentation for instructions on adjusting your computer's power settings.
- Page 42 Troubleshooting Points to Confirm Solution (When you are connected within a Make sure that the computer and this printer are installed on the same network following the steps below: network environment) Are the printer and computer (Confirming the IP address) configured on the same network? 1.
-
Page 43: Paper Does Not Feed Properly
Troubleshooting 2. Right-click the printer icon and select [Printer Properties]. The properties window will appear. 3. Click on the [Ports] tab and click [Add port]. 4. Select [CNUS Network Port] and click [New Port...]. The [CNUS Network Port] dialog box will be displayed. 5. -
Page 44: Improving The Print Quality
Troubleshooting Points to Confirm Solution Is the transport area stained? If the transport area is stained by paper dust or ink, paper jams are more likely to occur. Clean the transport area regularly. Refer to “Cleaning the Printer” (User’s Guide). Improving the Print Quality Condition Solution... - Page 45 Troubleshooting Condition Solution The printing is blurred. Confirm that the paper set (size, shape, and type) matches the paper (size, shape, and type) configured by the application software or printer driver. Clean the print head. Refer to “Cleaning the Print Head” (User's Guide). If you are using the printer at low temperature (Room temperature is 14 degrees Celsius (57 degrees Fahrenheit) or lower): Open the [Utility] tab in the printer driver and then select the [Low...
- Page 46 Troubleshooting Condition Solution Overall appearance of the printed Use dedicated paper. When paper other than dedicated paper is used the print quality may output is not satisfactory. be low. Also, it may cause paper jams and malfunctions. Verify that the paper set (size, shape, and type) matches the paper (size, shape, and type) configured by the application software or printer driver.
- Page 47 Troubleshooting Condition Solution The margin of the printed result is too Configure the paper size set by the application software or printer small or large driver as follows: When the margin is small or when images on the edge of the paper are missing: Decrease the [Paper Length] and adjust the image according to the paper size changed.
-
Page 48: Paper Is Jammed
Troubleshooting Paper Is Jammed When a paper jam occurs during printing, the printing is interrupted and the Status Monitor will display an error message such as “Paper jam #****” (where **** is a number). IMPORTANT • Do not pull the printed paper out from the ejection slot. Printing problems will occur. •... - Page 49 Troubleshooting 3. Pull the transport unit out with both hands as shown in the figure. CAUTION • When pulling the transport unit out of the printer, hold it securely with both hands so that it does not fall down. • Do not put your hands inside the printer. Failures or physical injury could result.
- Page 50 Troubleshooting Remove the jammed paper 1. Open the paper set lever. When the ejection slot area is clogged, remove the paper retainer (A) and verify that labels or other matter is not stuck to it. If there are any labels or scraps, remove them all.
- Page 51 Troubleshooting 3. Remove the jammed paper from the roll holder side. 4. If the paper retainer (A) was removed in Step 1, attach the paper retainer back. Align the arrow ( ) of the Paper Retainer (A) and the attachment position ( Load the paper.
-
Page 52: Specifications
Specifications ■ Printer Product name LX-P1300 LX-D1300 Printing method Inkjet Print colors Full color Output resolution 1200 dpi x 1200 dpi Printing speed Auto printing speed: 120, 80 mm/sec (4.7/3.1 in/sec) Preset printing speed: 120, 80, 70, 60, 50 mm/sec (4.7/3.1/2.7/2.3/1.9 in/sec) - Page 53 Specifications ■ Paper Paper form Dedicated roll paper (Label, Tag) Paper type Matte coated paper, Glossy paper, Synthetic paper Paper size 28.4 mm - 63.0 mm (1.12 in - 2.48 in) (W) 25.4 mm - 400 mm (1.00 in - 15.7 in) (L) (Including Liner) Paper thickness 145 μm - 255 μm (5.71 mil - 10.0 mil) Paper capacity...
- Page 54 CANON U.S.A., INC. One Canon Park, Melville, NY 11747, U.S.A. www.usa.canon.com 4Y8-8157-020 CANON FINETECH NISCA INC. 2018 PRINTED IN JAPAN...
Need help?
Do you have a question about the LX-P1300 and is the answer not in the manual?
Questions and answers