Table of Contents
Advertisement
Available languages
Available languages
Quick Links
DO1019SV
Handleiding
Mode d'emploi
Gebrauchsanleitung
Instruction booklet
Manual de instrucciones
Istruzioni per l'uso
Návod k použití
Návod na použitie
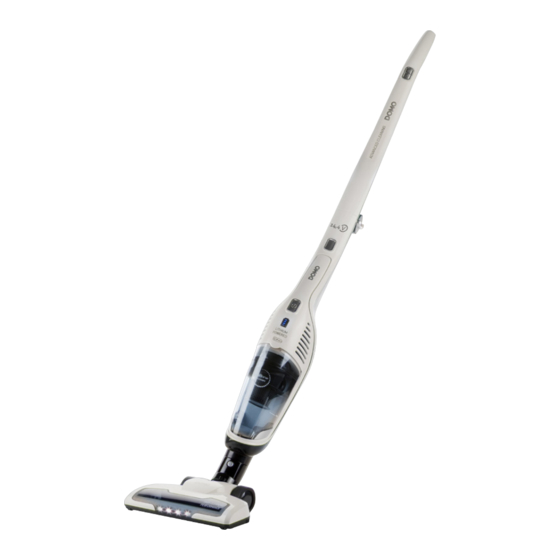
Steelstofzuiger 2-in-1
Aspirateur-balai 2-en-1
Handstaubsauger 2-in-1
2-in-1 Stick vacuum cleaner
Aspirador escoba
Aspirapolvere 2 in 1
Tyčový vysavač 2v1
Tyčový vysávač 2v1
PRODUCT OF
Advertisement
Table of Contents

Subscribe to Our Youtube Channel
Related Manuals for Linea 2000 DOMO DO1019SV


Summary of Contents for Linea 2000 DOMO DO1019SV
- Page 1 DO1019SV Handleiding Steelstofzuiger 2-in-1 Mode d’emploi Aspirateur-balai 2-en-1 Gebrauchsanleitung Handstaubsauger 2-in-1 Instruction booklet 2-in-1 Stick vacuum cleaner Manual de instrucciones Aspirador escoba Istruzioni per l’uso Aspirapolvere 2 in 1 Návod k použití Tyčový vysavač 2v1 Návod na použitie Tyčový vysávač 2v1 PRODUCT OF...
- Page 2 Lees aandachtig alle instructies - bewaar deze handleiding voor latere raadpleging. Lisez attentivement les instructions - gardez le mode d’emploi pour utilisation ultérieur. Lesen Sie genau die Anweisungen - bewahren Sie die Gebrauchsanleitung für spätere heranziehung. Read all instructions carefully - save this instruction manual for future reference. Lea detenidamente todas las instrucciones - Conserve este manual para futura referencia.
-
Page 3: Garantie
GARANTIE Geachte klant, Al onze producten ondergaan steeds een strenge kwaliteitscontrole, alvorens ze aan u worden aangeboden. Mocht u desondanks toch nog problemen hebben met uw toestel, dan betreuren wij dit ten zeerste. In dat geval verzoeken wij u contact op te nemen met onze klantendienst. Onze medewerkers zullen u met plezier verder helpen. - Page 4 VEILIGHEIDSVOORSCHRIFTEN Dit toestel mag gebruikt worden door kinderen vanaf 16 jaar en ouder, en door personen met een fysieke of sensoriële beperking of mensen met een beperkte mentale capaciteit of gebrek aan ervaring of kennis, op voorwaarde dat deze personen toezicht krijgen of instructies hebben gekregen over het gebruik van het toestel op een veilige manier en dat ze ook de gevaren kennen bij het gebruik van het toestel.
- Page 5 waar het in contact zou kunnen komen met een warm toestel. · Gebruik het toestel niet buiten. · Gebruik het toestel enkel voor het doel waarvoor het bestemd is. · Gebruik het toestel altijd op een stevig, droog, effen oppervlak. ·...
-
Page 6: Voor Het Eerste Gebruik
ONDERDELEN Aan-uitknop Snelheidsregelaar Knop om steel te plooien Ontgrendelknop kruimelzuiger Aan-uitknop kruimelzuiger Indicator batterijniveau Ontgrendelknop stofreservoir Ontgrendeling vloerzuigmond Vloerzuigmond met roterende vloerborstel 10. Snoer oplaadstation 11. Oplaadstation 12. Kierenzuiger 13. Stofborsteltje VOOR HET EERSTE GEBRUIK Om het toestel correct te monteren, volg je best de volgende stappen: ·... -
Page 7: Reiniging En Onderhoud
oplaadstation schuiven in elkaar, zodat de steelstofzuiger verticaal op het station blijft staan. Zorg ervoor dat het geheel stabiel staat. De indicator van het batterijniveau zal nu oplichten en geeft aan wanneer het toestel volledig opgeladen is. Tijdens het opladen kan het toestel niet gestart worden. GEBRUIK ·... - Page 8 Wij raden aan om de filters regelmatig te vervangen om een optimale werking van het toestel te verzekeren. Vuile filters zullen de zuigkracht drastisch doen dalen. Reinig na elke poetsbeurt het stofreservoir en de filters om de levensduur van het toestel te verlengen. DE VLOERBORSTEL PROPER MAKEN Verwijder de vloerzuigmond van de steelstofzuiger.
-
Page 9: Probleem En Oplossing
PROBLEEM EN OPLOSSING Probleem Oplossing Het toestel start niet. · De batterij is leeg. Laad het toestel op. · De kruimelzuiger is niet correct op de steelstofzuiger gemonteerd. Zorg ervoor dat de kruimelzuiger correct geïnstalleerd is. Het toestel zuigt niet. ·... - Page 10 MILIEURICHTLIJNEN Dit symbool op het product of op de verpakking wijst erop dat dit product niet als huishoudafval mag worden behandeld. Het moet naar een plaats worden gebracht waar elektrische en elektronische apparatuur wordt gerecycleerd. Als u ervoor zorgt dat dit product op de correcte manier wordt verwijderd, voorkomt u mogelijk voor mens en milieu negatieve gevolgen die zich zouden kunnen voordoen in geval van verkeerde afvalbehandeling.
- Page 11 GARANTIE Cher client, Tous nos produits sont soumis à des contrôles qualité stricts avant d’être proposés à la vente. Si vous deviez toutefois rencontrer un problème avec votre appareil, nous le déplorons vivement. Dans ce cas, nous vous invitons à prendre contact avec notre service à la clientèle. Nos collaboratrices se feront un plaisir de vous aider ! +32 14 21 71 91 info@linea2000.be...
-
Page 12: Consignes De Sécurité
CONSIGNES DE SÉCURITÉ Cet appareil peut être utilisé par des enfants âgés d’au moins 16 ans et par des personnes ayant des capacités physiques, sensorielles ou mentales réduites ou dénuées d’expérience ou de connaissance, s’ils (si elles) sont correctement surveillé(e)s ou si des instructions relatives à... - Page 13 · Cet appareil ne convient qu’à un usage domestique. Le fabricant décline toute responsabilité pour des accidents qui découleraient d’un mauvais usage de l’appareil ou du non-respect des instructions fournies dans ce manuel. · Toutes les réparations, en dehors de l’entretien ordinaire de l’appareil, doivent être réalisées par le fabricant ou son service après-vente.
-
Page 14: Avant La Première Utilisation
PARTIES Bouton marche/arrêt Régulateur de vitesse Bouton de repliage du manche Bouton de déverrouillage du ramasse-miettes Bouton marche/arrêt du ramasse-miettes Indicateur de batterie Bouton de déverrouillage du réservoir de poussière Bouton de déverrouillage du suceur pour sols Suceur pour sols avec brosse de sols rotative 10. -
Page 15: Nettoyage Et Entretien
Placez l’aspirateur à manche dans le chargeur, de manière à ce que les points de contact sur l’aspirateur soient en regard des points de contact sur le chargeur. L’aspirateur et le chargeur coulissent l’un dans l’autre, de manière à ce que l’aspirateur à manche reste bien en position verticale sur le chargeur. - Page 16 Videz le réservoir de poussière.Le réservoir à poussières, le filtre (A) et le filtre EPA (B) peuvent être nettoyés à l’eau courante. Prenez toutefois garde à ce qu’ils soient bien secs avant de réutiliser l’appareil. Nous vous recommandons de remplacer régulièrement les filtres, afin de garantir un fonctionnement optimal de l’appareil.
-
Page 17: Problèmes Et Solutions
PROBLÈMES ET SOLUTIONS Problème Solution L’appareil ne démarre pas. · La batterie est déchargée. Rechargez l’appareil. · Le ramasse-miettes n’est pas monté correctement sur l’aspirateur à manche. Veillez à ce que le ramasse-miettes soit placé correctement. L’appareil n’aspire pas. · Les filtres sont sales/le réservoir de poussière est plein. ·... -
Page 18: Mise Au Rebut
MISE AU REBUT Ce symbole sur le produit ou son emballage indique que ce produit ne peut être traité comme déchet ménager. Il doit plutôt être remis au point de ramassage concerné, se chargeant du recyclage du matériel électrique et électronique. - Page 19 GARANTIE Sehr geehrter Kunde, Sämtliche unserer Produkte unterliegen einer strengen Qualitätskontrolle, bevor Sie Ihnen angeboten werden. Sollten dennoch Probleme mit Ihrem Gerät auftreten, bedauern wir dies zutiefst. Wir möchten Sie in diesem Fall bitten, unseren Kundenservice zu kontaktieren. Unsere Mitarbeiter helfen Ihnen gern weiter! +32 14 21 71 91 info@linea2000.be Montag –...
- Page 20 SICHERHEITSVORKEHRUNGEN Dieses Gerät darf von Kindern ab 16 Jahren oder älter gebraucht werden. Ebenso dürfen Personen mit körperlicher bzw. leichter geistiger Behinderung sowie Personen mit eingeschränkter Erfahrung das Gerät betätigen. Dies unter der Voraussetzung, dass diese Personen ausreichende Anweisungen sowohl zum Gebrauch des Gerätes, als auch zu den hiermit verbundenen Gefahren erhalten haben.
- Page 21 · Benutzen Sie das Gerät nicht im Freien. · Benutzen Sie das Gerät ausschließlich für den Zweck, für den es gedacht ist. · Stellen Sie das Gerät immer auf eine stabile, flache und trockene Oberfläche. · Das Gerät ist nur auf den privaten Gebrauch ausgelegt. Der Hersteller ist nicht verantwortlich für Unfälle, die als Folge von unsachgemäßem Gebrauch des Geräts oder Nichtbefolgen der in dieser Anleitung aufgeführten Regeln entstehen.
-
Page 22: Vor Der Ersten Inbetriebnahme
TEILE An-/Ausschalter Geschwindigkeitsstufenschalter Knopf zum Einklappen des Stiels Entriegelungsknopf Handstaubsauger An-/Ausschalter Handstaubsauger Akkustandsanzeige Entriegelungsknopf für den Staubbehälter Entriegelungsknopf Bodendüse Bodendüse mit rotierender Bodenbürste 10. Netzkabel der Ladestation 11. Ladestation 12. Fugendüse 13. Staubbürste VOR DER ERSTEN INBETRIEBNAHME Um das Gerät korrekt zu montieren, führen Sie bitte die folgenden Schritte aus: ·... -
Page 23: Reinigung Und Wartung
Stellen Sie den Stielstaubsauger in die Ladestation, sodass die Kontaktpunkte des Staubsaugers genau auf die Kontaktpunkte der Ladestation treffen. Der Staubsauger und die Ladestation schieben sich ineinander, sodass der Stielstaubsauger vertikal auf der Ladestation stehen bleibt. Sorgen Sie dafür, dass das Ganze stabil steht. Die Akkustandsanzeige leuchtet jetzt auf und zeigt an, wann das Gerät vollständig aufgeladen ist. - Page 24 Leeren Sie den Staubbehälter. Der Staubraum, der Filter (A) und der EPA-Filter (B) können unter fließendem Wasser gereinigt werden. Achten Sie dabei darauf, dass sie komplett trocken sind, bevor sie erneut ins Gerät eingesetzt werden. Wir empfehlen, die Filter zur Gewährleistung einer optimalen Funktionalität des Geräts regelmäßig auszutauschen.
-
Page 25: Probleme Und Lösungen
PROBLEME UND LÖSUNGEN Problem Lösung Das Gerät startet nicht. · Der Akku ist leer. Laden Sie das Gerät auf. · Der Handstaubsauger ist nicht korrekt im Stielstaubsauger angebracht. Sorgen Sie dafür, dass der Handstaubsauger korrekt montiert wurde. Das Gerät saugt nicht. ·... - Page 26 ENTSORGEN Dieses Symbol auf dem Produkt oder seiner Verpackung weist darauf hin, dass dieses Produkt nicht als normaler Haushaltsabfall zu behandeln ist, sondern an einem Sammelpunkt für das Recyling von elektrischen und elektronischen Geräten abgegeben werden muss. Durch Ihren Beitrag zum korrekten Entsorgen dieses Produkts schützen Sie die Umwelt und die Gesundheit Ihrer Mitmenschen.
-
Page 27: Warranty
WARRANTY Dear client , All of our products are always submitted to a strict quality control before they are sold to you. Should you nevertheless experience problems with your device, we sincerely regret this. In that case, we kindly request you to contact our customer service. Our staff will gladly assist you. -
Page 28: Safety Instructions
SAFETY INSTRUCTIONS This appliance may be used by children from the age of 16 and up, and also by persons with a physical or sensorly limitation, as well as mentally limited persons or persons with a lack of experience and knowledge. But only on the condition that these persons have received the necessary instructions on how to use this appliance in a safe way and know the dangers that can occur by using this appliance. - Page 29 · Always use the appliance on a steady, dry and level surface. · Only use the appliance for domestic use. The manufacturer can not be held responsible for accidents that result from improper use of the appliance or not following the instructions described in this manual.
-
Page 30: Before The First Use
PARTS On-off button Speed control Button to bend the handle Release button hand-held vacuum cleaner On-off button hand-held Battery charge indicator Unlock button for dust reservoir Release button floor nozzle Floor nozzle with rotating floor brush 10. Charging station cord 11. -
Page 31: Cleaning And Maintenance
the vacuum cleaner are aligned with the contact points on the charging station. Push the vacuum cleaner and the charging station together so that the stick vacuum cleaner remains standing vertically on the station. Make sure it all is stable. The battery level indicator will now light up and indicate when the machine is fully charged. - Page 32 We advise replacing the filters regularly to ensure an optimal operation of the machine. Dirty filters will reduce the suction power drastically. After every cleaning, clean the dust reservoir and the filters to extend the life span of your machine. CLEANING THE FLOOR BRUSH Remove the floor nozzle from the upright vacuum cleaner.
-
Page 33: Problem And Solution
PROBLEM AND SOLUTION Problem Solution The machine does not start up. · The battery is empty. Charge the machine. · The hand-held vacuum cleaner is not correctly mounted on the stick vacuum cleaner. Make sure that the hand-held vacuum cleaner is correctly installed. -
Page 34: Environmental Guidelines
ENVIRONMENTAL GUIDELINES This symbol on the product or on its packaging indicates that this product may not be treated as household waste. Instead it must be brought to the applicable collection point for recycling of electrical and electronic equipment. By ensuring this product is disposed of correctly, you will help prevent potential negative consequences for the environment and human health, which could otherwise be caused by... - Page 35 GARANTIA Este aparato tiene un periodo de garantía de 2 años a partir de la fecha de compra. Durante el periodo de garantía, el distribuidor será completamente responsable de los defectos directamente asignables a errores del material y fabricación. Cuando se detecten este tipo de errores, y siempre que se estime necesario, el aparato se sustituirá...
-
Page 36: Instrucciones De Seguridad
INSTRUCCIONES DE SEGURIDAD Este aparato está diseñado para ser utilizado por niños a partir de 16 años de edad y por personas con discapacidades físicas, sensoriales o mentales, o por personas que no dispongan de suficiente experiencia y conocimientos, a no ser que sean supervisados o instruidos inicialmente en la utilización segura del aparato y los posibles peligros. - Page 37 · Utilice el aparato sólo para uso doméstico. El fabricante no es responsable de los accidentes que resulten del uso incorrecto del aparato, ni del incumplimiento de las normas establecidas en este manual. · Todas las reparaciones aparte del mantenimiento ordinario de la unidad deben ser efectuadas por el fabricante o por su servicio post-venta.
-
Page 38: Antes Del Primer Uso
PIEZAS Botón de encendido/apagado Control de velocidad Botón para plegar el mango Botón de desbloqueo del aspirador de migas Botón de encendido/apagado del aspirador de migas Indicador del nivel de batería Botón de desbloqueo del depósito de polvo Botón de desbloqueo de la boca de aspiración del suelo Boca de aspiración... -
Page 39: Limpieza Y Mantenimiento
Coloque el aspirador de migas en la escoba-aspiradora. Coloque la escoba-aspiradora en la estación de carga, de modo que los puntos de contacto en la aspiradora coincidan con los de la estación de carga. La aspiradora y la estación de carga encajan, de modo que la escoba-aspiradora queda vertical sobre la estación. - Page 40 Vacíe el depósito de polvo. El depósito de polvo, el filtro (A) y el filtro EPA (B) se pueden limpiar con agua corriente. Asegúrese de que están completamente secos antes de volver a utilizar el aparato. Recomendamos sustituir el filtro con regularidad para asegurar un funcionamiento óptimo del aparato.
-
Page 41: Problemas Y Soluciones
PROBLEMAS Y SOLUCIONES Problema Posibles causas El aparato no arranca. · La batería está vacía. Cargue el aparato. · El aspirador de migas no está correctamente montado sobre la escoba-aspiradora. Asegúrese de que el aspirador de migas está correctamente instalado. El aparato no aspira. - Page 42 DIRECTRICES MEDIOAMBIENTALES El símbolo en el producto o en el embalaje indica que este producto no puede ser tratado como residuo doméstico. Se debe llevar a un lugar en el que se reciclan equipos eléctricos y electrónicos. Si se asegura de que este producto se desecha correctamente, usted ayudará...
-
Page 43: Garanzia
GARANZIA La garanzia dell’apparecchio è valida per 2 anni a partire dalla data di acquisto. Durante il periodo di validità della garanzia, il distributore si assume la piena responsabilità dei difetti dei materiali o di quelli di fabbricazione. In caso di presenza di tali difetti, se necessario, si procederà... - Page 44 della rete elettrica domestica. · Non lasciare mai il cavo appoggiato su una superficie calda o penzolante dal bordo di un tavolo o della cucina. · Non utilizzare mai l’apparecchio se il cavo di alimentazione o la spina sono danneggiati, dopo un malfunzionamento o quando è...
-
Page 45: Prima Dell'uso
PRIMA DELL’USO Per montare correttamente l’apparecchio, seguire le istruzioni riportate sotto. · Raddrizzare il manico dell’aspirapolvere fino a quando si sente un click. · Assicurarsi che la bocchetta per i pavimenti sia fissata sul manico. CARICAMENTO · La stazione di caricamento può essere fissata al muro per aumentarne la stabilità. ·... -
Page 46: Pulizia E Manutenzione
ACCESSORI · Sull’aspirabriciole è possibile inserire i seguenti accessori: · Spazzola per la polvere: per mobili, librerie. tende e superfici difficili da pulire · Bocchetta a fessura: per angoli, spazi ristretti, scale, tastiere ... PULIZIA E MANUTENZIONE PULIRE LA VASCHETTA DI RACCOLTA DELLA POLVERE Staccare l’aspirabriciole dall’aspirapolvere e premere il tasto di sblocco della vaschetta di raccolta della polvere dell’aspirabriciole. -
Page 47: Problemi E Soluzione
La spazzola rotante può essere lavata con acqua corrente. Assicurarsi che sia completamente asciutta prima di riutilizzarla. Rimettere la spazzola per i pavimenti nella bocchetta di aspirazione dopo averla pulita. Richiudere lo sportellino. Riposizionare sul manico la bocchetta di aspirazione per pavimenti. L’apparecchio è di nuovo pronto all’uso. - Page 48 MISURE AMBIENTALI Il simbolo sul prodotto o sulla confezione indica che esso non deve essere trattato come rifiuto domestico. Deve, al contrario, essere conferito al punto di raccolta predisposto per il riciclo delle apparecchiature elettriche ed elettroniche. Facendo in modo che questo prodotto venga smaltito correttamente aiuterete a prevenire potenziali conseguenze negative per l’ambiente e la salute dell’uomo, che potrebbero essere causate da uno smaltimento non corretto.
- Page 49 ZÁRUKA Pro záruku začínající dnem prodeje spotřebiče platí na území ČR tyto podmínky: 1. trvání záruky: 2 roky 2. poskytování záruky: a) záruční opravu provedeme podle našeho zvážení opravou nebo výměnou vadných dílů, jestliže tyto závady vznikly prokazatelně vadou materiálu nebo chybou při výrobě b) záruční...
-
Page 50: Bezpečnostní Pokyny
BEZPEČNOSTNÍ POKYNY Tento spotřebič mohou používat děti ve věku 16 let a výše a také lidé s fyzickým nebo smyslových omezením, jakož i psychicky omezené osoby nebo osoby s nedostatkem zkušeností a znalostí. Ale pouze za podmínky, že tyto osoby obdržely nezbytné instrukce, jak používat tento spotřebič... - Page 51 popsanými v tomto návodu. · Všechny opravy by měly být prováděny výrobcem, jeho smluvním nebo autorizovaným servisem. · Nikdy neponořujte spotřebič, kabel ani zástrčku do vody nebo jiné kapaliny. · Děti se nesmí dotýkat zástrčky, přívodního kabelu ani přístroje. · Udržujte kabel daleko od ostrých hran a horkých částí nebo jiných zdrojů tepla. ·...
-
Page 52: Před Prvním Použitím
PŘED PRVNÍM POUŽITÍM Pro správné sestavení přístroje postupujte podle následujících kroků: · Rukojeť tyčového vysavače narovnejte, dokud se nezacvakne do správné polohy. · Ujistěte se, že podlahová hubice je pevně zacvaknutá do tyčového vysavače. NABÍJENÍ Pro větší stabilitu můžete nabíjecí stanici připevnit ke stěně. Nabíjecí... -
Page 53: Čištění A Údržba
PŘÍSLUŠENSTVÍ K ručnímu vysavači můžete připojit následující příslušenství: · Prachový kartáč: pro nábytek, poličky, záclony a povrchy, které se obtížně čistí. · Štěrbinový nástavec: pro štěrbiny, rohy, schody, klávesnice,... ČIŠTĚNÍ A ÚDRŽBA ČIŠTĚNÍ PRACHOVÉHO ZÁSOBNÍKU Odejměte ruční vysavač z tyčového vysavače a stiskněte tlačítko pro uvolnění na prachovém zásobníku. -
Page 54: Problémy A Řešení
Namotané vlasy a jiné nečistoty mohou poničit Váš přístroj (v horším případě i podlahu). ČIŠTĚNÍ PŘÍSTROJE Přístroj čistěte s vlhkým a měkkým hadříkem. Přístroj dobře vysušte. Nikdy neponořujte přístroj do vody! PROBLÉMY A ŘEŠENÍ Problém Možné řešení Přístroj se nespustí ·... - Page 55 OHLED NA ŽÍVOTNÍ PROSTŘEDÍ Symbol na přístroji či na jeho obalu znamená, že s tímto výrobkem není možno nakládat jako s běžným domovním odpadem, nýbrž musí být odevzdán na místech určených ke sběru a likvidaci elektrických a elektronických zařízení. Dodržením tohoto doporučení chráníte životní prostředí a zdraví...
- Page 56 ZÁRUKA Pre záruku začínajúcich dňom predaja spotrebiča platí na území SR tieto podmienky: 1. trvania záruky: 2 roky 2. poskytovanie záruky: a) záručnú opravu vykonáme podľa nášho zvážení opravou alebo výmenou chybných dielov, ak tieto závady vznikli preukázateľne chybou materiálu alebo chybou pri výrobe b) záručná...
-
Page 57: Bezpečnostné Pokyny
BEZPEČNOSTNÉ POKYNY Tento spotrebič môžu používať deti vo veku 16 rokov a vyššie a tiež ľudia s fyzickým alebo zmyslových obmedzením, ako aj psychicky obmedzené osoby alebo osoby s nedostatkom skúseností a znalostí. Ale len za podmienky, že tieto osoby dostali potrebné pokyny, ako používať... - Page 58 nehody, ktoré vyplývajú z nesprávneho použitia spotrebiča alebo nie sú v súlade s pokynmi popísanými v tomto návode. · Všetky opravy by mali byť vykonávané výrobcom, jeho zmluvným alebo autorizovaným servisom. · Nikdy neponárajte spotrebič, kábel ani zástrčku do vody alebo inej kvapaliny. ·...
-
Page 59: Pred Prvým Použitím
PRED PRVÝM POUŽITÍM Pre správne zostavenie prístroja postupujte podľa nasledujúcich krokov: · Rukoväť tyčového vysávača narovnajte, kým sa nezacvakne do správnej polohy. · Uistite sa, že podlahová hubica je pevne zacvaknutie do tyčového vysávača. NABÍJANIE · Pre väčšiu stabilitu môžete nabíjaciu stanicu pripevniť k stene. ·... -
Page 60: Čistenie A Údržba
ČISTENIE A ÚDRŽBA ČISTENIE PRACHOVÉHO ZÁSOBNÍKA Odoberte ručný vysávač z tyčového vysávača a stlačte tlačidlo pre uvoľnenie na prachovom zásobníku. Odoberte zásobník prachu z motorovej časti. Potom zo zásobníka vyberte filtre. Zásobník vyprázdnite, tak aby v ňom nezostali žiadne nečistoty ani prach. Zásobník prachu, filter (A) a EPA filter (B) môžete umyť... -
Page 61: Problémy A Riešenia
PROBLÉMY A RIEŠENIA Problém Možné riešenie Prístroj sa nespustí · Batéria je vybitá. Nabite prístroj. · Ručný vysávač nie je správne upevnený vo vysávači. · Uistite sa, že je vysávač správne zostavený a usadený. Prístroj nevysáva · Filtre sú špinavé / prachový zásobník je plný. ·... - Page 62 DO1019SV...
- Page 63 www.domo-elektro.be DO1019SV...
- Page 64 über: webshop.domo-elektro.be or scan here: oder hier scannen: of scan hier: ou scannez ici: LINEA 2000 bvba - Dompel 9 - 2200 Herentals - Belgium - Tel: +32 14 21 71 91 - Fax: +32 14 21 54 63...
Need help?
Do you have a question about the DOMO DO1019SV and is the answer not in the manual?
Questions and answers