Table of Contents
Advertisement
Available languages
Available languages
Quick Links
DO1084S
Handleiding
Mode d'emploi
Gebrauchsanleitung
Instruction booklet
Manual de instrucciones
Istruzioni per l'uso
Návod k použití
Návod na použitie
Stofzakloze stofzuiger
Aspirateur sans sac
Beutelloser Staubsauger
Bagless vacuum cleaner
Aspiradora sin bolsa
Aspirapolvere senza sacco
Bezsáčkový vysavač
Bezvreckový vysávač
PRODUCT OF
Advertisement
Table of Contents

Related Manuals for Linea 2000 DOMO DO1084S


Summary of Contents for Linea 2000 DOMO DO1084S
- Page 1 DO1084S Handleiding Stofzakloze stofzuiger Mode d’emploi Aspirateur sans sac Gebrauchsanleitung Beutelloser Staubsauger Instruction booklet Bagless vacuum cleaner Manual de instrucciones Aspiradora sin bolsa Istruzioni per l’uso Aspirapolvere senza sacco Návod k použití Bezsáčkový vysavač Návod na použitie Bezvreckový vysávač PRODUCT OF...
- Page 2 Required for R32/R290 Refrigerant only CAUTION RISK OF FIRE Lees aandachtig alle instructies - bewaar deze handleiding voor latere raadpleging. Lisez attentivement les instructions - gardez le mode d’emploi pour utilisation ultérieur. Lesen Sie genau die Anweisungen - bewahren Sie die Gebrauchsanleitung für spätere heranziehung.
-
Page 3: Garantie
GARANTIE Geachte klant, Al onze producten ondergaan steeds een strenge kwaliteitscontrole, alvorens ze aan je worden aangeboden. Mocht je desondanks toch nog problemen hebben met jouw toestel, dan betreuren wij dit ten zeerste. In dat geval verzoeken wij je contact op te nemen met onze klantendienst. Onze medewerkers zullen je met plezier verder helpen. - Page 4 · Dit toestel mag gebruikt worden door kinderen vanaf 16 jaar en personen met een fysieke of sensoriële beperking of mensen met een beperkte mentale capaciteit of gebrek aan ervaring of kennis, op voorwaarde dat deze personen toezicht krijgen of instructies hebben gekregen over het gebruik van het toestel op een veilige manier en dat ze ook de gevaren kennen bij het gebruik van het toestel.
- Page 5 · Wees extra voorzichtig wanneer je een trap stofzuigt. · Gebruik de stofzuiger nooit om brandbare of ontvlambare vloeistoffen zoals benzine op te zuigen, of gebruik het toestel niet op plaatsen waar zulke stoffen aanwezig kunnen zijn. · Verwijder grote of scherpe voorwerpen van de vloer vooraleer de vloer te stofzuigen om mogelijke schade te voorkomen.
-
Page 6: Montage
MONTAGE Trek altijd de stekker uit het stopcontact vooraleer onderdelen te (de)monteren. Zorg ervoor dat het stofreservoir op zijn plaats zit. FLEXIBELE SLANG · Montage: plaats het koppelstuk van de flexibele slang in de verbindingsopening vooraan de stofzuiger tot deze vastklikt. ·... -
Page 7: Reiniging En Onderhoud
REINIGING EN ONDERHOUD STOFRESERVOIR LEEGMAKEN EN REINIGEN Maak regelmatig het stofreservoir leeg. Let erop dat het stof in het stofreservoir het maximumniveau niet overschrijdt. Neem het handvat van de stofzuiger vast en druk op de knop. Trek het stofreservoir nu voorzichtig uit de stofzuiger. -
Page 8: Veelgestelde Vragen
In het wiel van de stofzuiger zit een rooster voor de hepa-filter. Deze kan je eenvoudig verwijderen door het rooster in tegenwijzerzin te draaien, en het rooster uit het toestel te nemen. De hepa-filter neem je op dezelfde manier uit het toestel. Reinig of vervang de filter en plaats terug door eerst de hepa-filter en nadien het rooster in positie te plaatsen en in wijzerzin vast te draaien. - Page 9 Het ventiel bovenop het handvat Sluit het ventiel. van de slang staat open. De filters zijn verzadigd. Na verloop van tijd zullen de poriën in de filters verzadigd zijn. Vervang de filters. Het apparaat Het toestel is oververhit. Schakel het toestel onmiddellijk uit en laat het ruikt verbrand.
-
Page 10: Consignes De Sécurité
GARANTIE Cher client, Tous nos produits sont soumis à des contrôles qualité stricts avant d’être proposés à la vente. Si vous deviez toutefois rencontrer un problème avec votre appareil, nous le déplorons vivement. Dans ce cas, nous vous invitons à prendre contact avec notre service clientèle. Nos collaboratrices se feront un plaisir de vous aider ! +32 14 21 71 91 info@linea2000.be... - Page 11 à son utilisation. Les enfants ne peuvent pas jouer avec cet appareil. L’entretien et le nettoyage de l’appareil ne peuvent pas être effectués par des enfants, sauf s’ils sont âgés de plus de 16 ans et sous la surveillance d’un adulte. ·...
- Page 12 · Tenez la fiche pendant l’enroulage du câble électrique. Ne la laissez pas se balancer. · Retirez la fiche de la prise de courant avant de raccorder le flexible à l’appareil. · N’aspirez aucun objet qui se consume ou dégage de la fumée (cigarettes, allumettes, cendres chaudes, etc.) ·...
- Page 13 FLEXIBLE · Montage : insérez l’embout du flexible dans l’ouverture de raccordement à l’avant de l’aspirateur jusqu’à emboîtement. · Démontage : pour déverrouiller, appuyez sur les boutons de déverrouillage situés sur le côté de la pièce de raccord. TUBE TÉLESCOPIQUE Enfoncez la poignée du flexible dans le tube télescopique.
-
Page 14: Nettoyage Et Entretien
NETTOYAGE ET ENTRETIEN VIDER ET NETTOYER LE RÉSERVOIR À POUSSIÈRE Videz régulièrement le réservoir à poussière. Veillez à ce que la poussière accumulée dans le réservoir ne dépasse pas le niveau maximum. Saisissez la poignée de l’aspirateur et appuyez sur le bouton. Retirez délicatement le réservoir à poussière de l’aspirateur. -
Page 15: Questions Fréquentes
Une grille destinée à accueillir le filtre HEPA est située dans la roue de l’aspirateur. Vous pouvez facilement déposer la grille en la faisant tourner dans le sens antihoraire. Le filtre HEPA peut être déposé de l’appareil de la même manière. Nettoyez ou remplacez le filtre et remettez-le en place en insérant d’abord le filtre HEPA, puis la grille et en les tournant dans le sens horaire. -
Page 16: Mise Au Rebut
Le flexible est bouché. Placez le flexible à l’envers (avec la poignée) dans l’orifice d’aspiration de l’appareil. Le bouchon sera aspiré dans l’autre direction, libérant de la sorte le flexible. Les filtres sont sales. Nettoyez soigneusement les filtres, comme décrit dans ce mode d’emploi. Il est très important de nettoyer tous les filtres en profondeur. - Page 17 GARANTIE Sehr geehrter Kunde, Sämtliche unserer Produkte unterliegen einer strengen Qualitätskontrolle, bevor Sie Ihnen angeboten werden. Sollten dennoch Probleme mit Ihrem Gerät auftreten, bedauern wir dies zutiefst. Wir möchten Sie in diesem Fall bitten, unseren Kundenservice zu kontaktieren. Unsere Mitarbeiter helfen Ihnen gern weiter! +32 14 21 71 91 info@linea2000.be Montag –...
- Page 18 · Diese Gerät darf von Kindern ab 16 Jahren und Menschen mit körperlichen oder sensorischen Behinderungen oder Menschen mit eingeschränkten geistigen Fähigkeiten oder mangelnder Erfahrung bzw. Sachkenntnis unter der Bedingung verwendet werden, dass diese Personen beaufsichtigt werden oder sie eine Anleitung zur sicheren Verwendung des Geräts erhalten haben und sich der Gefahren bei der Verwendung des Geräts bewusst sind.
- Page 19 · Seien Sie äußerst vorsichtig, wenn Sie Treppen saugen. · Benutzen Sie das Gerät nicht zum Aufsaugen von brennbaren oder entflammbaren Flüssigkeiten, wie z.B. Benzin. Benutzen Sie das Gerät ebenfalls nicht in der Nähe von solchen Stoffen. · Entfernen Sie grosse und scharfe Teile vom Boden, bevor Sie diesen staubsaugen, um zu vermeiden, dass das Gerät beschädigt werden könnte.
- Page 20 MONTAGE Ziehen Sie immer den Netzstecker aus der Steckdose, bevor Sie Einzelteile montieren oder demontieren. Achten Sie darauf, dass sich der Staubbehälter an der richtigen Stelle befindet. FLEXIBLER SCHLAUCH · Montage: Stecken Sie das Verbindungsstück des flexiblen Schlauchs in die Verbindungsöffnung auf der Vorderseite des Staubsaugers bis es einrastet.
-
Page 21: Reinigung Und Wartung
Wenn Sie fertig sind mit dem Staubsaugen ziehen Sie erst den Stecker aus der Steckdose und rollen Sie anschliessend das Kabel automatisch auf, indem Sie mit dem Fuss auf das Pedal mit dem Symbol drücken. Achten Sie darauf, dass der Stecker nicht hin- und herschlingert während des Aufrollens. -
Page 22: Häufig Gestellte Fragen
Der runde Filter befindet sich oberhalb des Staubbehälters. Wenn Sie den Staubbehälter aus dem Gerät nehmen, sehen Sie den Filter an der Luftzufuhr des Geräts. Sorgen Sie dafür, dass sie stets frei von Staub und Schmutz ist. Im Rad des Staubsaugers befindet sich ein Gitter für den HEPA-Filter. Dieses kann leicht entfernt werden, indem Sie das Gitter gegen den Uhrzeigersinn drehen und es vom Gerät abnehmen. - Page 23 Der Staubbehälter ist voll. Leeren Sie den Staubbehälter und sorgen Sie dafür, das maximale Fassungsvermögen nicht zu überschreiten. Der Schlauch ist verstopft. Stecken Sie den Schlauch umgekehrt (mit dem Griff) in die Saugöffnung des Geräts. Die Verstopfung wird auf die andere Seite gesogen, sodass der Schlauch erneut frei wird.
-
Page 24: Warranty
WARRANTY Dear client , All of our products are always submitted to a strict quality control before they are sold to you. Should you nevertheless experience problems with your device, we sincerely regret this. In that case, we kindly request you to contact our customer service. Our staff will gladly assist you. - Page 25 supervision or instruction concerning use of the appliance in a safe way and understand the hazards involved. Children shall not play with the appliance. Cleaning and user maintenance shall not be made by children unless they are older than 16 and supervised. ·...
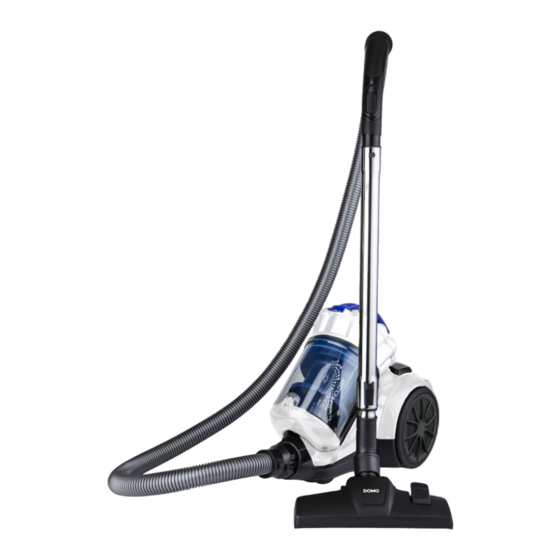
- Page 26 · Do not use the vacuum cleaner without dust bag and/or filter. SAVE THESE INSTRUCTIONS PARTS Filter dust reservoir Dust reservoir Button to empty the dust reservoir Floor nozzle Button to extend/retract brushes Telescopic tube Sliding button for tube length Handle for hose with valve Flexible hose 10.
-
Page 27: Cleaning And Maintenance
TELESCOPIC TUBE Put the handle of the hose into the telescopic tube. Set the telescopic tube to the desired length. To do this, push the slide button forward and pull out the bottom part of the tube to make it longer. Release the slide button and let the tube snap into place. - Page 28 If necessary, wipe the dust reservoir clean with a soft, damp cloth. Once the dust is removed, close the bottom until you hear it click. To prevent losing suction after emptying the dust reservoir, it is essential that the long interior filter is checked for blockages.
-
Page 29: Frequently Asked Questions
PLEASE NOTE: · Make sure that all components are correctly assembled before using the vacuum cleaner again. · Always use the vacuum cleaner with the filters intact. If you do not do this, you may lose suction force or damage the motor. ·... -
Page 30: Environmental Guidelines
ENVIRONMENTAL GUIDELINES This symbol on the product or on its packaging indicates that this product may not be treated as household waste. Instead it must be brought to the applicable collection point for recycling of electrical and electronic equipment. By ensuring this product is disposed of correctly, you will help prevent potential negative consequences for the environment and human health, which could otherwise be caused by inappropriate waste handling of this product. -
Page 31: Instrucciones De Seguridad
GARANTIA Este aparato tiene un periodo de garantía de 2 años a partir de la fecha de compra. Durante el periodo de garantía, el distribuidor será completamente responsable de los defectos directamente asignables a errores del material y fabricación. Cuando se detecten este tipo de errores, y siempre que se estime necesario, el aparato se sustituirá... - Page 32 · Se requiere supervisión cuando el aparato es usado por o cerca de niños. · El uso de accesorios no recomendados o vendidos por el fabricante puede causar incendios, descargas eléctricas o lesiones. · Desenchufe la toma de corriente cuando no se usa, para montar o desmontar piezas y antes de limpiarlo.
-
Page 33: Montaje
PIEZAS Filtro del depósito de polvo Depósito de polvo Botón para vaciar el depósito de polvo Boquilla de aspiración Botón para extraer y retraer los cepillos Tubo telescópico Botón deslizante para la longitud del tubo Asa del tubo con tapa Tubo flexible 10. -
Page 34: Limpieza Y Mantenimiento
TUBO TELESCÓPICO Inserte el mango del tubo flexible en el tubo telescópico. Ponga el tubo telescópico a la longitud deseada. Empuje el botón deslizante del tubo hacia delante y tire de la parte inferior del tubo para hacerlo más largo. Entonces suelte el botón deslizante y deje que el tubo haga clic en su lugar. - Page 35 Mantenga el depósito de polvo sobre el cubo de la basura. Presione el botón para vaciar el depósito de polvo El fondo se abre y el polvo cae. En caso necesario, limpie del depósito de polvo con un paño húmedo y suave. Una vez que se haya eliminado el polvo del depósito, vuelva a conectar el fondo.
-
Page 36: Preguntas Frecuentes
ATENCIÓN · Asegúrese de que todos los componentes se han montado correctamente antes de volver a utilizar la aspiradora. · Siempre debe utilizar la aspiradora con los filtros colocados en su lugar. Si no lo hace, esto podría causar una pérdida de la potencia de aspiración o daños en el motor. ·... - Page 37 La luz Los filtros están sucios o el tubo Limpie los filtros y asegúrese de que la roja se está obstruido. obstrucción se elimina. Recoja todos los objetos enciende en la de gran tamaño antes de empezar a aspirar. parte posterior del aparato.
-
Page 38: Garanzia
GARANZIA La garanzia dell’apparecchio è valida per 2 anni a partire dalla data di acquisto. Durante il periodo di validità della garanzia, il distributore si assume la piena responsabilità dei difetti dei materiali o di quelli di fabbricazione. In caso di presenza di tali difetti, se necessario, si procederà alla sostituzione o alla riparazione dell’apparecchio. - Page 39 · Togliere la spina dalla presa quando l’apparecchio non è in funzione, prima di montarne o smontarne i componenti e prima di pulirlo. Mettere tutti gli interruttori in posizione “off” ed estrarre la spina della presa afferrandola. Non tirare mai il cavo di collegamento o l’apparecchio per estrarre la spina dalla presa di corrente.
- Page 40 COMPONENTI Filtro serbatoio polvere Serbatoio polvere Tasto svuotamento serbatoio polvere Spazzola per pavimenti Tasto inserimento/estrazione spazzole Tubo telescopico Regolazione lunghezza tubo Impugnatura tubo con valvola Tubo flessibile 10. Raccordo per tubo Impugnatura 12. Tasto on/off Tasto avvolgimento tubo 14. Uscita dell’aria Tasto distacco serbatoio polvere 16.
-
Page 41: Pulizia E Manutenzione
TUBO TELESCOPICO Inserire l’impugnatura del tubo nel tubo telescopico. Impostare il tubo telescopico alla lunghezza desiderata. Premere il cursore sul tubo in avanti e tirare la parte inferiore del tubo per allungarlo. Lasciare il cursore facendo in modo che il tubo si fissi con un clic. - Page 42 Se necessario, pulire il serbatoio con un panno morbido e umido. Quando è stata eliminata tutta la polvere, riposizionare il coperchio sul fondo. Per evitare perdite di potenza dopo lo svuotamento del serbatoio è necessario controllare che non vi siano blocchi nel filtro interno lungo.
-
Page 43: Domande Più Frequenti
ATTENZIONE · Assicurarsi che tutti i componenti siano montati correttamente prima di utilizzare di nuovo l’aspirapolvere. · Utilizzare l’aspirapolvere sempre con i filtri in posizione. In caso contrario, si potrebbero avere perdite di potenza o danni al motore. · Togliere la spina dalla presa di corrente prima di pulire i filtri. ·... - Page 44 La spia I filtri sono sporchi o il tubo è Pulire i filtri e assicurarsi che il blocco venga rossa dietro ostruito. rimosso. Raccogliere tutti gli oggetti di grosse l’apparecchio si dimensioni prima di cominciare ad aspirare. accende. MISURE AMBIENTALI Il simbolo sul prodotto o sulla confezione indica che esso non deve essere trattato come rifiuto domestico.
-
Page 45: Bezpečnostní Pokyny
ZÁRUKA Práva a povinnosti prodávajícího a kupujícího ohledně práv z vadného plnění se řídí příslušnými obecně závaznými předpisy dle občanského zákoníku. Trvání záruky: 2 roky Záruka se nevztahuje a) na mechanické poškození b) nesprávné používání v rozporu s návodem k použití Záruka zaniká: - při použití... - Page 46 · Tento spotřebič mohou používat děti ve věku 16 let a starší a osoby se sníženými fyzickými, smyslovými nebo mentálními schopnostmi, nebo nedostatkem zkušeností a znalostí pokud jsou pod neustálým dozorem nebo byly poučeny o používání spotřebiče bezpečným způsobem a rozumí případným nebezpečím.
- Page 47 · Před vysáváním z podlahy odstraňte velké a ostré objekty, aby se zabránilo případnému poškození vysavače. · Uchopte zástrčku, zatímco převíjíte kabel do navijáku na kabel. Nedopusťte, aby zástrčka šlehala tam a zpět během převíjení. · Sací hadici připojujte pouze ve chvíli, kdy je vysavač vypnutý. ·...
- Page 48 OHEBNÁ SACÍ HADICE · Sestavení: Zakončení hadice nasuňte / nacvakněte na připojovací část v přední části vysavače. · Odejmutí: Pro odejmutí musíte stlačit postranní pojistky a poté konektor tahem odpojit. TELESKOPICKÁ TRUBICE Sací hadici a teleskopickou trubku spojte k sobě. Teleskopickou trubici si nastavte na požadovanou délku.
-
Page 49: Čištění A Údržba
ČIŠTĚNÍ A ÚDRŽBA VYPRÁZDNĚNÍ A ČIŠTĚNÍ ZÁSOBNÍKU PRACHU Zásobník na prach musí být pravidelně čištěn. Obsah nečistot v zásobníku nesmí nikdy překračovat maximální povolený objem zásobníku. Uchopte rukojeť vysavače, která se nachází na zásobníku, a stiskněte tlačítko uvolnění. Zásobník opatrně vyjměte. Zásobník držte nad odpadkovým košem (nebo venku) a pomocí... - Page 50 V kole vysavače je krycí mřížka pro HEPA filtr. Mřížku lehce odstraníte otočením proti směru hodinových ručiček a vyjmutím ven. Stejným způsobem vyjměte HEPA filtr. Filtr vyčistěte nebo vyměňte za nový. Ujistěte se, že nový/vyčištěný filtr usadíte jako původně a následně dotáhnete ve směru hodinových ručiček (dotáhněte i krytku).
- Page 51 V zadní části Znečištěné filtry nebo ucpaná Vyčistěte všechny filtry, případně i hadici. Před přístroje sací hadice/hubice. vysáváním doporučujeme větší předměty ručně signalizuje sebrat. červená kontrolka OHLED NA ŽÍVOTNÍ PROSTŘEDÍ Symbol na přístroji či na jeho obalu znamená, že s tímto výrobkem není...
-
Page 52: Bezpečnostné Pokyny
ZÁRUKA Práva a povinnosti predávajúceho a kupujúceho ohľadom práv z chybného plnenia sa riadi príslušnými všeobecne záväznými predpismi podľa občianskeho zákonníka. Trvanie záruky: 2 roky Záruka sa nevzťahuje a) na mechanické poškodenie b) nesprávne používanie v rozpore s návodom na použitie Záruka zaniká: - pri použití... - Page 53 · Tento spotrebič môžu používať deti vo veku 16 rokov a staršie a osoby so zníženými fyzickými, zmyslovými alebo mentálnymi schopnosťami, alebo nedostatkom skúseností a znalostí ak sú pod neustálym dozorom alebo boli poučené o používaní spotrebiča bezpečným spôsobom a rozumejú prípadným nebezpečenstvám.
- Page 54 · Nikdy nepoužívajte vysávač na vysávanie žiadnych horľavín alebo horľavých tekutín ako je benzín a nepoužívajte prístroj v miestach, kde by takéto látky mohli byť prítomné. · Pred vysávaním z podlahy odstráňte veľké a ostré objekty, aby sa zabránilo prípadnému poškodeniu vysávača.
- Page 55 ZOSTAVENIE Pred akýmkoľvek rozoberaním, zostavovaním a alebo výmenou častí vysávač najskôr odpojte z el. siete. Pred spustením sa vždy uistite, či je správne nasadený zásobník na prach. OHYBNÁ SACIA HADICA · Zostavenie: Zakončenie hadice nasuňte / nacvaknite na pripojovacie časť v prednej časti vysávača. ·...
-
Page 56: Čistenie A Údržba
ČISTENIE A ÚDRŽBA VYPRÁZDNENIE A ČISTENIE ZÁSOBNÍKA PRACHU Zásobník na prach sa musí pravidelne čistený. Obsah nečistôt v zásobníku nesmie nikdy prekračovať maximálna povolená kapacita zásobníka. Uchopte rukoväť vysávača, ktorá sa nachádza na zásobníku, a stlačte tlačidlo uvoľnenia. Zásobník opatrne vyberte. Zásobník držte nad odpadkovým košom (alebo vonku) a pomocou tlačidla z boku zásobníka ho otvorte. - Page 57 V kole vysávača je krycia mriežka pre HEPA filtr. Mriežku ľahko odstránite otočením proti smeru hodinových ručičiek a vybratím von. Rovnakým spôsobom vyberiete HEPA filter. Filter vyčistite alebo vymeňte za nový. Uistite sa, že nový/vyčistený filter usadíte ako pôvodne a následne dotiahnite v smere hodinových ručičiek (dotiahnite i krytku).
- Page 58 V zadnej Znečistené filtre alebo upchatá Vyčistite všetky filtre, prípadne aj hadicu. Pred časti prístroja sacia hadica / hubice. vysávaním odporúčame väčšie predmety ručne signalizuje zobrať. červená kontrolka OHĽAD NA ŽIVOTNÉ PROSTREDIE Symbol na prístroji alebo na jeho obale znamená, že s týmto výrobkom nie je možné...
- Page 59 www.domo-elektro.be DO1084S...
- Page 60 über: webshop.domo-elektro.be or scan here: oder hier scannen: of scan hier: ou scannez ici: LINEA 2000 BV - Dompel 9 - 2200 Herentals - Belgium - Tel: +32 14 21 71 91 - Fax: +32 14 21 54 63...
Need help?
Do you have a question about the DOMO DO1084S and is the answer not in the manual?
Questions and answers