Table of Contents
Advertisement
Quick Links
Advertisement
Table of Contents

Related Manuals for Redback A 4312


Summary of Contents for Redback A 4312
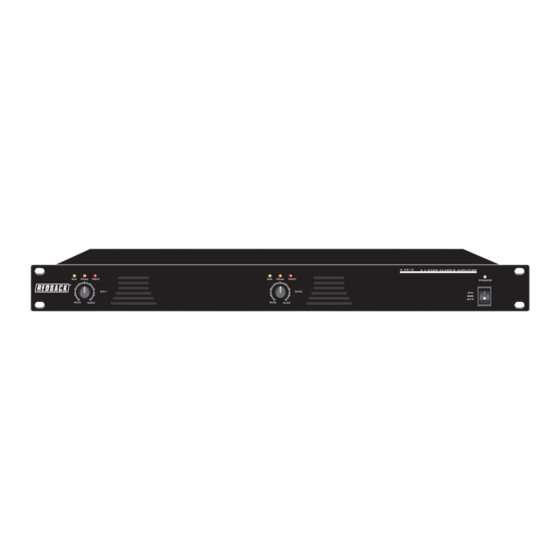
- Page 1 PUBLIC ADDRESS SYSTEM A 4312 CLASS-D AMPLIFIER A 4312 2 x 240W CLASS-D AMPLIFIER PEAK PROT PEAK PROT POWER Please follow the instructions in this manual to obtain the optimum results from this unit. We also recommend that you keep this manual handy for future reference.
-
Page 2: Table Of Contents
1. SAFETY PRECAUTIONS ................1 2. PRODUCT OVERVIEW .................. 3 3. FEATURES....................3 4. NOMENCLATURE AND FUNCTIONS ....................4 4.1 Front Panel ....................4 4.2 Rear Panel 5. MACHINE OPERATION ......................5 5.1 Function ................5 5.2 Read before using the amplifier ................6 5.3 Key operation on the panel ..................6 5.4 Remote operation ...................6... -
Page 3: Safety Precautions
1. SAFETY PRECAUTIONS Be sure to read the instructions in this section carefully before use. Make sure to observe the instructions in this manual as the conventions of safety symbols and messages regarded as very important precautions are included. We also recommend you keep this instruction manual handy for future reference. Safety Symbol and Message Conventions Safety symbols and messages described below are used in this manual to prevent bodily injury and property damage which could result from mishandling. - Page 4 SAFETY PRECAUTIONS When the Unit is in Use When Installing the Unit Do not place heavy objects on the unit as this may Never plug in nor remove the power supply plug cause it to fall or break which may result in with wet hands, as doing so may cause electric personal injury and/or property damage.
-
Page 5: Product Overview
2. PRODUCT OVERVIEW The D series digital amplifier is rated from 120W to 500W with balanced signal inputs(H5.08-3 European-style connector) and 100V power outputs (H5.08-2 European-style connector). 3.FEATURES 1.100V output channel 2.The rear panel is equipped with a "ground" suspension switch to effectively eliminate the loop noise caused by multiple equipment connection of “ground”... -
Page 6: Nomenclature And Functions
4 . N O M E N C L AT U R E A N D F U N C T I O N S 4.1 FRONT PANEL A 4312 2 x 240W CLASS-D AMPLIFIER PEAK PROT PEAK PROT POWER 1. -
Page 7: Machine Operation
5 . M A C H I N E O P E R AT I O N Function Amplifier Function The role of amplifiers is to enlarge the audio signal from audio sources, such as MIC, computer and MP3 etc. to boost speaker or pure amplifier to work. Constant Voltage Amplifier The output form of constant voltage amplifier output is constant voltage. -
Page 8: Key Operation On The Panel
After device enters to the working status, it has completed the device local power on operation. Press the power switch, after power off, power indicators are off. Device power off operation is completed. POWER A 4312 2 x 240W CLASS-D AMPLIFIER PEAK PROT... -
Page 9: Dc24V Backup Power (Battery) Power Supply Operation
M A C H I N E O P E R AT I O N DC24V backup power (battery) power supply operation In the rear panel of the device DC 24V backup power (battery) input port, "+" connect with red positive battery termination, "-" connect with negative battery termination; connecting the wires well as per requirements, connected with 24V DC power supply, then it can be normal operation to use the device. -
Page 10: Connections
6 . C O N N E C T I O N S Speaker connections 100V 100V Total impedance (A 4312) Speaker connection: Loosen the pressure screw. Put the speaker cable under the wire clamp pad. Tighten the pressure screw and make sure the 100V LINE connection is good. -
Page 11: Applications
A P P L I C AT I O N S " " When connecting, put the red cable to + 1: COLD- " - " terminal, terminal at the host, white to HOT+ and the shielded wire to the GND terminal. 3: GND The same connection to the output terminal of the pre-audio source processor. -
Page 12: Block Diagram
8 . B L O C K D I A G R A M... -
Page 13: Specifications
S P E C I F I C AT I O N S MODEL A 4312 RATED POWDR OUTPUT 2×240W SPDADER OUTPUTS 100V ±385mV/20KΩ,Balanced H5.08 European-style INPUT SENSITIVITY AND IMPEDANDCE connector input OVERLOAD SOURCE >11dB,Balanced H5.08 European-style connector input ELECTROMOTIVE FORCE... - Page 14 PUBLIC ADDRESS SYSTEM VersionV0.1...
Need help?
Do you have a question about the A 4312 and is the answer not in the manual?
Questions and answers