
Related Manuals for NEFF I14RBQ8W0/01


Summary of Contents for NEFF I14RBQ8W0/01
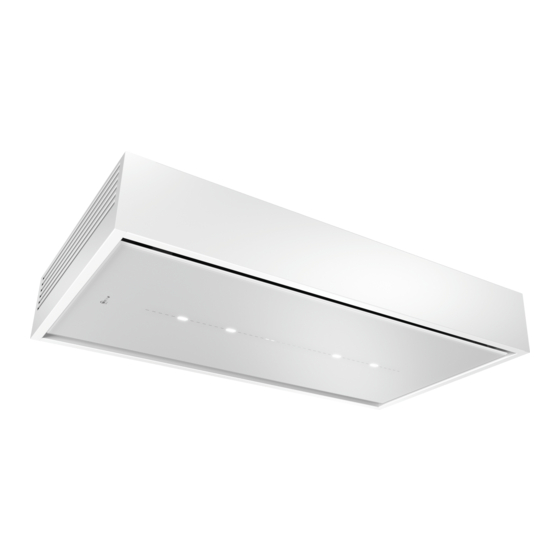
- Page 1 Ceiling-mounted ventilation system User manual and installation instructions I14RBQ8W0...
-
Page 2: Table Of Contents
en Safety Table of contents Only use this appliance: ¡ For extracting cooking vapour. ¡ in private households and in enclosed INFORMATION FOR USE spaces in a domestic environment. Safety .............. 2 ¡ up to an altitude of max. 2000 m above sea level. Preventing material damage ...... 4 Do not use the appliance: Environmental protection and saving en-... -
Page 3: Safety
Safety en Hot oil or grease ignites very quickly. Risk of injury when opening and closing the ▶ Always supervise hot oil and fat. hinges. ▶ Never extinguish burning oil or fat with wa- ▶ Keep your hands away from the hinges. The light emitted by LED lights is very ter. -
Page 4: Preventing Material Damage
en Preventing material damage ▶ If the appliance or the power cord is dam- WARNING ‒ Risk of explosion! aged, immediately unplug the power cord Highly caustic alkaline or highly acidic clean- or switch off the fuse in the fuse box. ing agents in conjunction with aluminium parts ▶... -
Page 5: Environmental Protection And Saving En- Ergy
Environmental protection and saving energy en 3 Environmental protection and saving energy 3.1 Disposing of packaging If cooking produces large amounts of steam, select a higher fan speed in good time. The packaging materials are environmentally compat- ¡ The odours are distributed around the room less. ible and can be recycled. -
Page 6: Familiarising Yourself With Your Appliance
en Familiarising yourself with your appliance 5 Familiarising yourself with your appliance 5.1 Controls Switch the fan run-on on or off Home Connect Establishing a connection You can use the controls to configure all functions of your appliance and to obtain information about the op- Reset the filter saturation indicator erating status. - Page 7 Basic operation en 7.3 Selecting a fan setting 7.10 Sensor sensitivity ▶ Press or . In automatic mode, a sensor in the appliance detects the intensity of the cooking odours and roasting a The LED for the set fan setting lights up in the LED odours.
- Page 8 en Home Connect 7.14 Resetting the saturation indicator 7.18 Setting the brightness ▶ After cleaning the grease filter or after changing the Press and hold or . odour filter, the saturation indicator can be reset. Note: Colour temperature settings are available in the Requirements Home Connect app provided the appliance has this ¡...
- Page 9 Home Connect en ¡ In networked standby mode, the appliance requires As soon as a software update is available, you will be a maximum of 2 W. informed via the Home Connect app and will be able to ¡ If you need your device's MAC address to connect start the software update via the app.
-
Page 10: Hob-Based Hood Control
en Hob-based hood control 9 Hob-based hood control You can connect your appliance to a suitable hob and, Notes in this way, control the functions of your appliance via ¡ Please note the safety precautions in the instruction the hob. manual for your appliance and ensure that they are If the hob and the extractor hood are Home Connect- also observed when operating the appliance via the compatible, connect the appliances in the Home Con-... -
Page 11: Cleaning And Servicing
Cleaning and servicing en Observe the information regarding the cleaning ATTENTION! agents. Falling grease filters may damage the hob below. ▶ → "Cleaning products", Page 10 Grip below the grease filter with one hand. Clean using a damp sponge cloth and hot soapy Open the locks on the grease filters. - Page 12 en Cleaning and servicing Observe the information regarding the cleaning Close the odour filter cartridge. → "Fitting grease filters", Page 12. agents. → "Cleaning products", Page 10 Place the grease filters loosely into the dishwasher. 10.9 Replacing the batteries in the remote Do not clean heavily soiled grease filters with control utensils.
-
Page 13: Troubleshooting
Troubleshooting en 11 Troubleshooting You can rectify minor faults on your appliance yourself. WARNING ‒ Risk of electric shock! Read the troubleshooting information before contacting Incorrect repairs are dangerous. after-sales service. This will avoid unnecessary costs. ▶ Repairs to the appliance should only be carried out WARNING ‒ Risk of injury! by trained specialist staff. -
Page 14: Accessories
Service telephone number to find them again website. quickly. 14 Accessories You can buy accessories from the after-sales service, www.neff-international.com from specialist retailers or online. Only use original ac- Accessories Order number cessories, as these have been specifically designed for your appliance. -
Page 15: Declaration Of Conformity
2014/53/EU. A detailed Declaration of Conformity can be found on- A detailed RED Declaration of Conformity can be found line at www.neff-home.com/uk among the additional online at www.neff-international.com among the addi- documents on the product page for your appliance. -
Page 16: 16.4 Secure Installation
en Installation instructions 16.1 Included with the appliance 16.3 Safety clearances After unpacking all parts, check for any damage in Comply with the safety clearances for the appliance. transit and completeness of the delivery. 16.4 Secure installation Follow these safety instructions when in- stalling the appliance. WARNING ‒ Risk of suffocation! Children may put packaging material over their heads or wrap themselves up in it and... - Page 17 Installation instructions en ▶ If the appliance or the power cord is dam- The appliance may fall down if it has not been aged, immediately unplug the power cord properly fastened in place. ▶ All fastening components must be fixed or switch off the fuse in the fuse box. ▶...
- Page 18 en Installation instructions 16.6 Instructions for the electrical Drill the hole depth in accordance with the length of the screws. connection Install the appliance with a fixing material which is In order to safely connect the appliance to the elec- sufficiently stable and has been adjusted accord- trical system, follow these instructions.
- Page 19 Installation instructions en Loosen the screws on the side covers. Guide the cable that is provided on-site through the opening and hook the appliance into the fastening screws on the ceiling. Open the odour filter cartridge. Push the appliance as far as it will go into the four key hole openings using the guide sleeves.
- Page 20 en Installation instructions Insert the on-site cable into the terminal plug. Push the side covers in the direction of the appli- ance frame and screw them firmly in place. Installing covers Remove the new odour filter from the packaging. Insert the odour filter into the odour filter cartridge. WARNING ‒ Risk of injury! Components inside the appliance may have sharp edges.
- Page 21 Installation instructions en Mount the filter cover on the designated screws and Press the lock on the filter cover. push it backwards/forwards depending on the key hole opening into the narrow section. To prevent the filter cover from swinging down sud- denly, hold onto the filter cover firmly with two hands.
- Page 22 en Installation instructions Remove the grease filters. Loosen the cable that is provided on-site from the terminal clamp. To avoid causing damage, do not bend the grease filters. Carefully loosen the diagonally opposite screws. Open the odour filter cartridge. Disconnect the appliance from the key hole open- Remove the odour filter.
- Page 24 Valid within Great Britain: Imported to Great Britain by BSH Home Appliances Ltd. Grand Union House Old Wolverton Road Wolverton, Milton Keynes MK12 5PT United Kingdom *9001521594* Register your product online neff -home.com BSH Hausgeräte GmbH 9001521594 Carl-Wery-Straße 34 030302 81739 München, GERMANY...
Need help?
Do you have a question about the I14RBQ8W0/01 and is the answer not in the manual?
Questions and answers