Table of Contents
Advertisement
Available languages
Available languages
Quick Links
Advertisement
Table of Contents

Subscribe to Our Youtube Channel
Related Manuals for Risco VUpoint RVCM32W16


Summary of Contents for Risco VUpoint RVCM32W16
- Page 1 VUpoint Dome 2MP Wi-Fi Camera M M odel: RVCM32W16 Quick Guide...
- Page 2 Language Page...
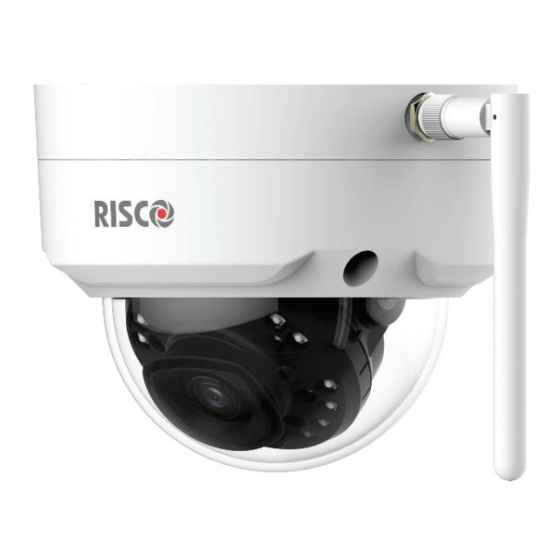
- Page 3 IP Camera Components Notes: For reset (used to return the camera settings to factory default mode), long press the Reset/WPS button for 8 seconds; the light turns off.
-
Page 4: Defining Ip Camera Settings
Defining IP Camera Settings Step 1 Connect one end of the network cable (LAN) to the camera Ethernet port and the other side to your router. Power up the camera with an appropriate power supply. Step 2 If the camera is connected to a VUpoint NVR, refer to the VUpoint Network Video Recorder Installation Guide for further installation instructions. - Page 5 Step 5 Select a wireless network from the available list If your network is password protected, enter a password into the displayed password field Click for Wi-Fi network connection Step 6 Click OK...
-
Page 6: Product Specification
Product Specification Parameter Description Image Sensor 1/2.7” 2Megapixel progressive CMOS IR Distance 20 m Focal Length 2.8 mm Power Supply 12V DC, 1A Power Consumption <4.7W Wi-Fi Power Output 20dBm max. Wi-Fi Frequency 2.4 GHz Operating Conditions -20◦C to 45◦C (-4◦F to 113◦F)/ less than ≤ 95% Protection IP67 Note:... - Page 7 Composants de la caméra IP Remarque : Bouton de réinitialisation Pour réinitialiser la caméra (c’est-à-dire rétablir ses paramètres par défaut), appuyez sur le bouton Reset/WPS pendant 8 secondes ; le voyant s'éteint.
- Page 8 Définition des paramètres de la caméra IP Étape 1 Raccordez l'une des extrémités du câble réseau (LAN) au port Ethernet de la caméra, et l'autre extrémité à votre routeur. Alimentez la caméra avec une alimentation appropriée. Étape 2 Si la caméra est raccordée à un enregistreur vidéo réseau (NVR) VUpoint, consultez le guide d’installation du NVR VUpoint pour obtenir des instructions d’installation.
- Page 9 Étape 5 Sélectionnez un réseau sans fil dans la liste Si votre réseau est protégé par mot de passe, saisissez le mot de passe dans le champ prévu à cet effet Cliquez pour établir la connexion au réseau Wi-Fi Étape 6 Cliquez sur...
-
Page 10: Spécifications Du Produit
Spécifications du produit Paramètre Description Capteur d'image CMOS 1/2.7” de 2 Mégapixel progressif Distance IR 20 m Focale 2.8 mm Alimentation 12V DC, 1A Consommation <4.7W Puissance disponible Wi-Fi 20dBm max. Fréquence Wi-Fi 2.4 GHz Conditions de fonctionnement -20◦C à 45◦C / moins de ≤ 95% Protection IP67... - Page 11 Componentes de la cámara IP Nota : Reinicio Para realizar un Reset (restaurar los ajustes de fábrica de la cámara), mantenga presionado el botón Reset/WPS durante 8 segundos y la luz se apagará.
- Page 12 Definiendo la configuración de la cámara IP Paso 1 Conecte un extremo del cable de red (LAN) al puerto Ethernet de la cámara y el otro extremo al router. Paso 2 Si la cámara está conectada a un NVR de VUpoint, consulte la Guía del grabador de vídeo en red (NVR) de VUpoint para ver más instrucciones de instalación.
- Page 13 Paso 5 Seleccione una red inalámbrica de la lista Si la red está protegida con contraseña, introduzca una contraseña en el campo de contraseña Pulse para establecer la conexión de red Wi-Fi Paso 6 Pulse OK...
-
Page 14: Especificaciones Del Producto
Especificaciones del producto Parámetro Descripción Sensor de imagen 1/3” 4Megapixel CMOS progresivo Distancia IR 30 m Distancia focal 2.8 mm 120 dB Fuente de alimentación 12V DC Consumo de energía <6.6W Salida de alimentación Wi-Fi 20dBm max. Frecuencia Wi-Fi 2.4 GHz Condiciones de funcionamiento -20◦C a 45◦C/ menos de ≤... - Page 15 Componenti della telecamera IP Nota: Per il reset (usato per tornare ai valori di fabbrica), premere il tasto Reset/WPS per 8 secondi; l’indicatore luminoso si spegnerà.
- Page 16 Configurazione parametri telecamera IP Passo 1 Collegare un cavo LAN alla porta ethernet della telecamera e con l’altro capo del cavo collegarsi al router. Alimentare la telecamera con un alimentatore appropriato. Passo 2 Se la videocamera è collegata a un NVR VUpoint, consultare la Guida all'installazione del videoregistratore di rete VUpoint per ulteriori istruzioni di installazione.
- Page 17 Passo 5 Inserire la password Selezionare della rete una rete WiFi WiFi, se dalla lista protetta e delle reti cliccare su disponibili Connetti Passo 6 Cliccare su OK...
-
Page 18: Specifiche Tecniche
Specifiche Tecniche Parametro Descrizione Sensore video 1/2.7” 2Megapixel progressivo CMOS Distanza a IR 20 m Lunghezza Focale 2.8 mm Alimentatore 12V DC, 1A Assorbimento <4.7W Potenza trasmessa Wi-Fi 20dBm max. Frequenza Wi-Fi 2.4 GHz Condizioni Operative -20◦C a 45◦C/ meno di ≤ 95% Protezione IP67... - Page 19 For the UKCA and CE Declaration of Conformity please refer to our website: www.riscogroup.com Rapport de Conformité de RED: Par la présente, RISCO Group, déclare cet équipement est en conformité aux conditions essentielles et à d'autres dispositions appropriées de la directive 2014/53/EU. Vous pouvez trouver la copie complète de la déclaration de conformité...
- Page 20 RISCO, for a period of (i) 24 months from the date of delivery of the Product ( the “Warranty Period”). This Limited Warranty covers the Product only within the country where the Product was originally purchased and only covers Products purchased as new.
- Page 21 Software and applications distributed or made available by RISCO in conjunction with the Product (with or without the RISCO brand), including, but not limited to system software, as well as P2P services or any other service made available by RISCO in relation to the Product, are not covered under this Limited Warranty.
- Page 22 DAMAGED. CUSTOMER ACKNOWLEDGES THAT NEITHER RISCO NOR ITS LICENSORS CONTROL THE TRANSFER OF DATA OVER COMMUNICATIONS FACILITIES, INCLUDING THE INTERNET, GSM OR OTHER MEANS OF COMMUNICATIONS AND THAT RISCO’S PRODUCTS, MAY BE SUBJECT TO LIMITATIONS, DELAYS, AND OTHER PROBLEMS INHERENT IN THE USE OF SUCH MEANS OF COMMUNICATIONS.
- Page 23 Contacting RISCO RISCO Group is committed to customer service and Product support. You can contact us through our website (www.riscogroup.com) or at the following telephone and fax numbers: United Kingdom Belgium (Benelux) Tel: +44-(0)-161-655-5500 Tel: +32-2522-7622 support-uk@riscogroup.com support-be@riscogroup.com Italy Tel: +39-02-66590054 Tel: +1-631-719-4400 support-it@riscogroup.com...
- Page 24 All rights reserved. No part of this document may be reproduced in any form without prior written permission from the publisher. © RISCO Group, 11/2021. All rights reserved. 5IN2890 C...
Need help?
Do you have a question about the VUpoint RVCM32W16 and is the answer not in the manual?
Questions and answers