Advertisement
Quick Links
Advertisement

Subscribe to Our Youtube Channel
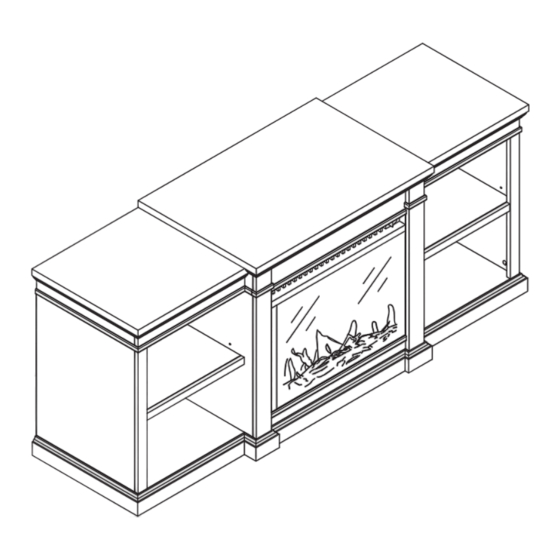
Summary of Contents for Ameriwood HOME Wilton 1767196COM
- Page 1 1767196COM B341767196COM00TV Easy Tough...
-
Page 2: Helpful Hints
Contact Us! Helpful Hints PEOPLE NEEDED FOR ASSEMBLY: 1-2 ESTIMATED ASSEMBLY TIME: 1 HOUR ameriwoodhome.com... -
Page 3: Before You Start
Before You Start Read through each step carefully and follow the proper order Separate and count all your parts and hardware Give yourself enough room for the assembly process Have the following tools: Flat Head Screwdriver, #2 Phillips Head Screwdriver and Hammer Failure to do so may result in stripping the screw. - Page 4 Not actual size CENTER TOP LEFT TOP RIGHT TOP T1767196010TV T1767196020TV T1767196030TV Qty: 1 Qty: 1 Qty: 1 LEFT BASE RIGHT BASE BOTTOM PANEL T1767196040TV T1767196050TV T1767196060TV Qty: 1 Qty: 1 Qty: 1 SIDE PANEL LEFT PARTITION RIGHT PARTITION T1767196070TV T1767196080TV T1767196090TV Qty: 2...
- Page 5 Not actual size RIGHT SHELF LEFT SHELF RAIL RAIL T1767196110TV T1767196100TV T1767196130TV T1767196120TV Qty: 1 Qty: 1 Qty: 1 Qty: 1 RAIL RAIL BOTTOM SUPPORT T1767196140TV T1767196150TV T1767196160TV Qty: 1 Qty: 1 Qty: 1 Qty: BACK PANEL FIREPLACE T1767196170TV FA23V60L-1 Qty: 2...
- Page 6 Not actual size...
-
Page 7: Metal Plate
Hardware Bag Reference Number: 21767196COM0TV Not actual size CAM BOLT DOWEL 8X30 SHELF HOLDER CAM LOCK 15-12 TTV003 TTV001Z TTV004 TTV002Z PH SCREW M3.5X12 PH SCREW 3.5X16 JCBC SCREW M6X30 FLAT WASHER TTV008 TTV007 TTV005 TTV006 L-BRACKET METAL PLATE ALLEN KEY M4 WARNING LABEL TTV009 TTV010... - Page 8 (1)X10 - Screw (1) into (A)&(B)&(C) as below shown.
- Page 9 (3) x16 (1)X10 - Screw (1) into (D),(E),(H)&(I) as below shown. - Insert (3) into (G),(H), (I) as below shown.
- Page 10 (3) x8 (1)X9 - Screw (1) into (N),(O)&(M) as below shown. - Insert (3) into (F)&(L) as below shown.
- Page 11 (2)X9 - Attach (M) to (F) as below shown. - Attach (N) to (H) as below shown. - Attach (O) to (I) as below shown.
- Page 12 (5) X4 (2)X4 (11) X1 (6) X4 - Attach (G) to (B) & (D) as below shown. - Attach (H) to (B) & (D) as below shown.
- Page 13 (5) X4 (2)X4 (6) X4 (11) X1 - Attach (G) to (C) & (E) as below shown. - Attach (I) to (C) & (E) as below shown.
- Page 14 (2)x6 - Attach (L) & (F) to (I) & (H) as below shown.
- Page 15 (7) X4 (10) X2 (8) x4 (9) X2 - Screw (9) & (10) to (P) as below shown. - A�ach (P) to assembled unit as below shown.
- Page 16 (4) X8 (2)X6 - Attach (A) to assembled unit as below shown. - Attach (J) & (K) to assembled unit as below shown.
- Page 17 (8) X28 - A�ach (Q) to assembled unit as below shown. Before a�aching the back panel, be sure that the unit is at 90�...
- Page 18 (7) X6 - A�ach (R) to assembled unit as below shown. BACK...
- Page 19 BEFORE CONNECTING THE UNIT TO A WALL ELECTRIC OUTLET WARNING Please carefully read and follow instruc�ons and safety warnings in IF THE INFORMATION IN THE “Fireplace Homeowners Opera�ng Manual” to operate your fireplace. FIREPLACE OPERATING MANUAL IS NOT FOLLOWED< AN ELECTRIC SHOCK OR FIRE MAY RESULT IN PROPERTY DAMAGE, PERSONAL INJURY, OR LOSS OF LIFE.
- Page 20 Binh duong,Vietnam.
- Page 23 (Página 4, 5, 6) (A) Estante central superior (1) PERNO DE LEVA (B) Panel superior izquierda (2) BLOQUEO DE LEVA (C) Panel superior derecho (3) TACO DE MADERA (D) Panel izquierdo (4) SOPORTE DE ESTANTES (E) Panel lateral derecho (5) TORNILLO JCBC (F) Panel base (6) ARANDELA PLANA (G) Tabla lateral...
- Page 24 Página 14 - Conecte (L) y (F) a (I) y (H) como se muestra a continuación. Página 15 - Atornille (9) y (10) a (P) como se muestra a continuación. - Fije (P) a la unidad ensamblada como se muestra a continuación. Página 16 - Fije (A) a la unidad ensamblada como se muestra a continuación.
- Page 26 (Page 7) (Page 4, 5, 6) (A) DESSUS CENTRAL (1) BOULON À CAME (B) DESSUS GUACHE (2) VERROUILLAGE À CAMES (C) DESSUS DROIT (3) GOUJON EN BOIS (D) BASE GUACHE (4) PORTE-ÉTAGÈRE (E) BASE DROIT (5) VIS JCBC (F) PANNEAU INFERIEUR (6) RONDELLE PLATE (G) PANNEAU LATERAL (H) CLOISON GRAUCHE...
- Page 27 Page 14 - Attachez (L) et (F) à (I) et (H) comme illustré ci-dessous. Page 15 - Vissez (9) et (10) sur (P) comme illustré ci-dessous. - Fixez (P) à l'unité assemblée comme illustré ci-dessous. Page 16 - Fixez (A) à l'unité assemblée comme illustré ci-dessous. - Fixez (J) et (K) à...


Need help?
Do you have a question about the Wilton 1767196COM and is the answer not in the manual?
Questions and answers