
Related Manuals for Ameriwood HOME CARSON 1766496COM


Summary of Contents for Ameriwood HOME CARSON 1766496COM
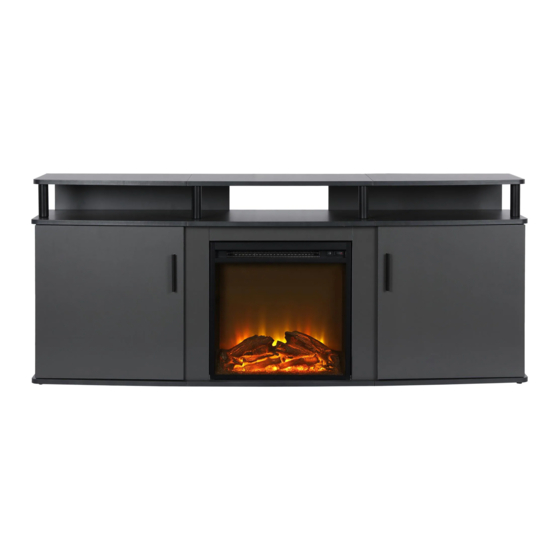
- Page 2 PEOPLE NEEDED FOR ASSEMBLY: 1-2 ESTIMATED ASSEMBLY TIME: 1-2 HOUR ameriwoodhome.com...
-
Page 4: Board Identification
Board Identification Not Actual Size ameriwoodhome.com... - Page 5 Board Identification Not Actual Size ameriwoodhome.com...
- Page 6 Board Identification Not Actual Size ameriwoodhome.com...
- Page 7 Board Identification Not actual size ameriwoodhome.com...
-
Page 8: Part List
Hardware Bag Reference Number: 21766496COM0KX Part List Actual Size Ø6X50 mm Ø8X30 mm Ø6X30 mm M8X20 mm × 39 × 4 × 35 × 12 Ø15X4 mm Ø4X14 mm Ø4X32 mm M4X20 mm × 4 × 7 × 30 × 22 Ø1/4"X30 mm Ø1/4"X12mm ×... - Page 9 Part List Not Actual Size Ø5X14 mm 70X70X 2mm 120 mm × 2 × 1 × 2 × 8 Ø35 mm Ø15X9 mm × 4 × 39 × 1 ameriwoodhome.com...
- Page 10 STEP 1 Ø8X30 mm M8X20 mm × 25 × 8 1.1 Attach (1) to (A), (B), (C), (D), (E) & (F) as illustrated. 1.2 Insert (3) to (B) & (E) as illustrated. ameriwoodhome.com...
- Page 11 STEP 2 Ø8X30 mm M8X20 mm × 6 × 9 2.1 Attach (1) to (M) & (N) as illustrated. 2.2 Insert (3) to (H), (K), (M) & (N) as illustrated. ameriwoodhome.com...
- Page 12 STEP 3 Ø6X30 mm × 12 3.1 Insert (4) to (U), (V), (W) & (X) as illustrated. Rear tip warning label ameriwoodhome.com...
- Page 13 STEP 4 Ø8X30 mm Ø4X14 mm Ø35 mm M8X20 mm × 16 × 8 × 18 × 4 4.1 Attach (1) to (Q), (R), (T) & (S) as illustrated. 4.2 Insert (3) to (Q), (R), (T) & (S) as illustrated. 4.3 Attach (15) to (Q) &...
- Page 14 STEP 5 Ø15X4 mm × 7 5.1 Connect (E), (D) & (F) as illustrated. 5.2 Attach (6) to (G), (H) & (I) as illustrated. 5.3 Connect (H) to (G) & (I) as illustrated. ameriwoodhome.com...
- Page 15 STEP 6 Ø15X9 mm × 6 6.1 Connect (B) to (A) & (C) as illustrated. 6.2 Attach (U) to (A) & (B) with (16) as illustrated. 6.3 Attach (V) to (B) & (C) with (16) as illustrated. Rear tip warning label ameriwoodhome.com...
- Page 16 STEP 7 Ø1/4"X12mm 70X70X 2mm × 8 × 2 7.1 Attach (11) to (A), (B) & (C), with (10) as illustrated. 7.2 Attach (Y) to (A), (B) & (C) as illustrated. CAUTION: Do not over-tighten support tube to avoid damage the board. LOCK UNLOCK ameriwoodhome.com...
- Page 17 STEP 8 Ø1/4"X30 mm Ø6X50 mm Ø4X32 mm × 4 × 6 × 4 8.1 Insert (2) to (U) & (V) as illustrated. 8.2 Attach (D), (E) & (F) to sample at previous step with (8) & (9) as illustrated. ameriwoodhome.com...
- Page 18 STEP 9 Ø15X9 mm × 10 9.1 Attach (K) to (T) & (S) with (16) as illustrated. 9.2 Attach (L) to (M) & (N) with (16) as illustrated. 9.3 Attach (K)-(S)-(T) to (L)-(M)-(N) with (16) as illustrated. ameriwoodhome.com...
- Page 19 STEP 10 Ø15X9 mm × 9 10.1 Attach sample at step (9) to (D), (E) & (F) with (16) as illustrated. ameriwoodhome.com...
- Page 20 STEP 11 Ø15X9 mm × 4 11.1 Attach (W) to (Q); (X) to (R) with (16) as illustrated. ameriwoodhome.com...
- Page 21 STEP 12 Ø15X9 mm × 10 12.1 Attach (Q)-(W) and (R)-(X) to sample at step 10 with (16) as illustrated. ameriwoodhome.com...
- Page 22 STEP 13 Ø4X14 mm × 6 13.1 Attach (Z) to frame with (7) as illustrated. Note: Please check and tighten all screws in this step ameriwoodhome.com...
- Page 23 STEP 14 Ø4X32 mm × 16 14.1 Attach (G), (H) & (I) to sample from previous step with (8) as illustrated. Note: Please check and tighten all screws in this step ameriwoodhome.com...
- Page 24 STEP 15 Ø5X14 mm × 8 15.1 Insert (14) to frame as illustrated. 15.2 Put (J) on shelf pin (14) as illustrated. ameriwoodhome.com...
- Page 25 STEP 16 Ø4X14 mm M4X20 mm 120 mm × 4 × 8 × 2 16.1 Attach (O), (P) to sample from previous step with (7) as illustrated. 16.2 Attach (13) to (O), (P) with (5) as illustrated. ameriwoodhome.com...
- Page 26 STEP 17 ameriwoodhome.com...
- Page 27 STEP 18 ameriwoodhome.com...
-
Page 28: Maximum Loads
Maximum Loads This unit has been designed to support the maximum loads shown. Exceeding these load limits could cause sagging, instability, product collapse, and/or serious injury. Warning: Please apply the TV warning label to your unit so you'll always have the model's weight and TV size limits. - Page 29 Visit your local retailer's website, rate your purchased product and leave us some feedback! We would like to extend a big "Thank You" to all of our customers for taking the time to assemble this Ameriwood Home product, and to give us your valuable feedback. ameriwoodhome.com...
- Page 30 Español ameriwoodhome.com...
- Page 31 Español Página 10 1.1 Adjunte (1) a (A), (B), (C), (D), (E) y (F) como se ilustra. 1.2 Inserte (3) en (B) y (E) como se ilustra. Página 11 2.1 Conecte (1) a (M) y (N) como se ilustra. 2.2 Inserte (3) en (H), (K), (M) y (N) como se ilustra. Pagina 12 3.1 Inserte (4) en (U), (V), (W) y (X) como se ilustra.
- Page 32 Español Página 15 6.1 Conecte (B) a (A) y (C) como se ilustra. 6.2 Conecte (U) a (A) y (B) con (16) como se ilustra. 6.3 Conecte (V) a (B) y (C) con (16) como se ilustra. Página 16 7.1 Conecte (11) a (A), (B) y (C), con (10) como se ilustra. 7.2 Conecte (Y) a (A), (B) y (C) como se ilustra.
- Page 33 Visite el sitio web de su distribuidor local, califique el producto que compró y déjenos sus comentarios. Nos gustaría enviar un gran "Agradecimiento" a todos nuestros clientes por tomarse el tiempo de ensamblar este producto de Ameriwood Home, y por darnos sus valiosos comentarios. Gracias...
- Page 34 Français ameriwoodhome.com...
- Page 35 Français Page 10 1.1 Attachez (1) à (A), (B), (C), (D), (E) et (F) comme illustré. 1.2 Insérez (3) à (B) et (E) comme illustré. Page 11 2.1 Fixez (1) à (M) et (N) comme illustré. 2.2 Insérez (3) à (H), (K), (M) et (N) comme illustré. Page 12 3.1 Insérez (4) à...
- Page 36 Français Page 15 6.1 Connectez (B) à (A) et (C) comme illustré. 6.2 Fixez (U) à (A) et (B) avec (16) comme illustré. 6.3 Fixez (V) à (B) et (C) avec (16) comme illustré. Page 16 7.1 Fixez (11) à (A), (B) et (C), avec (10) comme illustré. 7.2 Fixez (Y) à...
- Page 37 Visitez le site Web de votre détaillant local, évaluez le produit que vous avez acheté et laissez-nous vos commentaires ! Nous tenons à offrir un grand "Merci" à tous nos clients pour avoir pris le temps d'assembler ce produit "Ameriwood Home", et de nous donner vos commentaires précieux. Merci ameriwoodhome.com...
Need help?
Do you have a question about the CARSON 1766496COM and is the answer not in the manual?
Questions and answers