
Related Manuals for Qazqa Wind 91339


Summary of Contents for Qazqa Wind 91339
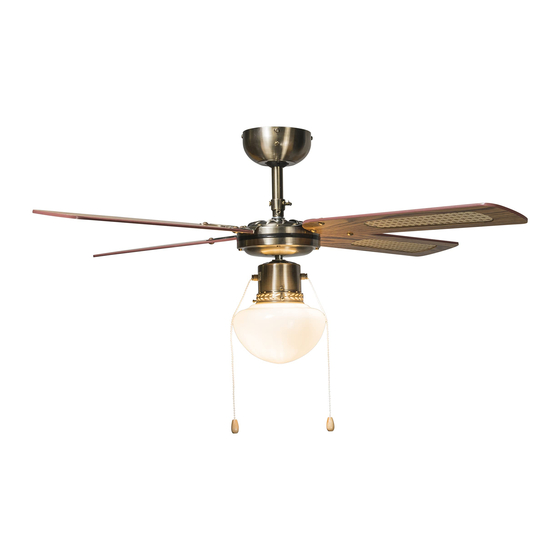
- Page 1 INSTRUCTION MANUAL English and Dutch Wind Fan 42 Brass/Wind Fan 42 White/Wind Fan 42 Grey 91339/91340/91341...
-
Page 2: General Safety Instructions
1. Warning symbols ead the instructions aution 2. General Safety Instructions ead this instruction manual thoroughly before using the appliance and save it for future reference and if necessary pass the instruction manual on to a third party. WARNING: W hen using electrical appliance, basic safety precautions should always be followed to reduce the risk of fire, electrical shock and personal injury. - Page 3 1) General efore carrying out any work on the fan, disconnect it from the electrical supply! heck if the electrical specifications of this appliance are compatible with your installation. The suppler accepts no responsibility for any physical injury or material damage resulting from incorrect use or installation of this fan.
-
Page 4: Electrical Safety
Electrical safety he appliance should be installed by authorized electrician only acc. to national wiring rules. Specific Safety Rules he fan is to be installed so that the blades are more than 2.3 m above the floor Environmental protection CAUTION! lectrical products must not be thrown out with domestic waste. -
Page 5: Parts Description
6. The ceiling fan (element) PARTS DESCRIPTION 1. MOUNTING PLATE 2. J HOOK (FOR TEMPORARY HANG UP THE WHEN WIRING CONNECTION) 3. SCREWS 4. SCREWS 5. HANGER BALL 6. UPPER CANOPY 7. DOWNROD 8. CROSS PIN 9. SCREWS 10. COTTER PIN 11. - Page 6 7. Installation of the ceiling fan 1. Install the mounting plate by screw (Fig.1) 2. Insert downrod over upper canopy (Fig 2 3) 3. Then, insert the cross pin over yoke and Cotter pin(Fig 4) 4. Connect the wire as the fig show (Fig 5)
- Page 7 5. Make sure the wiring correct, if you are not sure, pls consult qualified electrician (Fig.6) Black +Brown wire “L” Blue wire “N” Green & yellow wire 6. Hang up the fan and assembly the mounting plate with the motor set by 4 side screws (Fig 7) 7.
- Page 8 11. Now, the fan is completed (Fig 12) If the fan or light kit is PARTIALLY pre-assembled, you can skip the assembly procedures to next step...
-
Page 9: How To Use
8. How to use ne pull chain switch is for light control, another one for speed control he speed can be selected by pressing the speed chain -1 pull, –2 pull, —3 pull, ----4 pull ight on off can be controlled by pressing the light chain –1 pull, –2... -
Page 10: Troubleshooting
11.Trouble shooting TROUBLE PROBABLE CAUSES SUGGESTED REMEDY 1. Fan will not start A/ Fuse or circuit breaker blown. A/ Check main and branch circuit B/ Loose power line connections fuses or circuit breakers. to the fan. B/ Check line wire connections to fan C/ Speed controller not in correct C/ Check speed controller’s position. - Page 11 PREFACE our ceiling fan may sometimes have wobble problem when operate due to irregularity in blades or the blade holder. Also, improper assembly in the mounting system may cause some additional problem also bearing crooked. The following procedure to remedy such problem is strongly recommended by us from our past experience in handling the wobble problem.
- Page 12 his appliance can be used by children aged from 8 years and above if they have been given supervision or instruction concerning use of the appliance in a safe way and if they understand the hazards involved. Cleaning and user maintenance shall not be made by children unless they are older than 8 and supervised.
- Page 13 INSTRUCTION MANUAL HANDLEIDING HANDLEIDING Wind Fan 42 Brass/Wind Fan 42 White/Wind Fan 42 Grey Plafondventilator Wind 42 Plafondventilator Wind 42 91339/91340/91341 91339/91340/91341 91339/91340/91341...
-
Page 14: Warning Symbols
1. Warning symbols 1. Waarschuwings symbolen 1. Waarschuwings symbolen Lees de instructies Lees de instructies ead the instructions aution Waarschuwing Waarschuwing Lamp/Lichtbron Lamp/Lichtbron 2. General Safety Instructions 2. Algemene veiligheidsinstructies 2. Algemene veiligheidsinstructies Lees dit instructieboekje zorgvuldig door voor gebruik. Bewaar de kassabon samen met deze Lees dit instructieboekje zorgvuldig door voor gebruik. - Page 15 1) General 1) Algemeen 1) Algemeen De installatie van de ventilator moet worden uitgevoerd door iemand die over de WAARSCHUWING: Om het risico van brand en elektrische schokken te voorkomen, efore carrying out any work on the fan, disconnect it from the electrical supply! benodigde kennis beschikt of door een erkend elektricien.
- Page 16 Laat geen verpakkings onderdelen (plastic zak, doos en piepschuim) binnen het bereik van 1. Warning symbols 1. Waarschuwings symbolen kinderen liggen. Om de kans op lichamelijk letsel of schade aan de ventilator of andere voorwerpen te vermijden, dien je voorzichtig te zijn bij het werken aan of in de buurt van de ventilator en Lees de instructies bij het schoonmaken ervan.
-
Page 17: Technische Gegevens
Elektriciteits veiligheid De installatie van de ventilator moet worden uitgevoerd door iemand die over de beno- digde kennis beschikt of door een erkend elektricien volgens de nationale bedrading regels. Specifieke veiligheidsregels Zorg dat de ventilator minimaal 2.30 meter boven de vloer geïnstraleerd word. Milieubescherming WAARSCHUWING! Gooi elektrische producten niet bij het huisvuil. - Page 18 6. Onderdelen plafondventilator 6. Onderdelen plafondventilator 1. Warning symbols 6. The ceiling fan (element) ONDERDELEN BESCHRIJVING ONDERDELEN BESCHRIJVING 1. Montageplaat 1. Montageplaat PARTS DESCRIPTION ead the instructions 2. J- haak (voor het tijdelijk ophangen van de ventilator 2. J- haak (voor het tijdelijk ophangen van de ventilator 1.
- Page 19 e l i r s t e l i l i c j z i z i j 7. Installatie van de plafondventilator s t i 1. Pak de ventilator uit en controleer de inhoud. Schakel voor installatie de stroomtoevoer uit om l a t n t i l e t...
- Page 20 11. Now, the fan is completed (Fig 12) 7. Zorg dat de bedrading correct wordt aange- 7. Zorg dat de bedrading correct wordt aange- sloten. Bij onzekerheid neem contact op met sloten. Bij onzekerheid neem contact op met een elektricien, fig 7 een elektricien, fig 7 A.
- Page 21 13. Zo, nu is de ventilator 13. Zo, nu is de ventilator 11. Now, the fan is helemaal gemonteerd! helemaal gemonteerd! completed (Fig 12) Fig. 13 Fig. 13 !" :,.%$*13,.*' Stalen stang #$$%&'()$* Geel/groen 4$>$3,0'0*'3?%.., Bevestigingsplaat @%.A)*8?%.., Plafondplaat #$$%&'()$* Geel/groen #$$%&'()$* Geel/groen 4%./5...
- Page 22 8. Gebruiksaanwijzing Het is een ventilator die bediend wordt met een trekschakelaar. Het ene koord bedi- end het licht, de andere de snelheid van de ventilator. Snelheid kan bediend worden door aan het snelheids koord te trekken. Hi - 1x trekken Med - 2x trekken Low - 3x trekken Uit -...
- Page 23 9. Onderhoud Voor je enig onderhoud uitvoert, schakel je de lamp uit en de stroomtoevoer uit. - Laat de lichtbron afkoelen - Gebruik geen natte spons - Gebruik geen schuur, hardnekkige reinigingsmiddelen of andere vloeistoffen om de ventilator te reinigen. - Maak de motor, motorbehuizing en andere elektrische delen van de ventilator niet schoon met water ivm kortsluiting.
- Page 24 11.Trouble shooting 10. Probleem/oorzaak/oplossing 10. Probleem/oorzaak/oplossing TROUBLE PROBABLE CAUSES SUGGESTED REMEDY PROBLEEM PROBLEEM OORZAAK OORZAAK OPLOSSING OPLOSSING 1. Fan will not start A/ Fuse or circuit breaker blown. A/ Check main and branch circuit 1. Ventilator start niet 1. Ventilator start niet A - Het elektriciteitscircuit is opgeblazen A - Het elektriciteitscircuit is opgeblazen A - Controleer het circuit...
- Page 25 11. Gebruik van balans set Je plafond ventilator kan soms een balansprobleem hebben en wiebelen door een oneffen- heid in de bladen of bladhouder. Ook kan het zo zijn dat de lagers van de plafondbeves- tiging niet recht zijn. Gebruik de volgende procedure die door ons geadviseerd wordt om het probleem op te lossen.
- Page 26 12. Overige Dit product is akkoord met de relevante veiligheidseisen. Reparaties moeten uitgevo- erd worden door gekwalificeerde personen die gebruik maken van originele losse onderdelen. Dit kan anders resulteren tot een gevaar voor de gebruiker. INFORMATIE EISEN VOLGENS HET ECO-DESIGN OMSCHRIJVING SYMBOOL WAARDE...
Need help?
Do you have a question about the Wind 91339 and is the answer not in the manual?
Questions and answers