
Related Manuals for Fluid Kaabo Wolf Warrior 11


Summary of Contents for Fluid Kaabo Wolf Warrior 11
- Page 1 Kaabo Wolf Warrior 11 Electric Scooter User Manual Read this manual carefully BEFORE operating your scooter!
- Page 2 Congratulations on your new Kaabo Wolf Warrior electric scooter and thank you for purchasing it at fluidfreeride.com or at one of our retail partners. Follow us on Instagram and tag us to be featured on our page! @fluidfreeride Check out our support library at support.fluidfreeride.com...
-
Page 3: Before You Start
BEFORE YOU START It is important to read through, understand, and adhere to all instructions and safety warnings before charging and operating this scooter. Upon receiving and opening your box, please inspect the contents for signs of damage or loose screws from transport. If something doesn’t feel right, please take a few pictures and contact your place of purchase immediately. -
Page 4: Table Of Contents
TABLE OF CONTENTS BEFORE YOU START TABLE OF CONTENTS GENERAL SAFETY WARNINGS WOLF OVERVIEW What’s in the Box Technical Specifications Key Components CHARGING AND BATTERY SAFETY Charging the Wolf Battery Maintenance Battery Disposal Charging and Battery Safety Warnings SET UP, UNFOLDING & FOLDING Folding Mechanism Introduction Unboxing and Set up Unfolding and Folding... -
Page 5: General Safety Warnings
GENERAL SAFETY WARNINGS • Always wear a helmet and protective safety equipment. • Wear closed shoes without heels and ensure your laces are tied. • Do not ride with more than one rider or exceed the weight limit of 150kg/330lbs in any other way. •... -
Page 6: Wolf Overview What's In The Box
WOLF OVERVIEW What’s in the Box Certified chargers Wolf Electric Scooter Manual Set of tools (with detached handle bar) Technical Specifications Wolf 35Ah Configuration Motor 2x 1200W Battery 60V 35 Ah (LG) Top speed 50 mph (80 kmh) Range (eco mode) 70 miles (112 kilometers) Brakes Front and rear hydraulic disk brake... -
Page 7: Key Components
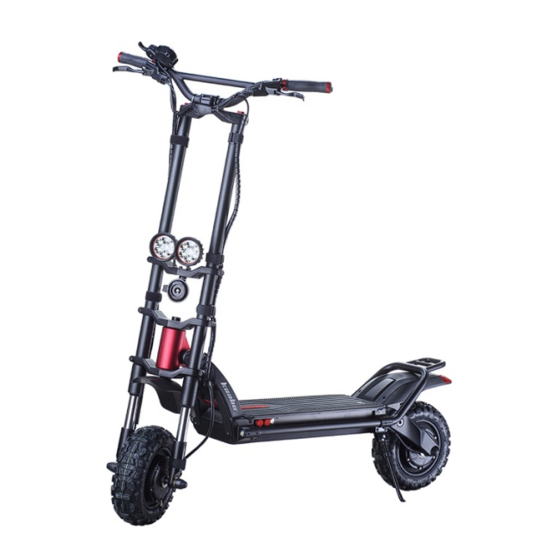
Key Components Single/Dual Motor & Eco/Turbo Switch Display & Throttle Hydraulic Brakes Folding Lever Headlight Beams Horn Headset Protective Frame Taillight Suspension Tubes Deck Light Switch Dual Charging Port CHARGING AND BATTERY SAFETY Charging the Wolf 1. Turn your scooter off 2. -
Page 8: Battery Maintenance
Battery Maintenance • We recommend to charge your scooter after every use. This is not required. • A lithium-ion battery is a consumable device. Please replace with a new battery once capacity drops below 50% of what you experienced initially. Contact your place of purchase for a replacement. •... -
Page 9: Charging And Battery Safety Warnings
Charging and Battery Safety Warnings • Use caution when using outlets to prevent electric shock. • Do not leave the charger plugged in for extended period of times (>24 hours). • Only charge your scooter in a safe, clean, and dry environment. Keep the charger and scooter away from inflammable materials as they may get hot. - Page 10 • Mishandling or misuse of the battery can result in lower performance, shorter lifespan, rupturing, igniting, or other incidents and could increase the risk of serious personal injury. • Do not discharge the battery using any other product than the scooter it comes with.
-
Page 11: Set Up, Unfolding & Folding
SET UP, UNFOLDING & FOLDING Folding Mechanism Introduction The Wolf is equipped with an advanced folding Safety Pin Slot mechanism that will be very durable and tight if set up correctly. It should have been properly Folding Shaft adjusted at the factory, but you should verify this during your initial set up. -
Page 12: Unfolding And Folding
Unfolding and Folding 1. Lift up the front stem 2. Lift up the Folding Lever and push the Folding Shaft downward with your thumb. The other side of the Folding Shaft will move upward. 3. Slowly bring the front stem in a vertical position while ensuring the Cylinder enters through the Opening. -
Page 13: Operation
OPERATION Driving Mode Selection Located underneath the main display on the right side of the handlebar you can find two switches to configure driving modes: The ECO/TURBO switch regulates the power of your scooter. By pressing down the button, ECO mode is activated which will reduce torque and top speed to maximize range. - Page 14 MODE COMMENT TIME Time since powering on the scooter. TRIP Distance travelled since powering on the scooter. Total distance travelled. Current battery voltage. Number of times battery has been charged (inaccurate as only full discharges are counted) Detailed P-settings mode. To access P-settings to make various advanced changes, press MODE [7] for 2-3 seconds.
-
Page 15: Riding
Cruise Control. Cruise control allows you to maintain your driving speed automatically without continuing to hold down the accelerator. In order to use Cruise Control, activate it first in the P-settings [P6]. While driving, keep the accelerator steady for a few seconds until Cruise Control kicks in and scooter travels at constant speed without driver holding down the accelerator. -
Page 16: Braking
Braking The Wolf electric scooter has front and rear hydraulic disc brakes. For braking, use the rear brake first for decelerating (the left braking lever on the handlebar) before engaging the front brake (the right lever) to come to a full stop. When travelling at higher speeds, exercise caution when braking as the brakes are sensitive. - Page 17 The display will start blinking whenever you are getting close to empty. If that happens while are you are still a few miles away from your destination, you can switch to ECO and single motor mode and cruise along to preserve battery charge.
-
Page 18: Scooter Maintenance & Transport
SCOOTER MAINTENANCE & TRANSPORT • Never perform maintenance on this product while the unit is powered on or charging. Always power off before performing maintenance. Do not attempt to perform repairs or modify the scooter but contact your place of purchase or refer to a professional repair facility. •... - Page 19 If your hydraulic disc brake is rubbing, please first ensure that this is not caused by a bent rotor. Put your scooter up on a box so the wheels are spinning freely. Put a light source behind the rotor so you can easily see if the rotor is bent or if it can be fixed by slightly aligning the brake pads.
-
Page 20: Declaration Of Conformity
DECLARATION OF CONFORMITY This product complies with Part 15 of the FCC Rules. Operation is subject to the following two conditions: (1) This product may not cause harmful interference, and (2) this product must accept any interference received, including interference that may cause undesired operation. - Page 21 Keep it fluid!
Need help?
Do you have a question about the Kaabo Wolf Warrior 11 and is the answer not in the manual?
Questions and answers