Table of Contents
Advertisement
Quick Links
Advertisement
Table of Contents

Subscribe to Our Youtube Channel
Related Manuals for Matrix Telecom ETERNITY NE


Summary of Contents for Matrix Telecom ETERNITY NE
- Page 1 ETERNITY NE System Manual...
- Page 3 ETERNITY NE The Next Generation IP PBX for Small Businesses System Manual...
- Page 4 Documentation Disclaimer Matrix Comsec reserves the right to make changes in the design or components of the product as engineering and manufacturing may warrant. Specifications are subject to change without notice. This is a general documentation for all models of the product. The product may not support all the features and facilities described in the documentation.
-
Page 5: Table Of Contents
Contents Introduction..............................1 Welcome ................................1 About this System Manual ..........................1 Product Description ............................7 The Interfaces ..............................9 Know Your ETERNITY NENX ........................... 13 Applications of ETERNITY NENX ........................15 Compatibility Versions of Extended Clients ...................... 16 Technical Specifications of ETERNITY NENX ....................17 Installing ETERNITY NENX .......................... - Page 6 Configuring Matrix SPARSH VP510 ....................... 190 Configuring Matrix Extended SPARSH VP710 ....................202 Configuring MATRIX VARTA WIN200 UC Client .................... 208 Configuring Matrix VARTA ADR100/AMP100 UC Clients ................214 Auto Sign-In Parameters ..........................221 VARTA License Management ......................... 224 Configuring Open SIP Phones ........................226 Third Party IP-Phone General Parameters .....................
- Page 7 Auto Attendant ..............................614 Auto Call Back (ACB) ............................620 Auto Redial ..............................624 Automatic Number Translation ........................628 Barge-In ................................631 BCCH Selection .............................. 634 Behind the System Application ........................639 Busy Lamp Field for Trunks ..........................642 Call Back on Trunk Ports ..........................644 Call Budget on Extension ..........................
- Page 8 Emergency Detection and Reporting ......................844 Emergency Dialing ............................848 Extended IP Phone/VARTA UC Client - Operation ..................850 Firebase Cloud Messaging (FCM) Support ..................... 893 Flashing on Trunks (Continued Dialing) ......................896 Follow Me ................................ 897 Forced Answer ..............................899 Forced Call Disconnection ..........................
- Page 9 Static Routing Table ............................1056 Station Message Detail Recording (SMDR) ....................1060 Station Message Detail Recording–Storage ....................1061 Station Message Detail Recording–Online ....................1066 Station Message Detail Recording–Report ....................1072 Station Message Detail Recording–Posting ....................1091 System Activity Log ............................1110 System Activity Log Display ..........................
- Page 10 PCAP Trace ..............................1252 SIP Extension ..............................1260 System Certificate ............................1261 Restart System .............................. 1262 System Debug ............................... 1263 VoIP Debug ..............................1266 System Status ............................1269 System Details .............................. 1269 System Usage ............................... 1270 USB Status ..............................1271 CO Status ..............................
-
Page 11: Introduction
Server and can use it effectively and efficiently. You may also refer to ETERNITY NE Quick Start, for quick installation. To view or download the Quick Start, scan the QR Code printed on the Product Label/Packaging Label. - Page 12 The feature description is arranged alphabetically by Feature Name to make it easy for you to locate the description you want to look up. • Voice Mail Features: This chapter describes in detail, the voice mail features offered by the Server. Matrix ETERNITY NE System Manual...
- Page 13 Warning: to indicate a hazard or an action that will cause damage to the system and or cause bodily harm to the user. Tip: to indicate a helpful hint giving you an alternative way to operate the system or carry out a procedure, or use a feature more efficiently. Matrix ETERNITY NE System Manual...
- Page 14 Acronyms have been defined in the text and a list of the same is appended. Some of the terms specific to this Manual that you will encounter are defined below: The words ‘ETERNITY NE’, 'ETERNITY', ‘ETERNITY NENX’, ‘SARVAM UCS’, ‘SARVAM UCS SOHO’ ‘System', 'PBX’, ‘Server’ are used interchangeably and synonymously to mean ETERNITY NENX.
- Page 15 4G network. Using this Manual, you will be able to set up, operate and make optimum use of this feature-packed Server. If you encounter any technical problems, please contact your Dealer/reseller or the Matrix Customer Care. Matrix ETERNITY NE System Manual...
- Page 16 Matrix ETERNITY NE System Manual...
-
Page 17: Product Description
Smart directory access using VARTA WIN200, VARTA ADR100 and VARTA AMP100 for easy and quick access to the extensions and other contacts • Mobile and Remote workers support • Outlook integration using CTI Interface • Auto-attendant with configurable call-flow Matrix ETERNITY NE System Manual... - Page 18 Web-based Programming ETERNITY NENX is easy to install and operate. The built-in web server Jeeves allows you to configure the system parameters and features on site and also from a remote location using any Internet browser. Matrix ETERNITY NE System Manual...
-
Page 19: The Interfaces
SIM Card protection with a Personal Identification Number (PIN) and Personal Unlock Keyword (PUK). • Wireless WAN support over 3G or 4G, which can be used to make VoIP calls (if VoIP module is installed). Matrix ETERNITY NE System Manual... - Page 20 VoIP Silence Detection and Disconnection • Voice Mail Subscription on SIP Extensions • Busy Lamp Field Subscription on SIP Extensions • Upto 10 Call Appearances on Extended IP Phone Extensions • Registration of SIP Extensions from 3 different locations Matrix ETERNITY NE System Manual...
- Page 21 • Conversation Recording • Call Taping • Voice-guided Wake-up Calls and Reminders • Message Wait Notification • Call Transfer to Mailbox • Call Forward to Voice Mail • Department Calls - Mailbox for Department Groups Matrix ETERNITY NE System Manual...
- Page 22 ETERNITY NENX supports WAN interface over Ethernet port and Wireless WAN over the UMTS/LTE Mobile Port (Mobile Port1) with 3G/4G SIM. When you use Wireless WAN over UMTS/LTE Mobile port, you can use the Ethernet Port as LAN. Matrix ETERNITY NE System Manual...
-
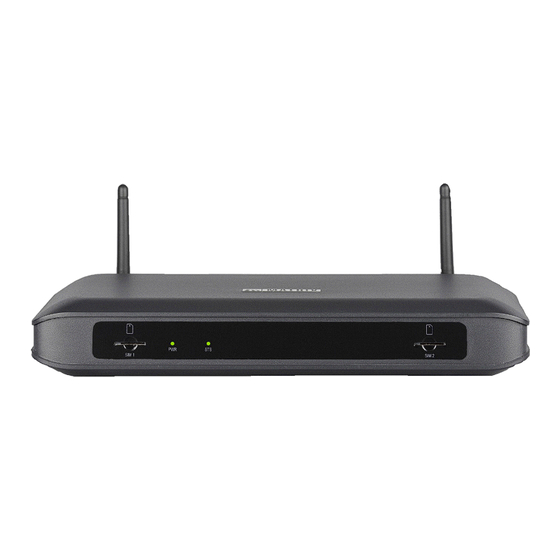
Page 23: Know Your Eternity Nenx
ETERNITY NENXIP50 Mobile2 Mobile1 Ethernet Port Power Adapter Single Line Telephone Analog Trunk Ports(SLT1-SLT2) Ports(CO1-CO4) Built-in Interfaces Optional Interfaces • 4 CO Trunks • Mobile • 2 SLT ports • Voice Mail System • VoIP Matrix ETERNITY NE System Manual... - Page 24 ETERNITY NENX416 Mobile 2 Mobile1 Ethernet Port Power Adapter Analog Trunk Single Line Telephone Ports(CO1-CO4) Ports(SLT1-SLT16) Built-in Interfaces Optional Interfaces • 4 CO Trunks • VoIP • 16 SLT ports • Mobile • Voice Mail System Matrix ETERNITY NE System Manual...
-
Page 25: Applications Of Eternity Nenx
ETERNITY NENX is designed for small and home offices, and nascent enterprises. Illustrated below is an example of how ETERNITY NENX can be optimally used by small businesses, taking full advantage of its enterprise grade features and facilities. Matrix ETERNITY NE System Manual... -
Page 26: Compatibility Versions Of Extended Clients
V01R13 and later SPARSH VP330 V01R12 and later SPARSH VP510 V01R12 and later Extended SPARSH VP710 V01R03 and later It is recommended to use the above mentioned client version with System for the overall functionality. Matrix ETERNITY NE System Manual... -
Page 27: Technical Specifications Of Eternity Nenx
To know about IP Subscriber license, refer to “License Management”. It is an optional module. It is an optional module, requires license activation. To know other technical details of ETERNITY NENX, refer to “Appendix”. Matrix ETERNITY NE System Manual... - Page 28 Matrix ETERNITY NE System Manual...
-
Page 29: Installing Eternity Nenx
You will be able to use the VoIP interface only if the system is connected to the LAN network. Installation Site ETERNITY NENX may be mounted on a table or on the wall. Select an appropriate site to install ETERNITY NENX taking into consideration the following recommendations and precautions: Matrix ETERNITY NE System Manual... - Page 30 Power supply for the system must be separate from other heavy electrical loads like Air-conditioners, heaters, welding machines, electrical motors etc. • The use of a UPS is recommended in case you experience frequent power failures. Matrix ETERNITY NE System Manual...
-
Page 31: Getting Started
Unpack ETERNITY NENX and verify your package contents. In case any of the items is missing or damaged, contact your Dealer/Distributor. Package Contents • ETERNITY NENXIP50 • ETERNITY NE VS (VoIP Server Module) • Power Adapter • 8 GB USB 2.0 Pen-Drive (Flash Drive) •... -
Page 32: Protecting Eternity Nenx And Yourself
Rechargeable) of diameter 12.5mm and height 2.0mm. The Battery should be replaced only by authorized dealers of Matrix. End Users must not attempt to replace it. Caution: There is risk of explosion if the Battery is replaced in an incorrect manner. Please dispose-off used Batteries. Matrix ETERNITY NE System Manual... - Page 33 • the product has been exposed to rain or water. • the product has been dropped or the cabinet has been damaged. • the product exhibits a distinct change in performance. Matrix ETERNITY NE System Manual...
- Page 34 Do not place magnetic storage media near the product. • People carrying medical implants like cardiac pacemakers are advised to maintain appropriate distance from the system. They are also advised to avoid being in the vicinity of the product for a long time. Matrix ETERNITY NE System Manual...
-
Page 35: Connecting Co Trunks
ETERNITY NENX312: 3 CO Ports • ETERNITY NENX416: 4 CO Ports Use standard, good quality, twisted-wire pair telephone cables with RJ11 plugs to connect the CO ports of ETERNITY NENX to the Trunk Lines from your exchange. Matrix ETERNITY NE System Manual... -
Page 36: Connecting To Mobile Networks
When the module is seated firmly on the studs on the mainboard, secure the module with the screws. Just like mobile handsets, each Mobile Port has a unique IMEI (International Mobile Equipment Identity) number, pasted on the mobile engine. Matrix ETERNITY NE System Manual... - Page 37 Remove the rubber cap and fix the antenna holder of the Antenna wire onto the Antenna connector of the enclosure. Antenna Antenna Wire Holder • Locate the patch antenna connector on the GSM/UMTS/LTE Module. Patch Antenna Connector Matrix ETERNITY NE System Manual...
- Page 38 ETERNITY NENX. • insert the SIM into the SIM slot of ETERNITY NENX, with its contact side facing up. • push the SIM backwards into the slot. The SIM will be locked inside the slot. Matrix ETERNITY NE System Manual...
- Page 39 ETERNITY NENX supports Hot Swapping of SIM Cards. You will be able to insert/remove SIM Card/s without switching off the system. However, while removing SIM Card in Power On condition, make sure the Mobile Port is idle or else it will lead to call disconnection. Matrix ETERNITY NE System Manual...
-
Page 40: Connecting To The Voip Network
SIP Trunks are same as SIP Accounts. A SIP Account is an account you would get from your VoIP/Internet Telephony Service Pro- vider much like you would get an email account from your Internet Service Provider. Matrix ETERNITY NE System Manual... - Page 41 While several installation scenarios are possible, only three most common and most typical scenarios are depicted here. Ethernet WAN • Use the RJ45 Ethernet cable supplied for the Ethernet port of ETERNITY NENX to connect the system to the IP network, which may be Public Internet or a LAN. Matrix ETERNITY NE System Manual...
- Page 42 Broadband Router/Modem. If connecting to a Private Network (Behind a NAT Router), • Plug one end of the RJ45 Ethernet cable into the Ethernet Port of ETERNITY NENX and the other end into the LAN Switch/Hub. Matrix ETERNITY NE System Manual...
- Page 43 SIM is present in the Mobile port. • Internet Services are activated on the SIM. Wireless WAN in ETERNITY NENX is used only for making SIP Calls and not for configuring the system. Mobile WAN LAN Switch/Hub Computer Matrix ETERNITY NE System Manual...
-
Page 44: Connecting Single Line Telephones
SLT ports of ETERNITY NENX. Place the SLTs, fax machine at the desired location. Terminate the cables from the SLT ports of ETERNITY NENX on the wall jacks. Connect the SLTs, Fax machine to the wall jacks. Matrix ETERNITY NE System Manual... -
Page 45: Connecting Sip Extensions
Calls between VoIP, Public and Private Networks may be subject to Regulation in your country. You may have to configure your system to allow or restrict call traffic between networks to comply with the telecom regulations of your country. Read “Logical Parti- tion”. Matrix ETERNITY NE System Manual... - Page 46 • You may also register any SIP device—Extended IP Phone or Open SIP phone—on the public network as SIP Extension. In this case, you must configure Port Forwarding for SIP and RTP on the Router. Matrix ETERNITY NE System Manual...
- Page 47 You may also register any SIP device—Extended IP phone/ Soft clients or Open IP phone—on the public network as SIP Extension. • Wireless WAN in ETERNITY NENX is used only for making SIP Calls and not for configuring the system. Matrix ETERNITY NE System Manual...
- Page 48 Use wall plugs, if required, to fix the screws. Leave the screw heads protruding from the wall to fit into the Keyholes. • Now, mount the phone on the wall, with the screws fitting into the Keyhole slots. “Packing List” in the Appendix topic. Matrix ETERNITY NE System Manual...
- Page 49 Decide which of these positions would work for you best and accordingly attach the Foot Stand. • Connect the Handset to the Phone body. • Plug the long straightened end of the phone cord into the handset jack at the bottom of the phone marked with the handset symbol. Matrix ETERNITY NE System Manual...
- Page 50 You may also plug in a stereo headset with an RJ9 connector into the headset port at the bottom of the phone, marked with the symbol • Connect the LAN Port of SPARSH VP248 to the LAN Switch/Hub or a Router, according to your installation scenario. Matrix ETERNITY NE System Manual...
- Page 51 After loading the firmware, the phone will prompt you to change Network settings. C h a n g e N e t w o r k S e t t i n g s ? Y e s • Wait for a few seconds. Matrix ETERNITY NE System Manual...
- Page 52 C h a n g e N e t w o r k S e t t i n g s ? Y e s • When the phone is making Network discovery, downloading configuration files, attempting registration, press the Enter Key to access network settings. Matrix ETERNITY NE System Manual...
- Page 53 For PPPoE Connection Type, you must configure the PPPoE User ID and Password provided by the Internet Service Provider. If you select Static, you must assign the IP Address, Subnet Mask and Gateway Address to the phone. Matrix ETERNITY NE System Manual...
- Page 54 Internet Service Provider has not provided a Service Name, do not configure this parameter. Server Address • ETERNITY works as the Auto Configuration Server for the phone. Enter the IP Address or the Dynamic DNS Domain Name of the Ethernet Port of ETERNITY here. Default: blank. Matrix ETERNITY NE System Manual...
- Page 55 Quality of Service (QoS) on Layer2 is referred to as Class of Service (CoS) which is defined by IEEE 802.1P. Matrix ETERNITY NE System Manual...
- Page 56 Enter the 802.1x Authentication MD5 Password associated with the identity provided by your network administrator. When you change the Network Settings, the phone will restart. Viewing Network Status • In the Local Menu of the phone, place the cursor on Network Status and press the Enter key. Matrix ETERNITY NE System Manual...
- Page 57 If you want to use the DHCP Server on your LAN for assigning IP Address to the Extended IP Phone, select DHCP option 224 and Data Type as ‘String’ and program the Ethernet Port IP Address /Domain Name and SPARSH Port in the format “Ethernet IP Address: SPARSH Port” in your LAN DHCP Server. Matrix ETERNITY NE System Manual...
- Page 58 • When you mount the phone on a desk, you can attach the Foot Stand in two ways as illustrated in the following. “Packing List” in the Appendix topic. Matrix ETERNITY NE System Manual...
- Page 59 • Connect the Handset to the Phone body. • Plug the long straightened end of the phone cord into the handset jack on the left side panel of the phone marked with the handset symbol Matrix ETERNITY NE System Manual...
- Page 60 • Switch ON power supply. When you power the phone, the boot process will be initiated in the following sequence. • All keys with LED, including the Speaker key, and the Ringer LED, will glow. Matrix ETERNITY NE System Manual...
- Page 61 The Forward key move the cursor one character. • The Back key to move the cursor one character and to return from the submenu to the main menu. • The Cancel key to exit a menu. Matrix ETERNITY NE System Manual...
- Page 62 Select the Connection Type as DHCP, PPPoE or Static according to the IP Addressing scheme of your network. If you select DHCP or PPPoE, the phone will be assigned IP Address, Subnet Mask and Gateway Address, DNS Address, Server Address, automatically by the DHCP/PPPoE server. Matrix ETERNITY NE System Manual...
- Page 63 This is the password provided by your Internet Service Provider for the PPPoE User ID. If you have selected PPPoE as Connection Type, you must enter the password provided by your Internet Service provider here. Matrix ETERNITY NE System Manual...
- Page 64 Quality of Service (QoS) on Layer2 is referred to as Class of Service (CoS) which is defined by IEEE 802.1P. Matrix ETERNITY NE System Manual...
- Page 65 If you want to restrict unauthorized clients from connecting to your LAN, you need to enable 802.1x Authentication. Using EAP MD5 protocol the PC connected to the LAN port of the IP Phone is first authenticated and then it gets connected to LAN. Matrix ETERNITY NE System Manual...
- Page 66 802.1x Authentication: The 802.1x authentication status is displayed—Success, Failure, Authenticating or Disabled. • FIRM: The version of the current Firmware of the phone. • UBOOT: The UBOOT release date. • KERNEL: The KERNEL release date. Matrix ETERNITY NE System Manual...
- Page 67 Fix two screws in the holes on the wall, ensuring that they are aligned with the Keyhole Slots 1 and 2 of SPARSH VP510. The screws should protrude from the wall to fit into the Keyhole Slots. Keyhole Keyhole Slot 1 Slot 2 “Packing List” in the Appendix topic. Matrix ETERNITY NE System Manual...
- Page 68 When you mount the phone on a desk, • You can attach the Foot Stand in the following ways — at an angle of 45 degrees or 55 degrees Stand attached at 45 degree angle Matrix ETERNITY NE System Manual...
- Page 69 Connect the Headset (not supplied by Matrix). • To use a Headset (not supplied with the phone), plug any standard stereo headset with 3.5mm single connector into the headset audio jack at the bottom of the phone, marked with the symbol Matrix ETERNITY NE System Manual...
- Page 70 The phone will start loading the Extended IP Phone Firmware. It will display current firmware being loaded. • After loading the firmware, the phone will prompt you to change Network settings. • Wait for a few seconds. Matrix ETERNITY NE System Manual...
- Page 71 Accessing Network Settings You can access the Network Settings of the Extended IP Phone in any of the following stages: • During start-up, when the phone prompts you to change the network settings after loading the firmware. Matrix ETERNITY NE System Manual...
- Page 72 If you want to clear a single digit/character, move the cursor to the right of the digit/character you wish to clear. Now press the Delete key. The digit to the left of the cursor will be deleted. Matrix ETERNITY NE System Manual...
- Page 73 If you select DHCP or PPPoE as Connection Type and your Internet Service Provider provides DNS Address, select the DNS Server option Automatic. However, if your Internet Service Provider does not provide DNS Address, select Static and configure the DNS Address. Matrix ETERNITY NE System Manual...
- Page 74 Secondary Server Port • Enter the Secondary Server Port. The phone sends the request for configuration files to this port if the Primary Server fails. Valid range of the port is: 80 or 1025–65535. Default: 80. Matrix ETERNITY NE System Manual...
- Page 75 Quality of Service (QoS) on Layer2 is referred to as Class of Service (CoS) which is defined by IEEE 802.1P. Matrix ETERNITY NE System Manual...
- Page 76 GW: The current Gateway IP Address assigned to the phone. • DNS: The Domain Name Server address assigned to the phone. • Active Server: This displays the Server that is active — Primary, Secondary — with which the phone is currently registered. Matrix ETERNITY NE System Manual...
- Page 77 Once you have installed SPARSH VP510 with ETERNITY, you can install the DSS532 by following the steps given below: • Unpack the box and verify the package contents • Four clamps are provided with the phone — 2 DSS-Phone Clamps and 2 DSS-DSS Clamp. “Packing List” in the Appendix topic. Matrix ETERNITY NE System Manual...
- Page 78 Turn the phone upside down on the table and place the inverted DSS532 adjacent to it. • To attach the DSS532 with the phone, place the DSS Extender as illustrated below. • Insert the hooks on the Extender into the slots provided on the phone and the DSS532. Matrix ETERNITY NE System Manual...
- Page 79 Now attach the clamps. To do so, • Remove the screws to attach the clamps. • Place the DSS-Phone Clamps between the DSS532 and the phone. • Insert the screws back to fix the clamps. Matrix ETERNITY NE System Manual...
- Page 80 Remove the Foot Stand • Remove the Foot Stand of attached DSS532. To do, • Firmly slide the Foot Stand of the attached DSS532 downward to unlock. • Now, slide down the attached DSS Extender in downward direction. Matrix ETERNITY NE System Manual...
- Page 81 Insert the hooks on the Extender into the slots provided on both the DSS532. • Firmly slide both the DSS Extenders upward consecutively (attach the second extender first followed by the existing one attached to the phone) and lock them in place. Matrix ETERNITY NE System Manual...
- Page 82 Connect the second DSS532 to the existing assembly • Plug one end of the RJ11 Cable into the OUT Port of the existing DSS532 (already connected with the phone) and the other end into the IN Port of the second DSS532. Matrix ETERNITY NE System Manual...
- Page 83 You must configure the necessary parameters in ETERNITY so that SPARSH VP330 can register as a SIP Extension. For instructions, see “SIP Extensions”. Now, follow the steps described below to install SPARSH VP330. • Unpack the SPARSH VP330 box and verify package contents “Packing List” in the Appendix topic. Matrix ETERNITY NE System Manual...
- Page 84 Push the handset wall mount tab upwards to remove it from the slot. Rotate it 180 degrees clockwise and push it downwards into the slot. • When you mount the phone on a desk, you can attach the Foot Stand in two ways at 35° Angle or at 50° Angle. Matrix ETERNITY NE System Manual...
- Page 85 You may plug a headset with an RJ9 connector into the headset port on the side panel of the phone, marked with the symbol Matrix ETERNITY NE System Manual...
- Page 86 On getting the IP Address and Server Address, the phone initiates Auto Configuration to download the configuration files from ETERNITY NENX. • On successful download of all configuration files, the phone attempts to register with ETERNITY NENX. Matrix ETERNITY NE System Manual...
- Page 87 It is recommended to use only the Matrix original Camera, supplied with the IP Phone for video calling. The use of any third-party camera may cause damage to the phone. Damages to the phone caused by using third-party camera is not covered by Matrix warranty. Matrix ETERNITY NE System Manual...
- Page 88 Attaching the stand Adjusting the angle of the touch screen. Attaching the optional wall mounting bracket Matrix ETERNITY NE System Manual...
- Page 89 Connect the optional USB Flash drive. Connect the network and power. There are two options to connect the power and the network. • AC power • Power over Ethernet (PoE) AC Power To connect the AC power: Matrix ETERNITY NE System Manual...
- Page 90 After the IP Phone is assembled and connected to the power supply, it automatically begins the initialization process. During this process, the IP Phone displays the start up screen “Welcome Initializing…please wait”. Once the IP Phone is initialized, it displays two different phone modes: • Standard SIP • Extended SIP Matrix ETERNITY NE System Manual...
- Page 91 On successful download of all configuration files, the phone attempts to register with ETERNITY NENX. • On successful registration, the Home screen appears. The phone will register successfully, only if the SIP Extension parameters in ETERNITY NENX have been correctly configured as per your installation scenario. Matrix ETERNITY NE System Manual...
-
Page 92: Installing The Voice Mail System
If you have no other modules to install, replace the top cover and secure the cover with the screws. • Connect a computer to the Ethernet Port of ETERNITY NENX with the Ethernet cable supplied for the port. • Open a Web browser on the computer to access the embedded Web server, Jeeves. Matrix ETERNITY NE System Manual... - Page 93 • Insert the Pen Drive in the USB port of your computer. • Click My Computer. • Right-click the removable disk to which you have connected your Pen Drive, in this example Removable Disk (F:). Matrix ETERNITY NE System Manual...
- Page 94 • In the shortcut menu, select Format. • The Format Removable Disk (F:) options appear on your screen. In File Format select FAT32. • Click Start to begin the formatting process. Matrix ETERNITY NE System Manual...
- Page 95 When the formatting process is complete, the message “Format Complete” will appear on your screen. • Click OK to close the formatting window. • Now, copy the contents of the factory fitted Pen Drive onto the new Pen Drive. Matrix ETERNITY NE System Manual...
-
Page 96: Starting Up Eternity Nenx
If you get Recovery Mode LED status, contact Matrix Support Team. • Mobile Ports take about 3 minutes to get registered with the network. You may now access the web-based programming tool, Jeeves that is, the SARVAM UCS SOHO Application and configure the same. Matrix ETERNITY NE System Manual... -
Page 97: Configuring Sarvam Ucs
Ethernet Port of ETERNITY NENX must be connected with a stand-alone PC or in a LAN. • a web-browser, either Internet Explorer 7 or later or Mozilla Firefox 3.5.1 or later, must be installed on the Matrix ETERNITY NE System Manual... - Page 98 Click Login. Before you start configuring the system, if you wish to view or download the ETERNITY NE Quick Start or any other related documents, you can click or scan the QR Code present on the login page of Jeeves.
- Page 99 0 to 9. You cannot set 1234 as the New SE Extension Password as it is the default SE Extension Password. • In Confirm New Password, re-enter the new password to confirm. Matrix ETERNITY NE System Manual...
- Page 100 Jeeves. While the Quick Installation Wizard provides a fast-track way for system configuration, detailed and advanced configuration of the system can be done only from the Basic Settings and Advanced Settings links of the Jeeves. Matrix ETERNITY NE System Manual...
- Page 101 SE mode. To log into the SA Mode, • Login as System Engineer. The Welcome page opens. • To set the password for SA Web Login and SA Extension Login, click on the link. Matrix ETERNITY NE System Manual...
- Page 102 6 characters to a maximum of 12 characters. • include atleast one upper-case, one lower-case, one number and one special character. • In Confirm New Password, re-enter the new password to confirm. • Click Submit. Set SA Password for Programming from Extensions Matrix ETERNITY NE System Manual...
- Page 103 • if you enter a wrong password for five times consecutively within 10 minutes, the system will block the source IP Address for 10 minutes. This activity will be logged in the “System Activity Log”. Matrix ETERNITY NE System Manual...
- Page 104 This default local language will be applied for every login session, unless you select another language as the default local language. • The default local language set on selecting the Region can also be changed from the “System Parameters” page of Jeeves. Matrix ETERNITY NE System Manual...
-
Page 105: System Configuration Using A Telephone
SE password. In case the System Engineer forgets the password, it can be restored to the default password and changed again. See “Restoring Default SE Password” for instructions on restoring the default SE password. Matrix ETERNITY NE System Manual... - Page 106 The Prefix string in the SA Command (1072) can be changed by the System Engineer. However, the command strings of the SA Command (001 in the above example) cannot be changed. Matrix ETERNITY NE System Manual...
- Page 107 You get a confirmation Tone. • Dial SA Command strings: 1072-Feature Access Code. • You get a confirmation tone and text message on the phone display. • Replace handset to exit SA mode. • Dial *1#92 Matrix ETERNITY NE System Manual...
- Page 108 To do this, • Dial 1#91-SE Password to enter SE mode from a SLT. • Dial 2188 to log out all users. • Press Enter key to save setting. Matrix ETERNITY NE System Manual...
-
Page 109: Basic Settings
“System Configuration using the Web-based GUI” for instructions. The Login page will open. • Login as System Engineer. On successful login, you reach the Home page. The Basic Settings, Advanced Settings, Maintenance and Status links appear on the left pane. Matrix ETERNITY NE System Manual... - Page 110 Network Parameters • Security Settings There are two ways to do the basic system configuration: • using the Wizard. A special configuration Wizard will lead you logically, step-by-step through the configuration of the parameters listed above. Matrix ETERNITY NE System Manual...
- Page 111 . The changes you made before you exit will be saved. Using Basic Settings Links You can choose the parameters you want to configure, and the order in which you want to configure. To do this, Matrix ETERNITY NE System Manual...
- Page 112 Copy: Click to copy the parameters under a specific link of a page to the same link under any other page. Settings: allows you to configure the settings of a parameter further. More link: displays all additional parameters on the page. Logout: allows you to exit Jeeves. Matrix ETERNITY NE System Manual...
- Page 113 Do not allow simultaneous login and system configuration using the Basic Settings pages. As the system updates configuration changes last submitted, configuration changes made by one person may be overwritten by those made by another. Matrix ETERNITY NE System Manual...
-
Page 114: Region
India is selected as the default Region. So, if you are installing the System in a country other than India, change the Region. To configure, • Click Region. • Select the Region (the country) where the system is installed from the list. • Click Submit. Matrix ETERNITY NE System Manual... -
Page 115: Pre-Requisites
Customer Name. You can assign Customer Name also on the “System Parameters” page. If you have entered the Customer Name on this page, the same Name will appear on the System Parameters page. Matrix ETERNITY NE System Manual... - Page 116 Define the Number of Ports Used for each Port Type: CO, SLT, Mobile, SIP from the respective combo boxes. For example, if you want 4 CO Trunks, select the same numbers from the combo box. If you want to use voice mail, select Yes in the respective combo box. • Click Submit. Matrix ETERNITY NE System Manual...
-
Page 117: Extension And Feature Codes
Feature access codes are short digit codes used to invoke a feature or function. See “Access Codes”. Here, the model type is ETERNITY NENXIP50. For ETERNITY NENX312 and ETERNITY NENX416, refer to “Technical Specifica- tions of ETERNITY NENX”. Matrix ETERNITY NE System Manual... - Page 118 If you assign the same Access Code to more than one feature, Jeeves will pop up a ‘Total Conflict’ message and ask you to resolve the conflicting codes. It will not allow you to submit until you have resolved the conflict. Matrix ETERNITY NE System Manual...
-
Page 119: Trunks
The name may consist of a maximum of 18 alphanumeric characters. • Configure the desired trunk by clicking the respective link on this page. For instructions, see “CO Trunks”, “Mobile Trunks”, “SIP Trunks”. • Click Submit. Matrix ETERNITY NE System Manual... -
Page 120: Time Tables
Operator by default), and customized Time Tables - 1, 2, and 3 which you can set to your preferences and apply to trunks and extensions. You can assign different Time Tables to different trunks and extensions. Refer the topic “Day Night Mode” to know more. Matrix ETERNITY NE System Manual... - Page 121 Define the Working days and the Day Time and Break Hours - start time and end time - for each Working day. • Click Submit. If you want to use the other customized time table, click their tabs and follow the same instructions as above. Matrix ETERNITY NE System Manual...
-
Page 122: Operator
(Non-working hours), calls may be landed on the extension of the Security Personnel. To meet this requirement, SARVAM UCS allows you to configure the Operator for the Day (Working hours), Break hours and for the Night (Non-working hours). • Click Operator. Matrix ETERNITY NE System Manual... - Page 123 You may enable this check box, if required. The extension next to the one that received the previous call. Matrix ETERNITY NE System Manual...
- Page 124 Matrix ETERNITY NE System Manual...
-
Page 125: Slt Extensions
To configure another SLT extension, click the SLT Extension name (number) tab. To save the settings, click Submit. To assign default values to all the parameters of the SLT extension, click Default. ETERNITY NENX312 and ETERNITY NENX416 supports 12 and 16 SLT Ports respectively. Matrix ETERNITY NE System Manual... - Page 126 Define the Class of Service for the SLT extension for Day time and Night/Break time. • To allow a feature, select the check box of the feature. • To deny a feature, clear the check box. • Click Submit. “Class of Service (CoS)” to know more. Matrix ETERNITY NE System Manual...
- Page 127 Select the call privilege for Calls allowed for Lock Level 1: No Calls, Local Calls, Regional Calls, National Calls, International Calls, Limited Calls, All Calls. The Call Privilege types are: No Calls, Local Calls, Regional Calls, National Calls, International Calls and Limited Calls. Matrix ETERNITY NE System Manual...
- Page 128 • Click Select Trunks for Outgoing Calls to expand. • Select Trunks allowed for dialing ‘0’. The outgoing call will be routed through the selected trunks when the extension user dials TAC ‘0’. Matrix ETERNITY NE System Manual...
- Page 129 The first call through the first trunk, the second through the second, the third through the third trunk, and so forth. Thus each new call is routed through the trunk next to the one that routed the previous outgoing call. Matrix ETERNITY NE System Manual...
- Page 130 Configure the Least Cost Routing method, by clicking Settings icon. Similarly, you will be able to select outgoing trunks for Trunk Access Codes 3, 4, 5 and 6, if you have assigned access codes to them in “Extension and Feature Codes”. • Click Submit. Matrix ETERNITY NE System Manual...
- Page 131 SLT port. SARVAM UCS supports 3 signaling protocols for CLI on the SLT port: DTMF, FSK-V.23, and FSK- BellCore. Default: DTMF. Select None to disable CLIP on the SLT port. Matrix ETERNITY NE System Manual...
- Page 132 The longer the Loop Length of the SLT port, the greater the likelihood of current dissipation, affecting speech quality of the tele- phone instrument connected to the SLT port. Change the Loop Current according to the Loop Length of the SLT instrument con- nected to the port. Matrix ETERNITY NE System Manual...
- Page 133 This signal can be generated on the SLT port to indicate to the PCO machine/Billing equip- ment connected to this port to consider the call as disconnected and stop billing. Thus, Disconnect Signaling on the SLT port helps prevent excessive billing. Matrix ETERNITY NE System Manual...
- Page 134 SLT when the FXS Port is connected to any Mobile Port of the system during an incoming or outgoing call. Valid Range for Tx Gain: +6dB to -12dB and Rx Gain +6dB to -12dB. Default: 0 dB. • Click Submit. Matrix ETERNITY NE System Manual...
- Page 135 Received by this extension: the system will store only incoming calls from other extensions. • Never: the system will not store internal calls. • To store details of incoming calls from external numbers, select Store Incoming Calls. Default: selected. Matrix ETERNITY NE System Manual...
- Page 136 ‘Held Party’ or the CLI of the ‘Transferring Party’ to the transfer destination extension while the call is being transferred. See the feature description for “Calling Line Identification and Presentation (CLIP)” to know more. • Click Caller ID on Call Transfer to expand. • Select the radio button of the desired option: Matrix ETERNITY NE System Manual...
- Page 137 Walk-Out automatically on completion of call: Select this option, if you want to assign One-Call per Walk-In to the extension. • Walk-Out on user request: Select this option, if you want to assign Walk-In until Logout to the extension. • Click Submit. Call Forward • Click Call Forward to expand. Matrix ETERNITY NE System Manual...
- Page 138 Select the Destination to which the calls are to be forwarded for Preset Call Forward - Day. Follow the instructions in steps 4 and 5 to configure Preset Call Forward - Break and Preset Call Forward - Night. “Preset Call Forward” for more details. • Click Submit Matrix ETERNITY NE System Manual...
- Page 139 Click the Settings icon. The page opens in a new window, displaying the parameters of the profile you selected for the extension. This icon does not appear when Call Taping is OFF. • In the new window, Matrix ETERNITY NE System Manual...
- Page 140 CDC Timer. Default: Disabled. • In the Apply CDC for calls matching with numbers column, type the external numbers on which you want to apply CDC. You can enter as many as 99 numbers. Matrix ETERNITY NE System Manual...
- Page 141 • Voice Message: The extension user is played a message recorded in the Voice Module on answering the alarm call. • Music-on-Hold: The extension user is played music-on-hold on answering the alarm call. Matrix ETERNITY NE System Manual...
- Page 142 Follow the same steps as described above to configure another SLT Extension. You may use the Copy button at the bottom of the page to apply the same SLT Extension settings you configured for the current extension to another SLT Extension. To do so, Matrix ETERNITY NE System Manual...
- Page 143 SLT Extensions. You may also copy the parameter values of a specific link under current SLT Extension to the same link under any other extension page. To do so, Matrix ETERNITY NE System Manual...
- Page 144 Select the Copy to/All check box, to apply the link settings to the same link under all other Extensions. You may also apply the link settings to the desired Extensions only, by selecting the respective check boxes. • Click OK. Matrix ETERNITY NE System Manual...
-
Page 145: Sip Extensions
For a list of IP phones on which various features of SARVAM UCS have been tested, see “SARVAM UCS Features tested on IP Phones of different Brands” in the Appendix. The number of SIP extensions you have specified on the “Pre-requisites” page will be displayed on this page. Matrix ETERNITY NE System Manual... - Page 146 Collapse: Click to collapse a link. Hides all parameters under the link. Copy: Click to copy the parameters under a specific link of a page to the same link under any other extension page. Settings: Click to configure the settings of a parameter further. Matrix ETERNITY NE System Manual...
- Page 147 “Security Settings”. • Enter the HTTP Authentication Password (Third Party IP-Phone) to authenticate the Open SIP Phone connected to the SARVAM UCS. All ASCII characters (except Percentage %, Hash #, Equal to =, Plus +, Matrix ETERNITY NE System Manual...
- Page 148 “Auto Sign-In Parameters”. • The Mail Status will display either sent, failed or sending. • Click Submit. These parameters are used by the SMS Server application. To know more about this feature, see “SMS Server”. Matrix ETERNITY NE System Manual...
- Page 149 If you have not configured the allowed and denied number list for the Type of Calls you selected as Toll Control, or if you want to add to the existing list, you may do it now. Matrix ETERNITY NE System Manual...
- Page 150 Configure the Allowed and Denied Numbers for Local, Regional, National, International, and Limited Calls. • Click Submit. The Call Privilege types are: No Calls, Local Calls, Regional Calls, National Calls, International Calls and Limited Calls. Matrix ETERNITY NE System Manual...
- Page 151 Press the ctrl key and click the left mouse button to select multiple trunks. • You may change the sequence of the trunks you selected, if required, using the Up and Down arrow buttons on the right display box. Matrix ETERNITY NE System Manual...
- Page 152 The first call through the first trunk, the second through the second, the third through the third trunk, and so forth. Thus each new call is routed through the trunk next to the one that routed the previous outgoing call. Matrix ETERNITY NE System Manual...
- Page 153 “Extension and Feature Codes”. • Click Submit. VoIP • Click VoIP to expand. • Keep the Authenticate INVITE check box enabled for Authentication of INVITE Request in SIP Messages. Default: Enabled. Matrix ETERNITY NE System Manual...
- Page 154 Vocoders are the various voice codecs used to compress the data in RTP packets for optimum use of bandwidth and for ensuring voice quality. You can set 7 Vocoder options in the order of preference. Matrix ETERNITY NE System Manual...
- Page 155 SIP - Voice Module (Tx-Gain and Rx-Gain): Configure the Gain Settings that you want the system to apply on the SIP Extension when the system plays Voice Module to the SIP Extension user. Valid Range for Tx Gain: -31dB to +31dB and Rx Gain -31dB to +31dB. Default: 0dB. Matrix ETERNITY NE System Manual...
- Page 156 Select Echo Cancellation Tail Length (msec) for Extensions and Digital Trunks. It may be 32, 64, or 128 milliseconds. Default: 32 milliseconds. • Configure Jitter Buffer to cut down on packet delays and improve voice quality. Matrix ETERNITY NE System Manual...
- Page 157 When Jitter Buffer type is Dynamic, the Minimum Delay specifies the minimum time for which the Dynamic Jitter Buffer will store the received voice packet before sending it to the DSP for voice processing. You can send/receive Fax, by connecting a fax machine to the SLT port of SARVAM UCS. Matrix ETERNITY NE System Manual...
- Page 158 Through FAX Rx Gain (SIP to Digital Trunk Call). This parameter has relevance when you select 'Pass Through' as the Fax Type. • Select dB level for Data Gain, from -31 to 31. Default: -11 dB. Matrix ETERNITY NE System Manual...
- Page 159 Select the Intercept Destination for DND during Day. You may select: • None • any SLT Extension • any SIP Extension • Voicemail Default: None Similarly, you may select Intercept Destination for DND during Break and Intercept Destination for DND during Night. SMDR Storage Matrix ETERNITY NE System Manual...
- Page 160 International Calls • All Calls Default: No Calls. Click the Settings icon to view the Toll Control - Allowed-Denied Numbers page. This icon does not appear when you select No Calls or All Calls option. Matrix ETERNITY NE System Manual...
- Page 161 Walk-Out automatically on completion of call: Select this option, if you want to assign One-Call per Walk-In to the extension. • Walk-Out on user request: Select this option, if you want to assign Walk-In until Logout to the extension. • Click Submit. Matrix ETERNITY NE System Manual...
- Page 162 Select the Destination to which the calls are to be forwarded for Preset Call Forward - Day. Follow the instructions in steps 4 and 5 to configure Preset Call Forward - Break and Preset Call Forward - Night. “Preset Call Forward” for more details. Matrix ETERNITY NE System Manual...
- Page 163 MATRIX VARTA WIN200 UC Client” • If you have connected Open SIP Phones or SIP enabled devices as SIP Extensions, for configuration instructions, see “Configuring Open SIP Phones”. More Features • Click More... to expand. Matrix ETERNITY NE System Manual...
- Page 164 Apply as per profile 1 • Apply as per profile 2 • Apply as per profile 3 • Apply as per profile 4 If you do not want to apply Call Taping, select OFF. Default: OFF. Matrix ETERNITY NE System Manual...
- Page 165 Enable Apply CDC for Incoming Calls received from trunk, if CDC is to be applied on incoming external calls. Default: Disabled. • Enable Apply CDC for Outgoing Calls made from the trunk, if CDC is to be applied to outgoing external calls. Default: Disabled. Matrix ETERNITY NE System Manual...
- Page 166 Working days, and the start and end time of the Working hours and Break hours for each working day. “Time Tables” to know more. Alarm Notification Type To configure this parameter and for the feature description, see “Alarms” to know more. Matrix ETERNITY NE System Manual...
- Page 167 Account Code. To know more, see “Account Codes”. • Select the check box Do not allow Outgoing Calls without Account Code (Force Account Code). • Click Submit. Applicable only for SPARSH VP310 AND SPARSH VP510. Applicable only for SPARSH VP510. Matrix ETERNITY NE System Manual...
- Page 168 You may use the Copy button at the bottom of the page to apply the same SIP Extension settings you configured for the current extension to another SIP Extension. To do so, • Click Copy. Matrix ETERNITY NE System Manual...
- Page 169 SIP Extensions. You may also copy the parameter values of a specific link under current SIP Extension to the same link under any other extension page. To do so, Matrix ETERNITY NE System Manual...
- Page 170 Select the Copy to/All check box, to apply the link settings to the same link under all other Extensions. You may also apply the link settings to the desired Extensions only, by selecting the respective check boxes. • Click OK. Matrix ETERNITY NE System Manual...
-
Page 171: Configuring Matrix Sparsh Vp248
“Configuring Matrix VARTA ADR100/AMP100 UC Clients”. If you have registered MATRIX VARTA WIN200 UC Client in any of the locations, refer to “Configuring MATRIX VARTA WIN200 UC Client”. • Click Device Settings - Location 1 to expand. Matrix ETERNITY NE System Manual... - Page 172 No two devices can have similar MAC address and thus it uniquely identifies your phone. MAC address is assigned as per the IANA standard. The MAC Address of the phone will be used as source MAC address on all Ethernet frames. Matrix ETERNITY NE System Manual...
- Page 173 Select a Ringer Mode for the phone from the four options: • Ring immediately (it rings immediately as a fresh calls lands on the phone). • Ring if idle (rings only if the phone is idle). Matrix ETERNITY NE System Manual...
- Page 174 Headset Receive Volume to the desired level, from 0 to 7. Default: 4. • To change the Transmit Gain of the Speakerphone MIC Volume, set Speaker Transmit Volume to the desired level, from 0 to 7. Default: 4. Matrix ETERNITY NE System Manual...
- Page 175 SIP INVITE Timer (sec): This is the time in seconds that the phone waits for a response from the called party after sending INVITE message. This timer starts after sending INVITE message to the called party and stops on receipt of the provisional response or the final response or when the user Matrix ETERNITY NE System Manual...
- Page 176 You can customize the DSS keys of the Extended IP Phone, to match the requirements of the extension user. To customize the keys of the Extended IP Phone registered at this location, • Click Key Settings link. Matrix ETERNITY NE System Manual...
- Page 177 The default key map of the Extended IP Phone appears on your screen. • Click the key you want to configure. For example, CO3. A dialog box opens, with the options for the Functions to be Performed by the key. Matrix ETERNITY NE System Manual...
- Page 178 In the Select Offset drop down list, all the features that can be assigned to keys are listed. • Select Operator from the list of features in the Select Offset box. • Click OK. The box closes. Matrix ETERNITY NE System Manual...
- Page 179 You can reinstate default key assignment any time, by clicking the Default button at the bottom of the window. • When you complete assigning functions to keys, close the window. • If you assign/re-assign functions to the following keys, the Phone will restart: • Speaker • Headset Matrix ETERNITY NE System Manual...
- Page 180 • The SE Password of SARVAM UCS is changed • You restart the System • Set the System to Default • The Network Parameters are changed • Specific parameters in the VoIP page are changed Matrix ETERNITY NE System Manual...
-
Page 181: Configuring Matrix Sparsh Vp310
“Configuring Matrix VARTA ADR100/AMP100 UC Clients”. If you have registered MATRIX VARTA WIN200 UC Client in any of the locations, refer to “Configuring MATRIX VARTA WIN200 UC Client”. • Click Device Settings - Location 1 to expand. Matrix ETERNITY NE System Manual... - Page 182 No two devices can have similar MAC address and thus it uniquely identifies your phone. MAC address is assigned as per the IANA standard. The MAC Address of the phone will be used as source MAC address on all Ethernet frames. Matrix ETERNITY NE System Manual...
- Page 183 The SA can change the Language by logging into the SA Jeeves. • Select a Ringer Mode for the phone from the four options: • Ring immediately (it rings immediately as a fresh calls lands on the phone). Matrix ETERNITY NE System Manual...
- Page 184 VP310, set the Headset Receive Volume Level to the desired level, from 0 to 7. Default: 4. • To change the Transmit Gain of the Speakerphone MIC Volume, set Speaker Transmit Volume Level to the desired level, from 0 to 7. Default: 4. Matrix ETERNITY NE System Manual...
- Page 185 If the IP phone is connected behind a NAT router, configure NAT Keep Alive. • Select the Enable NAT Keep Alive check box to send Keep Alive messages periodically to refresh the binding in the NAT router. Default: Disabled. Matrix ETERNITY NE System Manual...
- Page 186 Client will send only the debug messages for the selected level to the remote server on the IP network. For example, if the debug log of 'Call's is required, you can select this option, and disable all others. • Click Submit. Matrix ETERNITY NE System Manual...
- Page 187 To customize the keys of the Extended IP Phone registered at this location, • Click Key Settings link. The default key map of the Extended IP Phone appears on your screen. • Click the key you want to configure. For example, None. Matrix ETERNITY NE System Manual...
- Page 188 The Operator function is a Feature, so select the option Feature from the Select Function Type list box. From the Select Offset drop down list, all the features that can be assigned to keys are listed. • Select Operator from the list of features in the Select Offset box. • Click OK. Matrix ETERNITY NE System Manual...
- Page 189 Click OK, each time you select a Function Type and Offset in the dialog box. You can reinstate default key assignment any time, by clicking the Default button at the bottom of the window. • When you complete assigning functions to keys, close the window. Matrix ETERNITY NE System Manual...
- Page 190 • The SE Password of SARVAM UCS is changed • You restart the System • Set the System to Default • The Network Parameters are changed • Specific parameters in the VoIP page are changed Matrix ETERNITY NE System Manual...
-
Page 191: Configuring Matrix Sparsh Vp330
If you have registered MATRIX VARTA WIN200 UC Client in any of the locations, refer to “Configuring MATRIX VARTA WIN200 UC Client”. If you want to use more than one SPARSH VP330 Phones as a SIP Extension, configure their settings as Location 1, Location 2 and Location 3. Matrix ETERNITY NE System Manual... - Page 192 No two devices can have similar MAC address and thus it uniquely identifies your phone. MAC address is assigned as per the IANA standard. The MAC Address of the phone will be used as source MAC address on all Ethernet frames. Matrix ETERNITY NE System Manual...
- Page 193 If you select TLS, make sure the SIP Over TLS is selected in VoIP Port Parameters. • For secure conversations over SIP, select the Enable SRTP? check box. The SIP messages will be transported over SRTP only. • Define RTP Port: Matrix ETERNITY NE System Manual...
- Page 194 Registration request, etc. The range of the General Request Timer is 10-60 seconds. Default: 20 seconds. • Click Submit. Phone Key Settings • To personalize the key map of the SPARSH VP330, click the Key Settings link. Matrix ETERNITY NE System Manual...
- Page 195 • The key map of the Extended Phone opens in a new window on your screen. • Click the key you want to configure. For example, SLT 1. Matrix ETERNITY NE System Manual...
- Page 196 The Operator function is a Feature, so select the option Feature from the Select Function Type list box. From the Select Offset drop down list, all the features that can be assigned to keys are listed. • Select Operator from the list of features in the Select Offset box. • Click OK. Matrix ETERNITY NE System Manual...
- Page 197 Click OK, each time you select a Function Type and Offset in the dialog box. You can reinstate default key assignment any time, by clicking the Default button at the bottom of the window. • When you complete assigning functions to keys, close the window. Matrix ETERNITY NE System Manual...
- Page 198 • Enable Device • Device Type • Phone Settings • Language • Transport Mode • Enable SRTP? • Call Progress Tone • Date and Time • Apply Daylight Saving Time? • Quality of Service (QoS) Matrix ETERNITY NE System Manual...
- Page 199 • The SE Password of SARVAM UCS is changed • You restart the System • Set the System to Default • The Network Parameters are changed • Specific parameters in the VoIP page are changed Matrix ETERNITY NE System Manual...
-
Page 200: Configuring Matrix Sparsh Vp510
“Configuring Matrix VARTA ADR100/AMP100 UC Clients”. If you have registered MATRIX VARTA WIN200 UC Client in any of the locations, refer to “Configuring MATRIX VARTA WIN200 UC Client”. • Click Device Settings - Location 1 to expand. Matrix ETERNITY NE System Manual... - Page 201 No two devices can have similar MAC address and thus it uniquely identifies your phone. MAC address is assigned as per the IANA standard. The MAC Address of the phone will be used as source MAC address on all Ethernet frames. Matrix ETERNITY NE System Manual...
- Page 202 • SIP Extension users can change the language by accessing and navigating through the phone menu. • The SA can change the Language by logging into the SA Jeeves. Matrix ETERNITY NE System Manual...
- Page 203 VP510, set the Headset Transmit Volume Level to the desired level, from 0 to 7. Default: 4. • To increase/decrease the volume of outgoing speech (Receive Gain) on the headset of the SPARSH VP510, set the Headset Receive Volume Level to the desired level, from 0 to 7. Default: 4. Matrix ETERNITY NE System Manual...
- Page 204 RTP packets to the remote peer. The valid range for this port is 1025-65278. Default: 8000. • Set the Quality of Service (QoS) for SIP signaling as: • SIP DiffServe/ToS. Valid range is 00 to 63. Default: 26. Matrix ETERNITY NE System Manual...
- Page 205 Syslog uses the UDP as transport protocol and listens on the port 514 (the default listening port). • Select Debug Levels from these options, by selecting the respective check box: • • System • Hardware • Call Matrix ETERNITY NE System Manual...
- Page 206 To customize the keys of the Extended IP Phone registered at this location, • Click Key Settings link. The default key map of the Extended IP Phone appears on your screen. • Click the key you want to configure. For example, CO4. Matrix ETERNITY NE System Manual...
- Page 207 The Operator function is a Feature, so select the option Feature from the Select Function Type list box. From the Select Offset drop down list, all the features that can be assigned to keys are listed. • Select Operator from the list of features in the Select Offset box. • Click OK. Matrix ETERNITY NE System Manual...
- Page 208 You can reinstate default key assignment any time, by clicking the Default button at the bottom of the window. • When you complete assigning functions to keys, close the window. • If you assign/re-assign functions to the following keys, the Phone will restart: • Speaker • Headset Matrix ETERNITY NE System Manual...
- Page 209 Port No displays the software port number as well as the Location, for example: SIP Extension -1 - Location - 1. • Click ADD DSS. • The default key map of DSS532 appears on your screen. Matrix ETERNITY NE System Manual...
- Page 210 When you change any of the parameters listed below in the SIP Extension at Location 1, 2, 3, the phone will restart automatically, if registered. • Enable SIP Extension • SIP ID • Authentication ID Matrix ETERNITY NE System Manual...
- Page 211 • The SE Password of SARVAM UCS is changed • You restart the System • Set the System to Default • The Network Parameters are changed • Specific parameters in the VoIP page are changed Matrix ETERNITY NE System Manual...
-
Page 212: Configuring Matrix Extended Sparsh Vp710
“Configuring Matrix VARTA ADR100/AMP100 UC Clients”. If you have registered MATRIX VARTA WIN200 UC Client in any of the locations, refer to “Configuring MATRIX VARTA WIN200 UC Client”. • Click Device Settings - Location 1 to expand. Matrix ETERNITY NE System Manual... - Page 213 No two devices can have similar MAC address and thus it uniquely identifies your phone. MAC address is assigned as per the IANA standard. The MAC Address of the phone will be used as source MAC address on all Ethernet frames. Matrix ETERNITY NE System Manual...
- Page 214 If you want Extended SPARSH VP710 users to send SMS to any extension user as well as receive IM from any extension user, select the Enable SMS Over IP check box. For detailed information, see “SMS over IP” Matrix ETERNITY NE System Manual...
- Page 215 001 000 001 010 001 100 001 110 010 000 010 010 010 100 010 110 011 000 011 010 011 100 011 110 100 000 100 010 100 100 100 110 101 000 101 110 Matrix ETERNITY NE System Manual...
- Page 216 Matrix Extended IP Phone at the other two locations. When you change any of the parameters listed below in the SIP Extension at Location 1, 2, 3, the phone will restart automatically, if registered. • Enable SIP Extension • SIP ID Matrix ETERNITY NE System Manual...
- Page 217 • The SE Password of SARVAM UCS is changed • You restart the System • Set the System to Default • The Network Parameters are changed • Specific parameters in the VoIP page are changed Matrix ETERNITY NE System Manual...
-
Page 218: Configuring Matrix Varta Win200 Uc Client
If you have connected Extended SPARSH VP710 at any of the locations, refer to “Configuring Matrix Extended SPARSH VP710”. If you have registered Matrix VARTA ADR100 and VARTA AMP100 Mobile UC Clients in any of the locations, refer “Configuring Matrix VARTA ADR100/AMP100 UC Clients”. Matrix ETERNITY NE System Manual... - Page 219 If you want the UC Client to register using the WAN network, select Use Ethernet IP Address as Registrar Server Address. • If the UC Client is in the Global Network and SARVAM UCS is connected to Internet over Mobile WAN, select Use Mobile Port IP Address as Registrar Server Address. Matrix ETERNITY NE System Manual...
- Page 220 Video DiffServe/ToS: The system sends all the Video packets with this QoS setting. This field defines the priority bits for Video packet. It also improves the video quality.The Valid DiffServe range is from 00- 63, default: 46. Matrix ETERNITY NE System Manual...
- Page 221 Select the Enable NAT Keep Alive check box, to send Keep Alive messages periodically to refresh the binding in the NAT router. Default: Disabled. • Define as Interval (sec), the time period, from 001 to 9999 seconds, after which the phone should send Keep Alive message. Default: 120 seconds. Matrix ETERNITY NE System Manual...
- Page 222 RTP Listening Port • SMS over IP • NAT Keep Alive • SIP Timers • Class of Service • Trunk Access Code • The SE Password of SARVAM UCS is changed • You restart the System Matrix ETERNITY NE System Manual...
- Page 223 • Set the System to Default • The Network Parameters are changed • Specific parameters in the VoIP page are changed Matrix ETERNITY NE System Manual...
-
Page 224: Configuring Matrix Varta Adr100/Amp100 Uc Clients
For detailed product information and operation instructions, refer to the MATRIX VARTA ADR100 User Guide for Mobile/Tablet. SARVAM UCS supports only IPv4 Addresses for registering Mobile UC Clients. Matrix ETERNITY NE System Manual... - Page 225 If you have connected Extended SPARSH VP710 at any of the locations, refer to “Configuring Matrix Extended SPARSH VP710”. If you have registered MATRIX VARTA WIN200 UC Client in any of the locations, refer to “Configuring MATRIX VARTA WIN200 UC Client”. Matrix ETERNITY NE System Manual...
- Page 226 If you want the application to register using the LAN/WAN network, select Use Ethernet Port IP Address as the Internal Registrar Server Address. IMEI Number is the unique identification number of the GSM engine used in the Mobile handset. Matrix ETERNITY NE System Manual...
- Page 227 If you want Mobile Client users to send SMS to any extension user as well as receive IM from any extension user, select the Enable SMS over IP check box. For detailed information, see “SMS over IP”. • Define RTP Port: Matrix ETERNITY NE System Manual...
- Page 228 001 010 001 100 001 110 010 000 010 010 010 100 010 110 011 000 011 010 011 100 011 110 100 000 100 010 100 100 100 110 101 000 101 110 110 000 Matrix ETERNITY NE System Manual...
- Page 229 SIP ID • Name • Authentication ID • Authentication Password • Authenticate INVITE • Enable Device • Device Type • Internal Registrar Server Address • External Registrar Server Address • MAC Address/IMEI/ESN Number • Language Matrix ETERNITY NE System Manual...
- Page 230 • The SE Password of SARVAM UCS is changed • You restart the System • Set the System to Default • The Network Parameters are changed • Specific parameters in the VoIP page are changed Matrix ETERNITY NE System Manual...
-
Page 231: Auto Sign-In Parameters
The information you configure in Auto Sign-In Parameters will be sent in the mail to the Mobile Client user, when you click the Send Auto Sign-In Configuration Mail button. • Login as System Engineer. • Under Advanced Settings, click VoIP Configuration. Matrix ETERNITY NE System Manual... - Page 232 By default, Ethernet Port IP Address is selected as the External Server Address. • Select the SMTP Account though which you want the email to be sent. Make sure that the SMTP settings are configured correctly.For more information, refer “SMTP Settings”. Matrix ETERNITY NE System Manual...
- Page 233 If you select Don’t Send in both Internal as well as External Server Address, the server will send the Auto Sign-In mail but the VARTA Mobile Clients will not get registered. Matrix ETERNITY NE System Manual...
-
Page 234: Varta License Management
License Type: This displays the name of the licenses — Essential, Professional or Collaboration. • Total Available Licenses: This displays the total number of licenses activated. • Total Used Licenses: This displays the total number of VARTA users registered as SIP extensions. Applicable for ETERNITY NENXIP50. Matrix ETERNITY NE System Manual... - Page 235 Assigned License: Select the license you wish to assign to the SIP Extension and click Submit. • Location 1, 2, 3: This displays the Device Type selected on the SIP Extension Location 1, 2 and 3. Matrix ETERNITY NE System Manual...
-
Page 236: Configuring Open Sip Phones
“Configuring SIP Extension General Parameters” “SIP Extensions”. Auto Provisioning is not supported in SPARSH VP248. Some of the parameters may not be applicable depending on the Open SIP Phone you have connected to the SARVAM UCS. Matrix ETERNITY NE System Manual... - Page 237 Using any third party DHCP Server in your LAN • Make sure that the third party DHCP Server and your Open SIP Phone, both are connected in the same subnet as that of the Ethernet Port of SARVAM UCS. Matrix ETERNITY NE System Manual...
- Page 238 Address and provides configuration on validation. Some of the parameters may not be applicable depending on the Open SIP Phone you have connected. Please refer the specific Open SIP Phone manufacturer’s documentation for more details. Matrix ETERNITY NE System Manual...
- Page 239 Select the Primary NTP Server Address with which you want to synchronize the Date and Time of the Open SIP Phone. Panasonic Primary NTP Default: None. Make sure you configure the desired NTP Server UTG200B Server Address/es in the “Third Party IP-Phone General Parameters”. Matrix ETERNITY NE System Manual...
- Page 240 3. Grandstream GXP21xx/116x/ 14xx 4. Grandstream GXV3140/3175 Some of the parameters may not be applicable depending on the Open SIP Phone you have connected. Please refer the specific Open SIP Phone manufacturer’s documentation for more details. Matrix ETERNITY NE System Manual...
- Page 241 3. Grandstream GXV3140/3175 1. Grandstream GXP2200 Phone Book Configure the Phone Book Download interval in 2. Grandstream GXP21xx/116x/ Download minutes. Valid Range: 0 - 720 minutes. Default: 60 14xx interval (min) minutes 3. Grandstream GXV3140/3175 Matrix ETERNITY NE System Manual...
- Page 242 You are recommended to complete the following steps before connecting any of the Yealink Open SIP Phones: • Decide the physical location of the Open SIP Phone. • Log into Jeeves as the System Engineer. Matrix ETERNITY NE System Manual...
- Page 243 3. Yealink SIP-T3XG configuration on validation. Some of the parameters may not be applicable depending on the Open SIP Phone you have connected. Please refer the specific Open SIP Phone manufacturer’s documentation for more details. Matrix ETERNITY NE System Manual...
- Page 244 Default: admin 3. Yealink SIP-T3XG 1. Yealink SIP-T19P/SIP- Select the Time Zone of the region/country T21P/T22P/T26P/T28P/T4X Time Zone where the Open SIP Phone is installed. 2. Yealink SIP-T20P Default: +05:30 India (Calcutta) 3. Yealink SIP-T3XG Matrix ETERNITY NE System Manual...
- Page 245 DST by Date 2. Yealink SIP-T20P corresponding list boxes respectively. 3. Yealink SIP-T3XG 1. Yealink SIP-T19P/SIP- Offset Configure the DST Offset timer value in T21P/T22P/T26P/T28P/T4X (minutes) minutes. Valid Range:-300 to +300. 2. Yealink SIP-T20P 3. Yealink SIP-T3XG Matrix ETERNITY NE System Manual...
- Page 246 YY and for other phones: WWW MMM DD 3. Yealink SIP-T3XG 1. Yealink SIP-T19P/SIP- Time Display Select the Time Display Format for the Open T21P/T22P/T26P/T28P/T4X Format SIP Phone. Default: 24Hr 2. Yealink SIP-T20P 3. Yealink SIP-T3XG Matrix ETERNITY NE System Manual...
- Page 247 To do so, • Click SIP Extensions. Some of the parameters may not be applicable depending on the Open SIP Phone you have connected. Please refer the specific Open SIP Phone manufacturer’s documentation for more details. Matrix ETERNITY NE System Manual...
- Page 248 Select the Send Phone Book check box to 1. Cisco SPA50xG/51xG enable downloading of the Phone Book Send Phone SIP Phone (consisting of Extension and Global Directory Book 2. Cisco SPA525G SIP Contacts) from the SARVAM UCS. Default: Phone Enabled. Matrix ETERNITY NE System Manual...
- Page 249 If DST is applicable, select the Enable DST 1. Cisco SPA50xG/51xG check box. A list of DST parameters appear. SIP Phone Enable DST Configure them as per your requirement. 2. Cisco SPA525G SIP Default: Disabled Phone Matrix ETERNITY NE System Manual...
- Page 250 Primary NTP Time of the Open SIP Phone. Default: None. SIP Phone Server Make sure you configure the desired NTP 2. Cisco SPA525G SIP Server Address/es in the “Third Party IP- Phone Phone General Parameters”. Matrix ETERNITY NE System Manual...
- Page 251 Polycom IP Phone click Submit to save. Some of the parameters may not be applicable depending on the Open SIP Phone you have connected. Please refer the specific Open SIP Phone manufacturer’s documentation for more details. Matrix ETERNITY NE System Manual...
- Page 252 SIP Phone’s User Interface should be Polycom IP Phone Language displayed. Default: English Internal (en-in) Select the Time Zone of the region/country Time Zone where the Open SIP Phone is installed. Polycom IP Phone Default: + 05:30 India (Calcutta) Matrix ETERNITY NE System Manual...
- Page 253 Select the Date Display Format for the Open Date Display Format Polycom IP Phone SIP Phone. Default: 1 Jan, Mon Select the Time Display Format for the Open Time Display Format Polycom IP Phone SIP Phone. Default: 24Hr Matrix ETERNITY NE System Manual...
- Page 254 Select the Enable Device check box. Snom IP Phone Some of the parameters may not be applicable depending on the Open SIP Phone you have connected. Please refer the specific Open SIP Phone manufacturer’s documentation for more details. Matrix ETERNITY NE System Manual...
- Page 255 Select the path from which the Open SIP Phone must Phone User fetch the Language files. Default: None. Make sure Language File Snom IP Phone you configure the desired Path (Server Address/es) in Download Path “Third Party IP-Phone General Parameters”. Matrix ETERNITY NE System Manual...
- Page 256 You are recommended to complete the following steps before connecting the Htek 802 Open SIP Phones: • Decide the physical location of the Open SIP Phone. It must be connected in the same subnet as that of the LAN Port of SARVAM UCS. Matrix ETERNITY NE System Manual...
- Page 257 Phone. It can be a maximum of up to 16 characters. Password Default: admin Assign Voice Enable this check box to assign the first Htek 802 IP Phone Mail Key programmable key of the phone as Voice Mail. Matrix ETERNITY NE System Manual...
- Page 258 UCS will be used for assigning the ‘Auto Provisioning Server Address’ and ‘Server Port’ to the Open SIP Phone. If you are using third party DHCP Server in your LAN, see “Using any third party DHCP Server in your LAN”. Matrix ETERNITY NE System Manual...
- Page 259 Password as HTTP Password in the Open SIP Phone. Some of the parameters may not be applicable depending on the Open SIP Phone you have connected. Please refer the specific Open SIP Phone manufacturer’s documentation for more details. Matrix ETERNITY NE System Manual...
- Page 260 Select the Allow HTTPS check box to enable Allow HTTPS Matrix SPARSH VP110 HTTPS Web access. Default: Enabled Enter the port number on which the HTTPS HTTPS Port Matrix SPARSH VP110 access is to be given. Default: 443 Matrix ETERNITY NE System Manual...
- Page 261 • Priority • Emergency Conference Default: Disabled Select the region to apply the Call Progress Call Progress Tone prevailing in the area where the Open Matrix SPARSH VP110 Tone SIP Phone is connected. Default: Custom. Matrix ETERNITY NE System Manual...
- Page 262 DST Stop Day of Select the DST Stop Day of Week Last in Matrix SPARSH VP110 Week Last Month. in Month End Hour of Select the DST End Hour of the Day. Matrix SPARSH VP110 Matrix ETERNITY NE System Manual...
- Page 263 To avoid unauthorized access, we recommend you to change the Admin Password regularly. Make sure it is strong and is kept con- fidential. SPARSH VP110 Key Settings • To personalize the key map of the SPARSH VP110, click SPARSH VP110 under Key Template in Advanced Settings. Matrix ETERNITY NE System Manual...
- Page 264 • The key map of the SPARSH VP110 opens in a new window on your screen. Matrix ETERNITY NE System Manual...
- Page 265 For each KeyType, select the Type of function that is to be performed by the key. For example, to use the Softkey 1 to send a SMS, select Key Type as SMS. You may also change the key Label, if required for Softkey 1 to 4. • Click OK. Matrix ETERNITY NE System Manual...
- Page 266 Configure the SIP Extension Settings in SARVAM UCS. For details, see “SIP Extensions”. • Configure the device specific settings applicable to your Matrix SPARSH VP710- Standard SIP at Location1 on the SIP Extensions page. To do so, • Click SIP Extensions. Matrix ETERNITY NE System Manual...
- Page 267 Dial Plan rules configured in the Dial Plan selected here. For instructions, see “Dial Plan for SIP Extension”. Transport Select the protocol to be used to transport the Matrix SPARSH VP710 Mode SIP messages. Default: TCP Matrix ETERNITY NE System Manual...
- Page 268 Phone Book. Default: Do not send Enable this check box if you want to allow Send Personal usage of Personal Directory. These contacts Matrix SPARSH VP710 Directory will be stored in the phone’s Local phone Book. Matrix ETERNITY NE System Manual...
- Page 269 Open SIP Phone is installed. Matrix SPARSH VP710 Default: + 05:30 India (Calcutta) Daylight Select the Daylight Saving Time Mode that Saving Time should be applied to the selected Open SIP Matrix SPARSH VP710 Mode Phone. Default: Automatic. Matrix ETERNITY NE System Manual...
- Page 270 Select the Date Display Format for the Open Matrix SPARSH VP710 Format SIP Phone. Default: WWW MMM DD Time Display Select the Time Display Format for the Open Matrix SPARSH VP710 Format SIP Phone. Default: 24 Hr Matrix ETERNITY NE System Manual...
- Page 271 To avoid unauthorized access, we recommend you to change the User Password regularly. Make sure it is strong and is kept confidential. To avoid unauthorized access, we recommend you to change the Admin Password regularly. Make sure it is strong and is kept confidential. Matrix ETERNITY NE System Manual...
-
Page 272: Third Party Ip-Phone General Parameters
You may configure maximum 5 different Paths. Phone User Language File Download Path for Snom IP-Phone • Under Path, configure the path from which you want the Open SIP Phone to fetch the Language files for the Phone user. Default: Blank. Matrix ETERNITY NE System Manual... - Page 273 Web user. Default: Blank. You may configure maximum 5 different Paths. • Click Submit. The Server Addresses/Path you configure on this page will appear in the Combo box of the respective parameter on the SIP Extension page. Matrix ETERNITY NE System Manual...
-
Page 274: Black List Ip Address - Sip Extensions
To clear a entry from the Black List IP Address - SIP Extensions table, • Login as System Engineer. • Under Advanced Settings, click VoIP Configuration. • Click Black List IP Address - SIP Extensions. Matrix ETERNITY NE System Manual... - Page 275 Select the Clear IP Address & Port check box of the entries that you want to remove from the Black List IP Address - SIP Extensions table. • Click Clear Selected. The selected entries will be removed from the table. • Click Clear All to clear all the entries stored in the table. Matrix ETERNITY NE System Manual...
-
Page 276: Device Management
SIP messages received from this SIP Extension. The number may be a string of maximum 6 alphanumeric characters. All ASCII characters except < > and “ (double quote) are allowed. Matrix ETERNITY NE System Manual... - Page 277 Reboot: Click this button to reboot the phone remotely. The phone will reboot only if it supports remote reboot. • Click Clear All Assigned Entries, to clear all the assignments. • Click Clear All Entries, to clear all the entries on the page. Matrix ETERNITY NE System Manual...
-
Page 278: Call Pickup Group
You can create as many as 8 Call Pickup Groups, and assign the extensions to these groups. To create a Call Pickup Group, • Click Call Pickup Group. • For the desired Call Pickup Group Number, double click the Extensions field. Matrix ETERNITY NE System Manual... - Page 279 To create another Call Pickup Group, double click the Extensions field against the desired group number (02 to 08) and select the desired extensions. • Click Submit to save your Call Pickup Groups. To know more about this feature, refer the topic “Call Pickup”. Matrix ETERNITY NE System Manual...
-
Page 280: Co Trunks
To save the settings, click Submit. To assign default values to all the parameters of the CO Trunk, click Default. To copy all CO Trunk parameter values to another CO Trunk, click Copy. ETERNITY NENX312 supports three Analog Trunk Ports. Matrix ETERNITY NE System Manual... - Page 281 • 1st Ring, FSK, 2nd Ring • DT-AS, FSK, 1st Ring • RP-AS, FSK, 1st Ring • Polarity Reversal, DT-AS, FSK, 1st Ring • Any DTMF Format (without Start/Stop Code) Default: Any ETSI DTMF format. Matrix ETERNITY NE System Manual...
- Page 282 Select the landing destination to Route Calls during Day to. You may select: • Operator • Extensions • Department Group • Built-in Auto Attendant • Voice Mail Auto Attendant (if available) • If you select Extensions as the landing destination, Matrix ETERNITY NE System Manual...
- Page 283 When Rotation is enabled, each new call lands on the extension next to the one that received the call last. This ensures equal dis- tribution of incoming calls to all the destination extensions in this group. Matrix ETERNITY NE System Manual...
- Page 284 If you select Voice Mail Auto Attendant as the landing destination for calls during the day, then configure “Voice Mail Auto Attendant Menu”. • To enable CLI Based Routing on the CO Trunk during day, select the Apply CLI Based Routing check box. Default: Disabled. Matrix ETERNITY NE System Manual...
- Page 285 When Busy: the system will answer incoming calls on the trunk, if the landing destination is busy. Trunk Auto Answer enables calls landing on a trunk to be answered automatically by greeting the caller with a voice message before the call is actually handled. Matrix ETERNITY NE System Manual...
- Page 286 You can record 4 different RBT Messages for Trunk Auto Answer and assign a different RBT message for the Day, Break and Night. See “Voice Message Applications” for instructions on recording and assigning voice modules for RBT messages. Matrix ETERNITY NE System Manual...
- Page 287 SARVAM UCS prefixes the number with the appropriate country-area code when it routes the call through the GSM network. To apply Automatic Number Translation (ANT) on the CO Trunk, • Click Automatic Number Translation to expand. Matrix ETERNITY NE System Manual...
- Page 288 To store details of incoming calls landing on this trunk, select the check box Store Incoming Calls. Default: Enabled. • To store details of outgoing calls made from this trunk, select the check box Store Outgoing Calls. Default: Enabled. • Click Submit. DSS Key Interface Matrix ETERNITY NE System Manual...
- Page 289 Configure the Pulse Rate Type according to the billing pattern of the service provider of this trunk. Trunks following the same billing pattern should be assigned the same Pulse Rate Option. • Define the Call Cost Calculation Schedule for the Pulse Rate option you selected. Matrix ETERNITY NE System Manual...
- Page 290 • To have the system reset the Number of Calls/Amount/Minutes automatically on a particular date, select the desired date from the Reset Call Budget on combo box as 1st to 31st of the every month. Matrix ETERNITY NE System Manual...
- Page 291 Click Call Taping to expand. • Select the check box to enable Call Taping on the trunk. Default: Enabled. To disable Call Taping on the trunk, clear the check box. • Click Submit. “Call Taping” to know more. Matrix ETERNITY NE System Manual...
- Page 292 “Call Duration Control (CDC)” to know more. Hardware Settings • Click Hardware Settings to expand. • Select your Trunk Type. Three types of CO trunks can be interfaced to a CO port of the SARVAM UCS: Matrix ETERNITY NE System Manual...
- Page 293 AC Termination Impedance (presented by CO port of SARVAM UCS to the line) and CO Termination (Impedance presented by the Central Office to the line), and to some extent by the transmit and receive signal path. Matrix ETERNITY NE System Manual...
- Page 294 CO Port when the CO Port is connected to any SIP Trunk or SIP Extension of the system during an incoming or outgoing call. Valid Range for Tx gain: +10dB to -15dB and Rx Gain +10dB to -15dB. Default: -0.6dB for Tx Gain and -0.3dB for Rx Gain. Matrix ETERNITY NE System Manual...
- Page 295 When the signal is received, the billing will start and in the absence of this signal, the call will not be billed, ensuring that unanswered and unsuccess- ful call attempts are not billed. Matrix ETERNITY NE System Manual...
- Page 296 SARVAM UCS) has not disconnected the call, the call remains live within the system. So, Disconnect Supervision signal is important, particularly when calls are routed from CO-to-CO ports, to indicate to the system that it needs to disconnect the call and release the port. Matrix ETERNITY NE System Manual...
- Page 297 17 to 204 milliseconds. Default: 68. • Set the following Timers, if necessary. • Speech Delay Timer: It is the time after which the system gives dial tone to the extension, when the extension user grabs the CO Trunk. Matrix ETERNITY NE System Manual...
- Page 298 Idle Wait Timer: This is the time taken by the Central Office to detect and release the line after the CO trunk has been released by SARVAM UCS. This time may vary from Central Office to Central Office. Set the Idle Wait Timer as per the time taken by your Central Office. Matrix ETERNITY NE System Manual...
- Page 299 CO Trunks terminating into the Extension ports of the other PBX, and other trunks being directly connected to the PSTN. If the CO Trunk port is directly connected to the PSTN, PPDC must be set to '0'. Matrix ETERNITY NE System Manual...
- Page 300 Fax gain settings consist of Data Gain and Bypass Gain. SARVAM UCS supports Fax Receive Gain for SIP to CO Trunks, SIP to Digital Trunk calls as well as SIP to SLT Calls. Matrix ETERNITY NE System Manual...
- Page 301 The copy page displays the number and/or name of the current trunk in Copy from:. It also lists the numbers and/or names of the trunks to which you can copy the trunk settings under Copy To:. Matrix ETERNITY NE System Manual...
- Page 302 Select the Copy to/All check box, to apply the link settings to the same link under all other Trunks. You may also apply the link settings to the desired Trunks only, by selecting the respective check boxes. • Click OK. Matrix ETERNITY NE System Manual...
-
Page 303: Mobile Trunks
Mobile Trunk 1 as Vodafone, Mobile Trunk 2 as Airtel, these names will appear in place of Mobile 1 and Mobile 2. If you want to change the name of the Mobile Trunk, you must go back to the “Trunks” page. Matrix ETERNITY NE System Manual... - Page 304 If you select this option, you must also configure the landing destinations for incoming calls during the day, night and break. Matrix ETERNITY NE System Manual...
- Page 305 When Rotation is enabled, each new call lands on the extension next to the one that received the last call. This ensures equal dis- tribution of incoming calls to all the destination extensions in this group. Matrix ETERNITY NE System Manual...
- Page 306 If you want to play a different message, make sure you record the desired messages in the Voice Modules after completing the installation with Basic Settings. Refer the “Voice Message Applications” topic to know more. “Auto Attendant” to know more. Matrix ETERNITY NE System Manual...
- Page 307 Access (DISA)”. • To enable “Trunk Auto Answer” on the trunk, select the type of Trunk Auto Answer you want: • For all Calls: the system will answer all incoming calls landing on the trunk line. Matrix ETERNITY NE System Manual...
- Page 308 Tone to the caller. Default: Do Not Play. Trunk Auto Answer enables calls landing on a trunk to be answered automatically by greeting the caller with a voice message before the call is actually handled. Matrix ETERNITY NE System Manual...
- Page 309 When RCOC is enabled on the Mobile trunk, the system routes calls returned by remote parties back to the extensions that originally made the call from this trunk (i.e. the original callers' extensions). To know more, refer the “RCOC (Return Call to Original Caller)” feature. Matrix ETERNITY NE System Manual...
- Page 310 Number Translation such that when an extension user dials a local landline number, the SARVAM UCS prefixes the number with the appropriate country-area code when it routes the call through the GSM network.To know more about this feature, see the description for “Automatic Number Translation”. Matrix ETERNITY NE System Manual...
- Page 311 Set the Network Registration Retry Count from 1 to 255. This is the number of attempts the Mobile Port will make to register with the network of the service provider whose SIM you have inserted in the port. Default: 02 attempts. Matrix ETERNITY NE System Manual...
- Page 312 For example, AirTel, a GSM network operator in India, has different MNC assigned to its networks in various states. The MNC for AirTel in the state of Maharashtra is 90, while the same for the state of Gujarat is 98. Matrix ETERNITY NE System Manual...
- Page 313 Put current call on Hold, when Extended IP Phone user presses DSS key of another Trunk, while in speech on this Trunk. (Default). Call Cost Calculation Configure this parameter, if you want to apply Call Cost Calculation feature on the trunk. See “Call Cost Calculation (CCC)”. Matrix ETERNITY NE System Manual...
- Page 314 If your service provider offers the same Pulse Rate for calling a number for the entire day, there is no need to change the default Time Schedule. The system will follow Time Zone 1. “Call Cost Calculation (CCC)”. Matrix ETERNITY NE System Manual...
- Page 315 To configure the profile, click the Settings icon. This icon does not appear when Call Back is OFF. • A new window opens. • Configure the Profile Number. See “Call Back on Trunk Ports” for instructions. • Click Submit to save your profile. • Close the window. Matrix ETERNITY NE System Manual...
- Page 316 Select the Apply CDC for Outgoing Calls check box, to control the call duration for outgoing calls on this trunk. Default: Enabled. Clear this check box, if you do not want to apply CDC for outgoing calls on this trunk. • Click Submit. “Call Duration Control (CDC)” to know more. Matrix ETERNITY NE System Manual...
- Page 317 Mobile Port when the Mobile Port is connected to another CO Port of the system during an incoming or outgoing call. Valid Range for Tx Gain and Rx Gain is: Very Low, Low, Medium, High, Very High. Default: Medium. Matrix ETERNITY NE System Manual...
- Page 318 UCS will out dial the digit 2 after 9 seconds, i.e. after a delay of individual P i.e. 3+3+3 =9. The range of this time is from 1 to 9. The Pause Time is used in the “Multi-Stage Dialing” feature. Matrix ETERNITY NE System Manual...
- Page 319 • In Number of SMS to be sent through this port daily, enter the maximum number of SMS that can be sent using this Mobile Trunk Port daily. Valid Range: 1 to 20000. Default: 20000. Matrix ETERNITY NE System Manual...
- Page 320 Make sure that you have configured Network Preferred Mode as Any (LTE/UMTS/GSM) or LTE only. For more details, refer to “Network”. • Click VoLTE Configuration to expand. • MBN File Selection Mode displays the current mode. To change the Selection Mode, • Click Matrix ETERNITY NE System Manual...
- Page 321 The module stores varies MBN files. MBN File Used displays the name of the MBN file being used by the particular Mobile Port. MBN File Upload To upload a new MBN file, • Click MBN File Upload button. A new window pops up. Matrix ETERNITY NE System Manual...
- Page 322 Select a Time Table for the Mobile trunk. Default: System Time Table. If you have not configured Time Table, you may do so now, • Clicking the Settings icon. • The Time Table page opens. Matrix ETERNITY NE System Manual...
- Page 323 Follow the same steps as described above to configure another Mobile Trunk. You may use the Copy button at the bottom of the page to apply the same Mobile Trunk settings you configured for the current trunk to another Mobile Trunk. To do so, Matrix ETERNITY NE System Manual...
- Page 324 Mobile Trunk. You may also copy the parameter values of a specific link under current Mobile Trunk to the same link under any other trunk page. To do so, Matrix ETERNITY NE System Manual...
- Page 325 Select the Copy to/All check box, to apply the link settings to the same link under all other Trunks. You may also apply the link settings to the desired Trunks only, by selecting the respective check boxes. • Click OK. Matrix ETERNITY NE System Manual...
-
Page 326: Voip Parameters
Settings: Click to configure the settings of a parameter further. More link: Click to view all additional parameters on the page. To save the settings, click Submit. To assign default values to all the parameters of the VoIP Port, click Default. Matrix ETERNITY NE System Manual... - Page 327 If domain is programmed, VoIP module will listen for the SIP message which is redirected to the programmed domain as well as will listen for SIP messages on the Ethernet IP address. But if domain is not programmed, the VoIP module will listen for SIP messages only on the Ethernet Port IP address. Matrix ETERNITY NE System Manual...
- Page 328 QoS setting. Valid range is 00 to 63. Default: 46. • Define the priority bits for Fax packets in the Fax DiffServe/ToS. The VoIP module sends all the Fax packets with this QoS setting. Valid range is 00 to 63. Default: 46. Matrix ETERNITY NE System Manual...
- Page 329 This parameter is to be configured if you want to support reliable transmission of (SIP) provisional responses and to use PRACK (Provisional Acknowledgement). • Click SIP 100rel to expand. • To enable SIP 100rel, select the check box Use 100rel. Default: Disabled. Matrix ETERNITY NE System Manual...
- Page 330 This port defines the port on which the SARVAM UCS listens for SIP messages transported over UDP. This port is also used as the source port for sending SIP messages to the remote peer. The valid range for this port is 1025-65535. Default: 05060. • Enter the SIP TCP Port address. Matrix ETERNITY NE System Manual...
- Page 331 On expiry of the timer, SARVAM UCS clears the transaction. This timer is used for Registration request. The range of the General Request Timer is 10-60 seconds. Default: 20 seconds. The Timers will be applicable only after System Restart. Matrix ETERNITY NE System Manual...
- Page 332 Private key is a security mechanism used by SARVAM UCS to authenticate SIP messages. It is the MD5 authentication key used by the system to encrypt/decrypt the SIP messages. • Click Submit to save your VoIP port settings. Matrix ETERNITY NE System Manual...
- Page 333 Select the Check User-Agent for routing call check box if you want SARVAM UCS to check if the call is originated from a trunk or an extension. By default, Check User-Agent for routing call is disabled. This parameter will be applicable only if Matrix PBX’s are connected on both the ends. Matrix ETERNITY NE System Manual...
-
Page 334: Sip Trunks
Copy: Click to copy the parameters under a specific link of a page to the same link under any other trunk page. Settings: Click to configure the settings of a parameter further. More link: Click to view all additional parameters on the page. Matrix ETERNITY NE System Manual... - Page 335 If you are not using the services of an ITSP, select Peer-to-Peer and click Settings icon to configure the Peer-to-Peer Table. See “Peer-to-Peer Calling” feature for instructions. • Enter the SIP ID for the trunk. Matrix ETERNITY NE System Manual...
- Page 336 If you have defined the SIP Trunk mode as Proxy, configure the Proxy/Registrar Server parameters. • Enter the Proxy/Registrar Server Address and the Registrar Server Port provided by your ITSP. The Registrar Server Address can be an IP Address or domain. Matrix ETERNITY NE System Manual...
- Page 337 The Registrar Server deletes an entry of its client from its database on expiry of a fixed timer. This timer is set by the Registrar Server. The Re-registration Timer of SARVAM UCS enables it to send a registration request before the Timer of the Registrar Server expires to remain registered on the Server. Matrix ETERNITY NE System Manual...
- Page 338 Do not configure the port, if you want to allow incoming calls from all the ports for a particular IP Address. • Click Submit to save your entries and close the window. Matrix ETERNITY NE System Manual...
- Page 339 Select the landing destination to Route Calls during Day to. You may select: • Operator • Extensions • Department Group • Built-in Auto Attendant • Voice Mail Auto Attendant (if available). • If you select Extensions as the landing destination, Matrix ETERNITY NE System Manual...
- Page 340 When Rotation is enabled, each new call lands on the extension next to the one that received the call last. This ensures equal dis- tribution of incoming calls to all the destination extensions in this group. Matrix ETERNITY NE System Manual...
- Page 341 If you select Voice Mail Auto Attendant as the landing destination for calls during the day, then configure “Voice Mail Auto Attendant Menu”. • To enable CLI Based Routing on the SIP Trunk during day, select the Apply CLI Based Routing check box. Default: Disabled. Matrix ETERNITY NE System Manual...
- Page 342 When Busy: the system will answer incoming calls on the trunk, if the landing destination is busy. Trunk Auto Answer enables calls landing on a trunk to be answered automatically by greeting the caller with a voice message before the call is actually handled. Matrix ETERNITY NE System Manual...
- Page 343 Play RBT Message3 • Play RBT Message4 If you do not want RBT message to be played, select Do Not Play. The system will play Ring Back Tone to the caller. Default: Do Not Play. Matrix ETERNITY NE System Manual...
- Page 344 To apply RCOC (Return Call to Original Caller) on the SIP Trunk, • Click RCOC to expand. • Select the check box Set RCOC for Calling Extension, when Called Number is busy/ switched-off / not responding. Default: Disabled. Matrix ETERNITY NE System Manual...
- Page 345 In the Add Prefix column, enter the number you want the system to add as a prefix to the Dialed Number String before the system dials out this number. The Prefix can be a maximum of 40 characters. Default: Blank. • Click Submit. Matrix ETERNITY NE System Manual...
- Page 346 Click DSS Key Interface to expand options. • Select the radio button of the desired DSS Key Interface option: • Disconnect current call when Extended IP Phone user presses DSS key of another Trunk, while in speech on this Trunk. Matrix ETERNITY NE System Manual...
- Page 347 Pulse Rate will be applied. The default Time Schedule (start and end time) for each Time Zone Index is as follows: Start Time Zone Index End Time Time 00:00 23:59 00:00 23:59 00:00 23:59 Matrix ETERNITY NE System Manual...
- Page 348 Reset Call Budget on combo box as 1st to 31st of the every month. The consumed Call Budget Amount/Minutes/Number of Calls can be reset from SE and SA Mode, referred to as Manual Reset. Refer the feature description “Call Budget on Trunk”. Matrix ETERNITY NE System Manual...
- Page 349 Select the check box to enable Call Taping on the trunk. Default: Enabled. To disable Call Taping on the trunk, clear the check box. • Click Submit. “Call Taping” to know more. Call Duration Control (CDC) Matrix ETERNITY NE System Manual...
- Page 350 For example, if 'PPP7' is to be out dialed and Pause time is programmed as 3 seconds, the SARVAM UCS will out dial the digit 7 after 9 seconds, i.e. after a delay of individual P (i.e. 3+3+3 =9). Matrix ETERNITY NE System Manual...
- Page 351 SIP Trunk is other than "SIP ID", then also SIP ID will be sent as CLI. When Emergency numbers are dialed using the SIP Trunk and even if CLIR is set as the ‘Send CLI in FROM field’ option, the system will send the number of the caller as CLI. Matrix ETERNITY NE System Manual...
- Page 352 Configure the following P-Asserted-Identity/P-Preferred-Identity for Incoming calls parameters as provided to you by your Service Provider. • Select Get CLI from P-Asserted-Identity/P-Preferred-Identity check box, if supported by your Service Provider. • Select P-Preferred-Identity or P-Asserted-Identity as the Preference. Matrix ETERNITY NE System Manual...
- Page 353 Vocoders are the various voice codecs used to compress the data in RTP packets for optimum use of bandwidth and for ensuring voice quality. You can set 7 Vocoder options in the order of preference. Matrix ETERNITY NE System Manual...
- Page 354 Payload Type can be set from 96 to 127. Gain Settings To avoid noise or echo during speech on SIP Trunks, you must set the speech volume levels (Tx and Rx Gain) on SIP Trunk with reference to other ports. Matrix ETERNITY NE System Manual...
- Page 355 SRTP, SARVAM UCS will use normal RTP for transporting the speech packets. • If you select this option, you must configure the SRTP Media Type. You may select AVP or SAVP. Default: AVP. Matrix ETERNITY NE System Manual...
- Page 356 Factor determines the rate of adaptation of the Dynamic Jitter Buffer to the jitter in the network. • Set the Minimum Delay (msec) (for both Static and Dynamic Jitter Buffer) to the desired value from 10 to 280 milliseconds. Default: 10. Matrix ETERNITY NE System Manual...
- Page 357 Set the Max Rate (Kbps) to the desired speed. Default: 14.4 kbps. The Max Rate controls the Fax image transfer speed. As EQM is inversely proportional to fax Max Rate, if you receive poor quality fax, the Max Rate should be reduced. Matrix ETERNITY NE System Manual...
- Page 358 Configure this parameter if you selected Pass Through as Fax Type, and the fax is to be received on a digital trunk. • Select the dB level for Data Gain (dB) from -31 to 31 dB. Default: -11 dB. Matrix ETERNITY NE System Manual...
- Page 359 SARVAM UCS enables you to configure gain settings for fax. Fax gain settings consist of Data Gain and Bypass Gain. SARVAM UCS supports Fax Receive Gain for SIP to Digital Trunk calls as well as SIP to SLT Calls. Matrix ETERNITY NE System Manual...
- Page 360 The System security might be at risk, if you enable this option as packets from all RTP ports are accepted by the System. • Select the Default Transport for Outgoing Messages from the following options: • UDP: Outgoing messages are transported using UDP. • TCP: Outgoing messages are transported using TCP. Matrix ETERNITY NE System Manual...
- Page 361 NAPTR/SRV Record: Select this option, if you want SARVAM UCS to send queries to the DNS Server to fetch the Transport, Port and IP Address of the Target Server on which further SIP messages are to be sent. Default: A/AAAA Record Matrix ETERNITY NE System Manual...
- Page 362 With this option enabled, the Operator will be able to handle calls more efficiently. When there is an incoming call, SARVAM UCS matches the number with the numbers configured in the Global Directory. If a Matrix ETERNITY NE System Manual...
- Page 363 Diversion header, along with the reason of redirection. Default: Disabled. • If you have selected Generate new Call as the Call Redirection Type, you may select the Include "History-Info" while diverting the call checkbox. The system includes the incoming call request Matrix ETERNITY NE System Manual...
- Page 364 Select the radio button of the desired option: • Display number of Transferring Extension when call is transferred by this Extension. • Display number of Party kept on Hold when call is transferred by this Extension Matrix ETERNITY NE System Manual...
- Page 365 You can configure the Toll Control - Allowed-Denied Numbers for each type. To do this, • Click the Settings icon. This opens Toll Control - Allowed-Denied Numbers page in a new window. This icon does not appear when Toll Control is selected as All Calls or No Calls. Matrix ETERNITY NE System Manual...
- Page 366 SIP) and port numbers. If you have enabled On-Site Configuration, only those trunks that are connected will appear in the box. • To select a trunk, place your cursor on the desired trunk, and click Select>>. Matrix ETERNITY NE System Manual...
- Page 367 The first call through the first trunk, the second through the second, the third through the third trunk, and so forth. Thus each new call is routed through the trunk next to the one that routed the previous outgoing call. Matrix ETERNITY NE System Manual...
- Page 368 • Apply as per profile 1 • Apply as per profile 2 • Apply as per profile 3 • Apply as per profile 4 If you do not want to apply Call Taping, select OFF. Matrix ETERNITY NE System Manual...
- Page 369 Enable Apply CDC to Internal Calls, if CDC is to be applied on internal calls. Default: Disabled. • Enable Apply CDC for Incoming Calls received from trunk, if CDC is to be applied on incoming external calls. Default: Disabled. Matrix ETERNITY NE System Manual...
- Page 370 The system will allow extension users to dial out numbers only after they have dialed the Account Code or Name. Account Codes feature must also be enabled in the Class of Service of extension users who are to be allowed this feature. Matrix ETERNITY NE System Manual...
- Page 371 You may use the Copy button at the bottom of the page to apply the same SIP Trunk settings you configured for the current trunk to another SIP Trunk. To do so, • Click Copy. Matrix ETERNITY NE System Manual...
- Page 372 SIP Trunk. You may also copy the parameter values of a specific link under current SIP Trunk to the same link under any other trunk page. To do so, Matrix ETERNITY NE System Manual...
- Page 373 Select the Copy to/All check box, to apply the link settings to the same link under all other Trunks. You may also apply the link settings to the desired Trunks only, by selecting the respective check boxes. • Click OK. Matrix ETERNITY NE System Manual...
-
Page 374: Ddi Routing
If outgoing calls are made by Extension User1 then the CLI sent to the called party will be the DDI number assigned to Extension User1, if Send DDI Number as CLI option is enabled. If not then the Pilot number will be sent. Matrix ETERNITY NE System Manual... - Page 375 Keep the Allow Incoming DDI Calls check box enabled, to allow the system to land incoming calls with the same DDI number on the extension user who is assigned this number. Default: Enabled. Clear the check box, if you want to disable. Matrix ETERNITY NE System Manual...
- Page 376 If you clear the check box, the system will send the Pilot number of the respective SIP Trunk as CLI for outgoing calls made from this extension. • Click Pilot Numbers to expand. Enter the DDI Pilot Number provided by the ITSP with whom you have registered each SIP Trunk. • Click Submit. Matrix ETERNITY NE System Manual...
-
Page 377: Emergency Numbers
Outgoing Trunks for these numbers. Disclaimer: Matrix Comsec is not responsible for incorrect configuration of Emergency Numbers. • To add an Emergency Number, click the Emergency Numbers. • Enter the desired number in the Route the Emergency Number. Matrix ETERNITY NE System Manual... - Page 378 The first call through the first trunk, the second through the second, the third through the third trunk, and so forth. Thus each new call is routed through the trunk next to the one that routed the previous outgoing call. Matrix ETERNITY NE System Manual...
- Page 379 • Click OK to save the selected trunks. All the trunks you selected appear in Through, in the sequence you selected, separated by a comma. • Click Submit. Matrix ETERNITY NE System Manual...
-
Page 380: Network Parameters
If you select Ethernet as Preferred WAN, you must configure the parameters: Network Connection Type, DNS Connection Type, Dynamic DNS, Router’s Public IP Address, and Simple Traversal of UDP through NAT (STUN). If you select Wireless WAN (Mobile 1), configure Wireless WAN parameters. Matrix ETERNITY NE System Manual... - Page 381 Address, the Subnet Mask, the Gateway Address to the Ethernet Port whenever SARVAM UCS is restarted. You have to configure the Domain Name Server (DNS) Address only, if not already provided by your Internet Service Provider. Matrix ETERNITY NE System Manual...
- Page 382 PPPoE server will appear here. • DNS Domain Name: Configure the DNS Domain Name if provided by your ITSP/LAN Administrator. Otherwise, keep it blank. The Domain Name may be a maximum of 16 characters. Default: Blank. Matrix ETERNITY NE System Manual...
- Page 383 IP Address, Subnet Mask and Gateway Address to the Ethernet Port, you need not change any of these. Configure the following PPPoE parameters: • IPv6 Scope Preference: IPv6 includes support of Global as well as Non-Global Addresses(Unique). Select the scope of preference — Global or Unique. Default: Global. Matrix ETERNITY NE System Manual...
- Page 384 DNS Connection Type (IPv6 settings) • Click DNS Connection Type (IPv6 settings) to expand. • DNS Address Assignment: If you selected 'Static' as your IPv6 connection type, you can select only 'Static' as the DNS Address Assignment. Matrix ETERNITY NE System Manual...
- Page 385 Enter the User ID provided to you for accessing the internet service by your Service Provider. • In Password, enter the authentication password for the User ID provided by your Service Provider. MAC Address Selection • Click MAC Address Selection to expand. Matrix ETERNITY NE System Manual...
- Page 386 However, if the SARVAM UCS frequently sends IP Address update requests to the DDNS server, the server is likely to block the hostname in its database and terminate the DDNS services provided to SARVAM UCS. According to your installation scenario and Preferred WAN you configured. Matrix ETERNITY NE System Manual...
- Page 387 Server Address in the SPARSH client. Valid range: 80 or any value ranging from 1025 to 65535. Default: 80. When the system is set to default, the Router’s SPARSH Port value will not be set to default. Matrix ETERNITY NE System Manual...
- Page 388 Enter the STUN Server Address, a maximum of 40 characters. • Enter the Listening Port of the STUN Server in the STUN Server Port. The valid range for this field is from 1024-65535. The default STUN Port is 03478. Matrix ETERNITY NE System Manual...
- Page 389 In the DNS Server Address, enter the DNS address to be assigned to the DHCP Clients. • Define the maximum Lease Time (hours) for which the IP Addresses should be allocated to the DHCP Clients. The Lease Time may be from 1 to 192 hours. Default: 24 hours. Matrix ETERNITY NE System Manual...
- Page 390 If you want the SARVAM UCS and VARTA AMP100 to communicate using secure protocol, make sure you have enabled the option Enable Secure Connection with Server in the client. When the system is set to default, the Secure SPARSH Port value will not be set to default. Layer 2 VLAN/Cos Matrix ETERNITY NE System Manual...
- Page 391 The IEEE 802.1P standard allows Layer2 switches to prioritize the traffic, thus providing Quality of Service (QoS), better handling of data that pass over a network, thereby resulting in greater reliability and quality. Quality of Service (QoS) on Layer2 is referred to as Class of Service (CoS) which is defined by IEEE 802.1P. Matrix ETERNITY NE System Manual...
- Page 392 Network Address Traversal (NAT) allows multiple hosts in the network to share the single public routable IP address. Means all the hosts in the private network shall be identified by single public IP address in the global IP cloud. Matrix ETERNITY NE System Manual...
-
Page 393: Security Settings
Trusted IP Address/es table must be configured. You can configure a maximum of 10 addresses in this table. • determine the facilities you want to allow to each IP Address — Remote Login, Web, Third Party Auto Configuration, SIP Extension registration. • with this table configured, Matrix ETERNITY NE System Manual... - Page 394 IP Address/es and their respective Subnet Mask in the Trusted IPv4 Address/es table. • enable the Allow Remote Login check box in the Trusted IPv4 Address/es table. If you select All IP Address/es or Only Trusted IP Address/es option, click Generate Key. Matrix ETERNITY NE System Manual...
- Page 395 If you want to allow access to generate the password for the Remote Login from all IP Addresses, select All IP Address/es option. If you want to allow access to generate the password for the Remote Login from specific IP Addresses only: • select Only Trusted IP Address/es option. Matrix ETERNITY NE System Manual...
- Page 396 The Prefix Length is a decimal value that indicates how many of the high-order contiguous bits of the address comprise the prefix (the network portion of the address). • enable the Black List SIP Extension IP Address:Port except check box for those IP Addresses which you do not want to blacklist. Matrix ETERNITY NE System Manual...
- Page 397 Click OK. You will be able to configure Authentication password of minimum 2 characters. Allowed characters are 0-9, a-z, A-Z, all special characters except %, =, #, +, &, \, <, >, ", ' and space. • Click Submit. Matrix ETERNITY NE System Manual...
- Page 398 Matrix ETERNITY NE System Manual...
-
Page 399: Configuring Voice Mail System
• The prompts used to route the call using the Voice Mail Auto Attendant can be customized as per your requirement. Refer to “Prompts Management”. To configure Voice Mail Settings, • Login as System Engineer. Matrix ETERNITY NE System Manual... - Page 400 • Under Advanced Settings, click VMS Configuration. • Configure the VMS Parameters using the different sub-links as required. Matrix ETERNITY NE System Manual...
-
Page 401: Configuring Vms General Parameters
Use SMTP Account: Select the SMTP Account you wish to use for VMS Notifications. The SMTP Account you configure will be used for all VMS Email Notifications — Message Notifications and Memory Usage Notifications. You may add a new SMTP Account. To do so, Matrix ETERNITY NE System Manual... - Page 402 Time Format: Select the Time Format — 24 Hour or 12 Hour. The Time format selected here will be applicable for all the VMS features, VMS E-Mail Notifications, etc. This parameter will not function if you have selected None as the Use SMTP Account option. You may configure this parameter for future use. Matrix ETERNITY NE System Manual...
- Page 403 A window will pop up. You can edit the language name here. • Click OK. To delete a language, click If the language you wish to delete is already configured for any other parameter, the system will set English as the default language for that parameter. Matrix ETERNITY NE System Manual...
- Page 404 Select this option if you want the system to add the Message Type for the Message Type message stored. The Mailbox Extension Number parameter is only applicable for General Mailbox Filename Format. Matrix ETERNITY NE System Manual...
- Page 405 The table below displays the default events for which notifications will be sent to the SE. You may customize it as per your requirement. Event Message Description Notification for Memory Usage VMS Memory consumption alert to SE Matrix ETERNITY NE System Manual...
- Page 406 [VMS] Message received for call This email will be sent to user’s personal Call Tapping Message recording between <num1> and mailbox, when the conversation between two <num2> Numbers was recorded. Notification for New Message in General Mailbox Matrix ETERNITY NE System Manual...
- Page 407 If Caller Number is unavailable, Caller Name will be displayed. If both are unavailable, ‘Unknown’ will be displayed. The CLI Number can be an External Caller Number or an Internal Caller Number. Message Type may be Normal or Urgent. Matrix ETERNITY NE System Manual...
-
Page 408: General Mailbox Settings
<, >, :, ", /, \, |, ? and * characters are not allowed. • Mailbox Password: If you have selected the Ask Password to access Mailbox check box in Extension Voice Mail Settings, extensions users can access the General Mailbox by dialing the default Password-1111. Matrix ETERNITY NE System Manual... - Page 409 By default, the General Mailbox with access code-1176 will open. For information regarding the configuration, see “Extension Voice Mail Settings”. • Click Submit to save the settings. For more information and instructions on how to access the General Mailbox, see “Accessing General Mailbox”. Matrix ETERNITY NE System Manual...
-
Page 410: Extension Voice Mail Settings
Extension Number/Name and then select the same from the drop • For Extension, down list. • For Department Group, select the desired Department Group Number from the drop down list. • Click OK. You may now configure the respective VMS parameters. Matrix ETERNITY NE System Manual... - Page 411 Extension, Department Group or General Mailbox. It allows you to access your Personal Mailbox. For Extension and Department Group: If you disable the check box, the Personal Mailbox will not be assigned and the system will not allow you to access your Personal Mailbox. Matrix ETERNITY NE System Manual...
- Page 412 In case, the recorded message size is greater than the old message that is to be overwritten then the recorded message wll not be delivered. A prompt will be played for the same. Note: The old message will be deleted. Not applicable when you select Operator as the “Select Number” option. Matrix ETERNITY NE System Manual...
- Page 413 In Message Profile, select the Message Profile you want to assign. For more information, see “Message Profile”. • In Mailbox Menu, select the Mailbox Menu you want to assign. For more information, see “Mailbox Menu”. Matrix ETERNITY NE System Manual...
- Page 414 Not applicable when you select General Mailbox as the “Select Number” option. Not applicable when you select Operator as the “Select Number” option. Matrix ETERNITY NE System Manual...
- Page 415 Select Scheduled, if you want the notification to be sent at fixed time schedules. • Select None, if you do not want to set message wait notification via call. Default: None. Applicable only when you select Extension as the “Select Number” option. Matrix ETERNITY NE System Manual...
- Page 416 Click Submit to save Extension Voice Mail settings. • Click Copy if you wish to copy the respective Extension’s Voice Mail settings to other extensions. Not applicable when you select Operator as the “Select Number” option. Matrix ETERNITY NE System Manual...
- Page 417 For multiple extensions, select Extension Numbers from and enter the Extension Number range. For all extensions, select All Extensions. The Voice Mail Settings — Abbreviated Name, Message Wait Notification via Call parameters and Message Wait Notification via Email parameters will not be copied. Matrix ETERNITY NE System Manual...
-
Page 418: Voice Mail Auto Attendant Menu
You may add a new menu, edit the default menus or delete a VMAA menu. To add a new VMAA Menu, • Click Add New Menu. A new VMAA Menu xxx will be created. You may now configure this as per your requirement. Matrix ETERNITY NE System Manual... - Page 419 You may add a new prompt from here. For further details, see “Prompts Management”. Once the files are uploaded these appear as options for Afternoon Prompt. • In Evening Prompt, select the prompt which you wish to play to the caller as the Evening Greeting. Matrix ETERNITY NE System Manual...
- Page 420 For more information, see “Language Selection Profile”. From here, the caller can select a different language other than the Menu Language configured. All the VMS prompts henceforth will be played in the language selected here. Matrix ETERNITY NE System Manual...
- Page 421 In No Match Found Prompt, select the prompt which you wish to play when caller has dialed an invalid extension number. Select None, if you do not wish to play any prompt. You may add a new Prompt. To do so, • Click Settings . The Prompts Management page opens. Matrix ETERNITY NE System Manual...
- Page 422 “Prompts Management”. Once the files are uploaded these appear as options for Confirm Name Prompt. The system will place the call only when the entered name matches with the name stored in the Global Directory. Matrix ETERNITY NE System Manual...
- Page 423 The default Auto-Attendant actions taken by the system, when there is an incoming trunk call on the VMS are displayed here. You may add a new action, edit or delete the default actions. To delete an Auto-Attendant action, mouse over on the respective action and click Matrix ETERNITY NE System Manual...
- Page 424 For more information, “Language Selection Profile”. All the VMS prompts henceforth will be played in the language selected here. • If you select Repeat prompt, the system will repeat all the Auto-Attendant prompts configured in sequence. Matrix ETERNITY NE System Manual...
- Page 425 In Information Prompt Playover Action, select — Transfer to Operator, Transfer to Department Group, Transfer to Extension, go to VMAA Menu or Disconnect. • If you select Transfer to Department Group or Transfer to Extension, select the respective Department Group number or enter the desired extension number. Matrix ETERNITY NE System Manual...
- Page 426 Once the files are uploaded these appear as options for Dial by Name Prompt. • In Call Transfer Profile, select the desired Call Transfer Profile as per your requirement. By default, As configured for Transfer Number is selected. Matrix ETERNITY NE System Manual...
- Page 427 In No Digit Dialed Retry Count, select the number of times you wish to prompt the caller for dialing the digit. The prompt will be played repeatedly till the Retry Count expires. • In Retry Count Expiry Prompt, select the prompt you wish to play when the Retry Count expires. Matrix ETERNITY NE System Manual...
- Page 428 Select the No Match Found Retry check box to prompt the caller to dial the Extension name again. • In No Match Found Retry Count, select the number of times you wish to prompt the caller for dialing the extension number. The prompt will be played repeatedly till the Retry Count expires. Matrix ETERNITY NE System Manual...
- Page 429 For more information, see “Call Transfer Profile”. • If you select Go to VMAA Menu, select the desired VMAA Menu. • If you select Disconnect, the system will disconnect the call. Multiple Match Found Settings Matrix ETERNITY NE System Manual...
- Page 430 Department Group, Go to VMAA Menu, Go to Previous Menu or Disconnect. • If you select Transfer to Department Group or Transfer to Extension, select the respective Department Group number or enter the desired extension number. Matrix ETERNITY NE System Manual...
- Page 431 • If you select Go to Previous Menu, the system will go back to the previous menu. • If you select Disconnect, the system will disconnect the call. • Click Close to close the window. Matrix ETERNITY NE System Manual...
- Page 432 If you select Transfer to Department Group or Transfer to Extension, select the respective Department Group number or enter the desired extension number. • In Call Transfer Profile, select the desired Call Transfer Profile as per your requirement. By default, As configured for Transfer Number is selected. Matrix ETERNITY NE System Manual...
- Page 433 Personal Greetings will not be applicable if your mailbox is defined as the destination for Call Tapping or Conversation Recording messages. • Select the Play Conditional Greeting check box to allow the conditional greetings to be played to the caller. Matrix ETERNITY NE System Manual...
- Page 434 Message Type, Message Sensitivity and Message Security that you configured. If you disable the check box, the system will not play the Message Leave Confirmation prompt to the caller after leaving the message. Matrix ETERNITY NE System Manual...
- Page 435 No Mailbox Action is applicable if you have enabled Overide Message Leave Settings of Extension parameter. • In No Mailbox Action, you can select — Disconnect, Transfer to Operator, Transfer to Extension, Transfer to Department Group, Go to VMAA Menu. Matrix ETERNITY NE System Manual...
- Page 436 Once the files are uploaded these appear as options for Mailbox Access Prompt. No Match Found Settings • For details, refer “No Match Found Settings”. No Digit Dialed Settings • For details, refer “No Digit Dialed Settings”. • Click Close to close the window. Matrix ETERNITY NE System Manual...
- Page 437 • Click Settings . The Prompts Management page opens. You may add a new prompt from here. For further details, see “Prompts Management”. Once the files are uploaded these appear as options for Disconnect Prompt. Matrix ETERNITY NE System Manual...
-
Page 438: Language Selection Profile
To edit a Language Profile, • In Profile Name, you may assign a name to the Language profile. By default, it is Language Selection x, where x is the Language Profile Number from 1 to 8. Matrix ETERNITY NE System Manual... - Page 439 In Retry Count Expiry Prompt, select the prompt you wish to play when the Retry Count expires. Select None, if you do not wish to play any prompt. • Click Settings . The Prompts Management page opens. Matrix ETERNITY NE System Manual...
- Page 440 In Retry Count Expiry Prompt, select the prompt you wish to play when the Retry Count expires. Select None, if you do not wish to play any prompt. • Click Settings . The Prompts Management page opens. Matrix ETERNITY NE System Manual...
- Page 441 Select Disconnect, if you want the system to disconnect the call. • Select a language from the Supported VMS Languages you configured, if you want the system to use the Language you select. See “Supported VMS Language”. Matrix ETERNITY NE System Manual...
-
Page 442: Message Profile
To edit a Message Profile, • In Profile Name, you may configure the name of the Message profile you want. By default, it is Message Profile xx where xx is the Message Profile Number from 01 to 12. Matrix ETERNITY NE System Manual... - Page 443 Select Set as Normal, if you want the system to store the messages received in the mailbox as Normal. The messages left by the external callers or replied by the internal callers will be considered as normal messages. Matrix ETERNITY NE System Manual...
- Page 444 The digit you configure will be played as the digit to be dialed by the caller to select the respective option. The options will be played in the sequence — 1-9, 0, *, #. The option for which the digit selected is None will not be played. Matrix ETERNITY NE System Manual...
- Page 445 This is applicable only if you have enabled the Message Verification check box or selected the Ask Caller as the Message Type and/or Message Sensitivity option. Based on the configuration, you may select the desired action — Normal+Normal, Urgent+Normal, Normal+Private or Urgent+Private. Matrix ETERNITY NE System Manual...
- Page 446 Urgent and then play the old messages with the message type as Normal. • Date Playback Format: Select the Date Playback Format — DD-MM-YYYY or MM-DD-YYYY— you want the system to play while playing the message details to the extension user. Matrix ETERNITY NE System Manual...
- Page 447 The message count has no interaction with the number of old/new/total messages present in the mailbox. If you disable the check box, the system will not play the Message sequence number before playing the message to the extension user. Matrix ETERNITY NE System Manual...
- Page 448 Select the Message Verification check box to allow the recorded message to be verified by the extension user before storing it in the Personal Mailbox or re-record it. If you disable the check box, the system will directly store the recorded message in the Personal Mailbox. Matrix ETERNITY NE System Manual...
- Page 449 This option is applicable only if you have selected the Confirm Number Collected check box. You can assign the Digits (0-9, *, # or None) to each of the options — Confirm, Re-enter. Make sure you do not assign the same digit to both the options. Matrix ETERNITY NE System Manual...
- Page 450 The additional message will be added as the final part of the message i.e. will be added at the end of the message. • Without Comment: The system will provide an option to the extension user for sending the recorded message to the destination number/s without adding any additional comment to it. Matrix ETERNITY NE System Manual...
- Page 451 Ask Caller as the Message Type option. • Private(Confidential): The system will save the recorded message as Private message. This is applicable only if you have selected the Ask Caller as the Message Sensitivity option. Matrix ETERNITY NE System Manual...
- Page 452 As soon as the destination number reads the message, the extension user will receive a read receipt in form of a voice mail. To retrieve the read receipt, access your voice mail. The read receipt includes the name, destination number and the first five seconds of the message sent or forwarded. Matrix ETERNITY NE System Manual...
- Page 453 Select None, if you do not wish to play any prompt when extension user has not dialed any digit. • Click Settings . The Prompts Management page opens. You may add a new prompt from here. For further details, see “Prompts Management”. Matrix ETERNITY NE System Manual...
- Page 454 Select Go to Previous Menu, if you want the system to provide an option to the extension user to go back to the Mailbox Access Main Menu. • Select Disconnect, if you want the system to disconnect the call. Matrix ETERNITY NE System Manual...
-
Page 455: Call Transfer Profile
Click Add New Profile. A new Transfer Profile xx will be created. You may now configure this as per your requirement. To delete a profile, click Delete. The default Call Transfer Profiles cannot be deleted. Matrix ETERNITY NE System Manual... - Page 456 If the Wait for Answer Timer value is greater than Ring Back Tone timer, then Ring Back Tone Timer will expire first and the next action will be taken as per the Call Transfer Unsuccessful - Unconditional configuration. Matrix ETERNITY NE System Manual...
- Page 457 In Call Transfer Profile, select the desired Call Transfer Profile as per your requirement. By default, As configured for Transfer Number is selected. • If you select Go to VMAA Menu, select the desired VMAA Menu. • If you select Disconnect, the system will disconnect the call. Matrix ETERNITY NE System Manual...
- Page 458 Select the Play Conditional Greeting check box to allow the conditional greetings to be played to the caller. If the conditional greeting is not recorded or is unavailable, no prompt will be played. Conditional Greeting will be applicable only if your mailbox is defined as the destination for Call Transfer Unsuccessful. Matrix ETERNITY NE System Manual...
- Page 459 You can assign the Digits (0-9, *, # or None) to each of the options — Re-record, Confirm, Urgent, Private(Confidential), Listen Recorded Message and Append to Recorded Message. Make sure you do not assign the same digit to multiple options. Matrix ETERNITY NE System Manual...
- Page 460 The VMS allows you to: • process the call immediately for the busy condition as per the options you select. • process the call after being held for a certain duration as per the options you select. Matrix ETERNITY NE System Manual...
- Page 461 Management”. Once the files are uploaded these appear as options for Busy Hold Prompt. • Select Provide Advanced Options during Hold check box, if you want the system to play Advanced options to the caller. Matrix ETERNITY NE System Manual...
- Page 462 Assistant Number. For detailed instructions, refer “Number Programming (Assistant/Personal)” “Mailbox Menu”. Click Settings to configure the parameter. • In Call Transfer Profile, select the desired Call Transfer Profile as per your requirement. By default, Wait for Ring is selected. Matrix ETERNITY NE System Manual...
- Page 463 The prompt will be played repeatedly till the Retry Count expires. • In Retry Count Expiry Prompt, select the prompt you wish to play when the Retry Count expires. Select None, if you do not wish to play any prompt. Matrix ETERNITY NE System Manual...
- Page 464 Click Settings . The Prompts Management page opens. You may add a new prompt from here. For further details, see “Prompts Management”. Once the files are uploaded these appear as options for Retry Count Expiry Prompt. Matrix ETERNITY NE System Manual...
- Page 465 Click Settings . The Prompts Management page opens. You may add a new prompt from here. For further details, see “Prompts Management”. Once the files are uploaded these appear as options for Retry Count Expiry Prompt. Matrix ETERNITY NE System Manual...
- Page 466 As Configured for Transfer Number is selected. Click Settings to configure the parameters of the selected profile. • If you select Go to VMAA Menu, select the desired VMAA Menu. • If you select Disconnect, the system will disconnect the call. Matrix ETERNITY NE System Manual...
- Page 467 As Configured for Transfer Number is selected. Click Settings to configure the parameters of the selected profile. • If you select Go to VMAA Menu, select the desired VMAA Menu. • If you select Disconnect, the system will disconnect the call. Matrix ETERNITY NE System Manual...
- Page 468 As Configured for Transfer Number is selected. Click Settings to configure the parameters of the selected profile. • If you select Go to VMAA Menu, select the desired VMAA Menu. • If you select Disconnect, the system will disconnect the call. Matrix ETERNITY NE System Manual...
- Page 469 While the Screened Options are being played, if the caller does not select any options, the following parameters will be applicable. • In Prompt if No Option Selected, select the prompt you wish to play to the caller, if no Screened Option is selected by the caller. Matrix ETERNITY NE System Manual...
- Page 470 Department Group number or enter the desired extension number. In Call Transfer Profile, select the desired Call Transfer Profile as per your requirement. By default, Wait for Ring is selected. Click Settings to configure the parameters of the selected profile. Matrix ETERNITY NE System Manual...
- Page 471 Leave Voice Mail • Transfer to Operator • Transfer to Assistant • Transfer to Alternate Number/Mobile Number • Dial Extension Number • Go to Main Menu • Go to Previous Menu • Stay on Hold • Disconnect Matrix ETERNITY NE System Manual...
- Page 472 Clear the check box if you want the system to apply Message Leave Settings configured for the extension or department group number. Transfer to Operator After you assign the digit, click Settings to configure the parameters. Matrix ETERNITY NE System Manual...
- Page 473 Dial Extension Number After you assign the digit, click Settings to configure the parameters. • In Dial Extension Number Prompt, select the prompt you wish to play to the caller to dial the desired extension number. Matrix ETERNITY NE System Manual...
- Page 474 If you select Transfer to Department Group or Transfer to Extension, select the respective Department Group number or enter the desired extension number. • In Call Transfer Profile, select the desired Call Transfer Profile as per your requirement. By default, As configured for Transfer Number is selected. Matrix ETERNITY NE System Manual...
- Page 475 As configured for Transfer Number is selected. Click Settings to configure the parameters of the selected profile. • If you select Go to VMAA Menu, select the desired VMAA Menu. • If you select Disconnect, the system will disconnect the call. Matrix ETERNITY NE System Manual...
- Page 476 You can assign the Digits (0-9, *, # or None) to each of the options — Leave Voice Mail, Transfer to Operator, Transfer to Assistant, Transfer to Alternate/Mobile Number, Dial Extension Number, Go to Main Menu, Go to Previous Menu and Disconnect. Make sure you do not assign the same digit to multiple options. Matrix ETERNITY NE System Manual...
- Page 477 Once the files are uploaded these appear as options for Dial Extension Number Prompt. • In Call Transfer Profile, select the desired Call Transfer Profile as per your requirement. By default, As configured for Dialed Extension is selected. Click Settings to configure the parameters of the selected profile. Matrix ETERNITY NE System Manual...
- Page 478 • In No Digit Dialed Prompt, select the prompt which you wish to play when caller has not dialed any digit. Select None, if you do not wish to play any prompt. Matrix ETERNITY NE System Manual...
- Page 479 In Busy Extension Status check time interval (sec), enter the interval of time after which you want the system to inform the caller that the extension number is busy. The system will play the Time Interval Expiry Prompt. Matrix ETERNITY NE System Manual...
- Page 480 • If you select Go to VMAA Menu, select the desired VMAA Menu. • If you select Disconnect, the system will disconnect the call. • If you select Give Advanced Option, see “Advanced Options”. Matrix ETERNITY NE System Manual...
- Page 481 In Invalid Digit Dialed Prompt, select the prompt which you wish to play when the caller has dialed an invalid digit. Select None, if you do not wish to play any prompt. • Click Settings . The Prompts Management page opens. Matrix ETERNITY NE System Manual...
- Page 482 In Invalid Digit Dialed Action, you can select — Disconnect, Go to Voice Mail, Transfer to Operator, Transfer to Assistant, Transfer to Alternate Number, Go to Main Menu, Go to Previous Menu, Stay on Hold. Refer to the details given above under “Advanced Options”. Matrix ETERNITY NE System Manual...
-
Page 483: Notification Via Call-Profile
When Schedule is selected as the Type of notification, • A new message arrives in the mailbox of the extension user. Matrix ETERNITY NE System Manual... - Page 484 Message Notification Retry Count, Message Notification Interval and Message Notification Ring. See “System Timers and Counts”. Configuring Notification via Call - Profile • Login as System Engineer. • Under Advanced Settings, click VMS Configuration. Matrix ETERNITY NE System Manual...
- Page 485 If you want to receive notifications on a holiday, select the Notify on Holiday check box. • Click Submit • Now, assign the profile numbers to the desired extensions. Make sure the Message Wait Notification via Call parameters have been configures in the Extension Voice Mail Settings of these extensions. Matrix ETERNITY NE System Manual...
-
Page 486: Mailbox Menu
• Click Add New Menu. A new Mailbox Menu xx will be created. You may now configure this as per your requirement. To delete a menu, click Delete. The default Mailbox Menus cannot be deleted. Matrix ETERNITY NE System Manual... - Page 487 The Destination Number may include a Distribution List. The Message will be send as per the Message Send/Forward Settings configured in the Message Profile. For details, refer “Message Send/Forward Settings”. Matrix ETERNITY NE System Manual...
- Page 488 The Message will be sent as per the Message Send/Forward Settings configured in the Message Profile. For details, refer “Message Send/Forward Settings”. After forwarding the message, the Mailbox Access menu will be played again. Matrix ETERNITY NE System Manual...
- Page 489 • The Mailbox Greetings options will be played asking the caller to select the type of greetings — Personal or Conditional — which he wishes to Record, Play or Erase. For details, refer “Mailbox Greetings”. Matrix ETERNITY NE System Manual...
- Page 490 Cancel: The system will clear the Message Redirect Number programmed by the caller. • Go to Previous Menu: The system will provide an option to the caller to go back to the “Mailbox Management” menu. Matrix ETERNITY NE System Manual...
- Page 491 Erase a personal greeting for the Non-Working Hour Timezone. • Go to Previous Menu: The system will provide an option to the caller to go back to the Record Mailbox Greetings Menu. For details, refer “Record Greetings/Name”. Matrix ETERNITY NE System Manual...
- Page 492 Erase: The system will clear the recorded Mailbox Name or the Personal/Conditional Greeting. • Go to Previous Menu: The system will provide an option to the caller to go back to the Previous Menu — Record Mailbox Name, Personal Greeting Timezone Selection or Conditional Greeting. Matrix ETERNITY NE System Manual...
- Page 493 Clear Number: The system will clear the Assistant Number or Personal Number programmed by the caller. • Go to Previous Menu: The system will provide an option to the caller to go back to the “Mailbox Management”. Matrix ETERNITY NE System Manual...
-
Page 494: Distribution List
To add a new List, • Click Add New List. A new List xx will be created. You may now configure this as per your requirement. To delete a list, click Delete. The default Distribution List cannot be deleted. Matrix ETERNITY NE System Manual... - Page 495 Place your cursor on the desired Extension and click delete key from your keyboard. The selected extension will be deleted. It is also possible to select a range of extensions at a time by pressing 'SHIFT’ and 'Down' arrow keys. • Click Submit. Matrix ETERNITY NE System Manual...
-
Page 496: Recording Voice Messages
"Please enter first three letters of the name" and then plays “More than one match found. Matching Names will be played one by one. To Select the name press ‘1’, to Skip the name press ‘2’, To Repeat the last name press ‘3’.” Matrix ETERNITY NE System Manual... - Page 497 The audio file is recorded in the prescribed format (.wav) and attributes. • The SARVAM UCS is connected to a computer (standalone or LAN). • You can upload a single prompt or the entire folder. For detailed instructions, see “Prompts Management”. Matrix ETERNITY NE System Manual...
-
Page 498: Prompts Management
The following table defines the maximum number of prompt files supported in each folder. Maximum length allowed for each folder Folder Name Maximum Prompt files supported (seconds) Greeting Auto-Attendant Matrix ETERNITY NE System Manual... - Page 499 Alarm Miscellaneous How to configure • Login as System Engineer. • Under Advanced Settings, click VMS Configuration. • Click Prompts Management. • In Select Prompt type to manage, select the desired folder. • Click OK. Matrix ETERNITY NE System Manual...
- Page 500 Make sure the prompt files within the folder are in .wav format and have the following attributes: • Audio Format: u-law • Channel : 1 (mono) • Sampling Frequency: 8 KHz • Audio Sample Size: 8 bit Matrix ETERNITY NE System Manual...
- Page 501 The filename can be a maximum of 64 characters. The allowed characters for the filename are A to Z, a to z, 0 to 9, - and _. To download all the prompts of the respective prompt type and language selected, click Matrix ETERNITY NE System Manual...
- Page 502 If you are using Mozilla Firefox (version 3.5 recommended), before you save the configuration files, set the Downloads option of your browser as Always ask me where to save files. Matrix ETERNITY NE System Manual...
- Page 503 • Save the file on the local disk. • To view the files, • Open the Prompt Type_Language folder. Matrix ETERNITY NE System Manual...
- Page 504 You may now upload, download or delete a prompt file to/from a folder. The files present in the Fixed Folders cannot be deleted or added, but the existing files can be overwritten by a new one. Matrix ETERNITY NE System Manual...
- Page 505 Make sure, the file to be uploaded is a wav file. The filename can be a maximum of 64 characters. The allowed characters for the filename are A to Z, a to z, 0 to 9, - and _. • To download a prompt, click Matrix ETERNITY NE System Manual...
- Page 506 If you are using Mozilla Firefox (version 3.5 recommended), before you save the configuration files, set the Downloads option of your browser as Always ask me where to save files. Matrix ETERNITY NE System Manual...
- Page 507 • Save the file on the local disk. • To delete a prompt, click Matrix ETERNITY NE System Manual...
-
Page 508: Mailbox Status
Select Number: You may select — Extension, Department Group or General Mailbox — whose mailbox status you wish to view. enter the Extension Number/Name and then select the same from the drop • For Extension, down list. Matrix ETERNITY NE System Manual... - Page 509 Urgent New / Urgent Old Messages: It displays the number of New Urgent Messages as well as the Old Urgent Messages available in the respective mailbox. • Last Cleared On: It displays the date and time when all the Mailbox Messages (old and new) were last cleared by the user or SE. Matrix ETERNITY NE System Manual...
- Page 510 USB. The USB Status will be updated only after these messages are cleared. • You can also view the Mailbox Status or delete the voice messages from the SE Mode. To do so, click Mailbox Status under Status and following the steps described above. Matrix ETERNITY NE System Manual...
-
Page 511: Voicemail Backup
If you want to store the backup files in a PC having Windows as the Operating System, make sure it has IPv4 address. • Backup is not possible in Apple PCs. How to configure Scheduled Backup • Login as System Administrator. • Click Voice Mail. • Under Voice Mail, click Voicemail Backup. Matrix ETERNITY NE System Manual... - Page 512 To backup voicemail of a range of Department Group mailboxes, enter the starting and ending Department Group Numbers and then select the same from the drop down list. • To backup voicemail of the General Mailbox, enable this check box. Matrix ETERNITY NE System Manual...
- Page 513 Notification. For instructions, see “System Log Notification” “SMTP Settings”. • In Notification on Backup Status, select the desired status for which you require notification — Failure, Success or Success + Failure. By default, Failure is selected. Matrix ETERNITY NE System Manual...
- Page 514 To backup voicemail of a range of Department Group mailboxes, enter the starting and ending Department Group Numbers and then select the same from the drop down list. • To backup voicemail of the General Mailbox, enable this check box. Matrix ETERNITY NE System Manual...
- Page 515 The Voicemail Backup of the respective Extension/s will be stored in the Shared Folder you configure in Network Drive Settings. The folder structure will be as shown below: The Voicemail_Backup folder consists of the folders with the folder names defined as per the Date and Time of the backup. Matrix ETERNITY NE System Manual...
- Page 516 Where, DDMonthname_YYYY represents the Date, HHMMSS represents the Time in 24 Hour format and HHMMSS_PM/ AM represents the Time in 12 Hour format. The sub-folders with the Extension Names contain the respective extension’s voicemail files. Matrix ETERNITY NE System Manual...
-
Page 517: Vms Debug
SARVAM UCS supports Syslog Client, which enables the VMS to send debug messages in syslog format to the remote 'Syslog Server' on the IP network. You can view the system debug messages on the remote Syslog server or any other application which can capture the Syslog debug messages. Matrix ETERNITY NE System Manual... - Page 518 Select the Slave Application check box to view the debug related to the records from VMS Layer side. Click Submit. You can also configure the VMS Debug from the Maintenance link. To do so, click VMS Debug under Maintenance. Matrix ETERNITY NE System Manual...
-
Page 519: Sms Server
Mobile port through which the messages are to be sent/received (Fixed/LCR), see “SMS Routing”. • configure the SMS parameters and the SMS Budget parameters (if required) on the respective Mobile ports, see “Mobile Trunks”. Matrix ETERNITY NE System Manual... - Page 520 • If a match is found in the Denied list, the SMS will be rejected. If no match is found, then it checks the destination where the SMS is to be forwarded as an email. Matrix ETERNITY NE System Manual...
- Page 521 Subject contains the Name and/or Number of the sender and the Body of the message contains the message for the recipients. The Name will be displayed only if it has been configured and it is found in the system database. Matrix ETERNITY NE System Manual...
- Page 522 The body must contain the message to be sent to the recipients, that is ‘Due to an urgent task tomorrow’s meeting is postponed.’ • The senders Email ID or Name will be displayed to the recipients, if you have configured the parameter Send Footer/Signature in SMS. Matrix ETERNITY NE System Manual...
- Page 523 The Server sends a return email as well as a delivery status report to the SA/Sender or to Both, informing that the SMS has been delivered/not delivered. If a match is not found for the Name, a reply mail is sent to the Sender, informing that the Name is not found. Matrix ETERNITY NE System Manual...
-
Page 524: Bulk Sms
Email Server uses SMTP to send messages and POP3 to receive messages. • you must configure the SMTP Client and POP3 Client parameters in the SMS Server of SARVAM UCS, “SMS Server - Mail Settings”. • users must have valid Email IDs. Matrix ETERNITY NE System Manual... - Page 525 Attachment file size should be less than 1 MB. If attached file format is found to be other than .csv No attachment found to process bulk SMS. Please attach valid “.csv” file for Bulk SMS. Matrix ETERNITY NE System Manual...
- Page 526 How to configure For the SMS Server to function, you need to configure the following parameters, General Parameters • Login as System Engineer. • Under Advanced Settings, click SMS Server. • Click General Parameters. Matrix ETERNITY NE System Manual...
- Page 527 SMS table opens. You can configure up to 250 numbers. • In the Allowed column, enter the numbers on which messages can be sent and in the Denied column, enter the numbers on which messages cannot be sent. Matrix ETERNITY NE System Manual...
- Page 528 Default text: Some texts of message are ignored as length of mail is more than allowed characters. • Configure the Minimum time delay between sending two consecutive SMS (sec) as supported by the network. Default: 05. • Click Submit. Matrix ETERNITY NE System Manual...
- Page 529 SMS as an Email to the System Administrator. Default: Disabled. If you enable this check box, you must configure at least one Email address of the System Administrator under “System Administrator Email ID”. • Click Submit. Matrix ETERNITY NE System Manual...
- Page 530 You can select Sender, System Administrator or Both. Default: Sender. If you select System Administrator, the email will be sent to the email IDs configured in “System Administrator Email ID”. Matrix ETERNITY NE System Manual...
- Page 531 Enter the Email IDs of the users who can send Bulk SMS. • You can also configure this list by clicking the Allowed Email IDs List for sending Bulk SMS link under SMS Server Default: Disabled. Matrix ETERNITY NE System Manual...
- Page 532 When Daily SMS credit exceeds, send email Daily SMS Limit Exceeds. Please consult to sender informing about the status. your System Administrator. If required you can modify the Email reply text as per your requirement. To do this, Matrix ETERNITY NE System Manual...
- Page 533 You must Configure the System Administrator Email ID to which a copy of SMS must be sent by the SMS Server, if you have enabled Send copy of each SMS to System Administrator as an Email checkbox under “SMS to Email Forwarding”. Matrix ETERNITY NE System Manual...
- Page 534 You can configure up to 5 Email ID’s. The Email IDs can be of maximum 64 characters. • Click Submit. Matrix ETERNITY NE System Manual...
-
Page 535: Sms Routing
• Under Advanced Settings, click SMS Server. • Click General Parameters. • Click SMS Configuration to expand. • In Send SMS, select Using Fixed Port. • Click Settings , the SMS Routing-Fixed Port table opens. Matrix ETERNITY NE System Manual... - Page 536 SMS and then configure the SMS over IP-Fixed Port table. To configure Fixed Port Routing, • Login as System Engineer. • Under Basic Settings, click VoIP Parameters. • Click SMS over IP Settings to expand. Matrix ETERNITY NE System Manual...
- Page 537 Enable Port: Select the Enable check box corresponding to the Mobile Port you want to use for sending the SMS. • Click Submit. Make sure that you have selected the Send SMS check box for this Mobile Port. See “Mobile Trunks”. Matrix ETERNITY NE System Manual...
- Page 538 SMS and then route it according to the selected preference. Configuring LCR • Login as System Engineer. • Under Advanced Settings, click SMS Routing. • Click Least Cost Routing (LCR). The SMS Routing-LCR table opens. • Configure the following parameters: Matrix ETERNITY NE System Manual...
- Page 539 Number: Configure the destination numbers to which the messages are to be sent. • Preference1 to 4: Select the trunks in the order of preference through which you want to send the SMS. You can select upto 4 preferences. • Click Submit. Matrix ETERNITY NE System Manual...
-
Page 540: Sms Server - Mail Settings
You may add a new SMTP Account. To do so, • Select Add New option for Use SMTP Account. • Click Settings to configure the parameters of the New SMTP Account you created. For more information, see “SMTP Settings”. • Click Submit. Matrix ETERNITY NE System Manual... - Page 541 Click the 'Click to Test POP3 Settings’, to check if the POP3 parameters have been configured correctly. When you click this button, the alert message appears: "Testing POP3 can take up to 99 seconds. Would you like to continue?" Click OK. Matrix ETERNITY NE System Manual...
- Page 542 Test Status Message Description When connection to POP3 server is established "Login to POP3 Mail Server is Successful" successfully. When connection to POP3 server is not "Login to POP3 Mail Server is Failed" established successfully Matrix ETERNITY NE System Manual...
-
Page 543: Sms Server - Reports
Part of SMS • Mobile Port • Text To generate the reports you must configure the following parameters: • General Report Settings • Scheduled Report Settings • Error Report Settings • Report Backup Parameters • Report Filters Matrix ETERNITY NE System Manual... - Page 544 You can print Reports whenever you want or schedule printing of the report from the System Administrator mode. You must set the filters as per your requirement before you print the Report. To do this, • Login as System Administrator. Matrix ETERNITY NE System Manual...
- Page 545 • Pending • Sent • Delivered • Not Delivered • Received • Failed • Select the type of Mail Status. You can select from the following: • • Sent • Received • Pending • Failed Matrix ETERNITY NE System Manual...
- Page 546 To view the report, click Generate Report. The report is displayed in a new window. Online Report Generation • Under SMS Server, click Report. • To Generate online report, click Start. • To stop printing, click Stop. Scheduled Report Generation • Under SMS Server, click Report. Matrix ETERNITY NE System Manual...
- Page 547 • Click Submit. Manual Report Generation • To generate the report manually, under SMS Server, click Report. • To Generate report now, click Generate. • The report is generated and appears in a new window. Matrix ETERNITY NE System Manual...
- Page 548 Click Export, if you wish to save the report at the desired location. The report will be saved in CSV format. Online Error Report Generation • Under SMS Server, click Report. • To Generate Online error report, click Start. • To stop printing, click Stop. Matrix ETERNITY NE System Manual...
- Page 549 In Current status of Bulk SMS process, the status of the Bulk SMS process is displayed. • If the Current status of Bulk SMS process displays Running, click Abort to stop the ongoing process midway. • To clear all the database, click Clear Database. Matrix ETERNITY NE System Manual...
-
Page 550: Sms Over Ip
“How to configure”. Wherever the SMS over IP Application handover the handling of the SMS to the SMS Server Application, make sure you have the SMS Server license to achieve the desired functionality. See “License Management”. Matrix ETERNITY NE System Manual... - Page 551 The destination can be the recipients Extension number or Name. The To field in the message body specifies the destination. You cannot send the same message to multiple destinations at the same time. You will have to send the same message to individual recipients. Matrix ETERNITY NE System Manual...
- Page 552 To forward an IM as an SMS, refer to the illustration below: Here, • The SIP extension user is typing a message to Jessica James. This message can either be sent as an IM or an SMS. Matrix ETERNITY NE System Manual...
- Page 553 To send messages through fixed Mobile Ports, select Using Fixed Port and configure the SMS over IP - Fixed Port Routing table. For detailed information, see “Fixed Port Routing (SMS over IP)”. Matrix ETERNITY NE System Manual...
- Page 554 Enable the Add Footer in SMS check box and in Footer text enter the desired text/message to be sent to the recipient as signature in the SMS. By default, the senders Name and Number will be sent. • Click Submit. Matrix ETERNITY NE System Manual...
-
Page 555: Sms/Email Group
Assign a Global/Personal Directory contact to the SMS/Email Group you created as per your requirement. For instructions, see “Configuring Personal Directory” “Configuring Global Directory”. Configuring SMS/Email Group table • Login as System Engineer. • Under Advanced Settings, click SMS Server. Matrix ETERNITY NE System Manual... - Page 556 Click SMS/Email Group. You can configure maximum 10 Groups, • At the desired index, in Type of Group configure the Group Name. The Group Name can be a maximum of 16 characters. Default: Blank. • Click Submit. Matrix ETERNITY NE System Manual...
-
Page 557: Computer Telephony Integration (Cti)
Retrieve a held call Toggle between two calls Transfer a call Disconnect/Release a call Conference - Add/Remove a party Dial digits for Multi-Stage dialing Matrix ETERNITY NE System Manual... - Page 558 You can handle calls from your computer (desktop application) as well as your extension phone. How to configure You must configure the following CTI parameters. To do so, • Login as System Engineer. • Under Advanced Settings, click CTI. • Click CTI Parameters. Matrix ETERNITY NE System Manual...
- Page 559 TSP Version: It displays the Software Version of the Matrix TSP installed in the Client. • Status: It displays the status of the Client and Server binding, that is whether the link is up or down. Matrix ETERNITY NE System Manual...
- Page 560 Matrix ETERNITY NE System Manual...
-
Page 561: Features And Facilities
As many as 50 different personal directories, numbered from 01 to 50 can be created and assigned to SLT and SIP Extensions. 92. These may be numbers of your branch offices, your clients, numbers of emergency services such as fire, police. Matrix ETERNITY NE System Manual... - Page 562 SARVAM UCS can call this number by simply dialing the '8' or '6' (feature access code for Abbreviated Dialing) followed by '102' (Memory Location code at which the desired number, 02652630566, is stored). The system will dial out the number using any of the trunks selected for routing Global Directory’s numbers. Matrix ETERNITY NE System Manual...
- Page 563 You may draw tables on paper and enter the numbers and corresponding names, email Ids, group and trunk access codes against each Index number. Personal Directory 01 Email ID Group Index No. Number Name (optional) (optional) Matrix ETERNITY NE System Manual...
- Page 564 For Personal directory contacts, the format of the CSV file must be as follow: For example 21, 9867985489, Sean Gilbert, Sean@hotmail.com, 1, 0 Where, 21 is the Index Number at which you want the entry to be stored (mandatory). 9867985489 is the Contact Number (mandatory). Matrix ETERNITY NE System Manual...
- Page 565 Under Advanced Settings, click Abbreviated Dialing. • Click Personal Directory. You can configure up to 50 Personal Directories. Select the directory number by clicking the required number tab above the table. For each directory configure the following parameters: Matrix ETERNITY NE System Manual...
- Page 566 After you have configured the Personal Directories, assign a personal directory to each extension. The extension may be a SLT or SIP extension. To assign Personal Directory to SLT extensions, • Under Basic Settings, click SLT Extensions. • Click the More ... link to expand options. Matrix ETERNITY NE System Manual...
- Page 567 Personal Directory. Similarly, you can assign a Personal Directory to a SIP extension. Upload Personal Directory CSV file • Login as System Engineer. • Under Advanced Settings, click Abbreviated Dialing. • Click Upload/Download. Matrix ETERNITY NE System Manual...
- Page 568 All the contacts of the CSV file will be uploaded in the selected Personal Directory. To view, click the respective Personal Directory link. Download Personal Directory CSV file • Under Advanced Settings, click Abbreviated Dialing. • Click Upload/Download. The Upload/Download page opens. • Click Download Personal Directory Contacts to expand. Matrix ETERNITY NE System Manual...
- Page 569 To open the Personal_Directory_01.csv file from the location on the local disk, follow the steps given below: • DO NOT OPEN THE CSV FILE DIRECTLY WITH EXCEL! • Open a New worksheet in Excel. • Open the Data tab and select From text button in the Get External Data. Matrix ETERNITY NE System Manual...
- Page 570 • Select your CSV file from the location on the local disk to import. Matrix ETERNITY NE System Manual...
- Page 571 • In Original data type section, select Delimited radio button and click Next. • In Delimiters select the Comma check box (column dividers will appear in preview) and click Next. Matrix ETERNITY NE System Manual...
- Page 572 SMS Server Personal Directory Configuration and the message in the body: Personal Directory is not assigned, can't add contact Name: XXXXX Number: XXXXX. Where name/number is as received in mail for directory configuration. Matrix ETERNITY NE System Manual...
- Page 573 Subject: SMS Server Personal Directory Configuration and the message in the body: New entry is successfully added at index-XX, Name: XXXXX, Number: XXXXX. Where XXXXX=is the information received in the mail for configuration. A separate mail is sent for each contact that is added. Matrix ETERNITY NE System Manual...
- Page 574 If the system is able to delete the entry, a reply mail with Subject: SMS Server Personal Directory Configuration and the message in the body: X is deleted from Personal Directory', where X is the particular name which is received for Matrix ETERNITY NE System Manual...
- Page 575 Click Advance to configure the Email ID and select the Group for the contact. • Enter the Email ID of the contact you wish to store. The Email ID can be a maximum of 64 characters. Matrix ETERNITY NE System Manual...
- Page 576 “Class of Service (CoS)” of the extensions. To do this, • Click Basic Settings and select the desired extension type: • “SLT Extensions” • “SIP Extensions” • On the respective extension page, click Class of Service to expand. Matrix ETERNITY NE System Manual...
- Page 577 Global directory with the contacts of CSV file. Default: Disabled. • Click Browse to Select the .csv file to be uploaded from the location on the local disk. Matrix ETERNITY NE System Manual...
- Page 578 To Open the Global_Directory.csv file from the location on the local disk, make sure you follow the steps given below: • DO NOT OPEN THE .CSV FILE DIRECTLY WITH EXCEL! • Open a New worksheet in Excel. Matrix ETERNITY NE System Manual...
- Page 579 Open the Data tab and select From text button in the Get External Data. • Select your CSV file from the location on the local disk to import. • In Original data type section, select Delimited radio button and click Next. Matrix ETERNITY NE System Manual...
- Page 580 • In Delimiters select the Comma check box (column dividers will appear in preview) and click Next. • Select the column with leading zeros and in Column data format select the Text radio button. Matrix ETERNITY NE System Manual...
- Page 581 • Press 'Enter' key. • Enter Name of the contact. • Press 'Enter' key. • Enter Trunk Access Code. • Press 'Enter' key. • You get confirmation tone and the message on your phone's display. Matrix ETERNITY NE System Manual...
- Page 582 You will get the confirmation tone and the confirmatory message: “Stored at Index xxx”. Editing a contact To edit a contact, • Scroll to ‘Contacts’ in the phone menu and press Enter key. • Select ‘Edit’ and press Enter key. Matrix ETERNITY NE System Manual...
- Page 583 Enter Personal Directory Index number: 001 to 025. • The desired number will be dialed out. For SLT Users • Pick up the handset. • Dial 8 (users world wide) • Dial 6 (users in USA) Matrix ETERNITY NE System Manual...
- Page 584 For SLT Users • Pick up the handset. • Dial 8 (users world wide) • Dial 6 (users in USA) • Dial Global Directory Index number: 100 to 999. • The desired number will be dialed out. Matrix ETERNITY NE System Manual...
-
Page 585: Access Codes
When the first digit '1' is dialed, the system finds a match. As several default access codes begin with '1' the system waits for the next digit to be dialed. • When the second digit '3' is dialed, the system finds a match for '13'. In reference to ETERNITY NENXIP50. Matrix ETERNITY NE System Manual... - Page 586 Call Forward and Redial, since both these features are invoked in the 'Dial' phase. Call forwarding options: Unconditional, When Busy, When No Reply, When Busy or No Reply. Matrix ETERNITY NE System Manual...
- Page 587 Auto Redial Cancel 1070 Barge-In Blind Transfer to Voicemail 1078 Call Chaining 1050 Call Cost Display 1075 Call Forward Call Forward - When Not Registered Call Park Call Park Retrieve Call Pick Up-Selective Call Pickup - Group Matrix ETERNITY NE System Manual...
- Page 588 Invoke RCOC Keypad Lock Last Caller Recall 1092 Leave Temp. / Rejoin Conf. Live Call Supervision 1098 Meet Me Paging 1093 Message Wait Set/Cancel 1076 Presence 1097 Mute 1052 Operator Paging 1074 Personal Directory Program 1071 Matrix ETERNITY NE System Manual...
- Page 589 You can either use the default Access Codes or change them to suit your preferences. To change Access Codes, see “Extension and Feature Codes” under Basic Settings for instructions. To change the Access Code of General Mailbox, see “General Mailbox Settings” under Voice Mail System. Matrix ETERNITY NE System Manual...
-
Page 590: Account Codes
Jet-Set Holidays D. Therefore, A pressed the Call Hold key to put B on Exclusive/ Global hold and dials the number of D. While in speech with D, A dials account code 002. Here, Account Matrix ETERNITY NE System Manual... - Page 591 Write Account Codes on one column. Account codes may be any three-digit number between 001 and 999. • Write the Account Names, i.e., names of the clients on the second column, against their respective Account Codes. Matrix ETERNITY NE System Manual...
- Page 592 To enable Account Code on extensions, • Click Basic Settings. • Click the extension type—SLT, SIP—to which you want to allow this feature. • Select the extension number to which you want to allow this feature. Matrix ETERNITY NE System Manual...
- Page 593 To enable Forced Account Code on the extension, • Click the More... link to expand. • Select the Do not allow outgoing calls without Account Code check box to enable this feature on the extension. • Click Submit. Matrix ETERNITY NE System Manual...
- Page 594 Dial Trunk Access Code. • Dial the number of the client. To enter Account Code Number during the call: • Press ‘Transfer’ Key. • Press DSS Key assigned to Account Code by Number. • Dial 1058 Matrix ETERNITY NE System Manual...
- Page 595 Dial the initial letter of the client's name. The Account Name List will be displayed on your Extended IP Phone, alphabetically with the corresponding account codes. • Scroll to select the desired client name and press Enter key. Matrix ETERNITY NE System Manual...
- Page 596 Printing Call Reports of Clients You can print the call details of your clients using their account codes as filter. “Station Message Detail Recording–Report”, for more detailed instructions on printing reports using filters. Matrix ETERNITY NE System Manual...
-
Page 597: Ac Impedance Test
Configuring Using Jeeves You can conduct the test after you have set the relevant test parameters. To do this, • Login as System Engineer. • Under Basic Settings, click CO Trunks. Select the desired CO Trunk. Matrix ETERNITY NE System Manual... - Page 598 The Reliable Test mode suggests the AC Impedance settings on the basis of most commonly used AC Impedances, CO Terminations and CO Line Types across the globe. The test using Reliable Test mode takes approximately 5 minutes to complete. Matrix ETERNITY NE System Manual...
- Page 599 • On completion of the test, the system will automatically disconnect the call. The message ‘Test completed’ appears on your screen. However, if you wish to abort the test midway, you may click Abort Test. Matrix ETERNITY NE System Manual...
- Page 600 Click Start Test. The message ‘Setting up the Test..’ appears on your screen. While the test is being conducted, in SARVAM UCS you will hear pulsating tone on all the ports of the system. • After 5 seconds the message ‘Test running successfully...’ appears on your screen. Matrix ETERNITY NE System Manual...
- Page 601 It is possible that the CO trunks subscribed from the same exchange differ in their AC Impedance settings, in such a case, you must run the test for each CO trunk separately and configure a different Hardware Settings for each of these trunks. Matrix ETERNITY NE System Manual...
- Page 602 • To generate the detailed test report, click Generate Test Report. The detailed test report appears in a new window. • You may print the report by clicking the Print in the test report window. Matrix ETERNITY NE System Manual...
- Page 603 You can also save the report in PDF format by selecting the PDF creator in your Printer options. • Close the window to return to the AC Impedance Test page. • Repeat the above steps to conduct further tests as per your requirement. Matrix ETERNITY NE System Manual...
-
Page 604: Alarms
Alarm Attempts at an Alarm Attempt Interval of 5 minutes to call the Operator. An improperly placed receiver may also be the cause for the busy tone on the extension phone. In that case, the system will notify the Operator Phone with the 'OFF-Hook Alert'. Matrix ETERNITY NE System Manual... - Page 605 Alarm Status Report The Operator can know the status of Alarms (details of Alarms that have not been served) from the WakeUp Alarms Reports from SA mode. The WakeUp Alarms Report is useful when Operators change shifts. Matrix ETERNITY NE System Manual...
- Page 606 • Alarm Attempt Interval: This is the time period between each Alarm Call attempt. By default, the Alarm Attempt Interval is set to 5 minutes. The range of this interval is from 1 to 9. Matrix ETERNITY NE System Manual...
- Page 607 Voice Mail: The extension user is connected to the Voice Mail System. • Voice Message: The extension user is played the message recorded in the Voice Module assigned to Alarm. • Music-On-Hold: The extension user is played music on hold. Matrix ETERNITY NE System Manual...
- Page 608 Viewing and Printing Alarm Status The Operator can view the status of Alarms that are yet to be served from the System Administrator pages of Jeeves. To view Alarm Status, • Login as System Administrator. Matrix ETERNITY NE System Manual...
- Page 609 Press 'Enter' key to set Alarm. • You get a confirmation tone and a text message with the phone number for which the alarm is set. • Go Idle or you get dial tone after 3 seconds. Matrix ETERNITY NE System Manual...
- Page 610 Replace handset or you get dial tone after 3 seconds. Using Jeeves: • Login as System Administrator. • Click Extensions. • Click the desired Extension tab. The Extension page will open. • Now set the desired type of alarm on this extension. Matrix ETERNITY NE System Manual...
- Page 611 To cancel Alarms • Pick up the handset. • Dial 161. • Dial #. • You get a confirmatory text message and confirmation tone. • Replace handset or you get dial tone after 3 seconds. Matrix ETERNITY NE System Manual...
- Page 612 You get a confirmatory text message and a confirmation tone. • Go idle. For SLT Users • Pick up the handset. • Dial 1072-913. • You get confirmation tone. • Replace the Handset on the cradle. Matrix ETERNITY NE System Manual...
-
Page 613: Alternate Number Dialing
The number of auto redial attempts depends on the Auto Redial Count configured in the system. By default, the system will make 5 redial attempts if Auto Redial 'normal' is set. If Auto Redial 'Priority' is set, the system will make 20 redial attempts. Matrix ETERNITY NE System Manual... - Page 614 Make a list of the numbers which need to be grouped as alternate numbers. For example: Name of the Contact Alternate Numbers Midas Business Solutions 2640459, 2631235, 2635589, 2565590 Jet Set Holidays 022281110001, 022281110002 Bacchus Vineyard 2640075, 2640076 Matrix ETERNITY NE System Manual...
- Page 615 “Abbreviated Dialing” instructions on configuring the Global Directory. To create Alternate Number Groups and configure them in the Global Directory, • Login as System Engineer. • Under Advanced Settings, click Abbreviated Dialing. • Click Global Directory. Matrix ETERNITY NE System Manual...
- Page 616 Global Directory dialed out by extensions. • You may enable LCR on the selected trunks. • Enter the contact’s Number you wish to store. The number may consist of 16 digits (maximum). Matrix ETERNITY NE System Manual...
- Page 617 So, the Global Directory Part containing the Alternate Number Groups must be allowed to the extensions in their Class of Service. For example, if Alternate Number Groups are configured in Global Directory Part 2, extensions must have Global Directory Part 2 in their Class of Service. Matrix ETERNITY NE System Manual...
- Page 618 Alternate Number Groups are configured in the Global Directory allowed to your extension. • 'Basic Features' (these include Redial) are enabled in the Class of Service allowed to your extension. Now, follow the instructions for using the feature “Last Number Redial”. Matrix ETERNITY NE System Manual...
-
Page 619: Apple Push Notification Service Support
Contact 1, 2, 3 it will display the time remaining for the expiry of the Device Inactivity Timer. • The server maintains an inbuilt timer, Device Inactivity Timer which is set as 2 days. Till the expiry of the timer the server will send Push Notifications to the application. Matrix ETERNITY NE System Manual... - Page 620 A connectivity between the system and the APNS Server is required so that the Push notifications can be sent to the clients. To check the APNS connectivity status, • Login as System Engineer. • Under Maintenance, click Network Diagnosis. Matrix ETERNITY NE System Manual...
- Page 621 If the Connectivity Test of either of the servers (APNS or FCM) with SARVAM UCS is not successful, then Push Notifications will not be sent to the Mobile Clients — MATRIX VARTA ADR100 / AMP100 application. Matrix ETERNITY NE System Manual...
-
Page 622: Auto Answer
“Configuring Matrix SPARSH VP310” “Configuring Matrix SPARSH VP510”. This timer defines the time in seconds that the phone should wait before going OFF-Hook to answer incoming calls. Beep is not supported on Extended IP Phones. Matrix ETERNITY NE System Manual... - Page 623 You get the options: Headset Not Connected Headset Connected • Scroll to select 'Headset Connected' and press Enter key. 100. This function must have been programmed by the System Engineer on a DSS Key of the phone. Matrix ETERNITY NE System Manual...
-
Page 624: Auto Attendant
The Built-In Auto Attendant Welcome Greeting message is played once. If no voice module is assigned as Welcome Greeting, the system will play music-on-hold after answering the call until the end of the Built-In Auto Attendant Music Timer (default: 5 seconds). Matrix ETERNITY NE System Manual... - Page 625 If the dialed extension does not answer before the expiry of the Built-In Auto Attendant Ring Timer, the system prompts the caller to dial again with the Built-In Auto Attendant Dial Prompt message to the caller. Matrix ETERNITY NE System Manual...
- Page 626 As a call lands on a trunk, the system checks the Incoming Call Route configured for the current time zone for the trunk. • On finding Operator or Extensions as the landing destination, the system rings on the destination extension for the duration of time defined for ringing the extension (default: 10 seconds). Matrix ETERNITY NE System Manual...
- Page 627 Working Hours, Break Hours and Non-working Hours. • Built-In Auto Attendant - Dial Prompt: played after the Welcome greeting message to prompt the caller to dial the desired extension number. This message is played once. Matrix ETERNITY NE System Manual...
- Page 628 (Ring Back Tone) Built-In Auto Attendant - Destination No The person you dialed is not responding. Reply message Built-In Auto Attendant Call Transfer to Please hold, transferring your call to the Operator. Operator message Matrix ETERNITY NE System Manual...
- Page 629 Built-In Auto Attendant Beeps Timer, the system will disconnect the Built-In Auto Attendant call instead of routing it to the Operator. Default: disabled. “System Parameters” for instructions. Matrix ETERNITY NE System Manual...
-
Page 630: Auto Call Back (Acb)
Auto Call Back ring before the expiry of the Ring Timer. • it has not been served within 60 minutes. Auto Call Back works for internal calls and for accessing trunk ports only. Matrix ETERNITY NE System Manual... - Page 631 Extension users can set two types of Auto Call Back: • Auto Call Back on Busy - when the extension/trunk they are trying is Busy. • Auto Call Back on No Reply - when there is no reply from the extension they are trying. Matrix ETERNITY NE System Manual...
- Page 632 Press the 'Call Back' Key / DSS Key assigned to Auto Call Back on Ring Back Tone. • Dial 2 on Ring Back Tone. • You get confirmatory message "Auto Call Back Set" on the phone's display. The LED of the DSS Key will be turned on. • Go idle. Matrix ETERNITY NE System Manual...
- Page 633 Replace handset or you get dial tone after 3 seconds. If you hear an error tone while setting an Auto Call Back request, it is likely that the system already has 50 pending requests and is unable to accept yours. Matrix ETERNITY NE System Manual...
-
Page 634: Auto Redial
CO ports. Valid range of the timer: 000 to 255 seconds. Default: 060 seconds. 102. Time for which the extension that has requested Auto Redial should ring. Valid range of the timer: 000 to 255 seconds. Default: 045 seconds. Matrix ETERNITY NE System Manual... - Page 635 This will change the number of redial attempts made by the system and the interval between them. • If required, also change other related Timers such as Auto Redial Ring Back Tone (RBT) Wait Timer, Auto Redial Ring Timer. Matrix ETERNITY NE System Manual...
- Page 636 For Extended IP Phone Users Using DSS Key To set Auto Redial: • When the external number you are trying is busy, • On Busy tone, press the DSS Key assigned to 'Auto Redial' function. • Go Idle. Matrix ETERNITY NE System Manual...
- Page 637 When the external number you are trying is busy, • Go ON-Hook on Busy Tone. • Dial 17. • Replace handset. To cancel Auto Redial: • Pick up the handset. • Dial 1070. • Replace handset. Matrix ETERNITY NE System Manual...
-
Page 638: Automatic Number Translation
0 to 9) can be represented using this character as XXXXXXXXXX. Thus, the entries you will need to make in the ANT table will be as follows: Dialed Number String Strip Digits Add Prefix XXXXXXXXXX Matrix ETERNITY NE System Manual... - Page 639 The ANT table has three columns: Dialed Number String, Strip Digits, Add Prefix. Each number string is stored against an Index number, from 1 to 32. You can enter as many as 32 entries in the ANT table. Matrix ETERNITY NE System Manual...
- Page 640 The Prefix can be a maximum of 40 characters. Default: Blank. • Click Submit. You may also configure the Automatic Number Translation (ANT) Table on the desired trunks. See Automatic Number Translation (ANT) under “CO Trunks”, “Mobile Trunks” “SIP Trunks” for instructions. Matrix ETERNITY NE System Manual...
-
Page 641: Barge-In
Barge-In works only if the user about to be barged in is in a two-way normal speech with another user or external party. • It will not work if the busy signal is due to the user being OFF-Hook, or in the middle of dialing, or accessing a feature of the system. Matrix ETERNITY NE System Manual... - Page 642 If the extension is busy, you get Busy Tone. • Press DSS Key assigned to 'Barge-In' function. • Dial 4 103. This default feature access code can be changed to suit your preference. Refer the topic “Access Codes”. Matrix ETERNITY NE System Manual...
- Page 643 If the extension is busy, you get Busy Tone. • Dial 4. • You get Ring Back Tone. • Wait for the system to connect you to the called extension. • Talk. • Replace the handset after the conversation has ended. Matrix ETERNITY NE System Manual...
-
Page 644: Bcch Selection
To lock the Mobile Port to a cell or a channel, • Login as System Engineer. • Under Advanced Settings, click Mobile Trunks. 104. BCCH Selection will not be supported if QUECTEL UC20G module is installed in your system. Matrix ETERNITY NE System Manual... - Page 645 Given below is a description of the various BCCH Locking status indication messages that will appear in this field. STATUS DESCRIPTION Displayed when user selects Manual BCCH Locking as ‘No’ from 'Yes' and Trying to Lock module is in initialization process after system or module restart. Matrix ETERNITY NE System Manual...
- Page 646 Cell ID: In this field, Cell ID is displayed. It is a 16-bit identifier that identifies the cell. For example, cell ID is displayed in hexadecimal characters for SIMCOM-2G engines which ranges from 0000 to FFFF Matrix ETERNITY NE System Manual...
- Page 647 If you have stopped Auto Refresh, click Refresh at the bottom of the page to refresh the page and view the current BCCH Locking settings of the Mobile port. • You may now log out of Jeeves. Matrix ETERNITY NE System Manual...
- Page 648 In this situation, user should set Manual BCCH locking mode to 'No' to register Mobile Port with the suitable network automatically. • Later, the user can set the Manual BCCH locking mode to 'Yes' and lock the Mobile Port to the desired cell after assessing the cell information. Matrix ETERNITY NE System Manual...
-
Page 649: Behind The System Application
Toll Control, SARVAM UCS rejects dialing on the trunk and plays an error tone to Extension 21. To resolve this, SARVAM UCS provides a configurable Pre-PSTN Digit Count (PPDC) for each CO trunk. Matrix ETERNITY NE System Manual... - Page 650 • Login as System Engineer. • Under Basic Settings, click CO Trunks. • Click the desired CO trunk number tab. The parameters of the selected CO trunk tab appears. • Click Hardware Settings to expand. Matrix ETERNITY NE System Manual...
- Page 651 Trunk Access Code defined for the trunks in other System. If the TAC is single digit, select '1'. If TAC is double or triple digit, select '2' or '3' as applicable. • Click Submit. Matrix ETERNITY NE System Manual...
-
Page 652: Busy Lamp Field For Trunks
An Open Standard SIP Phone is registered as a SIP Extension, with the extension number 3301. • As the user of extension 3301 wants to monitor the trunk CO-1, BLF subscription is enabled on extension 3301 and CO-1 is assigned to the BLF key on the SIP Phone. Matrix ETERNITY NE System Manual... - Page 653 Here, x should be a valid SIP Trunk number, that SIP-x is, from 1 to 8. a.The number of ports mentioned here are for ETERNITY NENXIP50. For details regarding the number of ports supported for ETERNITY NENX312/ETERNITY NENX416, see “Technical Specifications of ETERNITY NENX”. Matrix ETERNITY NE System Manual...
-
Page 654: Call Back On Trunk Ports
105. If the system does not find a match for the CLI of the caller in the list, the 'Call Back' feature will not be applicable and the call will be processed according to the normal incoming call logic. Matrix ETERNITY NE System Manual... - Page 655 Since this feature is essential for callers, they must be aware of its functioning, to be able to use it, that is, disconnect the call within the Call Back Timer. If the caller does not disconnect within the Call Back Timer, the call will be processed according to the normal incoming call logic. Matrix ETERNITY NE System Manual...
- Page 656 The CO trunk page opens. Select the number of the CO trunk you want to configure by clicking the trunk number tab. • Click Call Back. • Select the Call Back Profile you want to apply to this trunk. • Now, configure the Call Back Profile you selected by clicking the Settings icon. Matrix ETERNITY NE System Manual...
- Page 657 Call Back on same number from which missed call is received. If you select this option, you must configure the numbers eligible for call back in the Program the numbers for which call back is to be provided list. Matrix ETERNITY NE System Manual...
- Page 658 • Press the ctrl key and click the left mouse button to select multiple trunks. When selecting a trunk port type, make sure the trunk you select is not under restricted category in Logical Partition. Matrix ETERNITY NE System Manual...
- Page 659 CLI from the right towards left, the system will consider it as a complete match. 106. 'Operator' is the extension which is assigned to the Mobile port. Matrix ETERNITY NE System Manual...
- Page 660 Basic Settings, and follow the same instructions as above. 107. Where the CLI received can be dialed out without any modification, you do not need to configure any number string in the Alternate number List. Matrix ETERNITY NE System Manual...
-
Page 661: Call Budget On Extension
If the budget exceeds anytime during the month, and if no fresh budget amount is allotted, the system allows calls to be made as per the Calls allowed When Call Budget is Consumed till the end of the month. Matrix ETERNITY NE System Manual... - Page 662 Login as System Administrator. • Click Extension. • The Extension numbers appear on the tabs, starting with SLT extensions. To select a particular extension number or type, click the tab. 108. Based on the feature 'Call Cost Calculation'. Matrix ETERNITY NE System Manual...
- Page 663 Use leading zero if amount is fewer than 6 digits. • You get confirmatory message. • Go idle. To view Call Budget assigned to an Extension: • Press DSS Key assigned to the ‘Call Budget Extension’ function. • Dial 1072-011 (from SA mode). Matrix ETERNITY NE System Manual...
- Page 664 Dial 1072-004 (from SA mode). • Dial Extension Number. • Dial Call Budget Amount. Use leading zero if amount is less than 6 digits. • You get confirmation tone. • Replace handset. Call Budget cannot be viewed on SLT. Matrix ETERNITY NE System Manual...
-
Page 665: Call Budget On Trunk
At the end of each outgoing call made from the trunk, the system will calculate the cost of the call on the basis of the Pulse Rate Type configured. The system will thus calculate the total amount consumed after the end of each call. Refer the topic “Call Cost Calculation (CCC)” to know more. Matrix ETERNITY NE System Manual... - Page 666 This feature works independent of any Call Accounting Software (CAS) installed with SARVAM UCS. • SARVAM UCS will calculate cost of phone calls made by the trunks even when no call budget is allocated 109. Based on the feature 'Call Cost Calculation'. Matrix ETERNITY NE System Manual...
- Page 667 If you have set Call Budget to reset on a scheduled date, the date will appear in the Budget Reset Schedule (Date). • To reset Call Budget manually, click the Reset button assigned to Reset Consumed Budget. Matrix ETERNITY NE System Manual...
- Page 668 If you have set Call Budget to be reset on a scheduled date, the date will appear in the Budget Reset Scheduled (Date). • To reset Call Budget manually, click the Reset button assigned to Reset Consumed Budget. Similarly, you can reset Call Budget on Trunks from the SA mode. Matrix ETERNITY NE System Manual...
-
Page 669: Call Chaining
Call Chaining can be performed when call is transferred from any extension to another extension or external number. How to configure The only configuration involved in the functioning of this feature is assigning this feature to a DSS key which has LED and changing, if necessary, the Call Park Release Timer. Matrix ETERNITY NE System Manual... - Page 670 The called party answers. • Go ON-Hook to transfer call. • When extension/trunk disconnects, your extension rings. • Lift handset to answer. You get connected with the caller. • Go Idle after the conversation ends. Matrix ETERNITY NE System Manual...
-
Page 671: Call Cost Calculation (Ccc)
The Pulse Rate Table may be the Normal Pulse Rate Table or Discounted Pulse Rate Table, depending on the day of the call. The system uses the built-in RTC to determine the day. Matrix ETERNITY NE System Manual... - Page 672 Type for Type for Type for Type for Index Name Digit Code Pulse Rate Pulse Rate Pulse Rate Pulse Rate Count Option - 1 Option - 2 Option - 3 Option - 4 Local Mobile Matrix ETERNITY NE System Manual...
- Page 673 30 seconds and for the additional unit also, the cost will be considered as 1.00 for the duration of 30 seconds. This data will be used for calculating the total cost of call based on the total duration of the call. Matrix ETERNITY NE System Manual...
- Page 674 By default, no Service Charge is applied on call cost by the system. Service Charge on call cost is generally applied in Hotels and other organization which charge users for the calls made by them. If you want to apply Service Charge, Matrix ETERNITY NE System Manual...
- Page 675 Generally service providers offer discounted call rates for holidays. To take care of this, SARVAM UCS provides two types of Pulse Rate Tables: Normal and Discounted. If your service providers do not offer any special rates for holidays, you may skip configuring the Discounted Pulse Rate table. Matrix ETERNITY NE System Manual...
- Page 676 If you have configured Time Zones for the Call Cost Schedule on a trunk, you may define the different Pulse Rate Types for each Time Zone. • Click Submit. To configure the Discounted Pulse Rate table, • Click Discounted Pulse Rate. Matrix ETERNITY NE System Manual...
- Page 677 The pulse rate of a call depends on the destination number dialed. Generally, pulse rate varies according to the type of the call: Local, national, international. SARVAM UCS enables you to configure Pulse Rates according to Area codes. To configure Pulse Rates for Area Codes, Matrix ETERNITY NE System Manual...
- Page 678 SARVAM UCS allows you to assign different Pulse Rate Options for each area code. • For each area code, configure the Pulse Rate to be followed for the desired Pulse Rate Options in the Pulse Rate Type for Pulse Rate (Option 1 to 4) column. • Click Submit. Matrix ETERNITY NE System Manual...
-
Page 679: Call Cost Display
0 0 1 4 0 3 4 5 4 5 2 4 7 2 . 8 0 F r i 2 2 J A N 1 2 : 1 9 • The display is retained till the extension remains OFF-Hook. • Go Idle. Matrix ETERNITY NE System Manual... -
Page 680: Call Duration Control (Cdc)
Do Not Apply CDC for calls matching with numbers list in the CDC profile. The Apply CDC for Outgoing calls check box is disabled on the Trunk. CDC is not applied on the call. Matrix ETERNITY NE System Manual... - Page 681 Apply CDC for Incoming Calls check box is enabled on the Trunk on which the call is received. CDC is applied on the call. • A will get beeps and then the call will be disconnected. Internal Calls A and B are extension users. • A calls B. Matrix ETERNITY NE System Manual...
- Page 682 Make a list of numbers on which CDC is to be applied, and a list of numbers on which CDC is not to be applied. • Make a list of extensions on which CDC is to be applied and the CDC Profile number you want to assign to these extensions. Matrix ETERNITY NE System Manual...
- Page 683 You must configure this list with numbers which you want to be exempt from CDC. • Click Submit at the bottom of the page to save changes. • To configure another CDC Profile, click the Profile number tab and follow the same steps described above. Matrix ETERNITY NE System Manual...
- Page 684 Assign the CDC Profile to the desired extensions. For instructions, see “SLT Extensions” “SIP Extensions”, under Basic Settings. Enable CDC on the desired trunks. For instructions, see Call Duration Control under “CO Trunks”, “Mobile Trunks” “SIP Trunks” under Basic Settings. Matrix ETERNITY NE System Manual...
-
Page 685: Call Duration Display
Dials an external number. • The remote party answers the call. • The dialed external number with duration (5-digits in the format of MM:SS) is displayed on the LCD of the phone, when the call is answered. Matrix ETERNITY NE System Manual... -
Page 686: Call Forward
Forward No-Reply Timer to expire. A has set Call Forward to external number on No-Reply. • The system waits for the Call Forward No-Reply Timer to expire and then forwards all external incoming calls to the external number. Matrix ETERNITY NE System Manual... - Page 687 Calls for A will land on B only and calls for B will land on C only. • Only one Call Forward Type can be set from an extension. Every new Call Forward Type set overrides the previous one. Matrix ETERNITY NE System Manual...
- Page 688 Login as System Administrator. • Click Extension. • The Extension numbers appear on the tabs on the top pane, starting with SLT extensions. • To select a particular extension number or type, click on the tab. Matrix ETERNITY NE System Manual...
- Page 689 To set Call Forward on another extension, click the extension number tab, and follow the same instructions as above. You can also forward the calls of all extensions at one go to the same destination from the SA mode. To do this, Matrix ETERNITY NE System Manual...
- Page 690 • Dial 13. • Scroll to select Dual Ring. • Press 'Enter' key. • Select Dual Ring ON • Press ‘Enter’ key. • You get a confirmatory text message and confirmation tone. • Go Idle. Matrix ETERNITY NE System Manual...
- Page 691 To cancel Call Forward • Lift the handset. • Dial 130. • You get confirmation tone. • Replace the handset. To disable Dual Ring • Lift the handset. • Dial 136. • Dial 0. • Replace Handset. Matrix ETERNITY NE System Manual...
-
Page 692: Call Forward-Scheduled
If the current Time Zone of extension A is not the same as Time Zone set for Call Forward-Scheduled, the call will not be forwarded. The system will consider that no call forward has been set. Matrix ETERNITY NE System Manual... - Page 693 Extensions that are to be allowed to set Call Forward-Scheduled for other extensions must be allowed either the feature 'SA Mode’ or ‘SA Extension' in their Class of Service. Refer the topic “Call Forward- Remote”. Matrix ETERNITY NE System Manual...
- Page 694 • Login as System Administrator. • Click Extension. The Extension numbers appear on the tabs on the top pane, starting with SLT extensions. • To select a particular extension number or type, click the tab. Matrix ETERNITY NE System Manual...
- Page 695 Default: Unconditionally. Enter the external number to which calls must be forwarded. By default, TAC 0 is assigned for routing external calls. You can change the TAC as per your requirement. Matrix ETERNITY NE System Manual...
- Page 696 Enter Destination Number on prompt. • You get confirmation tone and message showing extension to which Call Forward is set. To cancel Call Forward-Scheduled for a Time Zone: • Press DSS key assigned to Call Forward-Scheduled - Remote. Matrix ETERNITY NE System Manual...
- Page 697 Dial 1072-223-Extension number-3-5-0 to cancel CF-Scheduled-Dual Ring. • Dial 1072-223-Extension number-3-0 to cancel CF-Scheduled. • Replace handset. To cancel Call Forward-Scheduled for all Time Zones • Lift handset. • Dial 1072-223-Extension Number-0 • Replace handset. Matrix ETERNITY NE System Manual...
-
Page 698: Call Forward-Remote
Basic Settings. How to use Setting Call Forward - Remote from Jeeves • Login as System Administrator. • Click Extension. • The Extension numbers appear on the tabs on the top pane, starting with SLT extensions. Matrix ETERNITY NE System Manual... - Page 699 Default: Unconditionally. Enter the external number to which calls must be forwarded. By default, TAC 0 is assigned for routing external calls. You can change the TAC as per your requirement. Matrix ETERNITY NE System Manual...
- Page 700 To cancel, select the Cancel Call Forward of all extensions radio button. • Click Submit. Using Call Forward - Remote from a Telephone For Extended IP Phone Users To set Call Forward-Remote • Press the DSS Key assigned to 'Call Forward-Remote'. • Dial 1072-006. Matrix ETERNITY NE System Manual...
- Page 701 For users world wide, Trunk Access Code (TAC) for dialing external numbers are: 0, 5. For users in USA, TAC for dialing external numbers are: 9, 5. 111. If call is to be forwarded on voice mail, dial the Access Code for the Voice Mail. The default Access Code is 390. Matrix ETERNITY NE System Manual...
-
Page 702: Call Forward - When Not Registered
‘Call Forward’ feature in the CoS assigned to the SIP extensions. If you disable ‘Call Forward’ in the CoS of a SIP Phone, the user will not be able to set any other type of Call Forward. Matrix ETERNITY NE System Manual... - Page 703 Also, assign a trunk to route the call by selecting the Trunk Access Code from the using TAC list. • Click Apply Call Forward. The message “Call Forward is set” appears. Matrix ETERNITY NE System Manual...
- Page 704 Matrix Extended IP Phone or any open standard SIP Phone. For Matrix Extended IP Phone Users • Lift handset. • Press DSS key assigned to Call Forward-When Not Registered (if programmed). • Dial *13. • Scroll to the desired option. Matrix ETERNITY NE System Manual...
- Page 705 Select ‘Cancel’ and press ‘Enter’ key. To cancel All Call Forward When Not Registered • Press DSS key assigned to Call Forward-When Not Registered (if programmed). • Dial *13. • Select ‘Cancel Call Forward’ and press ‘Enter’ key. Matrix ETERNITY NE System Manual...
- Page 706 Dial *13-2-0 for Day Time • Dial *13-3-0 for Break Time. • Dial *13-4-0 for Night Time. • Replace handset. To cancel All Call Forward-When Not Registered • Lift handset. • Dial *13-0. • Replace handset. Matrix ETERNITY NE System Manual...
-
Page 707: Call Hold
Answering the call, when it returns at the end of the Exclusive Hold Retrieval Timer. To be able to place calls on Exclusive Hold, you must select Exclusive Hold as the Default Call Hold Type in the System Parameters. See “System Parameters” for instructions. Matrix ETERNITY NE System Manual... - Page 708 Extended IP Phone which put it on hold. The Extended IP Phone rings and the user may answer the call. • The returned call is disconnected, if the Extended IP Phone is not in idle state, or if the call is not answered by Extended IP Phone user. Matrix ETERNITY NE System Manual...
- Page 709 VP310”, “Phone Key Settings” “Configuring Matrix SPARSH VP330” “Phone Key Settings” “Configuring Matrix SPARSH VP510” for instructions. • Global Hold Retrieval Timer: Change the default setting of this timer to the desired duration, if required. Matrix ETERNITY NE System Manual...
- Page 710 To retrieve the call put on hold using DSS key • Press DSS Key again. • Press Call Appearance key of your Extended IP Phone. • Press DSS Key of the Trunk/extension you put on hold from your Extended IP Phone. Matrix ETERNITY NE System Manual...
- Page 711 Press the DSS Key assigned to the feature (if configured). • Press Transfer key. For SLT Users To put a call on Consultation Hold • Press Flash. • Tap the Hook switch of your phone. Matrix ETERNITY NE System Manual...
-
Page 712: Call Logs
Programming of a DSS key for the Call Logs feature. See “Phone Key Settings” under “Configuring Matrix SPARSH VP248”, “Configuring Matrix SPARSH VP310” “Phone Key Settings” under “Configuring Matrix SPARSH VP330” “Phone Key Settings” under “Configuring Matrix SPARSH VP510”. Matrix ETERNITY NE System Manual... - Page 713 Press Enter key to select the desired Call Log. • The phone will display the call log details. • To view another call log, scroll with the Back Navigation key to return to the previous option. Matrix ETERNITY NE System Manual...
- Page 714 • The system will dial out the selected number using the Outgoing Trunks assigned for dialing ‘0’. • The dialed number will be logged in the "Dialed" call log and the Last Number Redial List. Matrix ETERNITY NE System Manual...
- Page 715 "Memory Full" will appear on your phone's display and you will get an Error Tone. Refer the topic “Abbreviated Dialing” to know more. 112. Only if there is a free Memory Index in the Personal Directory. Matrix ETERNITY NE System Manual...
-
Page 716: Call Park
Calls parked in personal orbit can be picked up only from where the call is parked. So, no other person can pick up this call. Multiple calls can be parked in the Personal Orbit at a time. Matrix ETERNITY NE System Manual... - Page 717 As B is not present at his extension, A presses the DSS key assigned to General Call Park - Auto. • Press the Transfer key and dial access code for Call Park-0. • System internally checks for the available free General Orbit and parks the held call there. Matrix ETERNITY NE System Manual...
- Page 718 To park a call • You are in speech with extension/external caller. • Press DSS Key assigned to 'Call Park'. Press Transfer key and dial 115 • Enter Orbit Number (1-9) (Personal Orbit:1; General: 2-9). Matrix ETERNITY NE System Manual...
- Page 719 You are in speech with the extension/external caller. To retrieve a parked call from your phone, when you are in speech with someone 113. This is applicable only for SPARSH VP510. 114. This feature is not applicable for SPARSH VP330. Matrix ETERNITY NE System Manual...
- Page 720 • Dial Flash -116-Orbit Number (Personal Orbit:1; General: 2-9). • You are in speech with the extension/external caller. Matrix ETERNITY NE System Manual...
-
Page 721: Call Pickup
Extensions need not be in Call Pickup Groups. • Whenever an extension in the system rings, the call can be picked up by any extension of the system by dialing the feature access code and the number of the ringing extension. Matrix ETERNITY NE System Manual... - Page 722 For each SLT/SIP extension assigned to a CPU Group, make sure Call Pickup is enabled in the “Class of Service (CoS)” of the extensions for the Day and Night/Break. Default: Enabled. See “Basic Settings” instructions on configuring CoS of different Extension types: SLT, SIP. Matrix ETERNITY NE System Manual...
- Page 723 To pick up any one of several ringing extensions ringing or the extension that is not in your group • Lift the handset. • Dial 12. • Dial number of the Extension you want to pick up. • Talk. • Replace handset. Matrix ETERNITY NE System Manual...
-
Page 724: Call Progress Tones
OFF duration Beep the Interrupt Request Timer, Barge-In (Intrusion Tone repeated every second; Timer or the Barge-In Timer as per ITU) played to the busy Timer. extension when another extension attempts Interrupt Request/ Barge-In Matrix ETERNITY NE System Manual... - Page 725 “CPTG Region Codes”. For countries that use different frequencies and cadences for the same tone, e.g. USA, only one frequency/cadence among the group is considered. See “Default CPTG Type” at the end of this topic. Matrix ETERNITY NE System Manual...
- Page 726 30 seconds. The duration of demonstration can be changed by setting the 'Tone Demo Timer' to match user preference. To demonstrate call progress tones: • Enter SE mode from a SLT. Matrix ETERNITY NE System Manual...
- Page 727 1.0on 2.0off .5on .5off Kenya Continuous Continuous 0.67on 0.2on 0.6off 3.0off 1.5on 0.2on 0.6off 5.0off Korea 350+440 Continuous 350+440 Continuous 440+480 1.0on 2.0off 480+620 0.5on 0.5off Malaysia Continuous Continuous 0.4on 0.2off 0.5on 0.5off 0.4on 2.0off Matrix ETERNITY NE System Manual...
- Page 728 0.25 off 0.1off 0.9off 1.0off 2.9off Canada 480+ 0.25on 350+440 0.1on 350+ 0.1on 0.3on 480+ 0.5on 0.25off 0.1off 0.9off 10.0off 0.5off China 0.7on 0.1on 0.1on 0.4 on 0.2on 0.7off 0.1off 0.9off 4.0off 0.2off 0.2on 0.6off Matrix ETERNITY NE System Manual...
- Page 729 0.1off 2.9off 0.1on 2.7off Korea 480+ 0.3on 350+440 0.1on 350+ 0.1on 350+440 0.3on 350+ 0.1on 0.2off 0.1off 0.9off 0.3off 2.9off 0.3on 3.3off Malaysia 2.5on 0.1on 0.1on 0.2on 0.1on 0.5off 0.1off 0.9off 0.2off 2.9off 0.2on 5.0off Matrix ETERNITY NE System Manual...
- Page 730 0.9off 0.1off 4.8off 0.23on 0.1on 0.53off 2.7off 480+ 0.25on 350+440 0.1on 350+ 0.1on 0.3on 480+ 0.5on 0.25off 0.1off 0.9off 10.0off 0.5off Italy2 0.25on 0.1on 1.75on 0.2on 0.2on 0.25 off 0.1off 0.1off 2.5off 0.2off 0.2on 2.5off Matrix ETERNITY NE System Manual...
- Page 731 On - 100 ms Off, 400 ms On - 100 ms Off (same for all Regions) The meaning of frequency notation is as follows: • f1*f2: f1 is modulated by f2. • f1+f2: The juxtaposition of two frequencies f1 and f2 without modulation. Default CPTG Type Matrix ETERNITY NE System Manual...
-
Page 732: Call Restriction Based On Ip Address
For each SIP Trunk, make a list of IP Addresses:Port from which you want to allow traffic. If you want to allow incoming calls from all ports for a particular IP Address, configure only the IP Address. You are allowed to configure a maximum of 10 IP Addresses. See “Trusted IP Address/es” under “SIP Trunks” instructions. Matrix ETERNITY NE System Manual... -
Page 733: Call Taping
When speech is established, the system starts recording the conversation between A and C automatically in E's mailbox. • Call Taping Beeps will be played to A and C, if Play Beep when Raid/Call Taping/Conversation Recording starts is enabled in the System Parameters. Matrix ETERNITY NE System Manual... - Page 734 Call Taping must be enabled on the Trunks assigned to the extension users for making/receiving external calls. • By default, Play Beep when Raid/Call Taping/Conversation Recording starts is enabled in the System Parameters. If required, you may disable these beeps. Matrix ETERNITY NE System Manual...
- Page 735 Now, assign the Call Taping Profiles you configured to the desired extension types. For instructions, see “SLT Extensions” “SIP Extensions” under Basic Settings. For Call Taping Mailbox, • Under VMS Configuration, click VMS General Parameters. Matrix ETERNITY NE System Manual...
- Page 736 To enable Call Taping on Trunks, • See Call Taping under “CO Trunks”, “Mobile Trunks” “SIP Trunks” under Basic Settings for instructions. To enable/disable Beeps during Call Taping, • Under Advanced Settings, click System Parameters. The System Parameters page opens. Matrix ETERNITY NE System Manual...
- Page 737 115. Only if the mailbox is password protected, you will be prompted to enter the mailbox password. 116. Only if the mailbox is password protected, you will be prompted to enter the mailbox password. 117. Only if the mailbox is password protected, you will be prompted to enter the mailbox password. Matrix ETERNITY NE System Manual...
-
Page 738: Call Toggle
To talk with D, A dials Flash-1. Speech with D. • A can toggle back to E by dialing Flash-1. • The party put on Consultation Hold during Call Toggle cannot hear the conversation between the other two parties. Matrix ETERNITY NE System Manual... - Page 739 External party 2 on Consultation Hold. • Press DSS Key assigned to Call Toggle. • Speech with External party 2. • Press DSS key assigned to Call Toggle again. • Speech with External party 1. Matrix ETERNITY NE System Manual...
- Page 740 • External party 2 on trunk 2 on Consultation Hold. • To talk with external party 2, dial Flash-1. • Speech with external party 2. • Dial Flash-1 again. • Speech with external party 1. Matrix ETERNITY NE System Manual...
-
Page 741: Call Transfer
SARVAM UCS allows Semi-attended Transfer and Transfer on Conference Hang-up on SIP Trunks. For a list of IP Phones on which this feature has been tested, see “SARVAM UCS Features tested on IP Phones of different Brands” in the Appendix. Matrix ETERNITY NE System Manual... - Page 742 If B does not answer the intrusion beeps at the end of the Transfer on Busy Timer, the call is returned to the Operator. C gets ring back tone. • If the Operator too is busy at the time of call return, C gets busy tone. Matrix ETERNITY NE System Manual...
- Page 743 118. The process of Trunk-to-Trunk transfer takes place outside of the PBX. So, the PBX will not know which of the two trunks have gone ON-Hook. Hence the call is automatically disconnected when the Trunk-to-Trunk Inactivity Timer expires. Matrix ETERNITY NE System Manual...
- Page 744 Changing Call Transfer Related Timers using Jeeves • Login as System Engineer. • Under Advanced Settings, click System Timers and Counts. • Scroll to reach the Call Transfer related timers and change the values as required. • Click Submit. Matrix ETERNITY NE System Manual...
- Page 745 119.Trunk Access Code (TAC): Users worldwide may dial a code from 0, 5. Users in USA may dial a code from 9, 5. 120.Trunk Access Code (TAC): Users worldwide may dial a code from 0, 5. Users in USA may dial a code from 9, 5. Matrix ETERNITY NE System Manual...
- Page 746 Dial External Number2. • Speech with the External Number2. • Replace Handset. Blind Transfer to VMS • Speech with Trunk/extension • Press Flash. • Dial 1078. • Dial desired party's extension number. • Replace handset. Matrix ETERNITY NE System Manual...
-
Page 747: Calling Line Identification And Presentation (Clip)
'+' with an appropriate number string which these telephones can display. CLIP and Caller ID Presentation on Call Transfer will work only if CLIR is not enabled on the extension that has transferred the call. Refer the topic “Calling Line Identity Restriction (CLIR)”. Matrix ETERNITY NE System Manual... - Page 748 Click Hardware Settings to expand. • As Caller ID Presentation Type, select the CLIP Type supported by the SLT: DTMF, FSK V.23, FSK- Bellcore. Default: DTMF. • Click Submit. • Now, click Caller ID on Call Transfer to expand. Matrix ETERNITY NE System Manual...
- Page 749 To replace '+' characters received as CLI on telephones that do not support CLI prefixed with this character, • Under Advanced Settings, click System Parameters. • Click System Parameters to expand. • Select Replace '+' from CLI check box. Matrix ETERNITY NE System Manual...
- Page 750 • In Replace '+' from CLI with the number string, enter the desired number string that the system should replace the ‘+’ in the string with. • Click Submit. Matrix ETERNITY NE System Manual...
-
Page 751: Calling Line Identity Restriction (Clir)
Dial 1031 to enable CLIR. 121. You are recommended to assign a DSS Key with LED to this feature. When the assigned DSS key is pressed, it will glow red indi- cating that CLIR is enabled. Matrix ETERNITY NE System Manual... - Page 752 • You get confirmation tone. • Replace handset. 122. If a DSS key with LED has been assigned, when you press the key again, the LED will be turned off indicating CLIR is now canceled. Matrix ETERNITY NE System Manual...
-
Page 753: Cancel All Extension Features
Dial 1051. • You get confirmation tone and confirmatory message on your phone display. • Go idle. For SLT Users • Lift handset. • Dial 1051. • You get confirmation tone. • Replace the handset. Matrix ETERNITY NE System Manual... - Page 754 Click Cancel All Features. The following features will get canceled, if any is set on this extension user: • Walk-in Class of Service • Do Not Disturb • Call Forward • Call Forward - Scheduled • Hotline • Auto Answer • Auto Redial • Auto Call Back • Trunk Reservation Matrix ETERNITY NE System Manual...
-
Page 755: Class Of Service (Cos)
The table below presents the list of features supported on the extensions for the Day and Night/Break. Default CoS Allowed During Feature Night/Break Account Code Auto Call Back-Busy Auto Call Back-No Reply Auto Redial Auto Redial Priority Basic Features Matrix ETERNITY NE System Manual... - Page 756 Global Directory Part-1 Global Directory Part-2 Global Directory Part-3 Global Directory Programming Hot Desk Hotline Intercom Interrupt Request Live Call Supervision Message Wait (Set/Cancel) Paging PIN Dialing Matrix ETERNITY NE System Manual...
- Page 757 Now, to configure the CoS features to be allowed or denied to extensions, go to “Basic Settings” of Jeeves. • Click the extension settings link for SLT and SIP Extension. • Select the desired extension number. Matrix ETERNITY NE System Manual...
- Page 758 The following features can be set/canceled on extensions from the SA mode, regardless of whether these features are allowed or denied in the CoS assigned to the extensions: • Call Forward • • Dynamic Lock and Timer • Hotline Matrix ETERNITY NE System Manual...
-
Page 759: Cli Based Routing
A's number is found as the destination extension. • The system lands the call on A. If D's number does not exist in the CLI Based Routing Table, the call will be routed according to the incoming call management logic. Matrix ETERNITY NE System Manual... - Page 760 Under Advanced Settings, click CLI Based Routing. • In Method for matching received CLI, select the method according to which you want the system to match the received CLI with the numbers stored in the CLI table. You can select: Matrix ETERNITY NE System Manual...
- Page 761 In Route to, select the landing destination extension number, which may be a SLT, SIP extension, Virtual extension or Voice Mail Auto Attendant Profile. • Click Submit. To enable CLI Based Routing on the Trunks, • See Incoming Call Routing under “CO Trunks”, “Mobile Trunks” “SIP Trunks” for instructions. Matrix ETERNITY NE System Manual...
-
Page 762: Closed User Group (Cug)
Inter Digit Wait Timer. When you configure the digit length, the system will match the dialed number string with the digit length you have configured and will route the number without waiting for the Inter Digit Wait Timer, if a match is found. Matrix ETERNITY NE System Manual... - Page 763 Route Code and the Dialed Digit Count. As a match is found, it selects the Tie Trunk defined for routing the Route Code, i.e. CO2. If the CUG is connected over IP network, you must also configure the SIP Trunk as Peer-to-Peer trunk and configure the Peer-to-Peer Table. See “Peer-to-Peer Calling” for instructions. Matrix ETERNITY NE System Manual...
- Page 764 If you have not assigned any names to the trunks, they will appear with their default names (CO, MOB, SIP) and port numbers. If you have enabled On-Site Configuration, only those trunks that are connected will appear in the box. Matrix ETERNITY NE System Manual...
- Page 765 124. The first call through the first trunk, the second through the second, the third through the third trunk, and so forth. Thus each new call is routed through the trunk next to the one that routed the previous outgoing call. Matrix ETERNITY NE System Manual...
-
Page 766: Conference-3 Party
A is in speech with C. B cannot hear their conversation. • A presses the ‘Conference’ key a three-way speech is established. • A, B, and C are now in speech. • Any of them can disconnect to withdraw from the conference. Matrix ETERNITY NE System Manual... - Page 767 D and E will hear Assistant Leave beeps as soon as F leaves the conference. • D and E are now in two-way speech. 125. The total Beep Time = Beep Cadence + Wait Timer. The Wait Timer(non-programmable) is fixed as 2 seconds by the system. Matrix ETERNITY NE System Manual...
- Page 768 The 'Conference' feature in the Class of Service also includes Dial-In and Multi-party Conference. Extensions that are denied 'Conference' in their Class of Service will not be allowed all three types of conferences - 3-Party, Dial-In and Multi-party Conference. Matrix ETERNITY NE System Manual...
- Page 769 Dial Trunk Access Code to grab a trunk. You get Trunk dial tone. • Dial telephone number of Party 2. You get ring back tone. • Speech with Party 2. • Dial Flash-*3. • Three-way speech is established. Matrix ETERNITY NE System Manual...
-
Page 770: Conference-Multiparty
The system will play beeps at regular intervals indicating that one of the participants present in the conference is the Operator (Assistant). 126. The total Beep Time = Beep Cadence + Wait Timer. The Wait Timer(non-programmable) is fixed as 2 seconds by the system. Matrix ETERNITY NE System Manual... - Page 771 The feature 'Conference' in the Class of Service also includes 3-Party and Multi-party Conference. Extensions that are denied 'Conference' in their Class of Service will not be allowed Dial-In as well as 3- Party and Multi-party Conference. Matrix ETERNITY NE System Manual...
- Page 772 • Select the option Include Party and dial the number. • When you are in speech with the party, press the ‘Conference’ Key. • Repeat the above steps to add new participants in the conference. Matrix ETERNITY NE System Manual...
- Page 773 Dial number of party 2. • Speech with party 2. Dial Flash-*3. A 3-way speech is established. • Dial Flash. • Dial number of party 3. • Speech with party 3. Dial Flash-*3. A multiparty conference is established. Matrix ETERNITY NE System Manual...
- Page 774 While you are all in speech, dial Flash-190. SLT users cannot Remove any participant from the Multiparty Conference. To use Multiparty Conference from DISA mode, see the instructions “Dial-In Conference using DISA” under “Conference Dial-In”. Matrix ETERNITY NE System Manual...
-
Page 775: Conference Dial-In
A informs B and C about the conference and provides them conference number, for example, '1' and the password, '4040'. 127. The total Beep Time = Beep Cadence + Wait Timer. The Wait Timer (non-programmable) is fixed as 2 seconds by the system. Matrix ETERNITY NE System Manual... - Page 776 • Rejoin a Dial-In Conference The participants who leave temporarily can rejoin the conference at a later stage by going Off-Hook and dialing the Rejoin Conference conference code. Matrix ETERNITY NE System Manual...
- Page 777 You can configure a DSS key for Dial-In Conference, Terminating a Conference, Temporarily Leave/ Rejoining a Conference, if required. See Phone Key Settings under “Configuring Matrix SPARSH VP248”, “Configuring Matrix SPARSH VP310”, “Configuring Matrix SPARSH VP510” “Configuring Matrix SPARSH VP330”. Matrix ETERNITY NE System Manual...
- Page 778 The numbers of the participants appear on your phone's display. • Scroll to select the participant you want to remove. • Press 'Enter' key. • You get confirmation tone. The extension user is now excluded from the conference. Matrix ETERNITY NE System Manual...
- Page 779 Enter SA mode from a SLT/Extended IP Phone. • Dial 1072-026-Conference Number • You get confirmation, the conference is released. You can also cancel a Dial-In Conference from System Administrator (SA) Mode using Jeeves. To do this, • Login as System Administrator. Matrix ETERNITY NE System Manual...
- Page 780 Include any participant in the conference. To join the Dial-In conference • Dial *192-Conference Number-Conference Password. • Talk, if you hear speech, or wait for others to join in. • Include any participant in the conference. Matrix ETERNITY NE System Manual...
- Page 781 You get feature tone, and the extension user is played music on hold. • Dial *3. Both of you are now included in the conference. To temporarily leave the Conference • Dial Flash-191. To rejoin the Conference • Go Off-Hook Dial 191. Matrix ETERNITY NE System Manual...
- Page 782 When you enter DISA mode, you get beeps, dial digits before the DISA Inactivity Timer elapses. • Never dial 'Flash' when in DISA mode, you will get disconnected. • Keep dialing any digit to continue the conference. • “Direct Inward System Access (DISA)” to know more. Matrix ETERNITY NE System Manual...
-
Page 783: Conflict Dialing
So it waits for 2 seconds again for the next digit to be dialed. • If A does not dial any other digit before the Timer elapses, the system interprets the code as '41' and invokes the Alarm feature. • If A dials '2' before the Timer elapses, Matrix ETERNITY NE System Manual... - Page 784 To change the Conflict Dialing Wait Timer, • Login as System Engineer. • Under Advanced Settings, click System Timers and Counts. • Scroll to Other Features. Set Conflict Dialing Timer to the desired value. • Click Submit. Matrix ETERNITY NE System Manual...
-
Page 785: Conversation Recording
Conversation Recording must be enabled in the “Class of Service (CoS)” of the extensions to which this feature is to be allowed. By default, none of the extensions have this feature in their CoS. Decide which Matrix ETERNITY NE System Manual... - Page 786 To listen to a recorded conversation • Press Voice Mail Key. Dial 390 • Follow Voice Mail Prompts. • Go Idle. 128. This is the default Voice mail Feature Access Code. If this has been changed, use the new code. Matrix ETERNITY NE System Manual...
- Page 787 • Speech with party reestablished. • Recording starts. • Replace handset when conversation ends. To listen to a recorded conversation • Lift the handset. • Dial 390 • Follow Voice Mail Prompts. • Replace handset. Matrix ETERNITY NE System Manual...
-
Page 788: Cosec Integration
Codes”)or by pressing the DSS key assigned to COSEC Door Open. Open SIP Phone users can put a call on hold by dialing #2. These users can also unlock the COSEC Door by dialing *7. How to configure • Login as System Engineer. Matrix ETERNITY NE System Manual... - Page 789 To assign Group IDs to SIP users, see parameter COSEC Door Group in “SIP Extensions”. To assign a DSS key to COSEC Door Open, refer the topic Phone Key Settings under “Configuring Matrix SPARSH VP248”, “Configuring Matrix SPARSH VP310”, “Configuring Matrix SPARSH VP330” “Configuring Matrix SPARSH VP510”. Matrix ETERNITY NE System Manual...
-
Page 790: Customer Name
Under Advanced Settings, click System Parameters • Click System Parameters to expand. • Under General Parameters, enter the name (and address, if desired) of the organization/enterprise in Customer Name. For example: Prudent Investment, 701 Sunshine Boulevard, Bangalore. • Click Submit. Matrix ETERNITY NE System Manual... -
Page 791: Day Night Mode
Day Night Mode can be set by the System Engineer (SE Mode) as well as the System Administrator (SA Mode).It can be done using Jeeves or by dialing a command from a Telephone. Setting Day Night Mode from SE Mode using Jeeves • Login as System Engineer. Matrix ETERNITY NE System Manual... - Page 792 Mode (Working Hrs) or Night Mode (Non-Working Hrs) on pressing the DSS Key. By default, this is disabled. • Click Submit. Setting Day Night Mode from SA Mode using Jeeves • Login as System Administrator. Matrix ETERNITY NE System Manual...
- Page 793 Select the check box Toggle Day/Night mode through ‘Set Day/Night Mode Key’ to enable the toggle functionality for the DSS Key. To know more, refer to “Setting Day Night Mode from SE Mode using Jeeves”. Matrix ETERNITY NE System Manual...
- Page 794 SPARSH VP248/ Day Mode Blue Continuous ON (Break Hour Mode) SPARSH VP310/ SPARSH VP510 Day Mode Night Mode Continuous ON Night Mode Day Mode Blue Continuous ON Break Hour Mode Day Mode Blue Continuous ON Matrix ETERNITY NE System Manual...
-
Page 795: Daylight Saving Time (Dst)
From 23:59 to 01:00 From 23:59 to 23:00 Second Sunday MAR First Sunday NOV Canada From 01:59 to 03:00 From 01:59 to 01:00 Second Sat OCT Second Sat MAR Chile From 23:59 to 01:00 From 23:59 to 23:00 Matrix ETERNITY NE System Manual... - Page 796 When DST Mode is set as 'Manual', you must set the start and the end time, i.e. the time at which the clock is to be advanced and the time at which the clock is to be delayed. There are two ways to adjust DST manually: Matrix ETERNITY NE System Manual...
- Page 797 If you have selected Scheduled DST mode, in the Region, select the country/region where your system is installed. • Click Submit to save your DST setting. • If you do not find your region on this list, you are recommended to set DST Mode to Manual and adjust DST manually. Matrix ETERNITY NE System Manual...
- Page 798 If you select the Day-Month Wise option, you should now select the desired options in each of the following: • Ordinal number: Select the Ordinal number of the day of the month, i.e. the 1st, 2nd, 3rd, 4th, 5th day, when DST begins. Matrix ETERNITY NE System Manual...
- Page 799 (that is, "from" time) at 23:59 hrs. • If you synchronize the RTC with the SNTP Server and the Date and Time changes, the DST will be applicable as per the new Date and Time. Matrix ETERNITY NE System Manual...
-
Page 800: Department Call
Department Calls can be made using Built-In Auto Attendant. For example, a company may use Built-In Auto Attendant to have callers who want information only to dial the Information Department instead of waiting for the Operator. Matrix ETERNITY NE System Manual... - Page 801 If there is a new message in the Department Group Mailbox, but none in the Personal Mailbox, the VMS will play the message:"You have <x> new Message in your Department Group Mailbox." 129. This will depend on the type of Message Wait Indication configured for the extension in its Voice Mail Settings. Matrix ETERNITY NE System Manual...
- Page 802 You may set the Call Forward No Reply Timer for Department to the desired value. This Timer is applied on all Department Groups which set Call Forward No Reply. Matrix ETERNITY NE System Manual...
- Page 803 If the No Reply Timer of the Department Group expires first, before the call is answered, the call will be forwarded to the destination set for the Department Group. Call Forward-No Reply Timer can be set from the SE Mode only. Matrix ETERNITY NE System Manual...
- Page 804 204, 205, 206 322, 323 211, 212, 213, The access codes for the department groups and extensions in this table are default access codes. Now, with this information ready, you may configure the department groups using Jeeves. Matrix ETERNITY NE System Manual...
- Page 805 “Access Codes” to know more. • You may also assign a Name to the department group to facilitate identification. This name will appear in the Dial by Name directory along with the department group number. Matrix ETERNITY NE System Manual...
- Page 806 You may enable this check box, if required. Matrix ETERNITY NE System Manual...
- Page 807 The color of the text indicating that Call Forward is set will change to red. To cancel Call Forward, • Click Cancel Call Forward. The color of the text indicating that Call Forward is not set will change to black. Matrix ETERNITY NE System Manual...
- Page 808 Dial the desired Department Group Number (default: 391-395). • You get Ring Back Tone as the call lands on an extension within the department group. • Talk when the call is answered. • Go Idle. Matrix ETERNITY NE System Manual...
- Page 809 Press DSS Key assigned to the Call Forward Department Group. • Dial 1179 (users worldwide). Users in the Philippines, dial 1108. • Enter the Access Code of the Department Group whose calls are to be forwarded. 130. Refer “Distinctive Rings” for description. Matrix ETERNITY NE System Manual...
- Page 810 3 for Forward when No Reply • 4 for Forward when Busy/No Reply • Dial 0 to Cancel Call Forward • Dial Destination number (number of the desired extension or voice mail) • You get confirmation tone. • Replace handset. Matrix ETERNITY NE System Manual...
-
Page 811: Dial Plan For Sip Extension
For example, if you want that users should be able to dial extension numbers from 3000 to 3999 without any delay, configure the Rule as 3XXX. For more details to configure the rules, refer to the topic Dial Plan in the SPARSH VP110 User Guide. • Click Submit. Matrix ETERNITY NE System Manual... - Page 812 • Now, click the location at which you have registered SPARSH VP710, for example, Device Settings - Location 1. • Scroll to Dial Plan. • Select the Dial Plan number you configured. • Click Submit. Matrix ETERNITY NE System Manual...
-
Page 813: Dial By Name
131. The process of entering the names is the same as when writing text messages (SMS) from a cell phone. The keys must be pressed multiple times in quick succession to enter the desired alphabet. Matrix ETERNITY NE System Manual... - Page 814 Scroll with the Up/Down navigation keys to reach the desired contact's name on the list. • Press 'Enter' key to select the name. • The system displays the name and number being dialed out. • You get Ring Back Tone or Busy Tone. Matrix ETERNITY NE System Manual...
- Page 815 Entered the wrong alphabet? • Go ON-Hook. • Go OFF-Hook. • Press the 'Names' key again. • Enter the name/initial letters of the contact's name. Matrix ETERNITY NE System Manual...
-
Page 816: Dialed Number Directory
The list of last dialed calls appear on your phone's display. • Scroll with up/down navigation key to reach the desired number. 132. Recall that the system does not check for Toll Control when Abbreviated Dialing is used. Matrix ETERNITY NE System Manual... - Page 817 Press 'Enter' key. • The desired number is dialed out and appears on your phone's display. • You get ring back tone. • Talk when speech is established. • Go ON-Hook after the conversation has ended. Matrix ETERNITY NE System Manual...
-
Page 818: Digest Authentication
Digest Authentication on the desired SIP Trunks. For instructions, see “Trusted IP Address/es” under “SIP Trunks”. • configure the Digest Authentication Table. To configure Digest Authentication Table, • Login as System Engineer. • Under Advanced Settings, click VoIP Configuration. Matrix ETERNITY NE System Manual... - Page 819 In Password, enter the corresponding Password. The Password must be within 16 characters. To avoid unauthorized access, we recommend you to change the Password regularly. Make sure it is strong and is kept confidential. • Click Submit. Matrix ETERNITY NE System Manual...
-
Page 820: Direct Inward System Access (Disa)
DISA mode. To end the DISA login session, caller must dial the Termination code or disconnect from the remote end. For this type of DISA, the DISA CLI Authentication Table must be configured first. Matrix ETERNITY NE System Manual... - Page 821 133. If no voice message is recorded, the system plays music-on-hold to the caller. 134. If the caller does not go Off-hook within this timer, the system releases the call. Matrix ETERNITY NE System Manual...
- Page 822 Auto Login extension for this Calling Party Number in the Table 135. If no match is found for the CLI of the caller in the Table, the call will be routed as per the Incoming Call Route configured in SAR- VAM UCS. Matrix ETERNITY NE System Manual...
- Page 823 136. If no match is found for the CLI of the caller in the Table, the call will be routed as per the Incoming Call Route configured in SAR- VAM UCS. 137. This feature is supported in Firmware Version V10R10 and later. Matrix ETERNITY NE System Manual...
- Page 824 CLI Authentication. The system will match the CLI of the callers with the numbers you store here. • For each Calling Party Number, in Auto Login as, select the extension you want to allow access to after the Calling Party Number is authenticated. • Click Submit. Matrix ETERNITY NE System Manual...
- Page 825 Dial the number of the Trunk on which DISA is enabled for the current time zone, i.e. Day, Break or Night. • SARVAM UCS answers the call. You will get music or Built-In Auto Attendant Voice Message, if configured. Matrix ETERNITY NE System Manual...
- Page 826 The features listed below are not supported in the DISA mode. • Auto Call Back • Auto Redial • Call Park • Call Chaining • Self Ring Test • Trunk Reservation • Walk-In Class of Service • Live Call Supervision Matrix ETERNITY NE System Manual...
-
Page 827: Direct Station Selection Console
Each DSS Key is equipped with an LED which glows to indicate the status of the Trunk/Extension or Feature assigned to it. Status of Extensions and Trunks The LED of DSS keys assigned to Extensions/Trunks glow in three colors to indicate status of the call event on the Extensions/Trunks and on the phone. Matrix ETERNITY NE System Manual... - Page 828 Feature like Auto Redial requires an LED to show that it has been set or canceled. So, the LED of the DSS key to which the Auto Redial feature has been assigned will glow Red, when Auto-Redial is set, and the LED is turned off when the feature is canceled. Matrix ETERNITY NE System Manual...
-
Page 829: Distinctive Rings
These ring types have the following ring cadence: Ring Pattern Cadence (in milliseconds) Short Fast 750-750 Short Long 500-1500 Short Very Slow 750-2250 Long Fast 1500-500 Long Slow 1000-4000 Very Long Slow 2000-4000 Double 400-200-400-2000 Triple 400-200-400-200-400-2000 Ring cadence is not configurable. Matrix ETERNITY NE System Manual... - Page 830 However, if required, you can change the default Ring Pattern and the Ring Text (for SIP Extensions) loaded by the system. When you change the Ring Texts for the Ring Types in SARVAM UCS, you must configure the same Ring Text in the SIP phones. Matrix ETERNITY NE System Manual...
- Page 831 Select the desired Ring Pattern (Ring Type) for each call event/feature that you want to customize. • You can also customize the Ring Text of each call event on SIP extensions. The text can be a maximum of 20 alphanumerical characters. • Click Submit. Matrix ETERNITY NE System Manual...
-
Page 832: Do Not Disturb (Dnd)
DND when set/canceled from the SA mode, will not depend on the assigned CoS. • The system supports only single-point DND with Intercept Destination, which means, if the destination extension has also set DND with Intercept Destination, the call will not follow the forwarding path. Matrix ETERNITY NE System Manual... - Page 833 You must record and assign a Voice Module to play the pre-recorded voice messages as DND Notification to the callers. Let us understand this feature with an example: A, B and C are extension users. B has Extended IP Phone, while C has a SLT. Matrix ETERNITY NE System Manual...
- Page 834 E’s extension. Only incoming calls on E’s extension will be routed to the B’s extension. 138. While DND and DND Text Message can be set from any phone, DND Text Message can be viewed on Extended IP Phone only. Matrix ETERNITY NE System Manual...
- Page 835 Configuring DND Text Messages • By default, 9 DND Text Messages are supported in the SARVAM UCS as listed below: Message # DND Message Do Not Disturb Unavailable In a Meeting In a Conference Try on Mobile Matrix ETERNITY NE System Manual...
- Page 836 DND set/canceled by Extension Users For Extended IP Phone Users To set DND • Press the 'DND' Key. • Dial 18 • Scroll to select the type of call: • All calls • Internal calls • External calls Matrix ETERNITY NE System Manual...
- Page 837 Lift the handset. • Dial 18-4-1 for 'Do Not Disturb' • Dial 18-4-2 for 'Unavailable' • Dial 18-4-3 for 'In a Meeting' • Dial 18-4-4 for 'In a Conference' • Dial 18-4-5 for 'Try on Mobile' Matrix ETERNITY NE System Manual...
- Page 838 Scroll to the desired option and press the 'Enter' key. • You get a text message 'DND Set' on the phone's display and confirmation tone. • Go Idle or you get dial tone after the confirmation tone. Matrix ETERNITY NE System Manual...
- Page 839 • Pick up the handset. • Dial 1072-001. You get feature tone. • Dial Extension Number. You get feature tone. • Dial '0' to cancel DND. • You get confirmation tone. • Replace the handset. Matrix ETERNITY NE System Manual...
- Page 840 Dial '4', the DND-Override Code, during the message or the routing beeps. • The called extension will start ringing. • You will get Ring Back tone. • If the dialed phone is busy, you will get busy tone. Matrix ETERNITY NE System Manual...
-
Page 841: Dss Call Pick-Up
Priority: If multiple calls are ringing on an extension, when you press the DSS Key assigned to that extension, you will be connected to the ringing call with the highest priority. To know more, see “Priority”. Matrix ETERNITY NE System Manual... - Page 842 When the DSS key assigned to the trunk blinks fast in violet color to indicate that there is an incoming call on the trunk, press the DSS Key. • You are in speech with the calling party. • You may talk. Matrix ETERNITY NE System Manual...
-
Page 843: Dynamic Lock
On return, the user can restore the previous Toll Control Level, by setting it back to Level 2. 139. The Call Privilege types are: No Calls, Local Calls, Regional Calls, National Calls, Limited Calls, All Calls. Matrix ETERNITY NE System Manual... - Page 844 Lock Timer and selecting the Toll Control Level. • Now, whenever a call is made from extension A, the system checks the Toll Control Level assigned to the extension. • The system then checks the associated Lists of allowed and denied numbers. Matrix ETERNITY NE System Manual...
- Page 845 By default, Dynamic Lock enabled on all extension types during the Day and the Night/Break. So, all extensions of SARVAM UCS can set Dynamic Lock. The 'Dynamic Lock Timer' is disabled in the Class of Service of all extension types. Matrix ETERNITY NE System Manual...
- Page 846 To set Dynamic Lock-Manual • Press DSS Key assigned to Dynamic Lock. • Dial 142. • Enter Phone Menu by pressing 'Enter' key. • You get the prompt <Enter User Password> • Enter your User Password. Matrix ETERNITY NE System Manual...
- Page 847 • Dial 142-User Password-00. • You get confirmation tone. • Replace handset. To set Dynamic Lock-Automatic • Lift the handset. • Dial 142-User Password-Minutes (max. 99 minutes) • You get confirmation tone. • Replace handset. Matrix ETERNITY NE System Manual...
- Page 848 If the feature ‘SA Mode’ is enabled in the Class of Service of this extension, the extension user will be prompted for the SA pass- word. Matrix ETERNITY NE System Manual...
- Page 849 If the feature ‘SA Mode’ is enabled in the Class of Service of this extension, the extension user will be prompted for the SA pass- word. Matrix ETERNITY NE System Manual...
-
Page 850: Emergency Conference
Call Appearance, but will not wait for the extensions to become free. • Extension B goes Off-Hook to answer the call first. B gets connected to the initiator of the conference, extension A. Matrix ETERNITY NE System Manual... - Page 851 Extensions”. By default, this feature is enabled on all extensions, so all extensions can use this feature. • If the extension you are providing this feature is an Extended IP Phone, you may program a DSS key on the phone with this feature. Matrix ETERNITY NE System Manual...
- Page 852 Select the option Terminate Conference and press the Enter Key. • Press the DSS key assigned to Terminate Conference. • All the participants will get an Error Tone and the system resource occupied by the conference will be freed. Matrix ETERNITY NE System Manual...
- Page 853 To cancel an Emergency Conference while in speech with one or more extensions • Go ON-Hook and then go OFF-Hook. • Dial 190 To cancel an Emergency Conference while the extensions are ringing • Go ON-Hook during Ring Back Tone. Matrix ETERNITY NE System Manual...
-
Page 854: Emergency Detection And Reporting
If the Emergency Call is not acknowledged by the Emergency Reporting Group/Operator, the emergency call is logged into the Emergency Alarms Log. To know more about the Emergency Alarms Log, see “Emergency Alarms Log” at the end of the topic. Matrix ETERNITY NE System Manual... - Page 855 By default, Operator is selected as the landing destination. To customize the Emergency Reporting Group (Day), double click the Extension/s field. The extensions to be selected in the routing group for the Day time appear in a new window. Matrix ETERNITY NE System Manual...
- Page 856 If this check box is disabled and you have selected the Continuous Ring check box, the extension that rejects the call stops ringing while the system hunts for other extensions in the routing group to land the call. 143. The extension next to the one that received the previous call. Matrix ETERNITY NE System Manual...
- Page 857 The acknowledged Emergency call is removed from the Emergency Alarms Log and is logged into the System Activity Log with the details of the extension that acknowledged the call. Also, see the “Emergency Dialing” “Emergency Numbers” topics. Matrix ETERNITY NE System Manual...
-
Page 858: Emergency Dialing
Basic Settings for instructions on configuring Emergency Numbers. How to use To dial an Emergency number • Go Off-Hook • Dial the Emergency Number • Dial Trunk Access Code-Emergency Number For example: Dial 0-112 Matrix ETERNITY NE System Manual... - Page 859 Therefore, in such cases, the extension user must first dial the Trunk Access Code and then the Emergency Number. In this case, the extension user must dial 0-000 for emergency number dialing, so that the system will not wait for the Conflict Timer to apply the Trunk access code logic. Matrix ETERNITY NE System Manual...
-
Page 860: Extended Ip Phone/Varta Uc Client - Operation
• Menu based operation of SARVAM UCS features • Multiple Language support SARVAM UCS Features The SPARSH VP248 supports SARVAM UCS features, a few of these are listed below: • Abbreviated Dialing • Auto Answer Matrix ETERNITY NE System Manual... - Page 861 Keypad Lock • Message Paging • Off-Hook Alert • Room Monitor • User Status (Presence) SPARSH VP248 Front View Ringer LED Date and Time Cursor Touch sense feature keys Touch sense navigation keys Volume Increase key Matrix ETERNITY NE System Manual...
- Page 862 6 lines x 24 LCD display capacity characters characters LCD with backlight Headset Interface Ringer Lamp (LED) Speaker Phone Full duplex Full duplex SPARSH VP248S 2 lines and 24 characters LCD display, full duplex, capsense feature keys Matrix ETERNITY NE System Manual...
- Page 863 Auto Redial Call Long, very slow (2000ms ON, 4000ms OFF) Auto Call Back Call Short, slow (750ms ON, 2250ms OFF) Priority Triple (400ms ON, 200ms OFF, 400ms ON, 200ms OFF, 400ms ON, 2000ms OFF) Programming mode Continuous Matrix ETERNITY NE System Manual...
- Page 864 Feature like Auto Redial requires an LED to show that it has been set or canceled. So, the LED of the Feature key to which the Auto Redial feature has been assigned will glow Blue, when Auto-Redial is set, and the LED is turned off when the feature is canceled. Matrix ETERNITY NE System Manual...
- Page 865 Trunk 1 the LED of the DSS Key assigned to Trunk 1 will be continuously ON. When you put the call on hold, the LED will blink slowly. • Status of Features: The LED of a DSS key is activated when the feature assigned to this key is used. Matrix ETERNITY NE System Manual...
- Page 866 For instructions on customizing the Key Maps, see “Phone Key Settings” under “Configuring Matrix SPARSH VP248”. Matrix ETERNITY NE System Manual...
- Page 867 To view the cost of calls made from the phone. Hotline To set/cancel Hotline and Delayed Hotline. Alarm To set/cancel Personalized and Automated Alarms. Change User To change the User Password. Password One Touch Transfer To set/clear Transfer Number. Matrix ETERNITY NE System Manual...
- Page 868 Configuring SPARSH VP248 For detailed instructions on how to configure SPARSH VP248, see “Configuring Matrix SPARSH VP248” Operating SPARSH VP248 Please refer the EON48_310_SPARSH VP248_310 User Guide for instructions on operating the features of SARVAM UCS. Matrix ETERNITY NE System Manual...
- Page 869 If any SPARSH VP310 extension is Off-Hook, the system will not be able to detect it. However, if any SLT is Off-Hook, Off-Hook Alert will be provided to SPARSH VP310 if it is the Operator phone. Matrix ETERNITY NE System Manual...
- Page 870 SPARSH VP310 Front View Ringer LED LCD Screen Navigation Keys Fixed Function Keys DSS (Direct Station Selection) Keys Digit Keys/ Dial Pad Keys Volume Increase Key/ "+" Key Speaker Key Volume Decrease Key/ "-" Key Handset Matrix ETERNITY NE System Manual...
- Page 871 Enter key, used to make a selection or to complete an action. is the Up key, used to scroll upwards while navigating the Menu. is the Down key, used to scroll downwards while navigating the Menu. Matrix ETERNITY NE System Manual...
- Page 872 Not all features require LED indication. For example, the feature Call Pick-Up does not require an LED. So when you assign this feature to a feature key, the LED of the key remains inactive, when Call Pick-Up is accessed. Matrix ETERNITY NE System Manual...
- Page 873 Violet indicates the state of the trunk you are in speech with. For example, when you are in speech on an outgoing call on Trunk 1 the LED of the DSS Key assigned to Trunk 1 will be continuously ON. When you put the call on hold, the LED will blink slowly. Matrix ETERNITY NE System Manual...
- Page 874 For instructions on customizing the Key Maps, see “Phone Key Settings” under “Configuring Matrix SPARSH VP310”. Matrix ETERNITY NE System Manual...
- Page 875 To view the cost of calls made from the phone. Hotline To set/cancel Hotline and Delayed Hotline. Alarm To set/cancel Personalized and Automated Alarms. Change User To change the User Password. Password One Touch Transfer To set/clear Transfer Number. Matrix ETERNITY NE System Manual...
- Page 876 Configuring SPARSH VP310 For detailed instructions on how to configure SPARSH VP310, see “Configuring Matrix SPARSH VP310”. Operating SPARSH VP310 Please refer the EON48_310_SPARSH VP248_310 User Guide for instructions on operating the features of SARVAM UCS. Matrix ETERNITY NE System Manual...
- Page 877 • Multiple Language Support: The phone can be operated in six different languages including English, French, German, Spanish, Portuguese and Italian. Matrix ETERNITY NE System Manual...
- Page 878 Improved Audio: High Definition (HD) Audio output that delivers crystal clear voice and life like conversations over HD handset and hands-free speaker. • Full-duplex Hands-free Speaker: High quality speaker with acoustic echo cancellation to deliver natural and clear speech even for hands free operation without any distortion. Matrix ETERNITY NE System Manual...
- Page 879 Front View Ringer LED LCD Screen Fixed Function Keys DSS (Direct Station Selection) Keys Digit Keys/ Dial pad Keys Volume Up Key/ "+" Key Speaker Key Volume Down Key/ "-" Key Handset Matrix ETERNITY NE System Manual...
- Page 880 Bottom View USB Port for Wi-Fi Adapter LAN Port PC Port Power Port for the Power Adapter (Optional) Left Side View RJ11 Headset Port Headset Port Handset Port Matrix ETERNITY NE System Manual...
- Page 881 SPARSH VP330 Key Template (default) Mute VoiceMail Headset Hold Conf Transfer Feature Keys and DSS Keys Matrix ETERNITY NE System Manual...
- Page 882 These Feature keys are programmable. You cannot change the labels of these keys and therefore it is recommended that you avoid programming these keys. However, if you still decide to reprogram features on these keys, see “Phone Key Settings” under “Configuring Matrix SPARSH VP330” for instructions. Matrix ETERNITY NE System Manual...
- Page 883 Configuring SPARSH VP330 For detailed instructions on how to configure SPARSH VP330, see “Configuring Matrix SPARSH VP330”. Operating SPARSH VP330 Refer the SPARSH VP330 User Guide for instructions on operating the features of SARVAM UCS. Matrix ETERNITY NE System Manual...
- Page 884 Tight integration with Server over SIP protocol /Proprietary Protocol • HTTP Auto Provisioning • Dual Color LED illuminated LED for line status • One Touch Transfer • Call logs • Ringtone selection • Wideband Codec: G722 • Narrowband Codec: G.711,G.723,G.729ab,GSM Matrix ETERNITY NE System Manual...
- Page 885 Off-Hook, Off-Hook Alert will be provided to SPARSH VP510, if it is the Operator phone. SPARSH VP510 Front View LCD Screen Ringer LED DSS (Direct Station Selection) Keys Fixed Function Keys Navigation Keys Volume Increase Key Matrix ETERNITY NE System Manual...
- Page 886 Forward Key: To move forward when dialing a number or scroll to view the Context Sensitive Key options. • Back Key: To move backwards when dialing a number, to go back one level in the Menu or scroll backwards to view the Context Key options. Matrix ETERNITY NE System Manual...
- Page 887 Feature like Auto Redial requires an LED to show that it has been set or canceled. So, the LED of the Feature key to which the Auto Redial feature has been assigned will glow Blue, when Auto-Redial is set, and the LED is turned off when the feature is canceled. Matrix ETERNITY NE System Manual...
- Page 888 Trunk 1 the LED of the DSS Key assigned to Trunk 1 will be continuously ON. When you put the call on hold, the LED will blink slowly. • Status of Features: The LED of a DSS key is activated when the feature assigned to this key is used. Matrix ETERNITY NE System Manual...
- Page 889 For instructions on customizing the Key Maps, see “Phone Key Settings” under “Configuring Matrix SPARSH VP510”. Matrix ETERNITY NE System Manual...
- Page 890 Alarm To set/cancel Personalized and Automated Alarms. Change User Password To change User Password. One Touch Transfer To set/clear the fixed destination number for One Touch Transfer. Phone Settings To customize settings of the phone. Matrix ETERNITY NE System Manual...
- Page 891 Configuring SPARSH VP510 For detailed instructions on how to configure SPARSH VP510, see “Configuring Matrix SPARSH VP510”. Operating SPARSH VP510 Please refer the EON510_SPARSH VP510 User Guide for instructions on operating the features of SARVAM UCS. Matrix ETERNITY NE System Manual...
- Page 892 Smart Directory Access: Provides you with the easy and quick way to access the extensions and other contacts through Smart Directory. • Presence: You can set your presence status and view other extension users’ presence statuses. Matrix ETERNITY NE System Manual...
- Page 893 Ethernet connectivity due to any reason, then you can register the IP Phone through the Wi-Fi Network. • Advanced Call Capabilities: Provides access to the features such as Callback, Dial-in Conference, Conversation Recording and many more. Matrix ETERNITY NE System Manual...
- Page 894 Extended SPARSH VP710 Front View Bottom View Matrix ETERNITY NE System Manual...
- Page 895 Indicates the status of camera and video calls. Covers and uncovers the camera. When the camera is Shutter Switch switched off, the video image is black. Allows you to connect the USB flash drive/USB headset to the USB2.0 Port phone. Matrix ETERNITY NE System Manual...
- Page 896 For detailed instructions on how to configure Extended SPARSH VP710, see “Configuring Matrix Extended SPARSH VP710”. Operating Extended SPARSH VP710 Please refer the EXTENDED SPARSH VP710 User Guide for instructions on operating the features of SARVAM UCS. Matrix ETERNITY NE System Manual...
- Page 897 Android OS family. • Advanced Call Capabilities: Access to features such as Callback, Dial-in Conference, Conversation Recording and many more. Matrix ETERNITY NE System Manual...
- Page 898 SARVAM UCS; calls made from the application will be almost free. Even if you are using the application via 3G network during roaming, external calls can be made using the SARVAM UCS trunks and thus reducing mobile calling and roaming charges. Matrix ETERNITY NE System Manual...
- Page 899 An innovative and easy to understand user interface delivers all productivity features at fingertips that enhances speed of communication and collaboration with office users and customers. Matrix ETERNITY NE System Manual...
- Page 900 Cellular network) to your application (registered using Wi-Fi network) without disconnecting or redialing the number. Similarly Wi-Fi to Cellular Handover is also possible where you can manually handover your call from the Wi-Fi to the Cellular network. Matrix ETERNITY NE System Manual...
- Page 901 Configuring VARTA AMP100 For detailed instructions on how to configure VARTA AMP100, see “Configuring Matrix VARTA ADR100/AMP100 Clients”. Operating VARTA AMP100 Refer to Matrix VARTA AMP100 User Guide for instructions on operating the features of SARVAM UCS. Matrix ETERNITY NE System Manual...
- Page 902 For detailed instructions on how to configure MATRIX VARTA WIN200, see “Configuring MATRIX VARTA WIN200 UC Client”. Operating MATRIX VARTA WIN200 Refer to MATRIX VARTA WIN200 User Guide for instructions on operating the features of SARVAM UCS. Matrix ETERNITY NE System Manual...
-
Page 903: Firebase Cloud Messaging (Fcm) Support
SIP Extension will display Registered and under the respective Contact 1, 2, 3 it will display the time remaining for the expiry of the Device Inactivity Timer. Matrix ETERNITY NE System Manual... - Page 904 A connectivity between the system and the FCM Server is required so that the Push notifications can be sent to the clients. To check the FCM connectivity status, • Log into Jeeves. • Click Maintenance. • Under Maintenance, click Network Diagnosis Matrix ETERNITY NE System Manual...
- Page 905 If the Connectivity Test of either of the servers (APNS or FCM) with SARVAM UCS is not successful, then Push Notifications will not be sent to the Mobile Clients — MATRIX VARTA ADR100 / AMP100 application. Matrix ETERNITY NE System Manual...
-
Page 906: Flashing On Trunks (Continued Dialing)
Speech with second call. Dial Flash-*. This informs the system to pass following code. Dial Flash-1. Speech with first call. Dial Flash-*. This informs the system to pass following code. Dial Flash-1. Speech with second call. Matrix ETERNITY NE System Manual... -
Page 907: Follow Me
Press Forward key of the other extension. Dial 135 • Enter your extension number. • Enter your user password. To cancel Follow Me from your extension • Press Forward key of your extension phone. • Select ‘Cancel’ Dial 130 Matrix ETERNITY NE System Manual... - Page 908 Lift the handset of the other extension. • Dial 135 • Dial your extension number. • Dial your user password. • Replace handset. To cancel Follow Me • Lift the handset of your extension. • Dial 130 • Replace handset. Matrix ETERNITY NE System Manual...
-
Page 909: Forced Answer
• Dial 5 on Ring Back tone. • The Ring Back Tone stops. • The called extension phone’s speaker is turned on. • You are in speech with the called extension. • You may talk. Matrix ETERNITY NE System Manual... - Page 910 You can also dial ‘5’, the feature code for Forced Answer, immediately after dialing the desired extension number, instead of dialing it during the Ring Back Tone. This way, you can talk to the desired extension user without waiting for the called extension user to answer your call. Matrix ETERNITY NE System Manual...
-
Page 911: Forced Call Disconnection
How to configure To be able to use Forced Call Disconnection, extension users must have: • Forced Release feature enabled in their “Class of Service (CoS)” for the Day and Night/Break time, as required. Matrix ETERNITY NE System Manual... - Page 912 Press the DSS Key assigned to Forced Call Disconnection on Busy tone. Dial #* on Busy tone. • You get confirmation tone. • You may now dial the extension number/grab the trunk. 144. You must have grabbed this trunk using Selective Port Access. Matrix ETERNITY NE System Manual...
- Page 913 For SLT Users To forcibly disconnect a busy extension/trunk • Dial #* on Busy tone. • You get confirmation tone. • You may now dial the extension number/grab the trunk. Matrix ETERNITY NE System Manual...
-
Page 914: Gain Settings
To configure Gain Settings for SIP Trunks, see “Gain Settings” under “SIP Trunks”. • To configure Gain Settings for SLT Extensions, see “Hardware Settings” under “SLT Extensions”. • To configure Gain Settings for SIP Extensions, see “VoIP” under “SIP Extensions”. Matrix ETERNITY NE System Manual... -
Page 915: Handover And Handoff
Handoff will not be possible.To know more refer to the MATRIX VARTA AMP100 User Guide. How to configure To use this feature, make sure the Basic Features are enabled in the Class of Service assigned to you. For instructions, see Class of Service in “SIP Extensions”. Matrix ETERNITY NE System Manual... -
Page 916: Help Desk
Select the extension number to which you want to apply this feature, by clicking the tab. The selected extension tab opens. • Click the More button to view all parameters on this page. • Click the More...link on the extension page. Matrix ETERNITY NE System Manual... - Page 917 • Scroll to Help Desk. • Select the Assign Help Desk function to this Extension check box. The selected extension will be designated as Help Desk. • Click Submit. Matrix ETERNITY NE System Manual...
-
Page 918: Holiday Table
In Start, enter the starting date and time of the holiday in DD-MMM-HH-MM format, that is 31 DEC, 00:00 and in End enter the last date and time of the holiday, that is 4 JAN 23:59. • In Time Zone for Holiday, select As per Time Table. Matrix ETERNITY NE System Manual... - Page 919 Time Zone you set for the Holiday. See “System Parameters” for more details. How to configure You can configure the Holiday Table from the SE as well as the SA mode. Matrix ETERNITY NE System Manual...
- Page 920 Default: Auto_Attendant_01. • Click Submit. You can also configure the Holiday Table from the SA mode also. To do this, • Login as System Administrator. Matrix ETERNITY NE System Manual...
- Page 921 You can either use the default Holiday messages or customize your messages by recording messages of your preference. To know more about the default Holiday Messages and how to record customized Holiday Messages, see “Recording Voice Messages”. Matrix ETERNITY NE System Manual...
-
Page 922: Hot Desking
Go to the SLT extension (Hot Desk Extension) with which you want to swap your SLT extension (Host Extension) properties. • Lift the handset of the Hot Desk extension. • Dial 1091. • Dial Host Extension number • Dial Host Extension User Password • Replace handset. Matrix ETERNITY NE System Manual... - Page 923 Dial own extension User Password. • Go ON-Hook. • On the Hot Desk Extension, dial 1091 • Dial own extension number. • Dial own extension User Password. • You get confirmation, Hot Desk cleared. • Go ON-Hook. Matrix ETERNITY NE System Manual...
-
Page 924: Hotline
If A sets delayed Hot Outward Dialing for a Trunk or an External Number, the system will play dial tone to A and wait for the duration of the Hotline Timer for A to dial digits. If A does not dial any digits within this timer, the system connects A to the Trunk/External Number. Matrix ETERNITY NE System Manual... - Page 925 SA mode. To do this, • Login as System Administrator. • Click Extension. • Now, click on the desired Extension Number tab. • The extension users details appear on your screen. Matrix ETERNITY NE System Manual...
- Page 926 On the expiry of this timer, it connects the extension user to the desired hotline extension number, department group, external number or outgoing trunk. • Click Set to set Delayed Hotline. • To cancel Hotline, click Cancel Hotline. Matrix ETERNITY NE System Manual...
- Page 927 The cancellation code must be dialed from the dial tone. You have to be very quick in dialing the cancellation code, if the delay in the Hotline Timer is set to 1 or 2 seconds. Matrix ETERNITY NE System Manual...
- Page 928 Dial the access code to cancel the Hot Outward Dialing (150). You get Confirmation Tone. • Go ON-hook. You get the return ring of the trunk. • Go OFF-Hook again. You get connected to the held trunk. • Go ON-Hook. Matrix ETERNITY NE System Manual...
-
Page 929: Incoming Cli Modification
For this feature to work, you must configure Incoming CLI Modification parameters in the “System Parameters” SARVAM UCS. To do this, • Login as System Engineer. • Under Advanced Settings, click System Parameters. • On the System Parameters page, click Incoming CLI Modification to expand. Matrix ETERNITY NE System Manual... - Page 930 Area Code required to make local calls?: Depending on the dialing pattern of your local public telephone network, you may choose from the following options: • No: select this option, if your public telephone network does not require the dialing of Area Code for local numbers. Matrix ETERNITY NE System Manual...
- Page 931 Prefix Area Code: If you have selected Yes, with Prefix Digit option for Area Code required to make local calls? parameter, enter the Prefix digits for the Area Code for local calls in this field. • Click Submit. Matrix ETERNITY NE System Manual...
-
Page 932: Interrupt Request (Ir)
Privacy against Interrupt Request: If the feature 'Privacy against Interrupt Request is enabled for an extension, it cannot be interrupted. • “Priority”: No Interaction with Interrupt Request. If 'A' has lower priority than 'B' but has Interrupt Request enabled; A can interrupt B. Matrix ETERNITY NE System Manual... - Page 933 Login as System Engineer. • Under Advanced Settings, click System Timers and Counts. • Scroll to reach Other Features and go to the parameter Interrupt Request Timer • Set the desired value for the Timer. • Click Submit. Matrix ETERNITY NE System Manual...
- Page 934 For Extended IP Phone Users When dialed extension is busy • Press DSS Key assigned to Interrupt Request • Dial 3 on Busy Tone For SLT Users When dialed extension is busy • Dial 3 on Busy Tone Matrix ETERNITY NE System Manual...
-
Page 935: Intercom
Call Forward-Busy: If the called extension has set Call Forward-Busy, SARVAM UCS will place the call on the forwarded destination number. However, this call (placed on the forwarded destination) will not be an Intercom call. Matrix ETERNITY NE System Manual... - Page 936 To use intercom to call an extension • Dial *5 followed by the desired extension number. • The called extension’s speaker goes OFF-Hook. • You are in speech with the called extension. • You may talk. Matrix ETERNITY NE System Manual...
-
Page 937: Last Caller Recall
Dial 1092. The system dials out the extension number that last called your extension. For SLT Users • Lift Handset. • Dial 1092. The system dials out the extension number that last called your extension. Matrix ETERNITY NE System Manual... -
Page 938: Last Number Redial
Scroll to select the desired number. • Press Enter key. • The system dials out the selected number. For SLT Users • Lift Handset • Dial 7 • The system dials out the number last dialed from your extension. Matrix ETERNITY NE System Manual... -
Page 939: Least Cost Routing (Lcr)
8 pm, as compared to Service Provider 2, whereas Service Provider 2 offers lower rates for calls made from City A to City B during off peak hours (8 pm to 9 am). Matrix ETERNITY NE System Manual... - Page 940 After assigning Cost Factor to Trunks, you must configure the Type of LCR to be used on Trunks in the Select Trunks for Outgoing Trunks allotted to the extensions for making calls. Assigning Cost Factor to Trunks • Login as System Engineer. • Under Advance Settings, click Least Cost Routing (LCR). Matrix ETERNITY NE System Manual...
- Page 941 At Time Zone Index 1, define the Time Zone start and end time in 24 Hours:Minutes format, enter the Cost Factor you assigned to CO-001 (01) and CO-002 (02) as Preference 1 and Preference 2 respectively. Matrix ETERNITY NE System Manual...
- Page 942 Login as System Engineer. • Under Advanced Settings, click Least Cost Routing (LCR). • Click Time based. • Enter the values of the Time based LCR you prepared on the sheet of paper in the appropriate fields. Matrix ETERNITY NE System Manual...
- Page 943 Cost Factor Index Number Preference 1 Preference 2 Preference 3 Preference 4 • If you have finished entering the number strings, and selecting the preferred trunks for the numbers, configure the Number based LCR using Jeeves. Matrix ETERNITY NE System Manual...
- Page 944 Only digits 0-9 are allowed after the caret. Character T can be configured only as a last character in a number string. When T (letter T) configured in a number string, the system waits for End of Dialing. Matrix ETERNITY NE System Manual...
- Page 945 “Wildcard Characters” to know the various number patterns you can use. • For each number string that you enter against an Index number, you must also specify the Area Code and the Ignore Digit Count. Matrix ETERNITY NE System Manual...
- Page 946 Enter the Area Codes and the corresponding Ignore Digit Counts from the sheet you prepared for Service Provider based LCR. You may also enter the respective name for each area code, if desired. • Click Submit. • Now, click Least Cost Routing (LCR). Matrix ETERNITY NE System Manual...
- Page 947 Number strings may be complete telephone numbers, truncated phone numbers or area codes. When the trunk you selected as first preference is busy, the system will route the call through the next trunk you set as preference if it is free. Matrix ETERNITY NE System Manual...
- Page 948 If you have finished defining the time zones, entering the number strings, and selecting the preferred trunks for the number strings, configure the Number and Time based LCR using Jeeves. Configuring Time+Number based LCR using Jeeves • Login as System Engineer. • Under Advanced Settings, click Least Cost Routing (LCR). Matrix ETERNITY NE System Manual...
- Page 949 Under “Basic Settings”, open the following Extension type: • “SLT Extensions” • “SIP Extensions” • Select the desired Extension number, for example SLT 201. • Click Select Trunks for Outgoing Calls option for the Extensions. Matrix ETERNITY NE System Manual...
- Page 950 Time-based, Number based, Service Provider based (Cost Factor), Time+Number based. Since you have already configured the LCR Type, you do not need to configure the LCR settings further on this page. • Click Submit. Matrix ETERNITY NE System Manual...
-
Page 951: Least Cost Routing - Carrier Pre-Selection
How to configure To use this feature, you must configure the Automatic Number Translation (ANT) table on the desired trunks—CO, Mobile or SIP. See Automatic Number Translation (ANT) under “CO Trunks”, “Mobile Trunks” “SIP Trunks” for instructions. Matrix ETERNITY NE System Manual... -
Page 952: License Management
The Server functions as a SMTP Client to send emails and as a POP3 Client to receive mails. 145. Make sure you have purchased and installed the VoIP Module. Refer to “Installing the VoIP Module”. 146. Make sure you have purchased and installed the VoIP Module. Refer to “Installing the VoIP Module”. Matrix ETERNITY NE System Manual... - Page 953 Call Forward Do Not Disturb Presence IM and SMS Matrix ETERNITY NE System Manual...
- Page 954 License for 5 VARTA UC Users with Essential features. This license is SARVAM VARTA USER5E required to register Android/iOS/Windows UC Clients. License for 5 VARTA UC Users with Professional features. This license is SARVAM VARTA USER5P required to register Android/iOS/Windows UC Clients. Matrix ETERNITY NE System Manual...
- Page 955 When you default SARVAM UCS, the demo period will not be reset. 147. In Demo Mode, VARTA Collaboration license will be assigned to all the VARTA clients. Matrix ETERNITY NE System Manual...
- Page 956 Under Advanced Settings, click License Management. The License Management Page displays the following: If you wish to view the features and functionalities currently available to your system, click the View Profile button. • Click Close. Matrix ETERNITY NE System Manual...
- Page 957 Keep your Current License Key and the License Voucher ready. • Open a new window on your browser. • Enter http://www.matrixcomsec.com/MatrixLicense/ in the address bar. • Click Login to Access. The Login to Access page will open. Matrix ETERNITY NE System Manual...
- Page 958 On successful login, the License Activation page will open. • As Product Family, select the option SAPEX. • In Current License Key, type the Current License Key you noted or paste the key you copied from the License Management page of Jeeves. Matrix ETERNITY NE System Manual...
- Page 959 • Click View. The page will show the current License Profile of the system. • Click Next to continue. The License Activation page will open. Matrix ETERNITY NE System Manual...
- Page 960 • In License PIN on this page, enter or paste the 16-digit License PIN from the Voucher. • Click Details. The details appear in the fields Product Family, Product Name, Product Variant. Matrix ETERNITY NE System Manual...
- Page 961 On successful activation, the confirmation message will appear on your screen along with the activation date and time. A confirmation mail will also be sent to your e-mail ID (registered with Matrix). You may Save, Print or Mail this information for your records, by clicking the relevant button. Matrix ETERNITY NE System Manual...
- Page 962 To log off, click Logout. If you are unable to use Online Activation of the License Key or have no internet access, contact the Matrix License Support Centre for assistance in generating the New License key. Matrix ETERNITY NE System Manual...
- Page 963 Now, send your Current License Key and the License PIN (on the Voucher) to the Matrix License Support Centre. • You will receive a New License Key. • Open Jeeves again. • Login as System Engineer. Matrix ETERNITY NE System Manual...
- Page 964 A new window opens which displays the updated service profile. • To log off, click Logout. The current License Key and Service Profile will remain unchanged when the system is set to default or the firmware is upgraded. Matrix ETERNITY NE System Manual...
-
Page 965: Lightweight Directory Access Protocol (Ldap)
Global Directories synchronized with the LDAP server. • Now, any extension user can easily dial out the desired contact from the Global Directory. To know more about making an outgoing call from the Global Directory, refer to “Global Abbreviated Dialing”. Matrix ETERNITY NE System Manual... - Page 966 Full name surname Last name or family name distinguishedName Unique identifier for each entry Domain component company Company or organization name telephoneNumber Office phone number. mobile mobilephoneNumber Mobile or cellular phone number mail emailid Email address Matrix ETERNITY NE System Manual...
- Page 967 LDAP Server Port: Configure listening port of LDAP Server here. By default, the value is 00389. • Enable Authentication: This parameter enables you to set permission for validating the credentials (Authentication ID and password) of the system by the LDAP server. By default, it is disabled. Matrix ETERNITY NE System Manual...
- Page 968 Select the desired attribute and enter the — Name, Number or Email-id. • Click the Test button. • If the connection has been successfully established then search results fetched from the LDAP server will be displayed. Matrix ETERNITY NE System Manual...
- Page 969 Hence, you must manually synchronize the Global directory contacts with LDAP server again (if LDAP contacts are required). • Click Submit. How to use To make an outgoing call to an LDAP contact from the synchronized Global Directory, refer to “Global Abbreviated Dialing”. Matrix ETERNITY NE System Manual...
-
Page 970: Live Call Supervision
To be able to use Live Call Supervision, extension users must have this feature enabled in their “Class of Service (CoS)” for the Day and Night/Break time, as required. “Basic Settings” for instructions on configuring Class of Service for different extension port types: “SLT Extensions” “SIP Extensions”. Matrix ETERNITY NE System Manual... - Page 971 For Extended IP Phone Users • Press DSS key assigned to Live Call Supervision • Dial 1098 • Enter the Extension number to be supervised For SLT Users • Dial 1098-Extension number to be supervised. Matrix ETERNITY NE System Manual...
-
Page 972: Logical Partition
Though Remote SIP Extensions can make internal calls to the SLT/Local SIP Extensions, but Logical Partition will be applied for the external SIP Extension calls and trunk calls. How to configure • Login as System Engineer. Matrix ETERNITY NE System Manual... - Page 973 • External Call Forward: In the case of Built-In Auto Attendant, DISA or when transferring a trunk call to an extension, if the extension has set call forward to an external number, the system will Matrix ETERNITY NE System Manual...
- Page 974 (from where the DISA login is made) and the destination trunk (which is used as Hotline Trunk) only if calling is permitted between them. Otherwise an Error Tone will be played to the DISA caller on the expiry of the Hotline Timer. Matrix ETERNITY NE System Manual...
-
Page 975: Macros
Thus, each time the extension user presses the special key *50, the system considers that the extension user has dialed 131-Trunk Access Code-26550333-#*. Matrix ETERNITY NE System Manual... - Page 976 “Phone Key Settings” under “Configuring Matrix SPARSH VP310” “Phone Key Settings” under “Configuring Matrix SPARSH VP330”and “Phone Key Settings” under “Configuring Matrix SPARSH VP510”. • When creating a Macro for a special Key on a SLT, Matrix ETERNITY NE System Manual...
- Page 977 *53 in the corresponding Access code field. The Access Code that you assign here in Macros must not conflict with any other Access Codes in the Dial Phase. See “Access Codes”. • Click Submit. Matrix ETERNITY NE System Manual...
-
Page 978: Meet Me Paging
Meet Me Paging. How to configure No configuration is required for Meet Me Paging. However, extension users who are using Paging to make their announcement, must have the “Paging” feature allowed in their Class of Service. Matrix ETERNITY NE System Manual... - Page 979 To answer a Paging call from the same extension that is paged • While the announcement is being made, • Go ON-Hook and then go OFF-Hook. • Dial 1093-Paging Extension Number. • You get connected to the Paging extension user. Matrix ETERNITY NE System Manual...
-
Page 980: Message Wait
The extension that set Message Wait on A gets the CLI of A as Message Wait. A can now deliver the message. • The LED of the Retrieve Message Wait key, if assigned, on Extension A will be turned off after all message wait set by other extensions on Extension A have been served. Matrix ETERNITY NE System Manual... - Page 981 SARVAM UCS can play only 4 Voice Modules simultaneously. The Voice Module for Message Wait Notification will not be played if there are already 4 being played simultaneously. In this case, Stuttered Dial Tone will be played for Message Wait Indication, when the extension user goes OFF-Hook. Matrix ETERNITY NE System Manual...
- Page 982 You may also configure the features ‘Message Wait’ and ‘Retrieve Message Wait’ on Extended IP Phone extensions. For instructions, see Phone Key Settings under “Configuring SIP Extension Settings as per the Device Type” in SIP Extensions. Matrix ETERNITY NE System Manual...
- Page 983 Pick up the handset. • Dial 1076 • Dial extension number on which you want to cancel Message Wait. • Dial 0 • Replace the handset. To Retrieve Message Wait • Pick up the handset. • Dial 1077 Matrix ETERNITY NE System Manual...
-
Page 984: Mobility Extension
Configure the parameter 'DISA' on the trunk lines on which Mobility Extensions users are to be provided access to. Make sure you select the option 'CLI Auth. Multiple Calls' in the 'DISA' parameter of the trunk port. Matrix ETERNITY NE System Manual... - Page 985 Mobility Extension Users can access the system features by dialing specific codes after making calls on the DISA enabled trunk of SARVAM UCS, or after answering the calls received on their external number. These codes are listed below. Activity Code to be dialed On-Hook Off-Hook Flash Pause Terminate the call Matrix ETERNITY NE System Manual...
- Page 986 Dial Trunk Access Code to grab the Trunk • After receiving the Dial Tone of the trunk, dial number of Party B. • After Party B answers the call, dial #0. • Party A will get connected with Party B. Matrix ETERNITY NE System Manual...
- Page 987 Make the first call. • Dial #2. • Make the second call. • Dial #2-*3 to establish conference. Multiparty Conference To create a Multiparty Conference • Mobility Extension User has generated three-party conference with B and C. Matrix ETERNITY NE System Manual...
- Page 988 Make a call on DISA enabled Trunk from Mobility Extension User. • After getting Dial Tone, dial 131-Extension/Department Group/VMS. • The system will give confirmation tone. To set Call Forward-Unconditionally on external number • Make a call on DISA enabled Trunk from Mobility Extension User. Matrix ETERNITY NE System Manual...
- Page 989 The system will give confirmation tone. To cancel Call Forward • Make a call on DISA enabled Trunk from Mobility Extension User. • After the Dial Tone, dial 130. • The system will give confirmation tone. Matrix ETERNITY NE System Manual...
- Page 990 “Call Forward-Scheduled” from the SA mode (using SA commands or Jeeves), the extension user/Operator can set Call Forward and Call Forward-Scheduled for any Mobility extension user. Refer the respective topics to know more. Matrix ETERNITY NE System Manual...
-
Page 991: Music On Hold (Moh)
You can record a piece of music or a message of maximum 16 seconds duration and assign it to Voice Module 01, which is reserved for Music-on-Hold. Refer the topic “Voice Message Applications” for instructions on recording and assigning voice modules. Matrix ETERNITY NE System Manual... -
Page 992: Multi-Stage Dialing
As the system must wait for the calling card server to answer before dialing the PIN, you must configure Wait for Answer (W) between the calling card server number and the PIN number. You must also insert a delay by configuring the Pause Timer after the PIN number. Matrix ETERNITY NE System Manual... - Page 993 Configure the DTMF Out Dial parameter on the desired trunks. For instructions, on configuring DTMF Out Dial on different Trunk types, see Hardware Settings under “CO Trunks”, “Mobile Trunks” “SIP Trunks”. • If required, you may also configure the Call Proceeding Tone for Multi-stage Dialing. For instructions, “System Parameters”. Matrix ETERNITY NE System Manual...
-
Page 994: Mute
Press Mute key. The LED of the key is turned off. • Press Transfer Key. • Dial 1052 For SLT Users To mute a call before making the call • Dial 1052 • Dial desired number Matrix ETERNITY NE System Manual... - Page 995 To mute a call during speech • Press Flash Key • Dial 1052 To resume outgoing speech • Press Flash Key • Dial 1052 Matrix ETERNITY NE System Manual...
-
Page 996: Off-Hook Alert
While the Error Tone for OFF-Hook Alert is being played on the extension phone, if the user presses the Speaker Key, the Error Tone will continue to be played on the handset until it is replaced correctly. How to configure • Login as System Engineer. • Under Advanced Settings, click System Parameters. Matrix ETERNITY NE System Manual... - Page 997 • Select the Give Off-hook Alert to Operator check box. • Click Submit. Matrix ETERNITY NE System Manual...
-
Page 998: One Touch Transfer
Configure the fixed destination extension number for One Touch Transfer. This number can be configured by extension users themselves from the Phone Menu or for any other extension from the SA mode. Configuring One Touch Transfer • Login as System Administrator. • Click Extension. Matrix ETERNITY NE System Manual... - Page 999 During an ongoing call, press the DSS Key assigned to One Touch Transfer. • The fixed destination extension number configured for One Touch Transfer starts ringing. • Answer the ringing call. • You will be in speech with the remote party. Matrix ETERNITY NE System Manual...
-
Page 1000: Paging
To answer the Paging call the desired extension user must use Meet Me Paging while the Paging call is active. For details refer, “Meet Me Paging”. • If no reply is received via Meet Me Paging, the calling SLT/SIP extension goes ON-Hook after the announcement. Matrix ETERNITY NE System Manual... - Page 1001 Page Zone 1 Index Member SIP Ext-2 SIP Ext.-4 SIP Ext.-5 Now, program Page Zone using Jeeves. To configure Page Zones, • Login as System Engineer. Matrix ETERNITY NE System Manual...
Need help?
Do you have a question about the ETERNITY NE and is the answer not in the manual?
Questions and answers