Table of Contents
Advertisement
Quick Links
Advertisement
Table of Contents

Subscribe to Our Youtube Channel
Related Manuals for GAPOSA QCTZ16SY

Summary of Contents for GAPOSA QCTZ16SY
- Page 1 QCTZ16SY 16 channels hand held display remote with timer INSTALLER MANUAL www.AVOutlet.com TECHNICAL DATA Radio frequency: 434.15 MHz Protection rating: IP 30 Operating temperature: 0°C to + 60°C (+ 32°F to + 140°F) Dimensions: 150 x 47 x 12 mm...
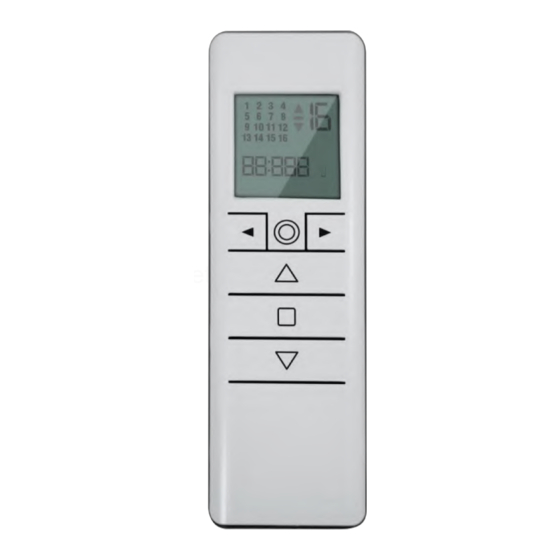
- Page 2 DESCRIPTION The QCTZ16SY hand-held display remote which allows you to control up to 16 motors or groups of motors wirelessly. Features: - LCD display - Hide unused channel function (to be implemented) - Easy customization of groups (Up to 8)
- Page 3 SELECTING A CHANNEL/GROUP When pressing the circle button sequentially the modes can be switched from single channel control mode to group control mode. Briefly press the circle button to enter single channel mode, scroll the channels with the arrow buttons (◄ or ►): each channel is identi- fied by a number.
- Page 4 TIMER FUNCTIONS CLOCK SET-UP (Note: The clock is in 24-hour format) 1. From the channels or groups screen, press and hold the circle button until appe- ars on the screen. Press the circle button again and the timer/ clock screen will appear. 2.
- Page 5 Manual Mode: The transmitter works only by sending up stop and down commands to channels or groups by manually pressing the button on the transmitter. Automatic Mode: The transmitter will operate with manual control as well as executing schedules auto- matically.
- Page 6 1. Switch the motor power supply OFF. Then switch it ON. 2. Within 8 seconds, using any Gaposa transmitter, press and hold both SYNC and STOP buttons until the motor makes a long jog. Memory is now empty. FIG. 5 LIMIT SWITCH SETUP (Fig.
- Page 7 FIG. 6 AUTOMATIC SETTING OF THE LIMITS (Just for motors with electronic limit switch) For limits set with torque sensor (mechanical stop of shutters or cassette awnings/shades), press and hold UP button until the bottom bar hits the cassette or shutter box. A short jog will indicate that the UP position has been memorized.
Need help?
Do you have a question about the QCTZ16SY and is the answer not in the manual?
Questions and answers