Advertisement
Quick Links
L
H
EGACY
OME
F
D
URNISHINGS &
ECOR
Assembly Instructions
Instrucciones de Ensamblaje
120mns
SAVE THESE INSTRUCTIONS
GUARDE ESTAS INSTRUCCIONES
Do Not Return!
No Vuelvas!
Email or call customer service for help first.
Envie correo electrónico o llame al servicio para
obtener ayuda primero.
1-972-395-8993
Monday-Friday 9am - 4pm CST
help@legacyhfd.com
3-Drawer Desk
Escritorio de 3 cajones
C2020094
Advertisement

Subscribe to Our Youtube Channel
Related Manuals for LHFD C2020094


Summary of Contents for LHFD C2020094
- Page 1 Instrucciones de Ensamblaje 120mns SAVE THESE INSTRUCTIONS 3-Drawer Desk Escritorio de 3 cajones GUARDE ESTAS INSTRUCCIONES C2020094 Email or call customer service for help first. Envie correo electrónico o llame al servicio para Do Not Return! obtener ayuda primero. No Vuelvas!
- Page 2 EGACY URNISHINGS & ECOR WARNING This product can expose you to chemicals including Formaldehyde, which is known to the State of California to cause cancer or birth defects or other reproductive harm. For more information go to www.P65Warnings.ca.gov/furniture ADVERTENCIA Este producto puede exponerlo a sustancias quím icas, incluyendo el formaldehído, el cual es conocido en el estado de California como causante de cáncer, defectos de nacimiento u otros daños reproductivos.
-
Page 3: Helpful Advice
EGACY URNISHINGS & ECOR Helpful advice Consejos útiles 1. Follow the assembly instructions carefully. 1. Siga a tentamente las instrucciones de montaje. 2. Check to ensure all parts, fasteners and hardware 2. Asegúrese de que la caja contiene todas las piezas, are present. - Page 4 EGACY URNISHINGS & ECOR Parts list/Lista de piezas ITEM DESCRIPTION DESCRIPCIÓN QUANTITY Upper left drawer back Tablero posterior del cajón superior izquierdo Tabrero inferior del cajón superior izquierdo Upper left drawer bottom Tablero frontal del cajón superior izquierdo Upper left drawer front Tablero izquierdo del cajón inferior Lower drawer side left Tablero derecho del cajón inferior...
- Page 5 EGACY URNISHINGS & ECOR Hardware/Lista de materiales ITEM IMAGE DESCRIPTION DESCRIPCIÓN QUANTITY Wood dowel Pernos Madera Perno Metálico (grande) Cam bolt (large) Bloqueo metálico (grande) Cam lock (large) Φ3.5*12 mm Screw Φ3.5*12 mm Tornillo Left glide Planeador izquierdo Right glide Planeador derecho Φ5*50 mm Screw Φ5*50 mm Tornillo...
- Page 6 EGACY URNISHINGS & ECOR Hardware/Lista de materiales ITEM IMAGE DESCRIPTION DESCRIPCIÓN QUANTITY Φ4.7*12.5 mm Screw Φ4.7*12.5 mm Tornillo Φ3.8*35 mm Screw Φ3.8*35 mm Tornillo Drawer connector Conector de plástico (grande) (large) M4*20 mm Bolt M4*20 mm Tornillo Handle Tirador Plastic file hanger Perchero de plástico Cam bolt (small) Tornilla metálico (Pequeño)
- Page 7 EGACY URNISHINGS & ECOR Hardware/Lista de materiales ITEM IMAGE DESCRIPTION DESCRIPCIÓN QUANTITY Φ3*16 mm Screw Φ3*16 mm Tornillo Note/Rema que/Nota El uso del tornillo incorrecto puede Using the wrong screw will cause provocar daños al producto. damage. Antes de iniciar la operación de Before you begin assembly check to ensure all parts are present.
- Page 8 EGACY URNISHINGS & ECOR Necessary tools/Herramientas necesarias Glue not included ( We recommend to apply some glue into holes before inserting wood dowels .) Cola, no incluida (Le recomendamos colocarunas gotas de cola en los ori cios antes de insertar las clavijas de madera.) How to use cam lock system/Cómo usar el sistema de jación Unlocked Nº1...
- Page 9 EGACY URNISHINGS & ECOR Attention: In order to help your assembly, do not lock the screw tightly until you have assembled all the other parts. Atención: Con el fin de facilitar su montaje, no apretar el tornillo firmemente hasta que haya ensamblad o todas las otras partes. Step 1/Paso 1 Insert 4 wood dowels (A) into the edge of the xed shelf (1).
- Page 10 EGACY URNISHINGS & ECOR Step 3/Paso 3 Insert 3 cam locks (C) into xed shelf (1) and rail (2) to combine them with gable left (3). Make sure cam locks are fully insert and in correct orientation. Conecte el Estante izquierdo (1),la Barra inferior del Cajón (2) al Tablero izquierdo (3) con 3 Bloqueos metálicos (grandes) (C).
- Page 11 EGACY URNISHINGS & ECOR Step 5/Paso 5 Insert 3 cam locks (C) into the holes on xed shelf (1) and rail (2) to combine the divider (4) with them. Make sure cam locks are fully insert and in correct orientation. Conecte el Tablero vertical (4) al ensamblaje con 3 Bloqueos metálicos (grandes) (C).
- Page 12 EGACY URNISHINGS & ECOR Step 7/Paso 7 Insert 2 cam bolts (B) into the divider (4). Align 1 left glide (E) with the holes on the divider (4), then secure with 3 screws (D). Make sure the rst hole you align is correct. Inserte 2 Pernos metálicos (grandes) (B) en fuera del Tablero vertical (4), Inserte el Planeador izquierdo(E) en el Tablero vertical (4) con 3 Tornillos (D) Tenga en cuenta que la posición del primer agujero sea correcto.
- Page 13 EGACY URNISHINGS & ECOR Step 9/Paso 9 Insert 2 cam locks (C) into the right bottom (6) to combine it with the divider (4). Insert 2 brackets (H) into the divider (4) with 2 screws (I). Conecte el Marco derecho inferior (6) al Tablero vertical (4) con 2 Bloqueos metálicos (grandes) (C), Insterte 2 Chapas en el Tablero vertical (4) con 2 Tornillos (I).
- Page 14 EGACY URNISHINGS & ECOR Step 11/Paso 11 Align the dowels on the gable right (7) with the holes on the right bottom (6), then combine them with 2 screws (G). Conecte el Tablero derecho (7) al Marco derecho inferior (6) con 2 Tornillos (G). G x 2 Step 12 /Paso 12 Connect right leg (12), left leg (13) with connecting pipe (11), use 2 bolts (W).
- Page 15 EGACY URNISHINGS & ECOR Step 13/Paso 13 Attach right leg (12), 2 left legs (13) to assembly part, use 12 bolts (U) and 12 washers (J). Tighten with hex wrench (V). Conecte los soportes (12) (13) al ensamblaje con 12 Tornillos hexagonales (U) y 12 Arandelas planas (J). Cerrarlos bien con la Llave Allen (V).
- Page 16 EGACY URNISHINGS & ECOR Step 15/Paso 15 Insert 6 cam bolts (B) into the smaller holes on the top (10). Inserte 6 Pernos metálicos (grandes) (B) en el Panel superior (10). B x 6 Step 16/Paso 16 Align the top (10) with the holes on gable left (3),divider (4) and gable right (7), then combine them with 6 cam locks (C). Conecte el Panel superior (10) al ensamblaje con 6 Bloqueos metálicos (grandes) (C).
- Page 17 EGACY URNISHINGS & ECOR Step 17/Paso 17 Insert 8 back buttons (X) into the left back panel (8) and right back panel (9) with 8 screws (Y). Utilice 8 Tornillos (Y) para bloquear 8 Botones de retroceso (X) al Tablero izquierdo posterior (8) e Tablero derecho posterior (9).
- Page 18 EGACY URNISHINGS & ECOR Step 19/Paso 19 Connect upper drawer side left (14), upper drawer side right (15), upper right drawer back (16) and upper right drawer bottom rail (17) with 5 screws (N). Insert small drawer connector (K) into the upper drawer side left (14) and upper drawer side right (15) with 2 screws (L).
- Page 19 EGACY URNISHINGS & ECOR Step 21/Paso 21 Insert handle (Q) into the upper right drawer front (19) with 2 bolts (P). Use 1 cam lock (T) to combine upper right drawer front (19) with upper right drawer bottom rail (17). Secure small drawer connector (K) to the upper right drawer front (19) with 2 screws (M).
- Page 20 EGACY URNISHINGS & ECOR Step 23/Paso 23 Insert small drawer bottom (21) into the assembly part. Inserte el Tablero inferior del cajón superior izquierdo (21). Step 24/Paso 24 Insert handle (Q) to the upper left drawer front (22) with 2 bolts (P). Secure small drawer connector (K) to the upper left drawer front (22) with 2 screws (M).
- Page 21 EGACY URNISHINGS & ECOR Step 25/Paso 25 Align 1 left glide (E) with the holes on the lower drawer side left (23), then secure with 3 screws (D). Align 1 right glide (F) with the holes on the lower drawer side right (24), then secure with 3 screws (D). Bloquee el Planeador izquierdo (E) al Tablero izquierdo del cajón inferior (23) con 3Tornillos (D), Bloquee el Planeador derecho (F) al Tablero derecho del cajón inferior (24) con 3 Tornillos (D).
- Page 22 EGACY URNISHINGS & ECOR Step 27/Paso 27 Insert upper left drawer bottom (21) into the assembly part. Inserte el Tabrero inferior del cajón superior izquierdo (21). Step 28/Paso 28 Insert handle (Q) into lower drawer front (26) with 2 bolts (P). Secure large drawer connector (O) to lower drawer front (26) with 4 screws (M).
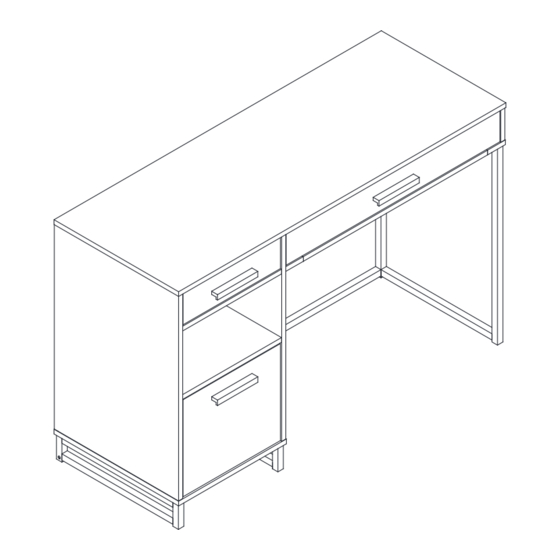
- Page 23 EGACY URNISHINGS & ECOR Step 29/Paso 29 Push 3 drawers to the stand assembly. Inserte los cajones en la mesa, y ajuste el espacio de los cajones.
- Page 24 EGACY URNISHINGS & ECOR Maximum weight capacities/Capacidades de carga máxima 6.61 lbs. 99.21 lbs. 3.31 lbs. 26.46 lbs. 14.33 lbs. WARNING Please use your furniture correctly and safely. Improper use can cause safety hazards, or damage to your furniture or household items.
-
Page 25: Year Warranty
4. The manufacturer may, at its discretion, fully discharge all obligations 10.For warranty inquiries or claims, you may contact LHFD at with respect to this warranty by refunding the wholesale price of the 1-972-395-8993, email us at help@legacyhfd.com.
Need help?
Do you have a question about the C2020094 and is the answer not in the manual?
Questions and answers