Advertisement
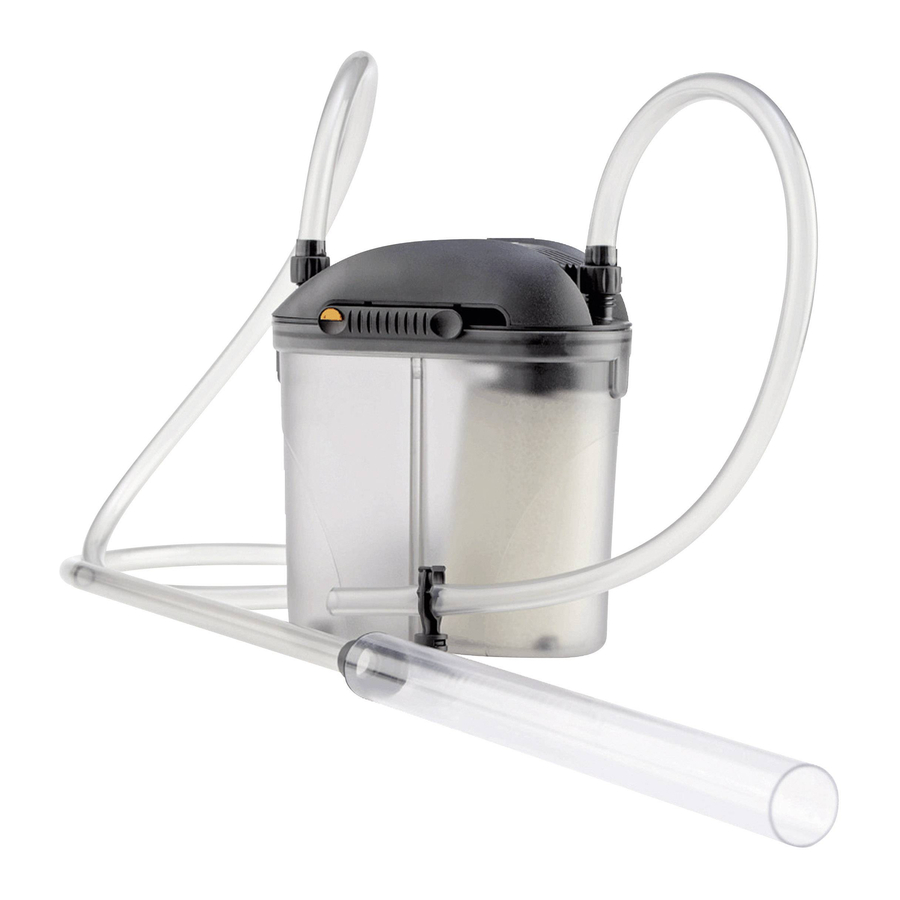
PARTS OVERVIEW

A - 9922-01
B - 9922-02
C - 9922-03
D1 -50Hz 9901-01
D2 -60Hz 9901-02
E - 9922-04
F - 9922-05
G - 9922-06
H - 9922-07
I - 9922-08
L - 9901-07
M - 9922-09
N - 9922-10
P - 9922-11
Q - 9908-04
R - 9922-12
S - 9922-13
T - 9922-14
INSTALLATION
Identify the parts you have found in the box and in the accessories bag.
Assemble the suction cups (G1) onto the clips (G2).
Mount the screw-nuts (E) onto the hard elbows (I) and on the filter head.
Insert the strainer (H) onto the intake tube (N).
Close one end of the spray bar tube (tube with holes P) with the tap supplied.
Mount the rubber elbow (M) onto the one hard elbow (I).
If you prefer to use the diverter (L) mount it directly onto the rubber elbow (M).
Insert the feet in their locations.

Open the filter by pushing first on the orange safety device, and then slide the clip towards the right end side.

Open the ceramic media bag, wash them under running water and insert them in the filter chamber.

Close the filter by pressing down the head completely and slide each locking clip from right to left.

Open the top cap and fill up completely. To close the tap, rotate it until the locking device clicks.

Thoroughly clean the wall before pressing the suction cups and tube against it.

Press the suckers on the spray bar against the thoroughly cleaned wall.

Push the pipes onto their spigots and lock with the screw nuts.

It is recommended that the filter is placed on the same level as the tank.

For best performance place the filter in an upright position beside the tank.

Avoid tight bends or kinks in the (inlet or outlet) pipes.

The filter will be closed only after pushing fully down the head and the clips from the right to the left hand side.

SAFETY WARNINGS
Check that the voltage shown on the label of the unit corresponds to the voltage of the mains supply. Connect the unit only to power supplies with residual current circuit breaker (RCCD) with sensitivity of 30mA. Always disconnect all electrical appliances from the mains before placing your hands in the water. The line cord cannot be replaced or repaired. Should the cord become damaged the appliance must be discarded. Units marked with on the label are for indoor use only. This unit must not be used in swimming pools or bathrooms. This appliance has been designed for use in fluids up to 35°C. Keep these instructions for future reference.
MAINTENANCE
Follow these instructions carefully for any maintenance, replacement of filter media, cleaning operation, etc.
- Always disconnect all electrical appliances before placing your hands in water.
- Unlock the screw nuts and detach the hoses from the intake and outlet spigots (fig. 8) to avoid siphoning of the tank.
- Move the complete filter on to a sink or similar place.
- Open the filter by pushing first the orange safety device and then sliding the clips toward the right side (fig. 2).
- Open the pump chamber (fig. 9).

- Take off the rotor system and carefully wash under running water together with the other components.
- Reassemble the parts paying care to the right positioning of the hose (fig. 9) that must be oriented towards the upper side of the filter.

A special internal device (fig. 9) discharges the air that remains in the upper part of the filter head. The length of this operation depends on the quantity of air inside and may take a few minutes. The noise will disappear as soon as the system has discharged all the air.
Disposal: (in accordance with RL2002/96/EC) the product must not be added to normal household waste. It must be disposed of properly.
EDEN S.R.L.
Via delle Industrie, 16
36050, Cartigliano, VI
TEL. +39 0424 590 866
FAX +39 0424 827 342
www.edensrl.com
e-mail: info@edensrl.com
MADE IN ITALY

Documents / Resources
References

Download manual
Here you can download full pdf version of manual, it may contain additional safety instructions, warranty information, FCC rules, etc.
Advertisement


Need help?
Do you have a question about the 501 and is the answer not in the manual?
Questions and answers