Table of Contents
Advertisement
Available languages
Available languages
Quick Links
OSMID #320671656
Model #HB-17122-HS
USE AND CARE GUIDE
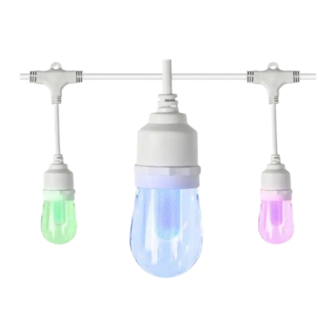
24-LIGHT INDOOR/OUTDOOR 48 FT. RGBW LED
SMART HUBSPACE CAFE STRING LIGHT
Questions, problems, missing parts? Before returning to the store,
call Hampton Bay Customer Service
8 a.m. - 7 p.m., EST, Monday – Friday, 9 a.m. – 6 p.m., EST, Saturday
1-877-592-5233
HOMEDEPOT.COM/HUBSPACE
THANK YOU
We appreciate the trust and confidence you have placed in Hampton Bay through the purchase of this string light. We strive to continually
create quality products designed to enhance your home. Visit us online to see our full line of products available for your home improvement
needs. Thank you for choosing Hampton Bay!
Advertisement
Table of Contents

Related Manuals for HAMPTON BAY HB-17122-HS


Summary of Contents for HAMPTON BAY HB-17122-HS
- Page 1 THANK YOU We appreciate the trust and confidence you have placed in Hampton Bay through the purchase of this string light. We strive to continually create quality products designed to enhance your home. Visit us online to see our full line of products available for your home improvement...
-
Page 2: Table Of Contents
□ Do not use this product for other than its intended use. please call our Customer Service Team at □ Do not hang objects from cord, wire, or light string. 1-877-592-5233 or visit hamptonbay.com/hubspace. Please reference your OSMID (320671656) or Model (HB-17122-HS). -
Page 3: Warranty
Safety Information (continued) Novolink, Inc. • 14860 Central Ave., Chino, CA. 91710 • Phone: 1-800-933-7188 Contains Transmitter Module FCC ID: 2AB2Q-LA02301 NOTE: This equipment has been tested and found to comply with the limits for a Class B digital device, pursuant to part 15 of the FCC Rules. -
Page 4: Planning Installation
Pre-Installation PLANNING INSTALLATION Read all instructions before installation. IMPORTANT: Inspect the wire insulation for any cuts, abrasions, or exposed copper that may have occurred during shipping. If there is a defect in the wire, do not attempt installation. Please call the Customer Service Team at 1-877-592- 5233. -
Page 5: Installation
Installation Preparing for installation □ Disconnect power at the source prior to attempting to install or service the light string. □ Use only with 120V AC receptacles. □ Before powering the string light, inspect bulb and socket. Turn the bulb slowly, yet firmly, clockwise, relative to the socket, to ensure a secure fit of the bulb. - Page 6 Installation (continued) Suspending the light string NOTE: Support cable and hardware not included (sold separately). □ The light string must be securely attached to a support structure at each end of each span. The maximum NOTE: Avoid damage to the insulation during installation. DO NOT pierce or otherwise compromise outer covering of unsupported span distance for a light string is 14.0m/46.0 wire or socket, jacket, or sheathing.
-
Page 7: Operation
Operation USING THE CONTROLLER BUTTON Turning On and Off The string light controller features a multipurpose button and red indicator light. Press the button to turn ON the lights. Press and hold the button for 2 seconds to turn off the lights. Cycling through the Settings Pressing and releasing the button will cycle the lights through a series of settings:... -
Page 8: Care And Cleaning
Care and Cleaning □ Do not use any cleaners with chemicals, solvents, or harsh abrasives. Use only a dry, soft cloth to dust or wipe carefully. □ To clean the fixture, disconnect the power by turning off the circuit breaker or by removing the fuse at the fuse box, and use a dry or slightly dampened, clean cloth to wipe the exterior surface of the fixture. - Page 9 Troubleshooting (continued) Problem Possible Cause Solution □ Make sure the device is connected to power. I lost my QR code. How do I add a device? □ In the Hubspace app, tap +, then Add Device. □ On the Scan Device screen, tap the Search button in the lower right corner.
- Page 10 For more information on the Hubspace app, setup instructions, or product compatibility details, please visit www.homedepot.com/hubspace. Questions, problems, missing parts? Before returning to the store, call Hampton Bay Customer Service 8 a.m. – 7 p.m., EST, Monday – Friday, 9 a.m. – 6 p.m., EST, Saturday 1-877-592-5233 HOMEDEPOT.COM/HUBSPACE...
- Page 11 GRACIAS Apreciamos la confianza que ha depositado en Hampton Bay por medio de la compra de esta tira de luces. Nos esforzamos continuamente para crear productos de calidad diseñados para mejorar su hogar. Visítenos en línea para ver nuestra línea completa de productos disponibles...
- Page 12 □ No cuelgue decoraciones u otros objetos del cordón, el 1-877-592-5233 o visite hamptonbay.com/hubspace. cable o la tira de luces. Haga referencia a su número de OSMID (320671656) o Modelo (HB-17122-HS). NO exceda el número máximo para dos (2) cadenas de luces de 48 pies cuando conecte varias cadenas...
- Page 13 Información de seguridad (continuación) Novolink, Inc. • 14860 Central Ave., Chino, CA. 91710 • Teléfono: 1-800-933-7188 Contiene el módulo transmisor FCC ID: 2AB2Q-LA02301 NOTA: Las pruebas realizadas en este equipo permiten afirmar que cumple con los límites de un dispositivo digital de Clase B, según lo estipulado en la Sección 15 de las normas de la FCC.
- Page 14 Antes de la instalación PLANIFICACIÓN DE LA INSTALACIÓN Antes de instalar, lea todas las instrucciones. IMPORTANTE: Inspeccione el material de aislamiento del cable para asegurarse de que no tenga ninguna cortadura, abrasiones o que se haya expuesto el cobre durante el envío. Si hay un defecto en el cable, no intente realizar la instalación.
- Page 15 Instalación Preparación para la instalación □ Desconecte la alimentación de la fuente antes de intentar instalar o reparar la tira de luces. □ Usarla solo con tomacorrientes de 120 V CA. □ Antes de conectar la tira de luces, inspeccione las bombillas y portalámparas.
- Page 16 Instalación (continuación) Para colgar la tira de luces NOTA: No se incluyen el cable de soporte ni el herraje (se venden por separado). □ La tira de luces debe estar bien fija a una estructura de soporte en cada extremo. La distancia máxima sin apoyo NOTA: Evite daños al aislamiento durante la instalación.
- Page 17 Funcionamiento USO DEL CONTROLADOR DE BOTÓN Apagar y Encender El controlador de la tira de luces cuenta con un botón multipropósito y una luz indicadora roja. Presione el botón para encender las luces. Mantenga presionado el botón por 2 segundos para apagar las luces.
- Page 18 Cuidado y limpieza □ No use limpiadores que contengan sustancias químicas, solventes o abrasivos agresivos. Use solo un paño seco y suave para limpiar con cuidado. □ Para limpiar la luminaria, desconecte la energía eléctrica ya sea apagando el disyuntor o retirando el fusible correspondiente en la caja de fusibles, y use un paño limpio y seco o apenas húmedo para limpiar la superficie exterior de la tira de luces.
- Page 19 Resolución de problemas (continuación) Problema Causa posible Solución □ Asegúrese de que el dispositivo esté conectado a la Se me extravió mi código QR. ¿Cómo agrego un dispositivo? alimentación. □ En la aplicación Hubspace, toque el botón +, y a continuación Add Device (Agregar dispositivo).
- Page 20 ¿Tiene preguntas o problemas, o le faltan piezas? Antes de devolver a la tienda, llame a Atención al Cliente de Hampton Bay Lunes a viernes de 8:00 a.m. a 7:00 p.m., EST, y los sábados de 9:00 a.m. a 6:00 p.m., EST 1-877-592-5233 HOMEDEPOT.COM/HUBSPACE...
Need help?
Do you have a question about the HB-17122-HS and is the answer not in the manual?
Questions and answers