Table of Contents
Advertisement
Quick Links
Advertisement
Table of Contents

Related Manuals for HEIDENHAIN LIP 6000 Dplus


Summary of Contents for HEIDENHAIN LIP 6000 Dplus
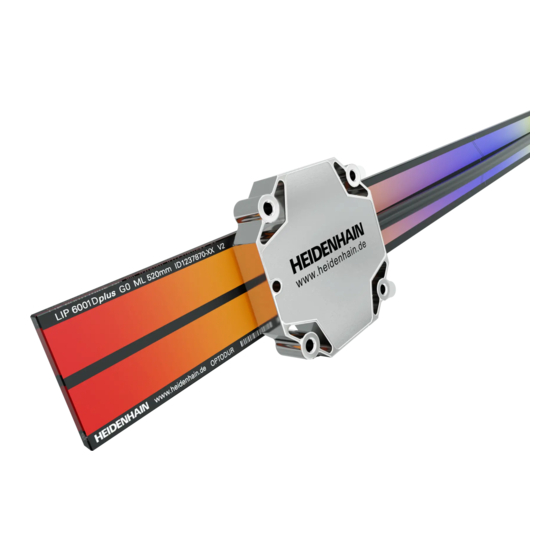
- Page 1 Mounting Instructions LIP 6000 Dplus a i n . d e n h . h e i d w w w x x x x x x x x- x x x x x ID x x x x D p lu...
-
Page 2: Table Of Contents
Contents Contents Basic information..........................5 Safety............................8 Items supplied and accessories....................9 Mounting.............................12 Adjustment and diagnosis......................19 Removal............................31 HEIDENHAIN | Mounting Instructions | LIP 6000 Dplus | 02/2022... - Page 3 4.2.3 Fastening the fixed-point element........................ 14 Mounting the scanning head......................16 4.3.1 Notes on mounting the scanning head....................... 16 4.3.2 Mounting the scanning head......................... 16 Final steps............................18 4.4.1 Resistance measurement..........................18 HEIDENHAIN | Mounting Instructions | LIP 6000 Dplus | 02/2022...
- Page 4 Starting the ATS software........................ 19 Adjusting the encoder........................22 Checking the mounting........................27 Activating/Deactivating the function display..................28 Exiting the ATS software........................29 Removal............................31 Safety precautions regarding removal....................31 Removal of the linear scale......................31 HEIDENHAIN | Mounting Instructions | LIP 6000 Dplus | 02/2022...
-
Page 5: Basic Information
This chapter contains information about the product and these Mounting Instructions. Validity of the documentation These Mounting Instructions apply to encoders of the LIP 6000 Dplus series . Prior to using the documentation, check whether the documentation and encoder model match The encoder designation is printed on the ID label. -
Page 6: Notes In This Documentation
Informational notes ensure reliable and efficient operation of the device. Informational notes are divided into the following groups: The information symbol indicates a tip. A tip provides additional or supplementary information. HEIDENHAIN | Mounting Instructions | LIP 6000 Dplus | 02/2022... -
Page 7: Units And Tolerances
Have you found any errors or would you like to suggest changes? We continuously strive to improve our documentation for you. Please help us by sending your suggestions to the following e-mail address: userdoc@heidenhain.de HEIDENHAIN | Mounting Instructions | LIP 6000 Dplus | 02/2022... -
Page 8: Safety
NOTICE Property damage due to electrical stress Do not engage or disengage any connecting elements while the product is under power Do not touch the contacts of the plug connections HEIDENHAIN | Mounting Instructions | LIP 6000 Dplus | 02/2022... -
Page 9: Items Supplied And Accessories
ID xxxxxxx-xx SN xxxxxxxx x 3.1.2 Items supplied with the scanning head Component Figure Scanning head a in .d e n h .h e id w w w Spacer shim HEIDENHAIN | Mounting Instructions | LIP 6000 Dplus | 02/2022... -
Page 10: Mounting Accessories
For more information on the listed products, please refer to the applicable Mounting Instructions and the Exposed Linear Encoders brochure. www.heidenhain.com/documentation Enter the document ID 208960 For mounting the linear scale Designation Figure Roller 276885-01 for mounting the linear scale HEIDENHAIN | Mounting Instructions | LIP 6000 Dplus | 02/2022... -
Page 11: Accessories For Fixed-Point Bond
Items supplied and accessories | Accessories for fixed-point bond Accessories for fixed-point bond Designation Figure Dispensing nozzles and mixing tubes 1176444-01 Adhesive 3M DP 460 EG 1180444-01 Double-cartridge gun 1180450-01 HEIDENHAIN | Mounting Instructions | LIP 6000 Dplus | 02/2022... -
Page 12: Mounting
4.2.1 Notes on mounting the linear scale Note that the mounting surface, as well as the surface of the scale unit must be clean and free of paint, dust or grease. > 1 HEIDENHAIN | Mounting Instructions | LIP 6000 Dplus | 02/2022... - Page 13 ML ≤ 2040. Use five stop pins for ML a measuring length of (ML+10) ML > 2040. 0.01 x (ML+10) 0.01 x (ML+10) 0.56 x (ML+10) HEIDENHAIN | Mounting Instructions | LIP 6000 Dplus | 02/2022...
-
Page 14: Gluing The Linear Scale
SN xx xxx xxx xx www.heidenhain.de OPTODUR [ ] [ ] [ ] [ ] [ ] [ ] [ ] [ ] [ ] [ ] [ ] (ML+10) / 2 HEIDENHAIN | Mounting Instructions | LIP 6000 Dplus | 02/2022... - Page 15 70 °C, we recommend high-temperature hardening at 80 °C over 3 hours. Apply a bead of adhesive with a double cartridge gun and a dispensing nozzle. HEIDENHAIN | Mounting Instructions | LIP 6000 Dplus | 02/2022...
-
Page 16: Mounting The Scanning Head
[ ] [ ] [ ] [ ] [ ] [ ] [ ] [ ] [ ] [ ] DU R OP TO in .d en ha he id ww w. Ø2m6 HEIDENHAIN | Mounting Instructions | LIP 6000 Dplus | 02/2022... - Page 17 [ ] [ ] [ ] [ ] [ ] [ ] [ ] [ ] [ ] [ ] DU R OP TO in .d en ha he id ww w. HEIDENHAIN | Mounting Instructions | LIP 6000 Dplus | 02/2022...
-
Page 18: Final Steps
[ ] [ ] [ ] [ ] [ ] [ ] [ ] [ ] O DU O PT n. de nh ai .h ei de w w w Resistance measurement HEIDENHAIN | Mounting Instructions | LIP 6000 Dplus | 02/2022... -
Page 19: Adjustment And Diagnosis
PWM 21 ATS software, version SV16, with integrated local encoder database for automatic encoder identification. The ATS software is available for download free of charge from the software download area on the HEIDENHAIN homepage. For more information, refer to the Exposed Linear Encoders brochure. - Page 20 Start page Enter the product ID If the product ID is not accepted, you can enter the variant 00 (e.g., 1340141-00). Click Connect The Position display tab opens Encoder selection HEIDENHAIN | Mounting Instructions | LIP 6000 Dplus | 02/2022...
- Page 21 Adjustment and diagnosis | Starting the ATS software Click the Wizards tab Position display tab The Wizards selection is displayed Wizards tab HEIDENHAIN | Mounting Instructions | LIP 6000 Dplus | 02/2022...
-
Page 22: Adjusting The Encoder
The message Step 1: Note is displayed Wizards selection Click Next > The message Step 2: Mounting the encoder is displayed Wizards tab with Step 1: Note message HEIDENHAIN | Mounting Instructions | LIP 6000 Dplus | 02/2022... - Page 23 Wizards tab with Step 2: Mounting the encoder message Click OK The encoder is reset to the factory default settings. Factory default settings message HEIDENHAIN | Mounting Instructions | LIP 6000 Dplus | 02/2022...
- Page 24 The blue dot must be within the green circles Click Next > Step 4: Adjusting is displayed Wizards tab with Step 3: Mounting the encoder (active measurement of scanning position 1) message HEIDENHAIN | Mounting Instructions | LIP 6000 Dplus | 02/2022...
- Page 25 2 have now been adjusted Step 5: Verify the adjustment is displayed Wizards tab with Step 4: Adjusting the incremental signals and the reference pulse (scanning position 2) message HEIDENHAIN | Mounting Instructions | LIP 6000 Dplus | 02/2022...
- Page 26 The signals of the selected scanning position are displayed Wizards tab with Step 5: Verify the adjustment message Click Exit The verification has been completed Wizards tab with Step 5: Verify the adjustment message HEIDENHAIN | Mounting Instructions | LIP 6000 Dplus | 02/2022...
-
Page 27: Checking The Mounting
Verifying the mounting using EnDat 3 is displayed Wizards tab Select the scanning position The values of the selected scanning position are displayed Checking the mounting Verifying the mounting using EnDat 3 HEIDENHAIN | Mounting Instructions | LIP 6000 Dplus | 02/2022... -
Page 28: Activating/Deactivating The Function Display
Activating/Deactivating the function display Click LIP mounting verification The Wizards tab with Function display appears Wizards tab Click Function display Note Mounting the encoder is displayed Wizards tab with Function display HEIDENHAIN | Mounting Instructions | LIP 6000 Dplus | 02/2022... -
Page 29: Exiting The Ats Software
The function display is inactive Repeat the process to activate the function display. Note Mounting the encoder Exiting the ATS software Click the Back arrow The start screen with Basic functions appears Wizards tab HEIDENHAIN | Mounting Instructions | LIP 6000 Dplus | 02/2022... - Page 30 Adjustment and diagnosis | Exiting the ATS software The ATS software has been exited Start screen with Basic functions HEIDENHAIN | Mounting Instructions | LIP 6000 Dplus | 02/2022...
-
Page 31: Removal
Risk of injury from splinters and sharp edges of the carrier material Wear protective gloves and safety goggles Removal of the linear scale Further information can be found in the "Disassembly Instructions." www.heidenhain.com/documentation Enter the document ID 1185755 HEIDENHAIN | Mounting Instructions | LIP 6000 Dplus | 02/2022... - Page 32 DR. JOHANNES HEIDENHAIN GmbH Dr.-Johannes-Heidenhain-Straße 5 83301 Traunreut, Germany +49 8669 31-0 +49 8669 32-5061 E-mail: info@heidenhain.de Technical support +49 8669 32-1000 Measuring systems +49 8669 31-3104 E-mail: service.ms-support@heidenhain.de NC support +49 8669 31-3101 E-mail: service.nc-support@heidenhain.de NC programming ...
Need help?
Do you have a question about the LIP 6000 Dplus and is the answer not in the manual?
Questions and answers