
Related Manuals for LG LTCS24223B/05


Summary of Contents for LG LTCS24223B/05
- Page 1 REFRIGERATOR SERVICE MANUAL CAUTION BEFORE SERVICING THE UNIT, READ THE SAFETY PRECAUTIONS IN THIS MANUAL. MODELS: LTCS24223B /05 LTCS24223S /05 LTCS24223W /05...
-
Page 2: Table Of Contents
CONTENTS WARNINGS AND SAFETY PRECAUTIONS ..................1. SPECIFICATIONS ......................... 2. PARTS IDENTIFICATION ......................3. DISASSEMBLY..........................4. TROUBLESHOOTING COMPRESSOR ..................4-1 Compressor activation defect ....................4-2 Service Diagnosis Chart........................... 5. COMPRESSOR ..........................6. CIRCUIT DIAGRAM ........................7. TROUBLESHOOTING ........................22 7-1 Compressor and Electric Components .................. -
Page 3: Specifications
1. SPECIFICATIONS LTCS20220W /00 LTCS20220B /00 LTCS20220S /00 LTCS24223W /00 LTCS24223B /00 LTCS24223S /00 SPECIFICATIONS Color Black Black White Stainless White Stainless Dimensions (W*D*H) (29 3/4 x 28 15/16 x 66 3/16)in (32 3/4 x 28 15/16 x 68 9/16)in Net Weight 97 Kg Capacity... -
Page 4: Parts Identification
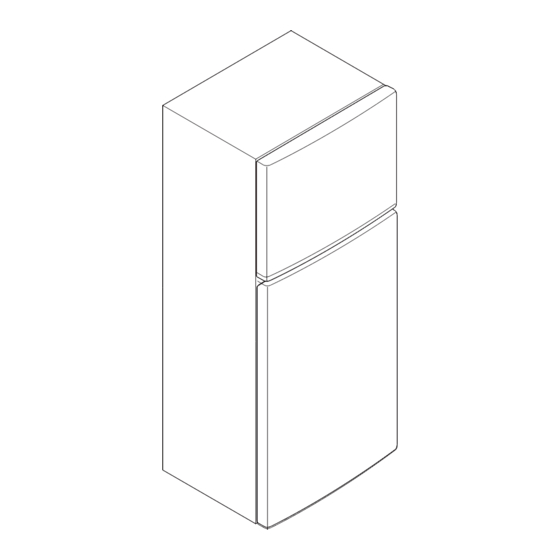
2. PARTS IDENTIFICATION Use this section to become more familiar with the parts and features. NOTE: This guide covers several diferent models. The refrigerator you have purchased may have some or all of the items listed below. The locations of the features shown below may not match your model. Custom Cube Icemaker * Pantry Drawer Ice Bin... -
Page 5: Disassembly
3. DISASSEMBLY WARNING WARNING Excessive Weight Hazard: Electrical Shock Hazard Use two or more people to remove and install the ‡ 'LVFRQQHFW WKH HOHFWULFDO VXSSO\ WR WKH UHIULJHUDWRU refrigerator doors. Failure to do so can result in back or before installing. Failure to do so could result in serious other injury. - Page 6 REPLACING THE REFRIGERATOR DOOR Carefully force-fit the top hinge cover back into place over the hinge. Lower the door onto the bottom hinge pin. Place the hinge pin of the middle hinge bracket inside of the hinge pin insert on top of the door. Hold the door in place and line the middle hinge bracket with the holes in the refrigerator housing.
- Page 7 Slightly lift up the refrigerator door and remove it. Pry off the cover on the top left side of the refrigerator to uncover the screw holes. Set the freezer door and top hinge parts to the side and remove the refrigerator door. Middle Hinge Bracket Cover (on top of...
- Page 8 Loosen and remove the two bolts and use the Phillips head Remove the Decorative Caps on the bottom of the refrigera- screwdriver to remove the Middle Hinge Bracket from the tor housing. You will need these holes for the Bottom Hinge. refrigerator housing.
- Page 9 REATTACHING THE DOORS With a flat-head screwdriver, carefully pry off and remove the cover over the screw holes on the left side of refrigera- Place the freezer door down over the Hinge Pin on the tor housing. Middle Hinge Pin Bracket. Fig.
- Page 10 After changing the doors, make sure that the corners of the Door Gaskets are not folded over. To ensure a good seal, apply a small amount of silicon grease on the corners of gaskets. Corners Fig. 37 Figure A DOOR ALIGNMENT If the space between your doors is uneven, follow the instructions below to align the doors.
-
Page 11: Troubleshooting Compressor
4. TROUBLESHOOTING COMPRESSOR 4-1 Compressor activation defect - Open PWB Cover Tes mode Button If COMP is normal it will not blink - Check the number of LED blinking (Refer to the next chapter for actions for each number of LED blinking) - Open back cover - Check disconnection in OLP and Comp... - Page 12 Compressor SVC Manual 1. Check LED Trip 1. Separate PCB COVER, and check number of LED blinking. 2. Verify the actions for each number of blinking Check when it is not RESET(Before turning off the power of the refrigerator). 3. Write the service information according to the number of LED blinking. 4.
- Page 13 Actions for each number of LED blinking 1. Check normal LED 1 time repeated operation after power reset AD-offset 2. If same error Error Blink Blink Blink Blink Blink Blink Blink Blink Repeated occurs after 1, replace PCB. 1. Check normal operation after LED 6 times repeated power reset...
- Page 14 Actions for each Trip and number of LED blinking 1. LED blinking 1 time (AD-offset Error) Blink OFF Blink OFF Cause : PCB Short, sensing part defect Objective: to detect Motor voltage or current sensing defect Actions: check CC310 voltage and if it is outside 2.2~2.8V, replace PCB Check LED blinking 1 time...
- Page 15 Actions for each number of TRIP and LED blinking 2. Current Trip and LED blinking 6 times (Current Trip) n i l Blink Blink Blink Blink Blink off/on within 3 min. 1. If it blinks 6 times, but there is no significant difference between the temperature inside the refrigerator and the set temperature, there is no problem in PCB, Compressor, or Cycle.
- Page 16 Actions for each TRIP and the number of LED blinking 3. LED blinking 7 times (IPM Fault) n i l Blink Blink Blink Blink Blink Blink Cause: IPM Short, defect(burned or damaged) Objective: Protection of the over-current caused by IPM short or defect. Actions: Visual verification of IPM burn when COMP is not in operation.
- Page 17 Check COMPRESSOR & HARNESS Measure COMP connector resistance (Power & Common) Check insulation destruction : measure the resistance between the COMP power connector and the grounding. Compressor terminal Multi Tester Compressor Motor resistance 7.96 ± 1 Ÿ BMA069LAMV There may be difference of several Ÿ in the resistance value according to the ambient temperature or operation condition.
-
Page 18: Service Diagnosis Chart
4-2 SERVICE DIAGNOSIS CHART Cooling is Is the power cord unplugged from the outlet? Plug to the outlet. Checked if the power S/W is set to OFF. Set the switch to ON. impossible. Check if the fuse of power S/W is shorted. Replace a regular fuse. -
Page 19: Compressor
5. COMPRESSOR 1.How to find out Inverter BLDC Compressor defect If Inverter BLDC Compressor defect occurs, you can check in the following order. 1-1. How to measure Compressor winding resistance Standard for judging normality When the resistance value of Harness(connected to Compressor) connecting Main PWB Connect201(CON201), if the resistance value shows the value of the level in the following figure, you can say that it is normal. - Page 20 General Control of Refrigerating Cycle ITEMS WELDING (1) H 30 Recommend H34 containing 34% Ag in the Chemical Ingredients Service Center. Ag : 30%, Cu : 27%, Zn : 23%, Cd : 20% Brazing Temperature : 710~840°C (2) Bcup-2 Chemical Ingredients Cu : About 93% P : 6.8~7.5% The rest : within 0.2%...
-
Page 21: Circuit Diagram
6. CIRCUIT DIAGRAM Models without Dispenser Lay Out of PCB - 21 -... -
Page 22: Troubleshooting
7. TROUBLESHOOTING 7-1. COMPRESSOR AND ELECTRIC COMPONENTS (Rated voltage Remove PTC-Starter Power Source. from compressor and measure voltage between T erminal C of compressor and terminal 5 or 6 of PTC. No voltage. Reconnect. Check connection condition. Replace OLP. Advise customer that Applied voltage isn't power supply needs to in acceptable range. -
Page 23: Ptc And Olp
7-2 PTC AND OLP Normal operation of Separate PTC-Starter Observation value is Compressor is from Compressor and 115V/60Hz : 6.8 ±20% at room temperature 25 c measure resistance impossible or poor. between No. 5 and 6 of PTC-Starter with a T ester. -
Page 24: Other Electric Components
7-3 OTHER ELECTRIC COMPONENTS ‡ Not cooling at all Check for open short or Compressor Cause incorrect resistance readings doesn't run. in the following components a. Starting devices Short, open, or broken. Poor contact b. OLP or shorted. Coil open or shorted. c. -
Page 25: Service Diagnosis Chart
7-4 SERVICE DIAGNOSIS CHART Electronic Display not 1. No Display at all 1. Supply voltage not within specifications 1. Check supply voltage to refrigerator operating correctly 2. Check wiring and connectors to PCB board 2. Open in wiring harness from PWB board 3. -
Page 26: Refrigerating Cycle
7-5 REFRIGERATING CYCLE ‡ Troubleshooting Chart TEMPERATURE STATE OF STATE OF THE CAUSE REMARKS OF THE THE UNIT EVAPORATOR COMPRESSOR PARTIAL Low flowing sound of A little higher ‡ Refrigerant level is low due Freezer LEAKAGE Refrigerant is heard and than ambient to a leak. -
Page 27: Ice Maker
8. ICE MAKER OPERATION PRINCIPLE AND REPAIR METHOD OF ICEMAKER 8-1 OPERATION PRINCIPLE 8-1-1 Operation Principle of Icemaker Power On Start Position ‡ Adjusts Ejector to Start Position whit power on. Icemaking ‡ Waits until water becomes cold after starting the Mode Icemaking operation. -
Page 28: Icemaker Functions
8-2 ICEMAKER FUNCTIONS 8-2-1 Start Position 1. After POWER OFF or Power Outage, check the EJECTOR's position with MICOM initialization to restart. 2. How to check if it is in place: - Check HIGH/LOW signals from HALL SENSOR in MICOM PIN. 3. - Page 29 8-2-4 Fill/Park Position 1. Once a normal harvest mode has been completed, the water solenoid will be activated. 2. The amount of water is adjusted by inserting a “pin” into small hole located at front of ice maker. These changes the time allowed for fill as illustrated in the table below.
-
Page 30: Defect Diagnosis Function
8-2-5 Function TEST o i t , t s i v r . , c Insert pin pressing internal button 2. The test works only in the Icemaking Mode. It cannot be entered from the Harvest or Fill mode. (If there is an ERROR, it can only be checked in the TEST mode.) 3. -
Page 31: Circuit Of Micom
9. CIRCUIT OF MICOM 9-1 FUNCTION 9-1-1 Function 1. When Appliance is plugged in for first time, is set “middle” for the refrigerator. You can adjust the refrigerator control temperature by pressing the Temperature Adjust button. 2. When the power is initially applied or restored a power failure, it is set at the last control temperature selected before the power initially applied or restored a power failure. - Page 32 9-1-4 CONTROL OF FAN IN THE FREEZER COMPARTMENT 1. When the freezer or refrigerator door is opened, the Freezer Fan ON, but if door not close within 1 min. then freezer fan turn off. 2.- Freezer fan is turn on when compressor is operating or TEST MODE 1 is activate. 3.- Freezer fan not working when defrosting is operating or TEST MODE 2 is activate.
- Page 33 9-1-9 ERROR DIAGNOSTIC MODE 1. The error diagnostic mode allows the SVC when a fault that may affect the performance of the product occurs while operating the product. 2. Even if the function control button is pushed when an error occurs, the function will not be performed. 3.
- Page 34 9-1-10 Lock Function 1. On initially operation the Lock Function is OFF. 2. If you wish lock the Water Dispenser, push on the WATER LOCK button, after this, the WATER LOCK LED on the Display will be turned ON.. 3. If you wish unlock the Water Dispenser, press the WATER LOCK button. Then the WATER LOCK LED on the Display will Be turned OFF.
- Page 35 9-1-12 TEST MODE 1. The test mode allows checking the PCB and the function of the product as well as finding out the defective part in case of an error. 2. The test button is on the main PCB of the refrigerator (Test S/W). The test mode will be cleared in 5 minutes on test mode 1 and in 2 hours on test mode 2 and then reset.
- Page 36 CONTENTS 1. PCB Picture 1) Main PCB 2) Display PCB 3) LED Lighting 2. Troubleshooting 1) RT Sensor Error 2) Refrigerator Sensor Error 3) Defrost Sensor Error 4) Defrost Error 5) Water Dispenser not working 6) Freezer Room LED Module doesn’t work 7) Refrigerator Room LED Module doesn’t work 8) Poor cooling in Refrigerator room 9) Over cooling in Refrigerator room...
- Page 37 1-1. MAIN PCB Part Name Picture P/N: EBR807574** CON202 CON8 110V CON11 CON6 CON201 CON5 CON1 CON2 MAIN PCB NOTES - CON 1 : Power Supply - CON 2 : AC Load - CON 5 : C-FAN,F-FAN, Hygiene(Optional), V-LED(Optional) - CON 6 : Tactile Display or Inner Display PCB - CON 8 : Sensors, LED Lightning and door switch.
- Page 38 1-1. MAIN PCB Part Name Picture PCB PJT P/N: EBR80757401 QT 24CU (100-127V) P/N: EAD61445253 Power Cord PJT Plug A2 (127V, 115V) - 38 -...
- Page 39 1-2. DISPLAY PCB & LED Lighting P/N: EBR59400502 Basic Models Tact and Inner Display P/N: EBR59400503 Dispenser Models Tact and Inner Display P/N: EAV48995122 F-Room LED Module P/N: EAV61573112 R-Room Right & Lefth LED Module - 39 -...
- Page 40 1) RT Sensor Error COLD COLDEST & Result SVC Action Firmly plugged Go to step 2 Check for loose connection in CON8. Plug firmly then check again. Problem persist? Loose YES: Go to step 2. NO: Explain to customer. 1.- Unplug connector from CON8. Result SVC Action 2.- Check resistance in wires Brown to...
- Page 41 2) Refrigerator Sensor Error COLD COLDEST & Result SVC Action Check for loose connection in CON8. Firmly plugged Go to step 2 Plug firmly, then check again. Problem persist? Loose YES: Go to step 2. NO: Explain to customer. 1.- Unplug connector from CON8. Result SVC Action 2.- Check resistance in wires White to...
- Page 42 3) Defrost Sensor Error COLD COLDEST & Check for loose connection in CON8. Result SVC Action Firmly plugged Go to step 2 Plug firmly, then check again. Problem persist? Loose YES: Go to step 2. NO: Explain to customer. 1.- Unplug connector from CON8. 2.- Check resistance in wires Orange to Result SVC Action...
- Page 43 4) Defrost Error COLD COLDEST & Part Result SVC Action Check the Door Gasket. Go to the 3 Fuse-M Change Fuse-M Check the Defrost control part. Fuse-M Def’ 34~42 Heater Go to the 3 52~58 44~50 Change Fuse-M Defrost Go to the 3 Def’...
- Page 44 5) Water Dispenser Not Working & Check the loose connection from CON2 Result SVC Action and CON11. Firmly plugged Go to step 2 Plug firmly, then check again. Problem persist? Loose YES: Go to step 2. NO: Explain to customer. Check Water Lever S/W signal in CON11, between sky blue wires.
- Page 45 5) Water Dispenser Not Working & Check the Blue to Red Lever s/w Result SVC Action (While pushing the lever S/W) 112 ~ 115 V Go to the 6 Pushing Other Change PCB 0 ~2 V Go to the 6 pushing Other Change PCB...
- Page 46 6) Freezer Room LED Module doesn’t work & Check the Freezer Door Switch If the wires of magnetic switch are loose, replace the switch. Open refrigerator door. Check visually the magnetic switch on the door. Magnetic If they’re not, go to step 2. switch wires are loose? If there is continuity between the terminals of Disconnect the magnetic switch and...
- Page 47 6) Freezer Room LED Module doesn’t work & 1.- Unplug connector from CON8. Status Result SVC Action 2.- Check resistance in wires Pink to Pink. Go to the 3 Normal Change door S/W Other Infinity Go to the 3 Push Other Change door S/W Plug in CON8, check voltage in wires...
- Page 48 7) Refrigerator Room LED Module doesn’t work & Check the Freezer Door Switch If the wires of magnetic switch are loose, replace the switch. Open refrigerator door. Check visually the magnetic switch on the door. Magnetic If they’re not, go to step 2. switch wires are loose? If there is continuity between the terminals of Disconnect the magnetic switch and...
- Page 49 7) Refrigerator Room LED Module doesn’t work & 1.- Unplug connector from CON8. Status Result SVC Action 2.- Check resistance in wires Gray to Gray. Go to the 3 Normal Change door S/W Other Go to the 3 Infinity Push Other Change door S/W Plug in CON8, check voltage in wires...
- Page 50 8) Poor cooling in Refrigerator room Checking flow Result & SVC Action 1.- Unplug connector from CON8. Temperature Result 2.- Check resistance in wires White to White. 23°F °C 32°F °C 41°F °C 50°F °C 19.5 59°F °C The sensor is determined by the temperature.
- Page 51 9) Over cooling in Refrigerator room Checking flow Result & SVC Action 1.- Unplug connector from CON8. 2.- Check resistance in wires White to Temperature Result White. 23°F °C 32°F °C 41°F °C 50°F °C 19.5 59°F °C The sensor is determined by the temperature.
- Page 52 10) Freezer BLDC FAN Motor Error COLD COLDEST Wiring diagram Main F-FAN CON5 Checking flow Result & SVC Action Push the TEST Mode Check the loose connection Input Test 1 Mode. (push the button 1 times) Open the freezer door and Check the Air flow.
- Page 53 11) Cooling BLDC FAN Motor Error COLD COLDEST Main C-FAN CON5 Result & SVC Action Checking flow Push the TEST Mode Check the loose connection Input Test 1 Mode. (push the button 1 times) Check the Fan motor rotate in machine Status SVC Action room.
- Page 54 3. Reference 1) Temperature compensation 1. How to make TEMP COMPENSATION If you want to raise or drop basic temperature, cut the jump wire on the Main PCB. Refrigerator Room CUT OPTION Temperature compensation JCR1 Over cooling compensation JCR2 JCR3 Poor cooling compensation JCR4...
- Page 55 2) TEST MODE and Removing TPA 1. How to make TEST MODE If you push the test button on the Main PCB, the refrigerator will be enter the TEST MODE * 1 time : Comp ON /F-fan ON / Defrost Heater OFF/ Display ALL ON All LED turn on * 2 times : Comp OFF/F-fan OFF/...
-
Page 56: Exploded View
#EV# 10. EXPLODED VIEW CASE PARTS CAUTION: Use the part number to order part, not the position number 103A 401A 301A 281A 281B 103A 501F 282E 406B 418A 311A 411A 404X 282B 501A 304A 406B 282H 120A 120A 158C 410A 120A 501B 120B... - Page 57 #EV# FREEZER PARTS CAUTION: Use the part number to order part, not the position number 405F 332A 330B 405C 319E 404A 110D 332B 329A 284A 404Z 149F...
- Page 58 #EV# REFRIGERATOR PARTS CAUTION: Use the part number to order part, not the position number 143A 143F 167F 155F 170A 167B 154A 151C 151D 155B 151A 151A...
- Page 59 #EV# DOOR PARTS CAUTION: Use the part number to order part, not the position number 200A 201A 203A 212G 205A 286A 205A 210B 210A 230A 241A 233A 231A 281E 241C 241C 286A 241D 210C...
- Page 60 #EV# ICE MAKER PARTS CAUTION: Use the part number to order part, not the position number 600C 602A 600A 619C 618A 623A 131A 627A...
- Page 61 P/No. MFL31442314 March, 2016...