Advertisement
Quick Links
Advertisement

Related Manuals for Omega ODW715X


Summary of Contents for Omega ODW715X
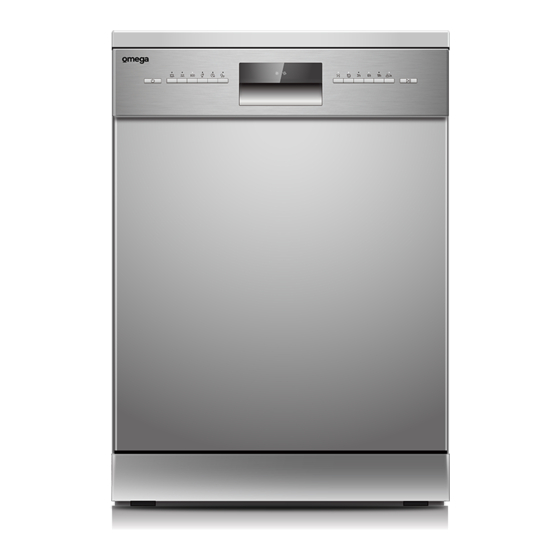
- Page 1 Instruction Manual Dishwasher ODW715X...
- Page 2 Thank you for purchasing an Omega appliance Tailored for the modern aesthetic and lifestyle of busy people, your new Omega Appliance will make a welcome addition to the family. Omega caters to style-savvy customers who look for balance between stunning form and clever function.
-
Page 3: Table Of Contents
The manufacturer will not be responsible for any damage to property or to persons caused by incorrect installation or improper use of the appliance. Due to continual product development, Omega reserves the right to alter specifications and appearances without notice. -
Page 4: Important Safety Warnings
Important Safety Warnings READ AND FOLLOW THIS SAFETY INFORMATION CAREFULLY Please carefully read this manual before using the dishwasher, it will help you to use and maintain the dishwasher properly. • This appliance must be grounded. In the event of a malfunction or breakdown, grounding will reduce the risk of an electric shock by providing a path of least resistance of electric current. -
Page 5: Product Details
Product Details Height: 845 mm Width: 598 mm Depth (D1): 600 mm (with the door closed) Depth (D2): 1175 mm (with door opened 90° Water pressure: 0.04-1.0MPa Power supply: see rating label Capacity: 15 place settings... -
Page 6: Installation Instructions
Installation Instructions Positioning the Appliance Position the appliance in the desired location. The back should rest against the wall behind it, and the sides, along the adjacent cabinets or walls. The dishwasher is equipped with water supply and drain hoses that can be positioned either to the right or the left sides to facilitate proper installation. - Page 7 Installation Instructions How to Connect the Safety Supply Hose (Aqua Stop) The appliance must be connected to the water mains using new hose-sets (aqua stop). The old hose-sets should not be reused. Water pressure must be between 0.04 MPa and 1 MPa. If the pressure is below the minimum consult our Service Department for advice.
- Page 8 Installation Instructions How to Drain Excess Water from Hoses If the sink is more than 1000mm higher than the floor, the excess water in hoses cannot be drained directly into the sink. It will be necessary to drain excess water from hoses into a bowl or suitable container that is held outside and lower than the sink.
- Page 9 Installation Instructions Step 2. Underneath existing work top (When fitting beneath a work top) In most modern fitted kitchens there is only one single work top under which cabinets and electrical appliances are fitted. In this case remove the work top of the dishwasher by unscrewing the screws under the rear edge of the top (a).
-
Page 10: Quick Operating Quide
Quick Operating Quide Please read the corresponding content on the instruction manual for detailed operating method. 1. Install the dishwasher 2. Remove larger residue from dishes. Avoid 3. Remove larger residue from dishes. Avoid pre-rinsing. pre-rinsing. 5. Select a suitable program and start the 4. -
Page 11: Operating Instructions
Operating Instructions Control Panel Operation (Button) Press this button to turn on your dishwasher, the screen lights up. 1 Power Select the appropriate washing program, the selected program indicator will be lit. Intensive Heavily soiled items include pots and pans. With dried on food. Heavy For heavily soiled loads, such as pots, plates, glasses and lightly soiled pans. - Page 12 Operating Instructions 90min For normally soiled loads that need quick wash. Program Rapid A shorter wash for lightly soiled loads that do not need drying. When you have about or less than half of full place settings dishware to wash, you can choose this function to save energy and water.
- Page 13 Operating Instructions USING YOUR DISHWASHER Before using your dishwasher : Inside Outside 1. Loading the basket 2. Fill the rinse aid dispenser (Please check the section 1 of PART Ⅱ: Special Version) 3. Fill in detergent (Please check the section 1 of PART Ⅱ: Special Version) Basket Used Tips Adjusting the upper basket Type 1:...
- Page 14 Operating Instructions Type 2: 1. To raise the upper basket, just lift the 2. To lower the upper basket, lift the upper basket at the center of each side adjust handles on each side to until the basket locks into place in the release the basket and lower it to upper position.
- Page 15 Operating Instructions Preparing And Loading Dishes Consider buying utensils which are identified as dishwasher-proof. For particular items, select a program with the lowest possible temperature. To prevent damage, do not take glass and cutlery out of the dishwasher immediately after the program has ended.
- Page 16 Operating Instructions Removing the dishes To prevent water dripping from the upper basket into the lower basket, we recommend that you empty the lower basket first, followed by the upper basket. WARNING Loading the upper basket The upper basket is designed to hold more delicate and lighter dishware such as glasses, coffee and tea cups and saucers, as well as plates, small bowls and shallow pans (as long as they are not too dirty).
- Page 17 Operating Instructions Function Of The Rinse Aid And Detergent The rinse aid is released during the final rinse to prevent water from forming droplets on your dishes, which can leave spots and streaks. It also improves drying by allowing water to roll off the dishes. Your dishwasher is designed to use liquid rinse aids.
- Page 18 Operating Instructions Adjusting the rinse aid reservoir To achieve a better drying performance with limited rinse aid, the dishwasher is designed to adjust the consumption by user. Follow the below steps. Close the door, switch on the appliance. Within 60 seconds after the appliance was switched on press the Rapid button for more than 5 seconds to enter the set model, the rinse aid indication blinks as 1Hz frequency.
- Page 19 Operating Instructions PROGRAMMING THE DISHWASHER Wash Cycle Table The table below shows which programs are best for the levels of food residue on them and how much detergent is needed. It also show various information about the programs. Consumption values and program duration are only indicative except for ECO program.
- Page 20 Operating Instructions Saving Energy Pre-rinsing of tableware items leads to increased water and energy consumption and is not recommended. Washing tableware in a household dishwasher usually consumes less energy and water in the use phase than hand dishwashing when the household dishwasher is used according to the instructions. Starting A program Draw out the lower and upper basket, load the dishes and push them back.
- Page 21 Operating Instructions Forget To Add A Dish? A forgotten dish can be added any time before the detergent dispenser opens. If this is the case, follow the instructions below: Press the Start/Pause button to pause the washing. After the spray arms stopped working, you can open the door completely. Add the forgotten dishes.
- Page 22 Operating Instructions...
- Page 23 Operating Instructions...
-
Page 24: Maintenance And Cleaning
Maintenance and Cleaning External Care The door and the door seal Clean the door seals regularly with a soft damp cloth to remove food deposits. When the dishwasher is being loaded, food and drink residues may drip onto the sides of the dishwasher door. - Page 25 Maintenance and Cleaning Hold the coarse filter and rotate it The fine filter can be pulled off the bottom anticlockwise to unlock the filter. Lift the of the filter assembly. The coarse filter can filter upwards and out of the dishwasher. be detached from the main filter by gently.
- Page 26 Maintenance and Cleaning Spray arms It is necessary to clean the spray arms regularly for hard water chemicals will clog the spray arm jets and bearings. To clean the spray arms, follow the instructions below: To To remove the lower spray arm, To remove the upper spray arm, hold pull out the spray arm upward.
- Page 27 Maintenance and Cleaning Caring For The Dishwasher Frost precaution Please take frost protection measures on the dishwasher in winter. Every time after washing cycles, please operate as follows: Cut off the electrical power to the dishwasher at the supply source. Turn off the water supply and disconnect the water inlet pipe from the water valve.
-
Page 28: Troubleshooting
Troubleshooting Error Codes When some malfunctions occur, the appliance will display error codes to warn you: Codes Meanings Possible Causes Faucet is not opened, or water intake is Longer inlet time. restricted, or water pressure is too low. Not reaching required temperature Malfunction of heating element. - Page 29 Troubleshooting Problem Possible Causes What to Do To clean the interior, use a damp sponge with White film on inside dishwasher detergent and wear rubber gloves. Hard water minerals surface Never use any other cleaner than dishwasher detergent for the risk of foaming or suds. There are rust The affected items are not The items should be corrosion resistant.
-
Page 30: New Zealand Product Warranty Statements Of Standard Warranty Conditions
WHAT IS COVERED: By Our Warranty During the warranty period, Omega or its authorised Service Centre will, at no extra charge, if your appliance is readily accessible without the need of special equipment and subject to the terms and conditions of this warranty, repair or replace any parts which it considers defective.
Need help?
Do you have a question about the ODW715X and is the answer not in the manual?
Questions and answers