Panasonic SC-PM700 Operating Instructions Manual
Cd stereo system
Hide thumbs
Also See for SC-PM700:
- Owner's manual (31 pages) ,
- Operating instructions manual (36 pages)

Related Manuals for Panasonic SC-PM700


Summary of Contents for Panasonic SC-PM700
- Page 1 Operating Instructions CD Stereo System SC-PM700 Model No. Thank you for purchasing this product. For optimum performance and safety, please read these instructions carefully. Please keep this manual for future reference. TQBM0895...
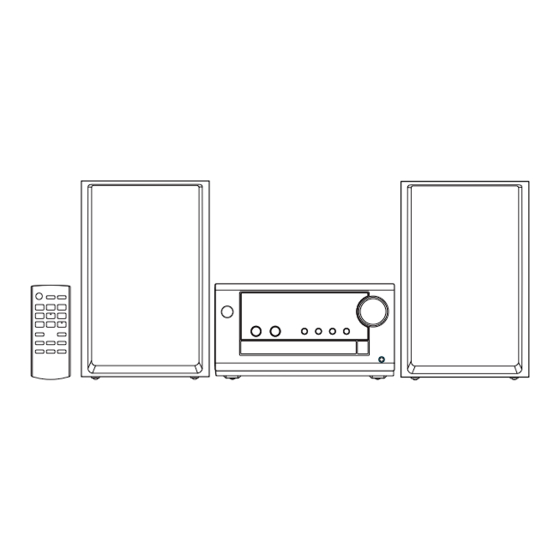
- Page 2 These operating instructions are applicable for to the following system. System SC-PM700 Main unit SA-PM700 Speakers SB-PM700 Your system and the illustrations can look differently. The symbols on this product (including the accessories) represent the following: Class II equipment (The construction of the product is double-insulated.)
-
Page 3: Safety Precautions
Safety precautions WARNING Unit • To reduce the risk of fire, electric shock or product damage, – Do not expose this unit to rain, moisture, dripping or splashing. – Do not place objects filled with liquids, such as vases, on this unit. –... -
Page 4: Table Of Contents
Table of contents Safety precautions ..............3 Supplied accessories . -
Page 5: Placement Of Speakers
Placement of speakers The left and right speakers are the same. Use only the supplied speakers. You can cause damage to the system and decrease the sound quality if you use other speakers. Note: • Keep your speakers more than 10 mm from the main unit for ventilation. •... -
Page 6: Making The Connections
Making the connections Connect the AC mains lead only after all the other connections have been made. Connect the AM loop antenna. Stand the antenna up on its base until it clicks. Connect the FM indoor antenna. Put the antenna where reception is best. Adhesive tape (not supplied) - Page 7 Connect the speakers. Connect the speaker cables to the corresponding terminals. Black Be careful not to cross (short-circuit) or reverse the polarity of the speaker wires as doing so may damage the speakers. Connect the AC mains lead. Do not use any other AC mains leads except the supplied one. To household mains socket Conserving power...
-
Page 8: Overview Of Controls
Overview of controls Do the procedures with the remote control. You can also use the buttons on the main unit if they are the same. Rear Standby/on switch [`], [1] Press to switch the unit from on to standby mode or vice versa. In standby mode, the unit is still consuming a small amount of power. - Page 9 Mute the sound To cancel, press the button again. “MUTE” is also cancelled when you adjust the volume or when you switch off the system. K View the play menu L Select the sound effects M Disc tray Remote control sensor Distance: Within approximately 7 m Angle: Approximately 10°...
-
Page 10: Preparing Media
® Press [ If “PAIRING” is shown, continue with step 3. Press [PLAY MENU] to select “PAIRING” and then press [OK]. Select “SC-PM700” from the Bluetooth menu of the device. ® If prompted for a passkey, input “0000”. The device connects with this system automatically after pairing is complete. - Page 11 ( 11). ® Press [ “BLUETOOTH READY” is shown. Select “SC-PM700” from the Bluetooth menu of the device. ® The name of the connected device is shown for a few seconds. Start playback on the device. Note: •...
-
Page 12: Media Playback
Media playback The following marks indicate the availability of the feature. CD-R/RW in CD-DA format or with MP3 files. USB device with MP3 files. Bluetooth device. ® BLUETOOTH Basic playback CD USB BLUETOOTH Play Press [4/9]. Stop Press [8]. The position is memorised. “RESUME”... - Page 13 Play menu CD USB Press [PLAY MENU] repeatedly to select “PLAYMODE” or “REPEAT”. Press [R, T] to select the setting and then press [OK]. PLAYMODE OFF PLAYMODE Cancel the setting. 1-TRACK Play one selected track. Press [2/3] or [5/6] to select the track. 1-ALBUM Play one selected MP3 album.
- Page 14 Input level BLUETOOTH You can change the input level setting if the sound input level of the Bluetooth transmission is too low. ® Press [PLAY MENU] repeatedly to select “INPUT LEVEL”. Press [R, T] to select the level and then press [OK]. (default) Note: Select “LEVEL 0”...
-
Page 15: Fm/Am Radio
FM/AM Radio Preparation Press [RADIO] (main unit: [SELECTOR]) repeatedly to select “FM” or “AM”. Manual tuning Press [PLAY MENU] repeatedly to select “TUNE MODE”. Press [R, T] to select “MANUAL” and then press [OK]. Press [2/3] or [5/6] to tune in to the station. To tune automatically, press and hold the button until the frequency starts changing quickly. - Page 16 Improving the sound quality When “FM” is selected Press [PLAY MENU] repeatedly to select “FM MODE”. Press [R, T] to select “MONO” and then press [OK]. To cancel, select “STEREO”. “MONO” is also cancelled when you change the frequency. To memorise the setting Continue with step 4 of “Manual presetting”...
-
Page 17: Sound Effects
Sound effects Press [SOUND] repeatedly to select the effect. Press [R, T] to select the setting and then press [OK]. MY SOUND “SOUND 1”, “SOUND 2” or “SOUND 3” ( PRESET EQ “HEAVY” (default), “SOFT”, “CLEAR”, “VOCAL” or “FLAT” BASS –4 to +4 (default: 0) Using the main unit Turn [BASS]. -
Page 18: Clock And Timers
Clock and timers Setting the clock This is a 24-hour clock. Press [SETUP] repeatedly to select “CLOCK”. Press [R, T] to set the time and then press [OK]. To check the time Press [SETUP] repeatedly to select “CLOCK” and then press [OK]. In standby mode, press [DISPLAY]. -
Page 19: Others
® Software updates Occasionally, Panasonic may release updated software for this system that may add or improve the way a feature operates. These updates are available free of charge. For more details, refer to the following website. https://panasonic.jp/support/global/cs/ (This site is in English only.) -
Page 20: Troubleshooting
Troubleshooting Before requesting service, make the following checks. If you are in doubt about some of the check points, or if the solutions indicated do not solve the problem, consult your dealer for instructions. When requesting service, make sure to send both the main unit and the remote control to the service centre. - Page 21 13). The device is connected but audio cannot be heard through the system. • For some built-in Bluetooth devices, you have to set the audio output to “SC-PM700” manually. Read the ® operating instructions of the device for details. Sound from the device is interrupted.
- Page 22 “VBR” • The system cannot show the remaining play time for variable bit rate (VBR) tracks. Remote control code When other Panasonic equipment responds to the remote control of this system, change the remote control code for this system. Preparation 1.
-
Page 23: Maintenance
System memory reset Reset the memory when the following situations occur: • There is no response when buttons are pressed. • You want to clear and reset the memory contents. Disconnect the AC mains lead. While you press and hold [1] on the main unit, connect the AC mains lead again. Continue to press and hold the button until “–... -
Page 24: Specifications
Specifications General █ Power supply AC 220 V to 240 V, 50 Hz Power consumption 27 W Power consumption in standby mode (approximate) With “BLUETOOTH STANDBY” set to “OFF” 0.3 W With “BLUETOOTH STANDBY” set to “ON” 0.4 W Dimensions (W x H x D) SA-PM700 210 mm ×... - Page 25 Speaker section █ Speaker unit(s) Woofer 10 cm cone type x 1 Tweeter 6 cm cone type x 1 Impedance 6 Ω Bluetooth section █ ® Bluetooth System Specification Bluetooth Ver. 4.2 ® ® Wireless Equipment Classification Class 2 (2.5 mW) Supported profiles A2DP, AVRCP Supported codec...
-
Page 26: References
Licenses The Bluetooth word mark and logos are registered trademarks owned by Bluetooth SIG, Inc. and any ® use of such marks by Panasonic Holdings Corporation is under license. Other trademarks and trade names are those of their respective owners. - Page 27 Panasonic Entertainment & Communication Co., Ltd. Web Site: https://www.panasonic.com TQBM0895 © Panasonic Entertainment & Communication Co., Ltd. 2023 L0323CH0...
Need help?
Do you have a question about the SC-PM700 and is the answer not in the manual?
Questions and answers
I press the power button and the unit turns on, I press the power button again and the unit shuts off... How do I get it to the standby mode???
To put the Panasonic SC-PM700 into standby mode, press the "[ ]" button on the main unit.
This answer is automatically generated