
Related Manuals for Panasonic CQ-C1505N


Summary of Contents for Panasonic CQ-C1505N
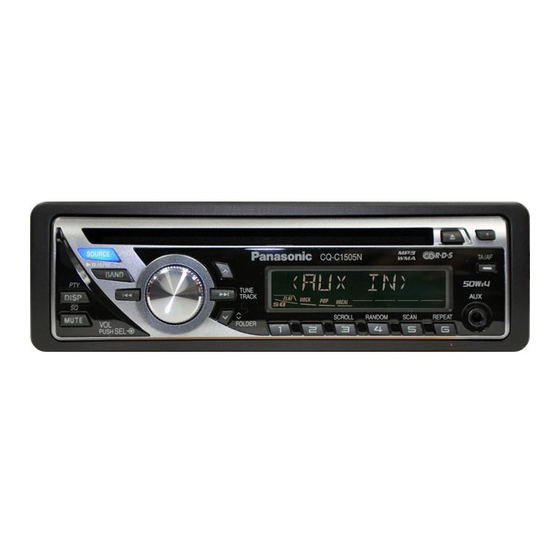
- Page 1 WMA MP3 CD Player/Receiver CQ-C1505N Model: Operating Instructions • Please read these instructions carefully before using this product and keep this manual for future reference.
-
Page 2: Safety Information
They contain instructions about how to use the system in connections and operations. The meanings of the pictographs a safe and effective manner. Panasonic assumes no responsibility are explained below. It is important that you fully understand the for any problems resulting from failure to observe the instructions meanings of the pictographs in order to use this manual and the given in this manual. - Page 3 (except for connecting to a tweeter) Installation of this unit requires special skills and experience. For maximum safety, have it installed by your dealer. Panasonic is not liable for any problems resulting from your own installation of the unit.
-
Page 4: Before Reading These Instructions
Before Reading These Instructions Panasonic welcomes you to our constantly growing family of electronic products owners. We endeavor to give you the advantages of precise electronic and mechanical engineering, manufactured with carefully selected components, and assembled by people who are proud of the reputation their work has built for our company. We know this product will bring you many hours of... - Page 5 Preparation Set your car’s ignition switch to the ACC or ON position. Press [SOURCE] (PWR: Power). The 24-hour system is used for the clock. Adjust the minute. Notes: • Adjust the clock when “NO CT” appears on the display. Minute entered •...
- Page 6 Tune Track selection Notes: Band Fast forward/fast reverse • Remote Control Unit for CQ-C1505N is option (CA-RC80N). Pause • The optional remote control is available from your local dealer. (CA-RC80N) Direct Sales at Panasonic UK • Order accessories and consumable items for your product Sales and Support Information with ease and confi...
-
Page 7: Notes On Discs
Notes on Discs If you use commercial CDs, they must have either of these labels shown at right. Some copy-protected music CDs are not playable. How to hold the disc Printed side • Do not touch the underside of the disc. •... -
Page 8: Notes On Mp3/Wma
Notes on MP3/WMA Note: MP3/WMA encoding and writing software is not supplied with this unit. Notes: Points to remember when making MP3/WMA fi les • With some software in which MP3/WMA format fi les have been Common encoded, the character information may not be displayed properly. •... -
Page 9: Anti-Theft System
Use fuses of the same specifi ed rating (15 A). Using substitutes or fuses with higher ratings, or connecting the unit directly without a fuse could cause fi re or damage to the unit. If the replaced fuse fails, contact your nearest authorized Panasonic Service Centre. -
Page 10: Specifications
Specifi cations Power supply DC 12 V (11 – 16 V), test voltage 14.4 V, negative ground Current consumption Less than 2.1 A (CD mode; 0.5 W 4 channels) Maximum power output 50 W x 4 (at 1 kHz), volume control maximum 22 W x 4 (DIN 45 324, at 4 ) Power output Bass: ±12 dB at 100 Hz, Treble: ±12 dB at 10 kHz... -
Page 11: Volume Adjustment
General [SOURCE] (Source) [VOL] (Volume) selects a source. (PWR) (Power) toggles power on/off. [TA/AF] ( “Radio Data System (RDS) in FM Broadcasting”) *[AUX] (AUX IN) (3.5 mm stereo) [MUTE] Remote Control Sensor Caution toggles mute on/off. From line output of external sound/audio •... -
Page 12: Frequency Adjustment
Radio (AM [LW/MW]/FM) [SOURCE] (Source) [BAND] selects a source. selects a band in the radio source. (APM) (Auto Preset Memory) executes APM in the radio source. (Hold it down for more than 2 seconds.) [TUNE ] [TUNE ] [DISP] (Display) [1] to [6] switches the information on the display. -
Page 13: Display Change
Band Frequency Preset Number Display change Press [DISP] to change the display. AM (LW/MW) mode: Band/frequency CT (Clock Time) lights while receiving an FM stereo signal. FM (not RDS) mode: Band/frequency RDS mode: PS (Programme Service name) Band/frequency Up to 6 stations can be preset in AM (LW/MW), FM1, FM2, and FM3 respectively. Preset stations can be simply called up by pressing one of the preset buttons from [1] to [6]. - Page 14 Player (Disc Player) Disc slot takes a disc in with the printed side facing Note: A disc which has both CD-DA data and MP3/WMA data on it may not be reproduced normally. [] (Eject) ejects the disc. [SOURCE] (Source) selects a source. () (Play/Pause) toggles pause/play in the player source.
-
Page 15: Repeat Play
CD-DA mode display Display change Track number Play time Press [DISP] to change the display. Disc Player (CD-DA disc): Disc Player (MP3/WMA disc): Normal Normal Disc title Play time Lights when the Play Mode Folder name/ disc is loaded. indicators Track title Album* MP3/WMA mode display... -
Page 16: Troubleshooting
Please refer the checking and the repair to professionals. • Never try to repair the unit by yourself because it is dangerous Panasonic shall not be liable for any accidents arising out of neglect to do so. of checking the unit or your own repair after your checking. -
Page 17: Radio Data System (Rds) In Fm Broadcasting
Radio Data System (RDS) in FM Broadcasting Useful functions such asAF, TA, PTY are available in the RDS (Radio Data System)-ready areas. Some FM stations are broadcasting added data compatible with RDS. This radio set offers convenient functions using such data. RDS service availability varies with areas. - Page 18 TA On/Off Traffi c Information Only (TA Mute) Pressing [TA] toggles TA on and off. For listening to only traffi c information, activate TA and set the volume to 0 in FM mode. Once traffi c information starts, the volume changes to the TA Notes: •...
-
Page 19: Audio Settings
Audio Settings [VOL] (Volume) selects a value in the audio menu. (PUSH SEL) (Push to select) selects items in the audio menu. [DISP] (Display) exits from the audio menu. Press [VOL] (PUSH SEL) to display the audio menu display. Note: If no operation takes place for more than 7 seconds in the audio menu (2 seconds in Main volume adjustment), the display returns to the regular mode. -
Page 20: Function Settings
Function Settings [VOL] selects a value in the function menu. (PUSH SEL) (Push to select) selects items in the function menu. [DISP] (Display) exits from the function menu. Hold down [VOL] (PUSH SEL) for more than 2 seconds to display the function menu display. Note: If no operation takes place for more than 7 seconds in the function menu, the display returns to the regular mode. - Page 21 Printed in China Afwerkingsrand Gedruckt in China YEFC051020 Web Site : http://panasonic.net Imprimé en Chine and consist of a set. (YEP0FZ5700) und bestehen als Satz. (YEP0FZ5700) Gedrukt in China et constituent un jeu. (YEP0FZ5700) en bestaan uit een set. (YEP0FZ5700)
- Page 22 Installation/Einbau/Montage/Installatie How to install the unit/Einbau des Gerätes/Mode de montage de l’appareil/Installeren van het toestel How to remove the unit/Ausbau des Gerätes/ Dépose de l’appareil/Verwijderen van het toestel Caution • Wear gloves for safety. Remove the cable from the battery negative terminal. •...
- Page 23 Motor Antenna Relay Control Lead To Motor Antenna. (Max. 100 mA) (This lead is not intended for use with a switch actuated power antenna) Amp·Relay Control Power Lead To Panasonic power amplifi er. (Max. 100 mA) (synchronized with the power on/off of amplifi er) Steuerkabel für Relais der motorbetriebenen Antenne.
- Page 24 B7 : B8 : ISO Connector Rear Left + (Green) Rear Left – (Green w/black stripe) ISO-Stecker Hinten Links + (Grün) Hinten Links – (Grün mit schwarzem Streifen) Connecteur ISO Arrière gauche + (Vert) Arrière gauche – (Vert à rayures noires) ISO aansluiting ...
Need help?
Do you have a question about the CQ-C1505N and is the answer not in the manual?
Questions and answers