Table of Contents
Advertisement
Available languages
Available languages
Quick Links
Advertisement
Table of Contents

Related Manuals for Kohler K-45209


Summary of Contents for Kohler K-45209
- Page 1 Installation Guide Shower Column M product numbers are for Mexico (i.e., K-12345M) Los números de productos seguidos de M corresponden a México (Ej. K-12345M) Français, page “Français-1” Español, página“ Español-1” 1381580-2-A...
-
Page 2: Tools And Materials
NOTE: The showerhead, hose, and handshower are purchased separately. Please read all instructions before you begin. Observe all local plumbing and building codes. Shut OFF the water supply. Inspect the existing supply piping and wall materials. Replace if necessary. 1381580-2-A Kohler Co. - Page 3 • The shower floor and the center of the existing shower arm at the finished wall surface. Verify sufficient clearance under the showerhead. • The center of the existing shower arm and the center of the mixing valve trim. Kohler Co. 1381580-2-A...
- Page 4 If the distance is between 2-7/8″ (73 mm) and 4″ (102 mm): Order the 1194630 Deep Roughing-in Kit. If the distance is less than 1-3/8″ (35 mm): Order the 1187917 Shallow Roughing-in Kit. 1381580-2-A Kohler Co.
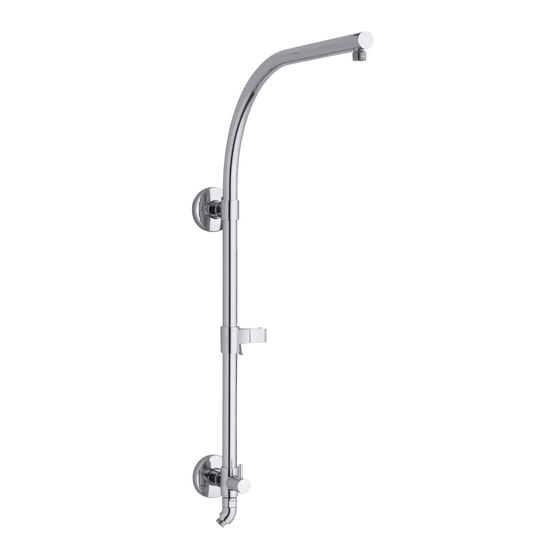
- Page 5 K-45209 (Less Showerhead, Handshower, and Hose) 18-5/8" (473 mm) 9-1/2" (241 mm) 27" (686 mm) 75" (1905 mm) Recommended 72" (1829 mm) 6" (152 mm) Backing Material K-45210 (Less Showerhead, Handshower, and Hose) 18-5/8" (473 mm) 3-3/4" (95 mm) 27"...
- Page 6 6" (152 mm) Recommended Backing 72" (1829 mm) Material K-45212 (Less Showerhead, Handshower, and Hose) 18-5/8" (473 mm) 3-3/4" (95 mm) 18" (457 mm) 78" (1681 mm) 6" (152 mm) Recommended Backing 75" (1905 mm) Material Roughing-In 1381580-2-A Kohler Co.
- Page 7 1″ (25 mm) minimum and 1-1/4″ (32 mm) maximum, and the hole is centered on the outlet of the 1/2″-14 NPT elbow fitting. Repair the wall surfaces if the existing shower arm hole is not centered or exceeds the recommended dimensions. Kohler Co. 1381580-2-A...
- Page 8 Refer to the ″Roughing-in″ section in this guide for proper location of the 1/2″-14 NPT elbow fitting inside the wall. Verify that the supply piping and 1/2″-14 NPT elbow fitting are securely fastened to the stud framing. 1381580-2-A Kohler Co.
- Page 9 For New Construction and Retrofit Installations Apply sealant tape to the supply adapter thread. The supply adapter has an internal 3/8″ hex socket. Thread the supply adapter into the 1/2″-14 NPT elbow using a 3/8″ hex wrench. Kohler Co. 1381580-2-A...
- Page 10 Center the mounting collar on the supply adapter. Mark the left and right mounting holes. For K-45209/K-45210 only: From the center of the supply adapter, measure down 27″ (686 mm) and mark the horizontal measurement with a pencil.
- Page 11 Repeat steps for the lower mounting collar and escutcheon. Carefully slide the shower column onto the supply adapter. Verify that the lower mounting collar is tight against the finished wall. Proceed to the ″Plumb the Shower Column″ section. Kohler Co. 1381580-2-A...
- Page 12 Turn the mounting collar until the shower column is plumb. Verify that the mounting collar slots align with the pencil marks on the finished wall. Make any adjustments as needed. Remove the shower column from the supply adapter. 1381580-2-A Kohler Co.
- Page 13 With one hand, pull the finger grips straight out (do not pull at an angle) so that the metal channel rests flush behind the wall. Slide the clip along the straps with your other hand until the flange of the clip is flush with the wall. Kohler Co. 1381580-2-A...
- Page 14 Place your thumb between the plastic straps. Wiggle the straps up and down until they snap off at the wall. Align the mounting collar with the anchor clips. Insert the bolt through the mounting collar and tighten until it is flush with the wall. 1381580-2-A Kohler Co.
- Page 15 Apply a bead of 100% silicone sealant to the back edge of each escutcheon. Slide the escutcheons over the mounting collars and press the escutcheons tight against the finished wall. Wipe away any excess sealant from the escutcheons and finished wall. Kohler Co. 1381580-2-A...
- Page 16 Do not apply excessive weight or force to the shower column overhang. Apply sealant tape to the shower column overhang outlet. Carefully thread the showerhead onto the shower column overhang outlet. 1381580-2-A Kohler Co.
- Page 17 With the screen washer installed, thread the hose to the handshower. Place the handshower into the holder. Turn on the water. NOTE: If water does not flow through the handshower or shower hose, the shower hose was incorrectly installed. To correct, reinstall Kohler Co. 1381580-2-A...
- Page 18 Install the Handshower (cont.) the shower hose ensuring the end of the hose containing the check valve is attached to the elbow or shower column. Check for leaks. 1381580-2-A Kohler Co.
-
Page 19: Care And Cleaning
Care and Cleaning For best results, keep the following in mind when caring for your KOHLER product: • Use a mild detergent such as liquid dishwashing soap and warm water for cleaning. Do not use abrasive cleaners that may scratch or dull the surface. - Page 20 • Use a soft, dampened sponge or cloth. Never use an abrasive material such as a brush or scouring pad to clean surfaces. For detailed cleaning information and products to consider, visit www.kohler.com/clean. To order Care & Cleaning information, call 1-800-456-4537. 1381580-2-A...
- Page 21 Guide d’installation Colonne de douche Kohler Co. Français-1 1381580-2-A...
-
Page 22: Outils Et Matériel
Lire toutes les instructions avant de commencer. Respecter tous les codes de plomberie et de bâtiment locaux. Fermer l’alimentation en eau. Inspecter la tuyauterie d’arrivée existante ainsi que les matériaux des murs. Remplacer si nécessaire. 1381580-2-A Français-2 Kohler Co. - Page 23 fini. Vérifier que le dégagement est suffisant sous la pomme de douche. • Le centre du bras de douche existant et le centre de la garniture du robinet mélangeur. Kohler Co. Français-3 1381580-2-A...
- Page 24 Si la distance est comprise entre 2-7/8 po (73 mm) et 4 po (102 mm) : Commander le kit de raccordement profond 1194630. Si la distance est inférieure à 1-3/8 po (35 mm) : Commander le kit de raccordement de faible profondeur 1187917. 1381580-2-A Français-4 Kohler Co.
- Page 25 K-45209 (Sans pomme de douche, sans douchette et sans tuyau) 18-5/8 po (473 mm) 9-1/2 po (241 mm) 27 po (686 mm) 75 po (1905 mm) recommandé 6 po 72 po (1829 mm) Matériau (152 mm) de renfort K-45210 (Sans pomme de douche, sans douchette et sans tuyau)
- Page 26 K-45212 (Sans pomme de douche, sans douchette et sans tuyau) 18-5/8 po (473 mm) 3-3/4 po (95 mm) 18 po (457 mm) 6 po 78 po (1681 mm) (152 mm) Recommended Matériau 75 po (1905 mm) de renfort Raccordement 1381580-2-A Français-6 Kohler Co.
- Page 27 Essayer de détecter un mouvement du tuyau d’arrivée vers l’intérieur. Si le mouvement vers l’intérieur est possible, sécuriser le tuyau d’arrivée sur les renforts dans l’ossature avant de commencer l’installation de la colonne de douche. Retirer le bras de douche existant. Kohler Co. Français-7 1381580-2-A...
- Page 28 1-1/4 po (32 mm) maximum et que le trou est centré sur la sortie du raccord coudé NPT 1/2 po-14. Réparer les surfaces de mur si le trou du bras de douche existant n’est pas centré ou s’il dépasse les dimensions recommandées. 1381580-2-A Français-8 Kohler Co.
- Page 29 Se reporter à la section « Plan de raccordement » dans ce guide pour trouver l’emplacement approprié du raccord coudé NPT 1/2 po-14 à l’intérieur du mur. Vérifier que la tuyauterie d’arrivée et le raccord coudé NPT 1/2 po-14 sont solidement fixés à l’ossature. Kohler Co. Français-9 1381580-2-A...
- Page 30 Appliquer un ruban d’étanchéité sur le filet de l’adaptateur d’arrivée. L’adaptateur d’arrivée comporte une douille à six pans creux interne de 3/8 po. Enfiler l’adaptateur d’arrivée dans le coude NPT 1/2 po-14 en utilisant une clé hexagonale de 3/8 po. 1381580-2-A Français-10 Kohler Co.
- Page 31 Centrer le collier de fixation sur l’adaptateur d’arrivée. Marquer les trous de fixation de gauche et de droite. Pour les K-45209/K-45210 seulement : Depuis le centre de l’adaptateur d’arrivée, mesurer 27 po (686 mm) vers le bas et marquer la mesure horizontale avec un crayon.
- Page 32 Enfiler la colonne de douche avec précaution sur l’adaptateur d’arrivée. Vérifier que le collier de fixation inférieur est bien ajusté contre le mur fini. Passer à la section « Mettre la colonne de douche d’aplomb ». 1381580-2-A Français-12 Kohler Co.
- Page 33 fixation jusqu’à ce que la colonne de la douche soit d’aplomb. Vérifier que les fentes du collier de fixation sont alignées avec les marques du crayon sur le mur fini. Effectuer les réglages nécessaires. Retirer la colonne de la douche de l’adaptateur d’arrivée. Kohler Co. Français-13 1381580-2-A...
- Page 34 Tenir le canal en métal du dispositif d’ancrage à plat le long des sangles en plastique et faire glisser le canal à travers les trous percés. Réaligner les poignées des sangles pour redresser le canal à l’arrière du mur. 1381580-2-A Français-14 Kohler Co.
- Page 35 Aligner le collier de fixation avec les clips des dispositifs d’ancrage. Insérer le boulon à travers le collier de fixation et serrer jusqu’à ce qu’il soit à ras du mur. Kohler Co. Français-15 1381580-2-A...
- Page 36 Appliquer un boudin de mastic à la silicone à 100% sur le bord arrière de chaque applique. Enfiler glisser les appliques sur les colliers de fixation et bien appuyer les appliques contre le mur fini. Essuyer tout excès de mastic des appliques et du mur fini. 1381580-2-A Français-16 Kohler Co.
- Page 37 Appliquer du ruban d’étanchéité sur la sortie coudée de la colonne de douche. Enfiler avec soin la pomme de douche sur la sortie du surplomb de la colonne de la douche. Kohler Co. Français-17 1381580-2-A...
- Page 38 Ceci permet de draper le tuyau autour de la garniture du robinet mélangeur. Enfiler le tuyau à travers le support. La rondelle à grille étant en place, visser le tuyau sur la douchette. Placer la douchette dans le support. Ouvrir l’arrivée d’eau. 1381580-2-A Français-18 Kohler Co.
- Page 39 été installé correctement. Pour rectifier, réinstaller le tuyau de la douche en s’assurant que l’extrémité du tuyau qui comprend le clapet de non retour est attachée sur le coude ou la colonne de la douche. Rechercher des fuites éventuelles. Kohler Co. Français-19 1381580-2-A...
-
Page 40: Entretien Et Nettoyage
Entretien et nettoyage Pour obtenir les meilleurs résultats possibles, prendre ce qui suit en considération lors de l’entretien de votre produit KOHLER : • Utiliser un détergent doux comme du liquide pour vaisselle et de l’eau chaude pour nettoyer. Ne pas utiliser de nettoyants abrasifs qui pourraient rayer ou ternir la surface. - Page 41 Guía de instalación Columna de ducha Kohler Co. Español-1 1381580-2-A...
-
Page 42: Herramientas Y Materiales
Lea todas las instrucciones antes de comenzar. Cumpla todos los códigos locales de plomería y de construcción. Cierre el suministro de agua. Revise las tuberías de suministro y los materiales de pared actuales. Haga los reemplazos necesarios. 1381580-2-A Español-2 Kohler Co. - Page 43 • El piso de la ducha y el centro del brazo de ducha actual en la superficie de la pared acabada. Verifique que haya suficiente espacio libre bajo la cabeza de ducha. • El centro del brazo de ducha actual y el centro de la guarnición de la válvula mezcladora. Kohler Co. Español-3 1381580-2-A...
- Page 44 Si la distancia está entre 2-7/8″ (73 mm) y 4″ (102 mm): Pida el kit de instalación profunda 1194630. Si la distancia es menos de 1-3/8″ (35 mm): Pida el kit de instalación poco profunda 1187917. 1381580-2-A Español-4 Kohler Co.
-
Page 45: Diagrama De Instalación
K-45209 (Sin cabeza de ducha, ducha de mano ni manguera) 18-5/8" (473 mm) 9-1/2" (241 mm) 27" (686 mm) 75" (1905 mm) se recomienda 72" (1829 mm) 6" (152 mm) Material Mín Mín de refuerzo K-45210 (Sin cabeza de ducha, ducha de mano ni manguera) 18-5/8"... - Page 46 K-45212 (Sin cabeza de ducha, ducha de mano ni manguera) 18-5/8" (473 mm) 3-3/4" (95 mm) 18" (457 mm) 78" (1681 mm) 6" (152 mm) se recomienda Material Mín 75" (1905 mm) de refuerzo Mín Diagrama de instalación 1381580-2-A Español-6 Kohler Co.
- Page 47 Si hay movimiento hacia dentro, antes de comenzar la instalación de la columna de ducha fije con seguridad la tubería de suministro a los refuerzos en los postes de madera. Retire el brazo de ducha actual. Kohler Co. Español-7 1381580-2-A...
- Page 48 1/2″-14 NPT. Repare las superficies de la pared si el orificio actual para el brazo de ducha no está centrado o si excede las dimensiones recomendadas. 1381580-2-A Español-8 Kohler Co.
- Page 49 Consulte la sección ″Diagrama de instalación″ de esta guía para la ubicación correcta de la conexión del codo de 1/2″-14 NPT dentro de la pared. Kohler Co. Español-9 1381580-2-A...
- Page 50 Aplique cinta selladora de roscas a las roscas del adaptador de suministro. El adaptador de suministro tiene un dado hexagonal interno de 3/8″. Enrosque el adaptador de suministro en el codo de 1/2″-14 NPT con una llave hexagonal de 3/8″. 1381580-2-A Español-10 Kohler Co.
- Page 51 Centre el collarín de montaje en el adaptador de suministro. Marque los orificios de montaje izquierdo y derecho. Solo en K-45209 y K-45210: A partir del centro del adaptador de suministro, mida hacia abajo 27″ (686 mm) y marque la medida horizontal con un lápiz.
- Page 52 Deslice con cuidado la columna de ducha en el adaptador de suministro. Verifique que el collarín de montaje inferior quede apretado contra la pared acabada. Continúe en la sección ″Coloque a plomo la columna de ducha″. 1381580-2-A Español-12 Kohler Co.
- Page 53 Verifique que la ranuras del collarín de montaje queden alineadas con las marcas de lápiz en la pared acabada. Haga los ajustes necesarios. Retire la columna de ducha del adaptador de suministro. Kohler Co. Español-13 1381580-2-A...
- Page 54 Vuelva a alinear las manijas de las tiras para enderezar el canal detrás de la pared. Con una mano, tire de las asas hacia fuera de manera recta (no en ángulo) para que el canal de metal descanse al ras detrás de la pared. 1381580-2-A Español-14 Kohler Co.
- Page 55 Alinee el collarín de montaje con los clips de anclaje. Inserte el perno a través del collarín de montaje, y apriete hasta que quede al ras con la pared. Kohler Co. Español-15 1381580-2-A...
- Page 56 Aplique un hilo continuo de sellador 100 % de silicona al borde posterior de cada chapetón. Deslice los chapetones sobre los collarines de montaje y presione los chapetones contra la pared acabada. Limpie el exceso de sellador de los chapetones y de la pared acabada. 1381580-2-A Español-16 Kohler Co.
- Page 57 Aplique cinta selladora a la salida del voladizo de la columna de ducha. Con cuidado enrosque la cabeza de ducha a la salida del voladizo de la columna de ducha. Kohler Co. Español-17 1381580-2-A...
- Page 58 Enrosque la manguera a través del soporte portador. Con la arandela de rejilla instalada, enrosque la manguera a la ducha de mano. Coloque la ducha de mano en el soporte portador. Abra el agua. 1381580-2-A Español-18 Kohler Co.
- Page 59 Para corregir, vuelva a instalar la manguera de ducha asegurándose de que el extremo de manguera que tiene la válvula de retención quede conectada al codo o a la columna de ducha. Verifique que no haya fugas. Kohler Co. Español-19 1381580-2-A...
-
Page 60: Cuidado Y Limpieza
• Utilice una esponja humedecida, o un paño suave y húmedo. Para limpiar las superficies nunca utilice materiales abrasivos, como cepillos o estropajos. Para obtener información detallada de limpieza y de productos a considerar, visite www.kohler.com/clean. Para solicitar información sobre cuidado y limpieza, llame al 1-800-456-4537. 1381580-2-A Español-20... - Page 61 1381580-2-...
- Page 62 1381580-2-...
- Page 63 1381580-2-...
- Page 64 USA/Canada: 1-800-4KOHLER México: 001-800-456-4537 kohler.com ©2018 Kohler Co. 1381580-2-A...
Need help?
Do you have a question about the K-45209 and is the answer not in the manual?
Questions and answers