Table of Contents
Advertisement
Quick Links
Advertisement
Table of Contents

Related Manuals for IMS ROBOTICS MICRO light plus


Summary of Contents for IMS ROBOTICS MICRO light plus
- Page 3 Information of the device Designation: MICROlight plus Manufacturer: IMS Robotics GmbH Am Bauhof 6 01458 Ottendorf-Okrilla Tel.: +49 (0)35205-75550 Fax: +49 (0)35205-53749 E-Mail: info@ims-robotics.de Website: www.ims-robotics.de User information: State 31.03.2022 Translation of the original instruction Article number: 031 10 000...
-
Page 4: Table Of Contents
Table of contents Intended use ........................ 6 Operation ........................7 General ........................7 Start-up ........................9 2.2.1 Fasten the fiberglass push rod ................12 2.2.2 Assembly and nominal width-depended setup of extension ring ......14 2.2.3 Control unit MICROlight plus ................16 Operation during work ....................17 2.3.1 Operation IMS Cutter MICROlight plus ............17 2.3.2... - Page 5 5.3.2.1 Replace pressure reducer DM 1 (stroke drive) .........38 5.3.2.2 Replacing the pressure reducer DM2 (bracing bubble) and DM3 (axial feed) Way-valves ......................40 5.4.1 Overview of way-valve spare parts ..............40 5.4.2 Replacing way-valves ..................40 5.4.2.1 Replacing way-valve WV 1 - 3 (stroke, bracing bubble, axial feed)...40 5.4.2.2 Replacing the way-valve 3 (cutter air) ............41 Replacing the camera ....................42...
-
Page 6: Intended Use
1 Intended use Operational safety of the equipment supplied is ensured only when used as intended. The intended use includes following the regulations contained in these operating instructions as well as compliance with all maintenance and service tasks. The IMS cutter MICROlight plus must only be used for cutting work for the restoration of pressureless pipes or lines. -
Page 7: Operation
2 Operation 2.1 General The IMS Cutter MICROlight plus is a device for performing cutting work for the purpose of pressureless pipe or line renovation. The device can be used to open inliners after renovation and remove obstacles (roots, protruding seals, offsets, deposits or the like). Commissioning of the IMS Cutter MICROlight plus requires provision of the cutter, itself, possibly a push rod, as well as nitrogen charging equipment and the required media. - Page 8 The cutter serial number is located on the rack. Serial number All assemblies have a minimum protection class of IP54. This means that the assemblies are protected against: access by small tools / wires; dust; and surrounding splash water The push rod must have an M12 external thread on the coupling. The media must have the following properties: Power supply: 100 –...
-
Page 9: Start-Up
2.2 Start-up Attentively read these operating instructions Check the assemblies and accessories for completeness, and the media for the required qualities Transport cutter, rack and possibly push rod to the desired place of work (manhole, inspection opening or similar). Place the rack in horizontal position. This is also the required working position for the rack, since the water separator will otherwise not work correctly. - Page 10 If necessary assemble the extension ring and set up to the corresponding nominal width (see 0 ) Plug and screw cutter drive and supply hose together using 3 screws M5x45, which are used to fasten the cover plate to the supply hose. Check the required cutting tool for imbalance (e.g.
- Page 11 Connecting the power supply unit starts pressure monitoring of the cutter drive. After approx. 10 seconds the LED-ring directly on the camera must flash 2 times. If the LEDs flash more often and the flashing repeats every 30 seconds, the nitrogen pressure is too high or too low.
-
Page 12: Fasten The Fiberglass Push Rod
2.2.1 Fasten the fiberglass push rod When using the fiberglass push rod, make sure that it is properly attached to the hose assembly. The fiberglass push rod pushes the milling drive better in the pipeline and stabilises it when pushing it in at branches and joints. NOTICE No work may be carried out without the fiberglass push rod! The mounting plate can get jammed in the pipeline (e.g. - Page 13 Symbols attached to the drum: These symbols on the frame of the drum are warnings and must always be observed during use! No work may be carried out without the fiberglass push rod! Always use the fiberglass push rod. It must be ensured that a manhole deflection pulley is always used in shafts or inaccessible, angled areas! NOTICE When milling in pipes with a closed end, compressed air must be able to escape.
-
Page 14: Assembly And Nominal Width-Depended Setup Of Extension Ring
2.2.2 Assembly and nominal width-depended setup of extension ring In the nominal diameter range DN 150 – 250, the IMS cutter MICROlight plus can be equipped with an extension ring. The extension ring consists of 2 half-shells, which are screwed to the crimp sleeve behind the turning gear. Fastening screws In larger nominal diameter from DN 150, wheels can be mounted to the extension ring. - Page 15 Threaded holes for whee assembly Extension plate for DN 250 The setup variations in the following table are to be understood as a recommendation. The actual setup has to be adapted to the respective pipe situation. Pipe Extension Small Large Extension Extension Extension...
-
Page 16: Control Unit Microlight Plus
2.2.3 Control unit MICROlight plus Bedienteil MICRO light plus: Light control Air motor Potentiometer for turning speed Joystick for turning/swivelling Switch axial bladder (Forward/Stop/Backward) Bracing bladder (Bracing/Stop/Deflation) Switch for deflation of axial bladder/Stop/Activation of switch for axial bladder... -
Page 17: Operation During Work
2.3 Operation during work 2.3.1 Operation IMS Cutter MICROlight plus Carefully insert the cutter drive into the pipe. Slide the cutter drive along with the hose and push rod, if available, to the work location; when sliding through bends, turn the cutter head in the direction of curvature using the joystick and then deflect its stroke so that the bend can be driven through without using force;... -
Page 18: Recovering The Cutter In Case Of Malfunction
2.3.2 Recovering the cutter in case of malfunction Under certain conditions it may no longer be possible to pull the cutter out of the pipe or to empty the stroke when the bracing bubble is inflated. Such malfunctions occur in case of: a defective control a defect in the electric system of the cutter defective way valve/s in the cable reel... -
Page 19: Finishing Work
2.4 Finishing work Straighten the stroke drive. Deflate the axial feed Once the bracing bubble is relieved, remove the cutter drive with hose and push rod from the pipe Check pressure monitoring (the light must not flash for approx. 40 seconds) Insert the cutter drive into the auxiliary tube Allow the air motor with the cutter tool to run for another approx. -
Page 20: Cutting Tools
2.5 Cutting tools We recommend using only original IMS cutting tools when working with the cutter. These tools have been designed and developed with the device itself, so as to ensure long product lifetime and reliability. Original IMS cutter tools meet the requirements in terms of quality, stability and true running, and especially in terms of design-engineered properties. -
Page 21: Overview Of Cutting Tools
2.5.1 Overview of cutting tools Original IMS-cutting tools for the cutter MICROlight plus are: Picture Order-No. Designation Use for 015 01 134 PC diamond globe Plastics (PVC, GRP, cutting tool D40 – 4 felt liners, etc.), roots winged – transparent 015 01 126 diamond half... -
Page 22: Changing The Cutting Tool
2.5.2 Changing the cutting tool The pins (5 mm diameter) as supplied are used to remove the cutting tool. The rotor is fixed by setting one pin into the prescribed bore hole on the housing. Bore hole The cutting tool is loosened by turning the second pin (corresponding to arrow direction). The tool is reassembled in reverse order. -
Page 23: Safety Regulations
3 Safety regulations 3.1 General regulations The accident prevention instructions (German UVV / BGV A-D) must be complied with when operating the device. This unit must be operated only by persons who have been trained in its usage and who have thoroughly studied this Operating Manual. Inadequate knowledge can cause damage to the unit or put the operator at risk. -
Page 24: Maintenance And Repair
4 Maintenance and repair 4.1 Cleaning and transportation After each use, clean the outside of the IMS MICROlight plus. Do not use high-pressure cleaning equipment. The IMS cutter MICROlight plus must be transported in the associated rack. The air motor must be dismantled, cleaned (without oil or grease, only with Ballistol) at regular intervals (recommendation: weekly) and stored in a dry location. -
Page 25: Cleaning The Camera Cleaning Ring
4.2.1 Cleaning the camera cleaning ring In order to prevent unnecessary soiling of the camera during work, it is advisable to dismantle and clean the camera cleaning ring every week. To do this, proceed as follows: First remove the two Allen screws M4 x 6. Then push the cleaning ring forwards in the direction of the arrow and remove it. -
Page 26: Pressure Monitoring
4.3 Pressure monitoring 4.3.1 Function check Check the pressure monitoring system before each use! Procedure: If necessary connect the cutter drive to the hose package Connect the control unit Connect the power supply unit to the cutter and the electric supply (both LED's on the power supply unit must light up;... -
Page 27: Nitrogen Refilling
In all cases of leakage, contact the service workshop! Continuing with your work may severely damage the device! If the device is leak tight, refill the cutter with nitrogen (4.3.4 Nitrogen refilling)! 4.3.4 Nitrogen refilling As a rule: Use dry nitrogen only! Never replenish nitrogen if the valve is wet (water enters into the cutter)! Always screw on the valve cap after filling. - Page 28 Charging with the optionally available IMS charger: First, set the correct pressure at the pressure reducer (0.8 bar). by briefly depressing the plunger on the charging device. The pressure dips briefly. The pressure must then readjust itself to 0.8 bar. After this, unscrew the valve cap and place the charging apparatus onto the valve.
-
Page 29: Checking The Pressure Reducer
4.4 Checking the pressure reducer Pressure reducer Pressure reducer 2 (DM2) bracing 1 (DM1) stroke bubble bubble Pressure gauge 4.4.1 Checking the pressure reducer for the stroke drive The stroke pressure is indicated by a pressure gauge. Actuate to full stroke and read the pressure in the pressure gauge. -
Page 30: Checking The Pressure Reducer For The Bracing Bubble
4.4.2 Checking the pressure reducer for the bracing bubble First disconnect the blue 6 mm hose (coming from the hose package) from the pressure reducer 2 (DM2). Press the black circlip towards the screw fitting and pull on the hose at the same time. -
Page 31: Check The Pressure Reducer For Axial Bladder
After this one can switch on the switch for the bracing bubble and read the pressure in the pressure gauge. The pressure must be approx. 2 bar, otherwise adjust the pressure accordingly. For this purpose pry the cap off the pressure reducer 2 with a screwdriver and keep turning the nut on the pressure reducer with an NW 6 open end spanner, until the pressure gauge indicates a pressure of 2 bar. -
Page 32: Repairs
5 Repairs 5.1 Repair, replacement or spare part? The IMS Cutter light plus consists of several replacement groups. In case of defects, these can be repaired in the service workshop or replaced as complete units, as desired. In addition, spare parts can be ordered from these assemblies. Repair The defective assembly is sent to IMS with a repair order. -
Page 33: Air Motor Repair
5.2 Air motor repair 5.2.1 Overview of air motor spare parts 006 30 001 Ball bearing with shim and circlip 021 01 027 Cylinder 006 30 002 Rotor with air motor ring 021 01 053 Set of fins 030 01 070 Ball bearings 030 01 032 Ventilation ring... -
Page 34: Disassemble And Reassemble Air Motor
5.2.2 Disassemble and reassemble air motor Removing the cutting tool, see 2.5.2 Changing the cutting tool. Unscrew the air motor cover (4 M3x8 screws). Pull out rotor with cylinder. Cylinder can be replaced. Remove the discs from the rotor. Cylinder and discs can now be exchanged. - Page 35 Place the rotor into vice or similar (without clamping) and knock the rotor out of the large bearing with light blows using a plastic mallet. The ball bearing with ventilation ring can be exchanged. Install the ventilation ring with the shoulder facing towards the ball bearing.
- Page 36 Position air ventilation ring with the shoulder pointing up. Push on the large ball bearing and knock it down against the stop with the plastic mallet. Shoulder Insert the discs and plug on the cylinder. The notch in the cylinder must face towards the large bearing.
-
Page 37: Pressure Reducer
5.3 Pressure reducer 5.3.1 Overview of pressure reducer spare parts 014 01 045 Pressure reducer 0.15 – 7 bar (stroke drive 6 bar, axial feed 3 bar) 010 01 055 Pressure reducer 0.1 - 3.5 bar (bracing bubble 2 bar) Pressure reducer 2 Pressure reducer 1 (DM2) (bracing bladder) -
Page 38: Replace Pressure Reducer Dm 1 (Stroke Drive)
5.3.2.1 Replace pressure reducer DM 1 (stroke drive) Unwind the hose package from the reel. Pull the transparent hoses off the pressure reducer 1 (DM1). For this purpose press the black circlip on the pressure reducer and pull on the hose at the same time. Loosen the switch panel nut with the pliers and unscrew. Pull off the transparent hoses Switch panel nut Unscrew the angular fittings, replace the pressure reducer and label it with DM1. -
Page 39: Replacing The Pressure Reducer Dm2 (Bracing Bubble) And Dm3 (Axial Feed)
5.3.2.2 Replacing the pressure reducer DM2 (bracing bubble) and DM3 (axial feed) Unwind the hose package from the reel. Pull the transparent and the blue hose off the pressure reducer. For this purpose press the black circlip on the pressure reducer and pull on the hose at the same time. -
Page 40: Way-Valves
5.4 Way-valves The way valves (WV 1 - 3 and WV 3) are spare parts and can be ordered from IMS. 5.4.1 Overview of way-valve spare parts 016 12 010 Way-valve (WV 1-3, stroke, bracing bubble, axial feed) 030 04 747 Way valve (WV 3, cutting air) 5.4.2 Replacing way-valves 5.4.2.1 Replacing way-valve WV 1 - 3 (stroke, bracing bubble, axial feed) -
Page 41: Replacing The Way-Valve 3 (Cutter Air)
5.4.2.2 Replacing the way-valve 3 (cutter air) Unreel the package from the drum. Unscrew the way-valve. Disconnect the two 10 mm transparent hoses and unscrew the plug. Replace the directional valve. Reconnect the hoses and plug. Fasten directional valve again with two screws. Fastening screws Transparent hose Screw, electrical connection... -
Page 42: Replacing The Camera
5.5 Replacing the camera Unscrew the camera (Allen screws M4x10) and remove it carefully. Allen screws M4x10 The cleaning ring (camera) for the air and water supply remains on the unit and is not sent back. O-ring Replace the camera. Do not operate the cutter drive without the camera! Screw on the camera. -
Page 43: Technical Data
6 Technical data Main dimensions: L 660 x W 550 x H 800 mm Weight: approx. 47 kg Applications: Pipe of nominal width 80 mm to 150 mm (optionally up to 250 mm) Protection class: IP 54 (protected against access by small tools/wires and access by small tools / wires) +5 ... -
Page 44: Warranty Terms
7 Warranty terms information instructions operation maintenance IMS MICROlight plus are based on our previous experience and technical expertise to the best of our knowledge. We reserve the right to make technical modifications within the context of further development of the equipment described in this Operating Manual. During the warranty period (1 year), the customer may undertake only those repairs to the system as described in this Operating Manual. -
Page 45: Ec Declaration Of Conformity
8 EC Declaration of Conformity... -
Page 46: Accessory Overview
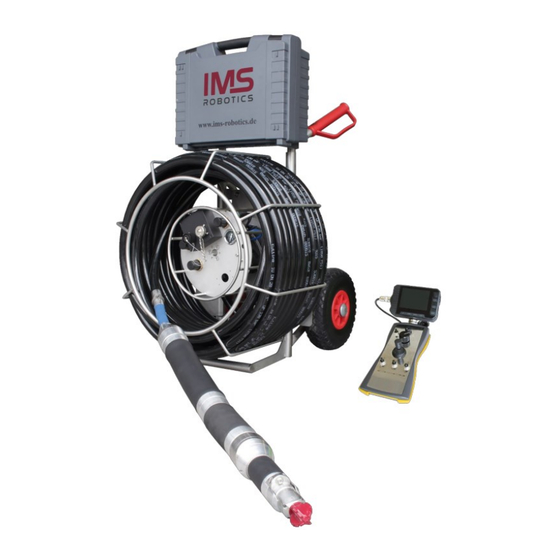
9 Accessory overview...
Need help?
Do you have a question about the MICRO light plus and is the answer not in the manual?
Questions and answers