
Related Manuals for Oryx SCA1200ht


Summary of Contents for Oryx SCA1200ht
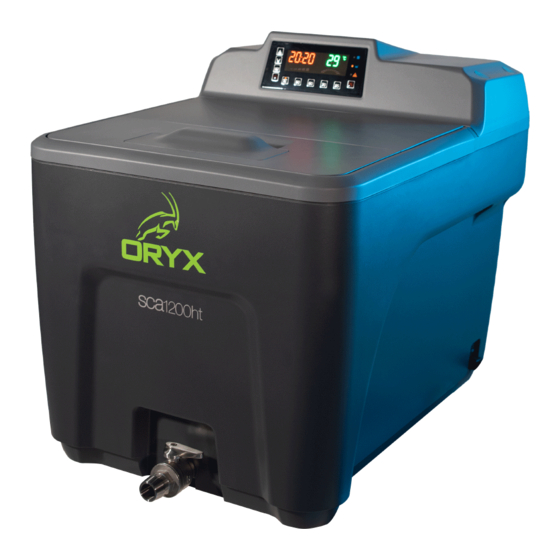
- Page 1 Repair Manual Oryx Additive Inc. 7755 S. Research Drive Ste. 120 Tempe, AZ 85284 1.833.817.3533 www.OryxAdditive.com info@OryxAdditive.com support@OryxAdditive.com Rev 2.16 April 18, 2023...
-
Page 2: Table Of Contents
Table of Contents I. PRELIMINARY STEPS ..................... - 4 - II. QUICK TROUBLESHOOTING ................. - 5 - III. REMOVING TOP COVER AND BACK PANEL ............- 10 - A. H ...................... - 10 - OW TO EMOVE THE OVER B. H ..................... - Page 3 B. H F2 2 250V F # 04802-01]............- 26 - OW TO EPLACE THE XII. TROUBLESHOOTING STEPS ................- 27 - A. P ..................- 28 - UMP AND RANSFORMER ROUBLESHOOTING B. H ....................- 36 - EATING LEMENT ROUBLESHOOTING C.
-
Page 4: Preliminary Steps
I. Preliminary Steps Follow these steps before attempting to service the SCA Power off and disconnect the SCA from the main power. Allow the SCA to cool completely. Attach a hose to the front valve and drain the tank completely Always disconnect the SCA from the main power and drain the tank completely before servicing. -
Page 5: Quick Troubleshooting
II. Quick Troubleshooting The SCA has been designed to allow the end user to resolve most operating problems. When a problem is encountered, please read through this repair manual. If a resolution is not found in this manual, please contact technical support. High Risk of Electrical Shock Always disconnect the unit from power before removing any cover! - Page 6 Probable Problem What to Do Causes Pump will not start, Timer has The system will only run when the timer is counting down. Check the SCA is powered up, not been set timer display on the control panel. display panel is lit. and started If it is not counting down, press the button.
- Page 7 Probable Problem What to Do Causes Warning Indicator Liquid level Check the indicator lights on the right side of the display control is too high or panel. If either level indicator is on, add or remove water from the Flashing too low tank until the indicator turns off.
- Page 8 Probable Problem What to Do Causes Warning Indicator Internal Error Sensor failure, power supply failure, heater failure or pump failure. (See Error Codes Section XIII). Flashing Error Codes: Error Code Displayed EP = Pump motor current fault EH = Heater current fault ES = 12VDC out of range, power supply error EO = Over temperature = Temperature sensor failure...
- Page 9 The power The 1200ht uses a power cord that is certified and rated specifically cord is for this model. Oryx does not advise using any 3 party power cords. defective or Use of 3 party power cords can result in damage to the SCA and wrong power may invalidate any warranty.
-
Page 10: Removing Top Cover And Back Panel
III. Removing Top Cover and Back Panel A. How to Remove the Top Cover 1. Remove the Top Cover a. Unplug the SCA from power and pry out the rubber plugs from the top cover. b. Remove the six M5 Phillips head screws holding the top cover. Figure 1 - Removing Plugs and Screws c. -
Page 11: How To Remove The Back Panel
B. How to Remove the Back Panel 1. Remove the Back Panel a. Unplug the SCA from power and remove the two M5 screws holding the back panel. b. Pull down on the back panel and remove. Figure 3 - Remove Back Panel... -
Page 12: Pump Assembly Replacement [Part # 04803-01]
IV. Pump Assembly Replacement [Part # 04803-01] A. How to Remove the Pump Assembly 1. Remove the Pump Assembly a. Unplug the SCA from power and remove the top cover (See How to Remove the Top Cover Section III A). b. - Page 13 NOTE The tray gasket may cause the pump assembly to stick to the bridge. If this happens, loosen the gasket by gently rocking the assembly back and forth. Figure 6 - Remove the Pump Assembly h. Grip the pump assembly by the motor and carefully guide the pump assembly through the hole in the bridge and remove.
-
Page 14: How To Install The Pump Assembly
B. How to Install the Pump Assembly 1. Install the Pump Assembly a. Mount the pump assembly to the bridge using the four M5 mounting screws and attach ground wire to the tray. b. Thread the motor wires through the bridge. c. -
Page 15: Sensor Assembly Replacement [Part # 04810-01]
V. Sensor Assembly Replacement [Part # 04810-01] A. How to Remove the Sensor Assembly Remove the Sensor Assembly a. Unplug the power cord and remove the top cover (See How to Remove the Top Cover Section III A). b. Unplug the three connectors from the sensors that attached to the Connector PCB. c. -
Page 16: How To Install The Sensor Assembly
B. How to Install the Sensor Assembly 1. Install the Sensor Assembly a. Insert the Sensor Assembly into the motor tray. b. Mount the Sensor Assembly using the four M5 screws. c. Plug in the three sensors to the appropriate connectors on the Connector PCB. d. -
Page 17: Spray Nozzle Replacement [Part # 04809-01]
VI. Spray Nozzle Replacement [Part # 04809-01] A. How to Replace the Nozzle 1. Replace the Nozzle a. The 1200ht has an old style and a new style nozzle. i. The old-style nozzle (Threaded style [04809-01 Rev A]) was present on SCAs from Serial Numbers HT00001 - HT01974. -
Page 18: Heater Assembly Replacement [Part # 04805-01]
VII. Heater Assembly Replacement [Part # 04805-01] A. How to Remove the Heater Assembly 1. Remove the Heater Assembly a. Unplug the SCA from power and remove the top cover (See How to Remove the Top Cover Section III A). b. -
Page 19: How To Install The Heater Assembly
M5 Screws (4 places) Figure 11 - Top View of SCA with the Top Cover Removed Figure 12 - Remove the Heater Assembly B. How to Install the Heater Assembly 1. Install the Heater Assembly a. Carefully guide the Heater Assembly through the hole in the Bridge until the plate is seated on the gasket on top of the bridge. -
Page 20: Display Control Panel Replacement [Part # 04808-02]
VIII. Display Control Panel Replacement [Part # 100039] A. How to Remove the Display Control Panel 1. Remove the Display Control Panel a. Remove the top cover (See How to Remove the Top Cover Section III A). b. Turn the cover over and remove the four screws holding ribbon cable Tabs Figure 13 –... -
Page 21: How To Install The Display Control Panel
B. How to Install the Display Control Panel 1. Install the Display Control Panel a. Thread the ribbon cable through the hole on the front of the top cover where the display will be mounted. b. Check the orientation of the display and proceed to press the display into the top cover. The display should snap into place. -
Page 22: Pcb Assembly Replacement [Par # 04807-01]
IX. PCB Assembly Replacement [Par # 04807-01] A. How to Remove the PCB Assembly 1. Remove the PCB Assembly a. Remove back panel (See How to Remove the Back Panel Section III B). b. Check the wires to make sure the labels are on the wires connected to the PCB. c. -
Page 23: How To Install The Pcb Assembly
B. How to Install the PCB Assembly 1. Install the PCB Assembly a. Slide the PCB in at an angle and guide the board onto the supports for the board. Make sure not to damage any wires as the board is placed. Make sure no wires get behind the board before securing the screws. -
Page 24: Power Switch Replacement [Part # 04813-01]
X. Power Switch Replacement [Part # 04813-01] A. How to Remove the Power Entry Module (PEM) Switch 1. Remove the PEM a. Ensure the power is unplugged from the SCA. b. Remove the back panel (See How to Remove the Back Panel Section III B). c. -
Page 25: Fuse Replacement
XI. Fuse Replacement A. How to Replace the F1 15A 250V Fuse [Part # 04801-01] 1. Replace the F1 Fuse a. Ensure the power is unplugged from the SCA. b. Remove the back panel (See How to Remove the Back Panel Section III B). c. -
Page 26: How To Replace The F2 2 Amp 250V Fuse [Part # 04802-01]
B. How to Replace the F2 2 amp 250V Fuse [Part # 04802-01] 1. Replace the 2 Amp Fuse a. Ensure the power is unplugged from the SCA. b. Remove back panel (See Removing the Back Panel Section III B). c. -
Page 27: Troubleshooting Steps
XII. Troubleshooting Steps NOTE: The symbol “ ” prefixing the measured value denotes “approximate”. Most measurements will not be completely accurate with the values represented in this manual, but the SCA will function normally. Usually, measurements that are extremely different from the indicated measurements will represent a possible failure in the component. -
Page 28: Pump And Transformer Troubleshooting
A. Pump and Transformer Troubleshooting Tools Needed: Multimeter Test Hooks .7mm Test Probes Phillips Screwdriver Symptom Pump Inoperable, EP error Theory: The pump is a 115VAC motor that circulates the water from the intake at the bottom of the pump out through the nozzle using an impeller attached to the motor shaft. The transformer is used to isolate the pump from the rest of the circuitry and reduce Electro Magnetic Interference (EMI). - Page 29 small staples may be used by inserting them into the connector. Choose the Resistance Setting Ω on the Multimeter. Check the resistance of the pump between the wires on pins 1 & 3 on the cable connector (See Figure 23). Ω...
- Page 30 3. Measure the Resistance of the Transformer a. Unplug the transformer connector from the “TRAN” connector on the PCB and measure the resistance. Check the resistance between the red wires on the transformer cable connector (See Figure 25). Ω Figure 25 – Transformer Resistance Measurement (red wires) Ω, continue to the next step (Step b).
- Page 31 Ω or , replace the transformer. Verify initial measurement. ii. If the multimeter reads 4. Check the Mechanical Rotation of the Pump Motor Shaft a. Reach into the top of the tub and rotate the shaft of the motor by rolling a finger across the shaft (See Figure 27).
- Page 32 Figure 28 - Capacitance Check on Run Capacitor b. If a capacitance option is not available on the multimeter, the resistance can be tested. i. Set the multimeter to Ohms Ω . ii. Short the leads of the Run Capacitor initially (See Figure 29).
- Page 33 Figure 30 – Pump Output Voltage (pins 1 and 3) VAC (~ VAC EU), continue to the next step (Step c). i. If the multimeter reads ~ ii. If the multimeter reads ~ VAC, Check the input voltage to the Transformer (See Measure the Input Voltage to the Transformer Section XII A 8).
- Page 34 VAC (~ VAC EU), continue to the next step (Step d). i. If the multimeter reads ~ ii. If the multimeter reads ~ VAC, this is an indication that the Run Capacitor is defective. d. If the voltage on pins 1 and 3 and pins 2 and 4 of the Pump In connector on the PCB are correct, the Transformer, PCB and Control Panel are operating correctly.
- Page 35 b. Set the multimeter to DC voltage . Press the start button on the control panel to enable the pump motor and measure the voltage across pin 2 (GND) and pin 4 (Motor Control Signal) on the connector J2 solder joints (See Figure 33). When the motor is enabled, the control signal transitions from a low (~0V DC) to a high (~12V DC).
-
Page 36: Heating Element Troubleshooting
B. Heating Element Troubleshooting Tools Needed: Multimeter Phillips Screwdriver Symptom Not Heating, Over Heating, Under Heating Theory: The heating element has an internal resistance that creates heat when current flows through. When submerged in water, the heat is transferred to the water. It should take approximately 3 minutes per degree to heat up the bath. - Page 37 Ω Ω Figure 35 - Heating Element Resistance Check d. If the multimeter reads Ω or , replace the heating elements. Verify initial measurements. 3. Heater Element Voltage Test SHOCK HAZARD! ONLY QUALIFIED PERSONNEL SHOULD DO THIS TEST Remove the top cover, (See Removing the Top Cover Section III A). b.
- Page 38 Figure 36 - Heating Element Input Voltage NOTE: There are 2 heating elements on the SCA 1200ht. One heating element is dedicated to 120V AC (US) only, the other is dedicated to 230V AC (EU). Only one element is used and only one element will have voltage depending on the input voltage.
- Page 39 c. Reseat connector J3 and check the voltage again. VDC, the Display Control Panel is operating correctly. i. If the multimeter reads ~ Re-check the voltage on the heating elements. ii. If the multimeter still reads ~ VDC, continue to the next step (Step d). d.
-
Page 40: Thermal Cutoff Switch (Tco) Troubleshooting
C. Thermal Cutoff Switch (TCO) Troubleshooting Tools Needed: Multimeter Phillips Screwdriver Symptom Not Heating Theory: The Thermal Cutoff switch found on the back wall of the tank by the main power switch removes voltage from the heater relay if the temperature of the bath exceeds 90ºC. To reset the switch, allow the temperature of the bath to drop below 80ºC and press the red reset button between the wire terminals. -
Page 41: Temperature Sensor Troubleshooting
D. Temperature Sensor Troubleshooting Tools Needed: Multimeter Philips Screwdriver Symptom Not heating at all, Over Heating, Under Heating, r1 Error Theory: The Temperature Sensor changes resistance according to the temperature of the bath. As the temperature increases, the resistance of the sensor decreases (See Figure 39). - Page 42 Steps: 1. Check the resistance of the Temperature Sensor a. Remove the Top Cover (See Removing the Top Cover Section III A). b. Unplug the NTC connector (See Figure 40) NTC Connector Figure 40 – NTC Connector c. Set the multimeter to ohms Ω and check the resistance of the Temperature Sensor across both wires on the NTC connector using the .7mm probes.
- Page 43 2. Set the SCA to 50°C and press the start b button. When the bath heats up and the Control Panel displays 50°C, remove power from the SCA, unplug the NTC connector and measure the resistance kΩ. Try different heat settings and compare the across both wires.
-
Page 44: Water Level Sensor Troubleshooting
E. Water Level Sensor Troubleshooting Tools Needed: Multimeter Philips Screwdriver Symptom SCA beeping, high or low water LED flashing on Control Panel, r2, r3 error. Theory: The float sensor uses two internal switches within a hollow rod straddled by a watertight stainless-steel float that slides along the rod as the water level changes (See Figure 42). -
Page 45: N Opower To Sca Troubleshooting
F. No Power to SCA Troubleshooting Tools Needed: Multimeter Phillips Screwdriver Symptom SCA Appears to have no power, there are no audible clicks when toggling the power switch, the LED on the PCB is not lit. Theory: The SCA requires 100-120VAC (US) or 220-230VAC (Europe). The SCA chooses the right configuration automatically according to the input power via an evaluation relay. - Page 46 i. If voltage is present, move to the next step (Step c). ii. If no voltage is present, check the continuity of the power cord and replace as needed. c. With the power cord unplugged from the SCA, disconnect the AC-L and AC-N from the PCB. Attach the multimeter leads between AC-L and AC-N wire connectors (See Figure 45).
- Page 47 b. If the fuse blows again immediately upon powering up the SCA, remove power from the SCA and unplug the pump and transformer connectors from the PCB. Replace the fuse. Figure 47 – Unplug the Transformer and Pump Connectors From PCB i.
-
Page 48: N Opower To Display Troubleshooting
G. No Power to Display Troubleshooting Tools Needed: Multimeter Phillips Screwdriver Symptom SCA Control Panel appears to have no power and is not lit up when powering on the SCA. Upon plugging in to power and toggling the power switch, there are audible clicking sounds and the LED is lit on the PCB. - Page 49 c. Power on the SCA. If the display powers up, there was probably a loose connection. 2. Measure the Display Voltage a. Measure the voltage between pin 2 (GND) and pin 10 (12V DC) on the Connector Board J2 solder joints. There should be between 9V and 15V DC (usually around 12 or 13 V DC) (See Figure 49).
-
Page 50: Documentation
XIII. Documentation A. Error Codes Pump-motor (See Pump and Transformer Troubleshooting Section XII A). malfunction/pump motor current fault. Heater current fault (See Heater Element Troubleshooting Section XII B). 12VDC out of range, (See No Power to Display Troubleshooting Section XII G). power supply error for display Over temperature... -
Page 51: Schematics
B. Schematics Power Circuit... - Page 52 Heating Elements Driver / Buzzer Circuit...
- Page 53 Black Pump Motor Driver...
- Page 54 Main board and Connector board to panel connection diagram...
-
Page 55: Pcb Layout
C. PCB Layout... -
Page 56: Controller Cable Connectors
D. Controller Cable Connectors • Low → ~0V DC • High → ~12V DC J1 Connector (PCB) Description High 12V DC Power off Power On Heating tube fault detection input No Fault Fault Heating tube fault detection input No Fault Fault Heating tube control signal input Heater Enable Off... - Page 57 • Low → ~0V DC • High → ~12V DC J2 Connector (Connector Board) Description High 110V and 220V recognition detection input 110V AC Applied DC Ground Buzzer control signal output Buzzer Off Buzzer On Pump Motor control signal output Pump Enable Off Pump Enable On Pump Motor failure detection input...
- Page 58 • Low → ~0V DC • High → ~12V DC J3 Connector (Connector Board) Description High Water Level High Sensing Water Level Low Sensing Temperature Sensing Display VCC ~12V DC Power Off Power On 110V and 220V recognition detection input 110VAC Heater Malfunction Sensing No Fault...
-
Page 59: Commonly Used Parts
E. Commonly Used Parts Commonly Used Parts Part Number Image Part Description Pump Motor Assembly 04803-01 Power Entry Module (PEM) 04813-01 Heater Assembly 04805-01 Sensor Assembly 04810-01 Thermal Cutoff Switch (TCO) 100503 Threaded Nozzle 04809-01 Rev A... - Page 60 Bayonet Nozzle 04809-01 Rev B Transformer 100506 Run Capacitor 100505 Printed Circuit Board (PCB) 04807-01 Display Controller 100039 F1 15A 250V Fuse 04815-01 F2 2 amp 250V Fuse 04802-01...
- Page 61 115VAC Power Cord (US) 04811-01 220VAC Power Cord (EU) 04811-02...
Need help?
Do you have a question about the SCA1200ht and is the answer not in the manual?
Questions and answers