Advertisement
Quick Links
Advertisement

Related Manuals for Dometic Enerdrive EN220080-12


Summary of Contents for Dometic Enerdrive EN220080-12
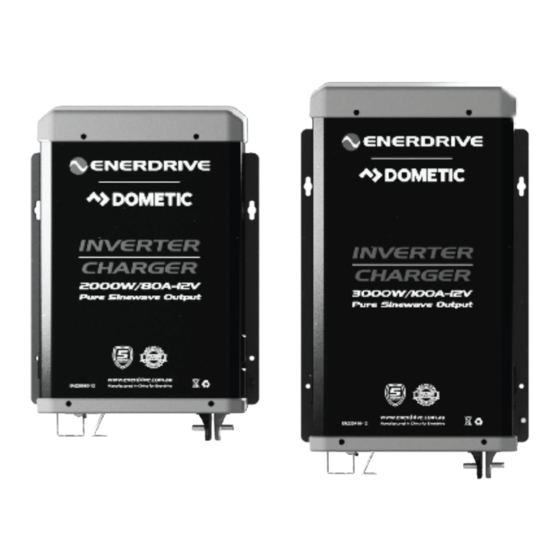
- Page 1 User Manual EN220080-12 / EN230100-12 Rev. 1.0...
- Page 2 Exclusions For Documentation And Product Usage Unless speci cally agreed to in writing, Dometic Power & Control (Enerdrive) Pty Ltd: makes no warranty as to the accuracy, su ciency or suitability of any technical or other information provided in its manuals or other documentation.
-
Page 3: Table Of Contents
TABLE OF CONTENTS Product Description Page 3 Introduction Page 4 Understanding the Unit Page 6 Installing the Unit Page 10 Unit Operation Page 12 Troubleshooting Page 29 Speci cations Page 30 Warranty Page 31 1 PRODUCT DESCRIPTION The Enerdrive Sinewave Inverter-Charger includes the items listed below. •... -
Page 4: Introduction
2 INTRODUCTION Thank you for purchasing the Enerdrive Sinewave Inverter-Charger. With our state of the art, easy to use design, this product will o er you True Sinewave AC power for your RV, Marine, 4WD and remote power needs also recharging your battery automatically when 240V AC is available. - Page 5 WARNING! Shock Hazard, Keep Away From Children • Avoid moisture. Never expose unit to snow, water, etc. • Unit provides high voltage AC; treat the AC output socket the same as regular wall AC sockets at home. WARNING! Explosion Hazard •...
-
Page 6: Understanding The Unit
3 UNDERSTANDING THE UNIT WARNING! • It is recommended that all wiring be done by a certi ed technician or electrician to ensure adherence to the applicable electrical safety wiring regulations and installation codes. Failure to follow these instructions can damage the unit and could also result in personal injury or loss of life. - Page 7 TYPICAL WIRING BLOCK DIAGRAM OF INVERTER-CHARGER INVERTER/CHARGER Battery Bank • The use of deep cycle battery is highly recommended for power inverter application • For battery size, you need to identify how much and for how long the inverter has to provide AC power to the loads (based on Amps x hour energy consumption).
- Page 8 DC Disconnect Switch • A DC Disconnect Switch connected along the DC positive line is recommended. The rating of the switch is with the same or higher rating of the selected fuse or circuit breaker. Use ignition protected switches when required by local codes. •...
- Page 9 AC Input Source An AC source is usually grid power or an AC Generator. The acceptable AC Input voltage range and frequency are as shown: Model Acceptable AC Input Voltage Range Acceptable AC Input Frequency Range 230VAC Series 180 - 260 VAC 47 - 53 Hz An automatic or manual AC source selector switch can be used to switch between the multiple sources of shore power to the unit.
-
Page 10: Installing The Unit
Ignition Start Port, Program Port, Can-BUS Port The Ignition Start Port is used for connecting to the ignition start signal from vehicles to control the operation of the inverter. The Program Port This USB port is for system rmware upgrade use only. This CANNOT be used for charging Smartphones or USB powered devices. - Page 11 DC Input Connection: WARNING! Electrical Shock Hazard The unit ‘On/O ’ switch does not disconnect the DC power from the battery. Use the DC Disconnect Switch or disconnect the DC input cables to disconnect the DC power from the battery before working on any circuits connected to the unit. Failure to follow these instructions can result in death or serious injury.
-
Page 12: Unit Operation
BTS (Battery Temperature Sensor) Connection (optional): To provide more accuracy and precision on battery voltage charging against battery temperature, a BTS (sold separately) can be used. The BTS can also be used to terminate the charging cycle when it senses the temperature of the battery rise to above 60 °C or fall below 0 °C. - Page 13 Item Description Item Description Power Indicator Up Button AC Output Indicator Down Button Status Indicator Escape Button Power Button Display Panel Socket Menu/Set Button Program Port Indicator Status Function Power Unit is power ON AC Output Switch is turned ON and AC is available at the Output Socket AC Output AC Output Switch is turned OFF and AC is not available at the Output Socket GREEN...
- Page 14 Unit Setting Function Chart Unit Setting Display Description and Available Setting ON : Use as Inverter only. No By-Pass functions. Inverter Inverter can be turned ON & OFF with a press of the power button. (AC OUT) Charger & Transfer Auto Connect when Mains is Connected (Within Range) Whole Unit can be turned OFF by HOLDING the Power Button for 5-seconds OFF : (Default): Continuous AC Output when inverter is ON 10 : Continuous AC Output when inverter is ON and AC load is >...
- Page 15 Understanding the Display Icons during Unit Operation POWER AC OUTPUT STATUS AC OUT Icons Meaning Solid: Unit is running in Battery Charger mode and is charging the battery. Solid: Unit is running in By-Pass mode. (The transfer switch is switched to AC Input Source). •...
- Page 16 Display Character Meaning ‘A’ icon On indicates the display shows battery discharge current (28A as shown) ‘kW’ icon on, it indicates the display shows AC Output power in kW (0.80kW = 800W as shown) ‘V’ icon on, it indicates the display shows battery voltage in V (12.8V as shown) Warning icon on, it indicates the display shows Error/Warning Code (E01 as shown, Battery Low Disconnected error) Equalization on Flooded battery is in process.
- Page 17 Display shows battery voltage (12.8V), use button to see DC Current discharge from battery, AC Output Power. is On indicates inverter is providing AC Power. icon indicates estimated battery capacity. - ‘Power’ indicator on indicates unit is On. - If ‘AC Output’ indicator is On, indicator is On, it indicates AC Output Switch is turned On (AC is available at the output socket and the output hardwire terminal).
- Page 18 When there is a blackout (AC Input Source or Shore Power is not available), unit is running in Inverter/Battery Mode. Unit has automatically switched to getting AC Power from the inverter. Display shows battery voltage (12.8V), use button to see DC Current discharge from battery, AC Output Power.
- Page 19 When there is a blackout (AC Input Source or Shore Power is not available), unit will not provide AC Backup as Inverter is disabled. Display remains On for 10 seconds with the following appearance: - Display shows battery voltage (12.6V), use button to see DC Current (always 0A because charger is O ), AC Input Power (always 0W because Inverter is disabled).
- Page 20 - ‘Power’ indicator on indicates unit is On. - If ‘AC Output’ indicator is On, it indicates AC Output Switch is turned On (AC is available at the output socket and the output hardwire terminal). POWER - If ‘AC Output’ indicator is O , it indicates AC Output Switch is turned O (AC is not available at the output socket and the output hardwire terminal).
- Page 21 No Backup with Battery Charger Function Enabled - Display shows battery voltage (14.2V), use button to see DC Current charging the battery, AC Input Power. is on indicates AC Input Source is in use. INPUT is on indicates AC Output is getting the power from AC Input source. INPUT is on indicates the charger is enabled and is charging the battery.
- Page 22 - ‘Power’ indicator on indicates Inverter function is On. - If ‘AC Output’ indicator is On, it indicates AC Output Switch is turned On (AC is available at the output socket and the output hardwire terminal). POWER - If ‘AC Output’ indicator is O , it indicates AC Output Switch is turned O (AC is not available at the output socket and the output hardwire terminal).
- Page 23 - ‘Power’ indicator on indicates unit is On. - If ‘AC Output’ indicator is On, it indicates AC Output Switch is turned On (AC is available at the output socket and the output hardwire terminal). POWER - If ‘AC Output’ indicator is O , it indicates AC Output Switch is turned O (AC is not available at the output socket and the output hardwire terminal).
- Page 24 c) Battery Disconnect Function Battery Under and Over Voltage Setting Battery Low Disconnect voltage has selectable range: 10.5 - 12.0V (0.1V steps) (Default 10.5V) The Battery Low Disconnect Voltage has to be with a minimum of 0.5V below the Battery Low Alarm (BLA) Voltage. Battery Low Alarm Selectable range: 11.0 - 12.5V (0.1V step) (Default 11.0V) The Battery Low Alarm Voltage has to be with a minimum of 0.5V above the Battery Low Disconnect (BLd) Voltage and has to be with a minimum of 0.5V below the Battery Low Recovery (bLr) Voltage.
- Page 25 Charging Voltage Setting: Bulk/Absorption (AbS), Float (FLO) and Recharge (rEC) Battery Type Bulk Voltage (Default) Float Voltage (Default) Recharge Voltage (Default) 13.8-14.8V (14.2V) 13.0-14.0 (13.8V) 12.8-14.0 (12.8V) Flooded 13.8-14.8 & 15.8V (14.4V) 13.0-14.0 (13.5V) 12.8-14.0 (12.8V) 13.8-14.8V (14.3V) 13.0-14.0 (13.4V) 12.8-14.0 (12.8V) Lithium 13.0-14.0 (13.5V)
- Page 26 Battery Temperature Setting ‘bTM' (voltage adjustment from 25°C setting) No Battery Temperature Sensor (BTS) installed There are three settings (Low, Normal, High) available for battery temperature setting. • Setting to ‘Low’ temperature will compensate the charging voltage by +0.675V on GEL and Flooded battery type and +0.525V on AGM battery type.
- Page 27 g) Manufacturing Factory Default Function Factory Default Setting Select ‘Yes’ to reset all the settings to the preset Factory Default settings. Note: The setting for battery type is GEL. If another battery type is used, select Yes to set all the parameter to factory default, then proceed to the battery type and make change to the new battery type.
- Page 28 Understanding the Error Codes Code Condition Corrective Action No AC Output. Inverter shutdown due to low battery voltage. Recharge the battery immediately and restart unit. (Battery Note: E01 will shows for about 30 sec. After 30 sec, Display will turns O and unit will shutdown completely. Mode) - No battery is connected to the unit.
-
Page 29: Troubleshooting
6 TROUBLESHOOTING To troubleshoot the unit, please note the error code displayed on the main unit and review “Understanding the Error Codes” in section 5. Problem Possible Cause/Condition Solution The thermal breaker on the unit is tripped Reset the thermal breaker Press and hold the ‘ESCAPE’... -
Page 30: Speci Cations
7 SPECIFICATIONS Note: Speci cations are subject to change without notice. 12V Input Model 230VAC 12V Model Speci cation EN220080-12 EN230100-12 Running as Inverter AC Output Power 2000W 3000W AC Output Current 8.7A 13.0A AC Surge Power (Peak) 4000W 6000W AC Output Voltage/Frequency 230 VAC / 50 Hz AC Output Waveform... -
Page 31: Warranty
8 WARRANTY 5 Year Warranty In the unlikely event that a technical issue arises with an Enerdrive product, customers are encouraged to initially contact the Enerdrive Support Team on 1300 851 535 or support@enerdrive.com.au for immediate and e cient expertise and rst class product support. IMPORTANT NOTE: CONSUMER PROTECTIONS If you have purchased your product in Australia, you should be aware that: This warranty is provided in addition to other rights and remedies held by a consumer at law. - Page 32 NOTES: Page 32 Enerdrive Inverter-Charger Owners Manual (Rev. 1.0)
- Page 33 NOTES: Page 33...
- Page 34 PO Box 9159, Wynnum Plaza, Queensland Australia, 4178 Ph: 1300 851 535 / Fax: 07 3390 6911 Email: sales@enerdrive.com.au Web: www.enerdrive.com.au...
Need help?
Do you have a question about the Enerdrive EN220080-12 and is the answer not in the manual?
Questions and answers