Table of Contents
Advertisement
Quick Links
Advertisement
Table of Contents

Related Manuals for Smeg DHT82LSIT


Summary of Contents for Smeg DHT82LSIT
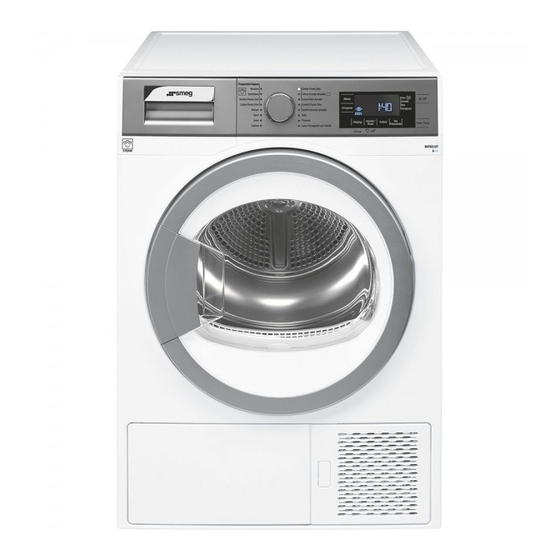
- Page 1 DHT82LSIT Dryer User Manual Asciugatrice Manuale utente 2960311175_EN/190815.1016...
-
Page 2: Please Read This User Manual First
Dear Customer, Thank you for prefering a Smeg product. We hope that your product which has been manufactured with high quality and technology will give you the best results. We advise you to read through this manual and the other accompanying documentation carefully before using your product and keep it for future reference. -
Page 3: Important Instructions For Safety And Environment
Important instructions for safety and environment This section contains safety instructions that will help protect from risk of personal injury or property damage. Failure to follow these instructions shall void any warranty. 1.1 General safety • The dryer can be used by children at and above 8 years old and by persons whose physical, sensory or mental capabilities were not fully developed or who lack experience and knowledge provided that they are supervised or trained on the safe usage of the product and the risks... -
Page 4: Electrical Safety
Important instructions for safety and environment • You may put laundry that is not dirty or stained but permeated with unpleasant odour in deodourizing program. • Do not use any dry cleaning set or additional material within a steam program or any program. 1.1.1 Electrical safety Electrical safety instructions should be followed while electrical connection is made during the installation. -
Page 5: Product Safety
Important instructions for safety and environment 1.1.2 Product safety Points to be taken into consideration for fire hazard: Below specified laundry or items must not be dried in the dryer considering fire hazard. • Unwashed laundry items • Items soiled with oil, acetone, alcohol, fuel oil, kerosene, stain removers, turpentine, paraffin or paraffin removers must be washed in hot water with plenty of detergent before being dried in the dryer. - Page 6 Important instructions for safety and environment • You must provide enough ventilation in order to prevent gases exiting from devices operating with other types of fuels including the naked flame from accumulating in the room due to the back fire effect. Underwear that contains metal reinforcements should not be dried in the dryer.
-
Page 7: Mounting Over A Washing Machine
Important instructions for safety and environment 1.2 Mounting over a washing machine • A fixing device should be used between the two machines when installing the dryer above a washing machine. The fitting device must be installed by the authorized service agent. • Total weight of the washing machine and the dryer -with full load- when they are placed on top of each other reaches to approx. -
Page 8: Intended Use
Important instructions for safety and environment 1.3 Intended use • Dryer has been designed for domestic use. It is not suitable for commercial use and it must not be used out of its intended use. • Use the dryer only for drying laundry that are marked accordingly. • The manufacturer waives any responsibility arisen from incorrect usage or transportation. -
Page 9: Compliance With Rohs Directive
Take them to the packaging material collection points designated by the local authorities. Please visit the following website to get more information on the product. http://www.smeg.com Dryer / User Manual 9 / 68 EN... -
Page 10: Technical Specifications
Important instructions for safety and environment 1.8 Technical Specifications Height (Min. / Max.) 84,6 cm / 86,6 cm* Width 59,5 cm Depth 60,9 cm Capacity (max.) 8 kg** Net weight (plastic front door usage) 52 kg Net weight (glass front door usage) 54 kg Voltage Rated power input... -
Page 11: Your Dryer
Your Dryer 2.1 Package Contents 1. Water drain hose * 2. Filter drawer spare sponge* 3. User Manual 4. Drying basket* 5. Drying basket user manual* *It can be supplied with your machine depending on its model. Dryer / User Manual 11 / 68 EN... -
Page 12: Appropriate Installation Location
Installation Before the calling the nearest Authorized Service for the on the power Do not place the dryer installation of the dryer, ensure that electrical installation cable. and water drain is appropriate referring to the user's 3.2 Removing the transportation manual.(See 3.3 Connecting to the drain and 3.5 safety assembly Electrical connection) If they are not suitable, contact... -
Page 13: Electrical Connection
Installation We recommend carrying the dryer in upright position. If it is not possible to carry the machine in the upright position, we recommend carrying it by tilting towards the right side when looked from the front. 3.7 Warnings about sounds It is normal to hear a metallic noise from the compressor sometimes during operation. -
Page 14: Laundry Not Suitable For Drying In The Dryer
Preparation 4.1 Laundry suitable for drying in the dryer Always obey the instructions given on the garment tags. Dry only the laundry having a label stating that they are suitable for drying in a dryer and make sure that you select the appropriate programme. LAUNDRY DRYING SYMBOLS Drying Suitable for... -
Page 15: Correct Load Capacity
Preparation • Clean the lint filter before or after each drying It is not recommended to load the dryer cycle. (See 6.1 Cleaning Lint Filter / Loading with laundry exceeding the level indicated Door Inner Surface) in the figure. Drying performance will degrade when the machine is overloaded. -
Page 16: Operating The Product
Operating the product 5.1 Control panel Programm Vapore Bus ness Cotone Pronto St ro Quot d ano Cotone Asc utto Armad o F ne / On / O Allarme S ntet c Pronto St ro Cotone Extra Asc utto Armad o Cotone Pronto St ro S ntet c Pronto St ro St ro... -
Page 17: Program Selection
Operating the product 5.3 Preparing the dryer Press and hold On/Off/Cancel button for 1 second. Plug in the tumble dryer Programm Vapore Open device door. Bus ness Cotone Pronto St ro Quot d ano Cotone Asc utto Armad o Place the laundry into the tub in a slight loosely. F ne / Allarme On / O... - Page 18 Operating the product 5.5 General Explanations of the steam programs Programs Screen Program Definition Capacity Time Business 28 min. You may use this program for cotton clothes (shirts, 1.5 kg or 5-6 pieces of shirts jackets, trousers, etc.). This program will allow you 22 min.
- Page 19 Operating the product 5.6 Programme selection and consumption table Spin Speed Capacity Drying Time Programs Program Description in Washing (kg)* (min) Machine (rpm) You may dry all your cotton laundry in this program. (T-shirt, pants, pyjamas, baby Cotton Wardrobe clothes, underwear, linen, etc.) You can 1000 Dryness put your laundry in the wardrobe without...
- Page 20 Operating the product Thanks to the basket with shelf placed into the drum, Drying Rack programme allows you to dry textile products such as trousers, skirts and woolen pullovers as well as sport shoes that bear the machine dryable label. Please consult the “Drying Rack programme Drying Rack / user manual”...
-
Page 21: Activating The Machine
Operating the product 5.7 Steamy programs You may use condensed water to fill the steam tank. For this, water should be filtered. You may fill the filling The steam programs you will use will allow you to vessel with condensed water accumulated in the water reduce odour in laundry and minimize wrinkles. -
Page 22: Operating The Machine
Operating the product 4. Pull the water tank out. 5.10 Operating the machine 5. Lift the cap of the steam tank as shown. The preferred Steam program is selected. After filling the steam tank, amount of steam will be determined based on amount of laundry. - Page 23 Operating the product Dryness level adjustment selection 5.11 Auxiliary functions Dryness level adjustment button is used to adjust Audio Warning the required dryness level. Programme duration can The machine will give an audio warning when the change depending on the selection. programme comes to an end.
- Page 24 Operating the product Anti-creasing Press Anti-creasing button to activate Anti-creasing programme duration may be this function. changed with the Anti-creasing selection button. You can use Anti-creasing function to prevent laundry from Anti-creasing symbol will illuminate at the creasing if you will not take the laundry out after the end of the programme if Anti-creasing function is activated.
-
Page 25: Warning Symbols
Operating the product Press End Time button to set the desired time delay. For detailed information, see 6 • Press Start/Pause button. Time Delaying starts Maintenance and cleaning. countdown and the time delaying symbol lights up on the display. The “:” in the middle of the If the filter cleaning symbol flashes displayed delay time will flash. -
Page 26: Progress Of Programme
Operating the product • All buttons except the On/Off/Cancel and Child 5.14 Starting the programme Lock button on the control panel are deactivated Press the Start/Pause button to start the program. when the Child Lock is active. Start symbol will light up to indicate that the •... -
Page 27: Canceling The Programme
Operating the product Any laundry added after the drying process has started may cause the clothes that are already dried in the machine intermingle with wet clothes and the result will be wet laundry after the drying process is over. You may repeat laundry adding or removing process as many times as you desire during drying. -
Page 28: Maintenance And Cleaning
Maintenance and cleaning Service life of product extends and frequently experienced problems will be reduced if it is cleaned at regular intervals. 6.1 Cleaning Lint Filter / Loading Door Inner Surface Lint and fiber released from the laundry to the air during the drying cycle are collected in the Lint Filter. -
Page 29: Draining The Water Tank
Maintenance and cleaning • Drain the water in the tank. Never use solvents, cleaning agents or similar substances for cleaning due to the risk of fire and explosion! • If there is lint accumulation in the funnel of the water tank, clean it under running water. •... - Page 30 Maintenance and cleaning • Pull out the filter drawer. • Wash the filter drawer sponge by hand to remove the fiber and lint on the surface. After washing the sponge, squeeze it by hand and remove the excess water. Well-dry the sponge before storing it. It is not necessary to clean the sponge if lint and fiber accumulation on it is not significant.
-
Page 31: Cleaning The Evaporator
Maintenance and cleaning 6.6 Cleaning steam equipment • Close the kick plate cover. • Clean the filling port if it is dirty or blocked. Pull out the water tank, and remove the steam tank filling port cover. Open the cover and turn it upside down and wash it under the tap water. -
Page 32: Troubleshooting
Troubleshooting Drying process takes too much time. • Pores of the lint filter are clogged. >>> Wash the lint filter with warm water. • Filter drawer is clogged. >>> Clean the sponge and the filter cloth in the filter drawer. • Ventilation grids on the front side of the machine are blocked. >>> Remove the objects (if any) that block ventilation in front of the ventilation grids. • Ventilation is not sufficient since the room where the machine is installed is very small. >>> Open the door and window of the room to avoid the room temperature increase too much. • Lime deposit has built up on the dampness sensor. >>> Clean the dampness sensor. • Excessive laundry is loaded. >>> Do not load the dryer in excess. • Laundry is not spun sufficiently. >>> Spin your laundry at a higher speed in your washing machine. - Page 33 Troubleshooting Lint Filter Cleaning symbol is on. • Lint filter is not cleaned. >>> Clean the lint filter. Lint Filter Cleaning symbol is flashing. • Filter housing is clogged with lints. >>> Clean the lint filter housing. • A deposit has built up on the lint filter pores that may cause clogging. >>> Wash the lint filter with warm water. • Filter drawer is clogged. >>> Clean the sponge and the filter cloth in the filter drawer. Water leaks from the loading door • Lint has accumulated on the inner surfaces of the loading door and on the surfaces of the loading door gasket. >>> Clean the inner surfaces of the loading door and the surfaces of the loading door gasket. Loading door opens spontaneously. • Loading door is ajar. >>> Push the loading door to close until you hear a locking sound. Water Tank warning symbol is on/flashing. •...
Need help?
Do you have a question about the DHT82LSIT and is the answer not in the manual?
Questions and answers