
Subscribe to Our Youtube Channel
Related Manuals for Smeg DHT83LRU


Summary of Contents for Smeg DHT83LRU
- Page 1 DHT83LRU Dryer User Manual Сушильная машина Руководство пользователя 2960311888_EN/111018.0839...
-
Page 2: Please Read This User Manual First
Please read this user manual first! Dear Customer, WARNING! Thank you for prefering a Smeg product. We hope that your product which has been • Warning against hot surfaces. manufactured with high quality and technology will give you the best results. We advise you... -
Page 3: Important Instructions For Safety And Environment
1 Important instructions for WARNING! safety and environment Always have the installation and NOTE repairing procedures carried out by the Authorized Service. • This section contains safety Manufacturer shall not be held instructions that will help protect liable for damages that may arise from risk of personal injury or from procedures carried out by property damage. -
Page 4: Electrical Safety
1.1.1 Electrical safety DANGER! DANGER! • Do not use extension cords, multi- • Electrical safety instructions plugs or adaptors to connect the should be followed while electrical dryer to power supply in order to connection is made during the decrease the risk of fire and electric installation. - Page 5 DANGER! DANGER! Points to be taken into • Clothes that are washed inadequately may ignite on their consideration for fire hazard: own and even may ignite after Below specified laundry or items drying ends. must not be dried in the dryer considering fire hazard.
-
Page 6: Mounting Over A Washing Machine
1.2 Mounting over a washing machine WARNING! • A fixing device should be used between the two machines when installing the • Never attempt to repair the dryer dryer above a washing machine. The by yourself. Do not perform any fitting device must be installed by the repair or replacement procedures authorized service agent. -
Page 7: Child Safety
1.4 Child safety 1.8 Technical Specifications • Packaging materials are dangerous for the children. Keep packaging materials away from children. 84,6 cm / 86,6 Height (Min. / Max.) • Electrical products are dangerous for the children. Keep children away from the Width 59,7 cm product when it is operating. -
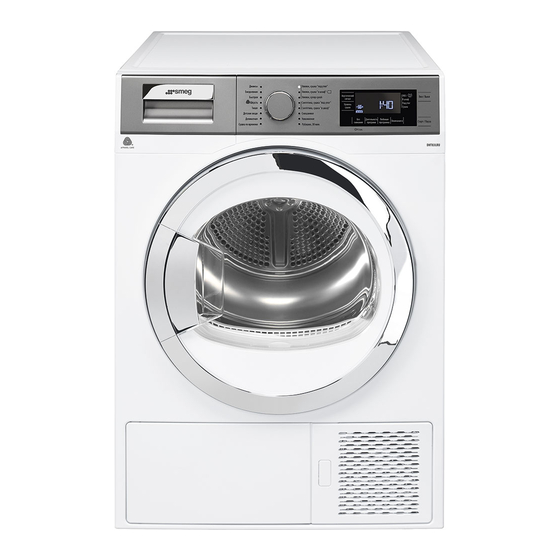
Page 8: Your Dryer
2 Your Dryer 3 Installation 2.1 Overview Before the calling the nearest Authorized Service for the installation of the dryer, ensure that electrical installation and water drain is appropriate referring to the user’s manual. If they are not suitable, contact a qualified electrician and technician to make necessary arrangements. -
Page 9: Removing The Transportation Safety Assembly
3.3 Connecting to the drain be adversely affected and it can get damaged. You can directly drain accumulated water through the water drain hose supplied with • The rear surface of the tumble dryer shall the product instead of periodically draining the be placed against a wall. -
Page 10: Transportation Of The Dryer
3.5 Transportation of the dryer Drain all water that has remained in the dryer. If direct water drain connection is made, then remove the hose connections. WARNING! • We recommend carrying the dryer in upright position. If it is not possible to carry the machine in the upright position, we recommend carrying it by tilting towards the right side when looked from... -
Page 11: Laundry Not Suitable For Drying In The Dryer
4 Preparation • Do not add wet laundry while the dryer is in operation 4.1 Laundry suitable for drying in the • For models with a condenser unit: clean dryer the condenser once in a month or after Always obey the instructions given on the every 30 operations regularly. -
Page 12: Operating The Product
5 Operating the product 5.1 Control panel 1. Programme Selection knob 6. Start/Pause button 2. Dryness Level Adjustment button 7. End Time button 3. Audio Warning Level button 8. Favourite button 4. Display 9. Timer Programmes Selection button 5. On /Off/Cancel button 10. -
Page 13: Programme Selection And Consumption Table
5.5 Programme selection and consumption table Programmes Programme Description You may dry your cotton laundry to be ironed in Cottons Iron Dry this program to have them slightly damp for ease 1000 of ironing. (Shirt, T-shirt, tablecloth, etc.) You may dry all your cotton laundry in this program. - Page 14 You can use this program to dry your cotton Express laundry that you have spun at high speeds in 1200 your washing machine. You can dry both cotton and synthetic laundry Daily with this programme.Sports and fitness clothes 1200 may be dried with this program. You may dry denim pants, skirts, shirts or jackets Jeans 1200...
- Page 15 Volume level low Anti-creasing 0 minute Volume level high Anti-creasing 30 minute Dryness level adjustment selection Dryness level adjustment button is used to adjust the required dryness level. Programme duration can change depending on the selection. Anti-creasing 60 minute NOTE •...
-
Page 16: Warning Symbols
Changing the End time If you want to change the time during countdown: • End Time is deactivated when the dryer is switched off and on with On/Off/Cancel button. Restart the dryer and repeat the End Time procedure for the desired time. End time •... -
Page 17: Progress Of Programme
5.9.Progress of programme NOTE • For detailed information, see Maintenance and cleaning. If the water tank becomes full while the programme is running, the warning symbol will 5.10 Child Lock start to flash and the dryer will pause. Drain Machine is equipped with a Child Lock which the water in the water tank and press Start / prevents interfering with the current programme Pause button to resume the programme. -
Page 18: Canceling The Programme
5.12 Canceling the programme • Select desired programme by turning the Programme Selection knob. To cancel the programme after the dryer is started: • Press the Start/Pause button to start the program. • Press and hold Start / Pause button for Adding / removing laundry while the dryer 1 seconds to pause the programme and is in operation... -
Page 19: Maintenance And Cleaning
6 Maintenance and cleaning A layer can build up on the filter pores that can cause clogging Service life of product extends and frequently of the filter after using experienced problems will be reduced if it is the dryer for a while. cleaned at regular intervals. -
Page 20: Draining The Water Tank
6.3 Draining the water tank There is an one stage filter. This one stage filter is from sponge Dampness of the laundry is removed and To clean the filter drawer: condensed during drying process and the water that arise accumulates in the water tank. •... -
Page 21: Cleaning The Evaporator
NOTE NOTE • There may be no cloth in the filter • A dirty lint filter and filter drawer will cause cassette of your drying machine, longer drying periods and higher energy depending on its model. consumption. 6.5 Cleaning the evaporator •... -
Page 22: Troubleshooting
7 Troubleshooting Filter cleaning warning symbol/LED is on/flashing. Fibre filter might not be cleaned. >>> Clean the filter. The filter slot might be clogged with lints. >>> Clean the filter slot. Drying operation takes too long. A layer of fluff might have accumulated clogging up the lint filter Fibre filter pores might be clogged.
Need help?
Do you have a question about the DHT83LRU and is the answer not in the manual?
Questions and answers