Table of Contents
Advertisement
Available languages
Available languages
Quick Links
Refrigerator
TOP MOUNTED FREEZER SERIES
USER MANUAL
MRT18B2ASL
Warning notices: Before using this product, please read this manual carefully and keep it for future reference.
The design and specifications are subject to change without prior notice for product improvement.
Consult with your dealer or manufacturer for details.
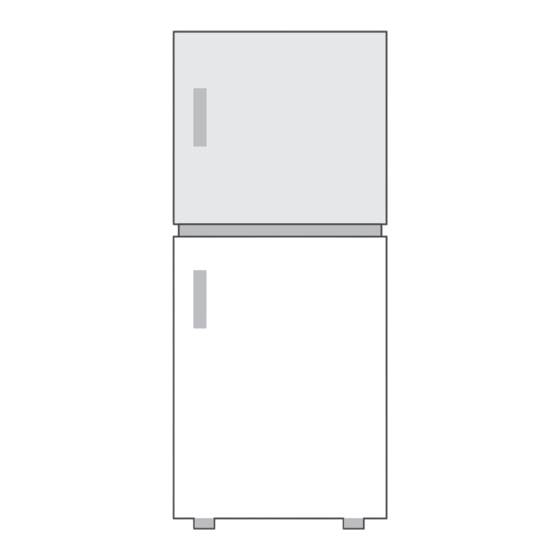
The diagram above is just for reference. Please take the appearance of the actual product as the standard.
Advertisement
Chapters
Table of Contents

Related Manuals for Midea MRT18B2ASL


Summary of Contents for Midea MRT18B2ASL
- Page 1 Refrigerator TOP MOUNTED FREEZER SERIES USER MANUAL MRT18B2ASL Warning notices: Before using this product, please read this manual carefully and keep it for future reference. The design and specifications are subject to change without prior notice for product improvement. Consult with your dealer or manufacturer for details.
-
Page 2: Table Of Contents
THANK YOU LETTER Thank you for choosing Midea! Before using your new Midea product, please read this manual thoroughly to ensure that you know how to operate the features and functions that your new appliance offers in a safe way. -
Page 3: Specifications
SPECIFICATIONS Rated Voltage 115V Rated Frequency 60Hz Rated Current 1.2A Defrost Power 180W Refrigerant, Amount R600a, 1.73oz(49g) Foaming Agent Cyclopentane... -
Page 4: Product Overview
PRODUCT OVERVIEW Names of components Shelf Fruits and vegetables box Freezer temperature control Door tray Display control panel Storage box ATTENTION The picture above is only for reference. The actual configuration will depend on the physical product or statement by the distributor. -
Page 5: Product Installation
PRODUCT INSTALLATION Install Instruction Dimensions and Clearances • Too small of a distance from adjacent items may result in the degradation of freezing capability and increased electricity costs. Allow over 100 mm of clearance from each adjacent wall when installing the appliance. >100mm Required space for air circulation... - Page 6 Space requirement diagram (when the door is open and when the door is closed) 135 ° Width Depth Overall Width Depth doors open doors open Height 1692 1270 1289 Notice: All dimensions in mm...
- Page 7 Door right-left change(Optional) List of tools to be provided by the user Allen wrench-Cross screwdriver Putty knife Thin-blade screwdriver 5/16″ socket spanner Masking tape 1. Unplug your refrigerator and remove all food from the door shelves. Remove all food from the inner door liner.
- Page 8 5. Unscrew screws of the bottom hinge, then remove the bottom hinge from the bottom right side of the refrigerator. 6. Unscrew the hinge shaft from the right side of the bottom hinge and move it to the left side, then secure the bottom hinge to the bottom left side of the refrigerator, using the screws you removed previously.
- Page 9 9. Install the refrigerator door vertically onto the bottom hinge. Take out the middle left hinge from the accessory bag then assemble the middle left hinge on the left side of the refrigerator. Middle left hinge 10. Install the freezer door vertically into the center hinge. Take out the left top hinge and left top hinge cover from accessory bag, assembly left top hinge, left top hinge cover and hole cover.
- Page 10 Installing an optional ice maker The refrigerator comes set up for ice maker installation, This refrigerator is compatible with Midea IM1900MD ice maker. Please refer to individual ice maker installation instruction manual. • WARNING: Connect to potable water supply only.
- Page 11 Leveling feet To avoid vibration, the unit must be leveled. If required, adjust the leveling screws to compensate for the uneven floor. The front should be slightly higher than the rear to aid in door closing. Leveling screws can be turned easily by tipping the cabinet slightly. Turn the leveling screws counterclockwise to raise the unit, clockwise lower it.
-
Page 12: Operation Instructions
OPERATION INSTRUCTIONS Control panal 1. Key • A. Setting button 2. Display screen • setting 1: LED1 COOL indicator • setting 2: LED2 indicator • setting 3: LED3 indicator • setting 4: LED4 indicator • setting 5: LED5 COOLEST indicator •... - Page 13 6. Setting the freezer temperature TEMP. CONTROL COLD COLDER • Turn the controls to adjust the freezer temperature. • Place frozen food into the freezer as quickly as possible after purchase. Pay attention to the storage time on the food packaging instructions. The storage life of frozen foods varies and the recommended storage time should not be exceeded.
- Page 14 Tips on storing food Freezer compartment • The freezer is designated for the storage of food frozen at very low temperature, long-term storage of frozen food, and for the production of ice. • Only use the shelves in the door of the freezer to store frozen food, not for storing hot food designated for freezing.
-
Page 15: Cleaning And Maintenance
CLEANING AND MAINTENANCE Defrost • The refrigerator is made based on the air-cooling principle and thus has automatic defrosting function. Frost formed due to change of season or temperature may also be manually removed by disconnection of the appliance from power supply or by wiping with a dry towel. Stop using Power failure: In case of power failure, even if it is in summer, foods inside the appliance can be... - Page 16 Cleaning of door tray • According to the direction arrow in the figure below, use both hands to squeeze the tray, and push it upward, then you can take it out. • After washing the tray having been taken out, you can adjust its installing height in accordance with your requirement.
-
Page 17: Troubleshooting
TROUBLESHOOTING The following simple issues can be handled by the user. Please call the after-sale service department if the issues are not solved. Problem Possible reason • Check whether the appliance is connected to power or whether the plug is in well contact Failed operation •... - Page 18 Problem Possible reason • Remove foreign matters on the door seal Door seal fails to be tight • Heat the door seal and then cool it for restoration (or blow it with an electrical drier or use a hot towel for heating) •...
-
Page 19: Warranty
U.S. and Canada. Midea Customer Service In the U.S.A. or Canada, call 1-866-646-4332. If outside the 50 States of the United States or Canada, contact your authorized Midea dealer to determine whether another warranty applies. 1 YEAR PARTS AND LABOR... - Page 20 DISCLAIMER OF REPRESENTATIONS OUTSIDE OF WARRANTY Midea makes no representations about the quality, durability, or need for service or repair of this major appliance other than the representations contained in this warranty. If you want a longer or more comprehensive warranty than the limited warranty that comes with this major appliance, you should ask Midea or your retailer about buying an extended warranty.
-
Page 21: Lettre De Remerciement
LETTRE DE REMERCIEMENT Nous vous remercions d’avoir choisi Midea ! Avant d’utiliser votre nouveau produit Midea, veuillez lire attentivement ce manuel afin de vous assurer que vous maîtrisez les caractéristiques et les fonctions de votre nouvel appareil en toute sécurité. -
Page 22: Spécifications
SPÉCIFICATIONS Tension Nominale 115V Fréquence Nominale 60Hz Courant Nominal 1.2A Puissance de Dégivrage 180W Réfrigérant, Montant R600a, 1.73oz(49g) Agent Moussant Cyclopentane... -
Page 23: Présentation Du Produit
PRÉSENTATION DU PRODUIT Noms des composants Étagère Bac à fruits et légumes Régulateur de la température Plateau de porte du congélateur Panneau de contrôle de Boîte de rangement l’affichage ATTENTION L’image ci-dessus est donnée uniquement à titre de référence. La configuration réelle dépend du produit physique ou de la notice du distributeur. -
Page 24: Installation Du Produit
INSTALLATION DU PRODUIT Instructions d’installation Dimensions et dégagements • Une distance trop petite des éléments adjacents peut entraîner une dégradation de la capacité de congélation et une augmentation des coûts d'électricité. Laissez plus de 100 mm de dégagement à partir de chaque mur adjacent lors de l'installation de l'appareil. - Page 25 Diagramme d'encombrement (porte ouverte et fermée) 135 ° Largeur des Profondeur des Largeur Hauteur totale Profondeur portes ouvertes portes ouvertes o o à 135 à 135 1 692 1 270 1 289 Remarque : Toutes les dimensions sont en mm...
- Page 26 Inverser l’ouverture de la porte (facultatif) Liste des outils à fournir par l’utilisateur Clé Allen-Tournevis cruciforme Tournevis à lame mince pour couteau à mastic Clé à douille 5/16 " Bande de masquage 1. Débranchez votre réfrigérateur et retirez tous les aliments des étagères de la porte.
- Page 27 5. Dévissez les vis de la charnière inférieure, puis retirez la charnière inférieure du côté inférieur droit du réfrigérateur. 6. Dévissez l’axe de la charnière du côté droit de la charnière inférieure et déplacez-le vers le côté gauche, puis fixez la charnière inférieure au côté inférieur gauche du réfrigérateur, à...
- Page 28 9. Installez la porte du réfrigérateur verticalement sur la charnière inférieure. Sortez la charnière centrale gauche du sac d’accessoires, puis assemblez la charnière centrale gauche sur le côté gauche du réfrigérateur. Charnière centrale gauche Middle left hinge 10. Installez la porte du congélateur verticalement dans la charnière centrale. Sortez la charnière supérieure gauche et le cache de la charnière supérieure gauche du sac d’accessoires, assemblez la charnière supérieure gauche, le cache de la charnière supérieure gauche et le cache-trou.
- Page 29 Installation d’une machine à glaçons en option Ce réfrigérateur est compatible avec la machine à glaçons Midea IM1900MD. Veuillez vous référer au manuel d’instructions d’installation de chaque machine à glaçons. • AVERTISSEMENT : À connecter uniquement à l’alimentation en eau potable.
- Page 30 Pieds réglables L'appareil doit être à niveau pour éviter toute vibration. Il faut tenir compte de l’uniformité du sol dans la mise à niveau. L'avant de la porte doit être légèrement plus haut que l'arrière pour faciliter sa fermeture. Les vis de mise à niveau peuvent être facilement tournées en inclinant légèrement l'appareil.
-
Page 31: Guide D'utilisation
GUIDE D’UTILISATION Panneau de commande 1. Touche • A. Bouton de réglage 2. Écran • Réglage 1 : Voyant FROID DEL1 • Réglage 2 : Voyant DEL2 • Réglage 3 : Voyant DEL3 • Réglage 4 : Voyant DEL4 • Réglage 5 : Voyant PLUS FROID DEL5 •... - Page 32 6. Réglage de la température du congélateur TEMP. CONTROL COLD COLDER • Tournez les commandes pour régler la température du congélateur. • Placez les aliments congelés dans le congélateur le plus rapidement possible après leur achat. Respectez la durée de conservation indiquée sur l’emballage des aliments.
- Page 33 Conseils pour la conservation des aliments Compartiment du congélateur • Le congélateur est destiné au stockage d'aliments à long terme congelés à très basse température, et à la production de glace. • N'utilisez les balconnets de porte du congélateur que pour stocker des aliments congelés, et non pour des aliments chauds destinés à...
-
Page 34: Nettoyage Et Entretien
NETTOYAGE ET ENTRETIEN Décongélation • Le réfrigérateur est fabriqué selon le principe du refroidissement par air et dispose donc d'une fonction de dégivrage automatique. Le givre formé en raison d’un changement de saison ou de température peut également être enlevé manuellement en débranchant l’appareil de l’alimentation électrique ou en l’essuyant avec une serviette sèche. - Page 35 Nettoyage du plateau de porte • Selon la flèche de direction dans la figure ci- dessous, utilisez les deux mains pour presser le plateau et poussez-le vers le haut pour pouvoir le sortir par la suite. • Après avoir lavé le casier retiré, vous pouvez ajuster sa hauteur en fonction de vos besoins.
-
Page 36: Dépannage
DÉPANNAGE Les problèmes simples suivants peuvent être traités par l’utilisateur. Appelez le service après-vente si ces problèmes ne sont pas réglés. Problème Cause possible • Vérifiez si l’appareil est branché au secteur ou si la fiche est bien en contact Échec de l’opération •... - Page 37 Problème Cause possible • Éliminez tout corps étranger sur le joint de la porte Le joint de la porte • Chauffez le joint de la porte, puis le refroidir pour le restaurer n’est pas serré. (ou soufflez dessus avec un séchoir électrique ou utilisez une serviette chaude) •...
-
Page 38: Garantie
RÉPARATION OU LE REMPLACEMENT DU PRODUIT, COMME PRÉVU AUX PRÉSENTES. Le service technique doit être assuré par une entreprise d’entretien désignée par Midea. La garantie limitée est valide uniquement dans les 50 états des États-Unis ou au Canada et s’applique uniquement si l’appareil ménager est utilisé... - Page 39 DÉNÉGATION DE DÉCLARATIONS NE RELEVANT PAS DE LA GARANTIE Midea ne fait aucune déclaration concernant la qualité ou la durabilité de cet appareil ménager, ni son besoin de service technique ou de réparation, à part les déclarations formulées dans la présente garantie.
- Page 40 2023...
Need help?
Do you have a question about the MRT18B2ASL and is the answer not in the manual?
Questions and answers