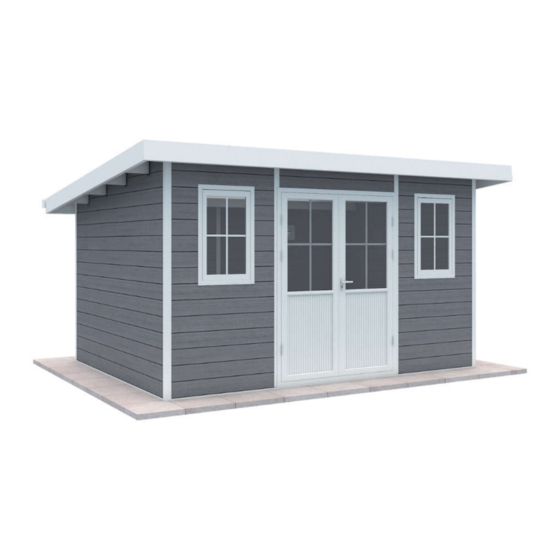
Summary of Contents for WoodLife Garden 4X3M
- Page 1 4X3M GARDEN 305mm 3861mm 305mm INSTALLATION INSTRUCTIONS NOTICE DE MONTAGE MONTAGEANLEITUNG INSTRUCIONES DE MONTAJE 11.3 m² ISTRUZIONI DI MONTAGGIO INSTRUKCJA MONTAŻU...
-
Page 2: Care And Safety Instructions
ENGLISH RECOMMENDATIONS Please read the components list BEFORE assembly, make sure that no parts are damaged or missing. Go through the complete assembly instructions again. Assemble all parts according to the instructions in this manual and do not skip any work step. Treat the wall panels with extreme care before and during assembly. -
Page 3: Back View
BACK VIEW FRONT VIEW SIDE VIEW AXONOMETRIC VIEW TOOLS REQUIRED FOR INSTALLATION Ø 8mm GARDEN... -
Page 4: Ground Requirements
ENGLISH GROUND REQUIREMENTS: Min 4100mm A good foundation is the most important fact to guarantee the safety and durability of your garden house. A foundation that is completely level and processed at right angles guarantees problem-free installation and durability of your garden shed. This is especially important for the exact fit of the doors. - Page 5 Nº STRUCTURE DESCRIPTION ZONE Aluminum bottom frame 40x35 L = 3870mm Aluminum bottom frame 40x35 L = 3870mm Aluminum bottom frame 40x35 L = 2930 mm Aluminum bottom frame 60x60 L = 2289mm Aluminum bottom frame 60x60 L = 2289mm Aluminum bottom frame 60x60 L = 1988mm Aluminum bottom frame...
- Page 6 ENGLISH Nº STRUCTURE DESCRIPTION ZONE WPC II Plank wall 160x28 L = 2845mm WPC II Plank wall 160x28 L = 293mm WPC II Plank wall 160x28 L = 1470mm WPC II Plank wall 160x28 L = 1127mm WPC II Plank wall 160x28 L = 717mm WPC II Plank wall 160x28 L = 2845mm...
- Page 7 3870.0mm 4854.0mm 4854.0mm 2930.0mm Frame out the installation area by chalk. Check the leveling before start installation – the foundation is the key point to guarantee your safe and durable garden sheds. Put the plastic expansion tube through the hole and punch into the ground, screwing into the tube as much as possible.
- Page 8 ENGLISH COLUMN POSITION VIEW Mark above important points, trying to keep them as exact as possible. GARDEN...
- Page 9 Right rear Left front Right front column column column Left rear column Put the column to the right position and fix them with L bracket and screws. Mind that there are column in different profile and height, make sure the column is vertical. GARDEN...
- Page 10 ENGLISH Fixing the door frame with connection acc. and fasten with hexagon key. NOTE: The hinges is in front of the frame. Put the door frame upon the aluminum bottom frame, fix the other column with L bracket. GARDEN...
- Page 11 Install the wall panel one by one, we suggest that we install them averagely to each Screw through each column to the wall panel every 4 pcs – making sure the columns are vertical. GARDEN...
- Page 12 ENGLISH Install the wall panels according to pictures showing above. Screwing every 4 pcs, checking the verticality of columns before screwing. Install the window kits. NOTE: These are inward opening window, no not mistake the Left and Right kits when installing. GARDEN...
- Page 13 Put the vent kits upon the 10th pcs of wall panel back side - put the short wall panel as per picture After the wallboard is installed in place in turn, fix it with screws at the connection between the top wall panel and the column(Note: keep the column Vertical) Clip the beam clip into the board slot GARDEN...
- Page 14 ENGLISH Fixing the L connectors to the beams, then put all beams into plugs, adjust the position of each beam. NOTE: The beam should extend front wall panel 265 mm. Keep as acute the extension dimension as possible. 265mm Fix the L-shaped corner code to the beam and wall panel. GARDEN...
- Page 15 Put outer beams and fix with L brackets and screws. NOTE: the position of the inner opening of the side beam shall be 650mm away from the beam. GARDEN...
- Page 16 ENGLISH Connect side outer beams to front/ back beams with L connector, then fixing them with L brackets. Fixing the connect rail between column and beams with screws. GARDEN...
- Page 17 J + K Put the roof panel upon roof beams ( grey side up ), the top side of the wall panel should be close to the top beam so one screw can be fixed, the panel should leave 10mm gap to the cover of front/ back out beams, then screw through the roof panel to the beams with roof fixing kits.
- Page 18 ENGLISH Put the gutter profile and insert the corner into the gap between roof and outer beam. Fixing the last row of roof panel with roof fixing kits, then put the gutter cover to the gutter. ( Seal some glue with caulking gun around the cover). Install downpipe (purchase separately) 75mm Bring out caulking gun and seal the joints between roof panels and front/ bottom out beams.
- Page 19 Now lets install the door – we only need align the plug on the door to the hinger on the frame and release the door. Try to open / close the door and adjust the door frame if needed – when we find out right position, fixing the door frame to the wall panel in back side with screws.
- Page 20 ENGLISH Insert the roof cover between roof panel and wall panels. - Start from the 1st piece and install one by one. Seal around the bottom frame, window kits and door frame with caulking gun to insulate the rain ( as shown in red ) GARDEN...


Need help?
Do you have a question about the 4X3M and is the answer not in the manual?
Questions and answers