
Related Manuals for WoodLife Garden 17350


Summary of Contents for WoodLife Garden 17350
- Page 1 4X3M GARDEN 305mm 3861mm 305mm INSTALLATION INSTRUCTIONS NOTICE DE MONTAGE MONTAGEANLEITUNG 11.3 m² INSTRUCIONES DE MONTAJE ISTRUZIONI DI MONTAGGIO INSTRUKCJA MONTAŻU...
-
Page 2: Care And Safety Instructions
ENGLISH RECOMMENDATIONS Please read the components list BEFORE assembly, make sure that no parts are damaged or missing. Read through the complete assembly instructions again. Assemble all parts according to the instructions in this manual and do not skip any step. Treat the wall panels with extreme care before and during assembly. - Page 3 Nº STRUCTURE DESCRIPTION ZONE Aluminum bottom frame 40x35 L = 3870 mm Aluminum bottom frame 40x35 L = 3870 mm Aluminum bottom frame 40x35 L = 2930 mm Aluminum bottom frame 60x60 L = 2289 mm Aluminum bottom frame 60x60 L = 2289 mm Aluminum bottom frame 60x60 L = 1988 mm Aluminum bottom frame...
- Page 4 ENGLISH Nº STRUCTURE DESCRIPTION ZONE WPC II Plank wall 160x28 L = 2845mm WPC II Plank wall 160x28 L = 293mm WPC II Plank wall 160x28 L = 1470mm WPC II Plank wall 160x28 L = 1127mm WPC II Plank wall 160x28 L = 717mm WPC II Plank wall 160x28 L = 2845mm...
- Page 5 FRANÇAIS RECOMMANDATIONS Avant de débuter l’installation, vérifiez que toutes les pièces nécessaires à l’assemblage sont présentes et non endommagées. Lisez entièrement la notice de montage et ne sautez aucune étape. Ne posez pas d’objets sur les panneaux muraux, ne marchez pas dessus et manipulez-les avec précaution. Deux personnes minimum sont nécessaires pour le montage de cet abri.
- Page 6 FRANÇAIS Nº PIÈCES DESCRIPTION QTÉ ZONE Cadre inférieur en alumini- um 40x35 L = 3870 mm Cadre inférieur en alumini- um 40x35 L = 3870 mm Cadre inférieur en alumini- um 40x35 L = 2930 mm Cadre inférieur en alumini- um 60x60 L = 2289 mm Cadre inférieur en alumini- um 60x60 L = 2289 mm...
- Page 7 Nº PIÈCES DESCRIPTION QTÉ ZONE Lame murale en composite 160x28 L = 2845mm Lame murale en composite 160x28 L = 293mm Lame murale en composite 160x28 L = 1470mm Lame murale en composite 160x28 L = 1127mm Lame murale en composite 160x28 L = 717mm Lame murale en composite 160x28 L = 2845mm...
- Page 8 DEUTSCH HINWEISE Vergewissern Sie sich vor Beginn der Installation, dass alle für den Zusammenbau erforderlichen Teile vorhanden und unbeschädigt sind. Lesen Sie die Montageanleitung vollständig durch und überspringen Sie keine Schritte. Legen Sie keine Gegenstände auf die Wandpaneele, treten Sie nicht darauf und gehen Sie vorsichtig damit Zum Aufbau dieses Gartenhauses sind mindestens zwei Personen erforderlich.
- Page 9 Nº TEILE BESCHREIBUNG ANZAHL ZONE Aluminium-Bodenrahmen 40x35 L = 3870 mm Aluminium-Bodenrahmen 40x35 L = 3870 mm Aluminium-Bodenrahmen 40x35 L = 2930 mm Aluminium-Bodenrahmen 60x60 L = 2289 mm Aluminium-Bodenrahmen 60x60 L = 2289 mm Aluminium-Bodenrahmen 60x60 L = 1988 mm Aluminium-Bodenrahmen 60x60 L = 1988 mm Oberer Türrahmen...
- Page 10 DEUTSCH Nº TEILE BESCHREIBUNG ANZAHL ZONE Verbundwerkstoff- Wandplatte 160x28 L = 2845mm Verbundwerkstoff- Wandplatte 160x28 L = 293mm Verbundwerkstoff- Wandplatte 160x28 L = 1470mm Verbundwerkstoff- Wandplatte 160x28 L = 1127mm Verbundwerkstoff- Wandplatte 160x28 L = 717mm Verbundwerkstoff- Wandplatte 160x28 L = 2845mm Schraube mit Kunststoffkappe 8x80 Schraube...
- Page 11 ESPAÑOL RECOMENDACIONES Antes de comenzar la instalación, verifica que todas las piezas necesarias para el montaje estén presentes y no estén dañadas. Lee las instrucciones de montaje por completo y no omitas ningún paso. No coloques objetos, pises ni manipules paneles de pared. Se necesitan dos personas como mínimo para el montaje de esta caseta.
- Page 12 ESPAÑOL CANTI- Nº PIEZAS DESCRIPCIÓN ÁREA Marco inferior de aluminio 40x35 L = 3870 mm Marco inferior de aluminio 40x35 L = 3870 mm Marco inferior de aluminio 40x35 L = 2930 mm Marco inferior de aluminio 60x60 L = 2289 mm Marco inferior de aluminio 60x60 L = 2289 mm Marco inferior de aluminio...
- Page 13 CANTI- Nº PIEZAS DESCRIPCIÓN ÁREA Hoja de pared compuesta 160x28 L = 2845mm Hoja de pared compuesta 160x28 L = 293mm Hoja de pared compuesta 160x28 L = 1470mm Hoja de pared compuesta 160x28 L = 1127mm Hoja de pared compuesta 160x28 L = 717mm Hoja de pared compuesta 160x28 L = 2845mm...
- Page 14 ITALIANO RACCOMANDAZIONI Prima di iniziare l’installazione, assicurarsi che tutte le parti necessarie per il montaggio siano presenti e non danneggiate. Leggere interamente le istruzioni di montaggio e non saltare nessun passaggio. Non appoggiare alcun oggetto sui pannelli delle pareti, non calpestarli e maneggiarli con cura. Per assemblare questa casetta sono necessarie almeno due persone.
- Page 15 Nº DESCRIZIONE Q.TÀ PARTI ZONA Telaio inferiore in alluminio 40x35 L = 3870 mm Telaio inferiore in alluminio 40x35 L = 3870 mm Telaio inferiore in alluminio 40x35 L = 2930 mm Telaio inferiore in alluminio 60x60 L = 2289 mm Telaio inferiore in alluminio 60x60 L = 2289 mm Telaio inferiore in alluminio...
- Page 16 ITALIANO Nº PARTI DESCRIZIONE Q.TÀ ZONA Fascia murale in composito 160x28 L = 2845mm Fascia murale in composito 160x28 L = 293mm Fascia murale in composito 160x28 L = 1470mm Fascia murale in composito 160x28 L = 1127mm Fascia murale in composito 160x28 L = 717mm Fascia murale in composito 160x28 L = 2845mm...
- Page 17 POLSKI ZALECENIA Przed rozpoczęciem instalacji należy upewnić się, że wszystkie części niezbędne do montażu są obecne i nieuszkodzone. Należy dokładnie przeczytać instrukcję montażu, i pod żadnym pozorem nie pomijać żadnego z kroków. Obchodź się ostrożnie z panelami ściennymi- nie kładź na nich żadnych przedmiotów i nie nadepnij na nie podczas instalacji.
- Page 18 POLSKI STRE- Nº CZĘŚCI OPIS ILOŚĆ Aluminiowa rama dolna 40x35 L = 3870 mm Aluminiowa rama dolna 40x35 L = 3870 mm Aluminiowa rama dolna 40x35 L = 2930 mm Aluminiowa rama dolna 60x60 L = 2289 mm Aluminiowa rama dolna 60x60 L = 2289 mm Aluminiowa rama dolna 60x60 L = 1988 mm...
- Page 19 Nº CZĘŚCI OPIS ILOŚĆ STREFA Kompozytowy panel ścienn 160x28 L = 2845mm Kompozytowy panel ścienn 160x28 L = 293mm Kompozytowy panel ścienn 160x28 L = 1470mm Kompozytowy panel ścienn 160x28 L = 1127mm Kompozytowy panel ścienn 160x28 L = 717mm Kompozytowy panel ścienn 160x28 L = 2845mm Śruba z plastikową...
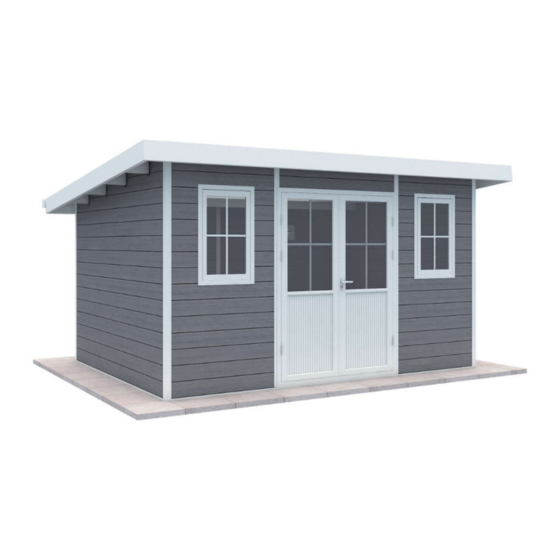
- Page 20 WOODLIFE GARDEN 4X3 TOIT PLAT BACK VIEW FRONT VIEW VUE ARRIÈRE VUE FRONTALE RÜCKANSICHT FRONTALANSICHT VISTA POSTERIOR VISTA FRONTAL VISTA POSTERIORE VISTA FRONTALE WIDOK Z TYŁU WIDOK Z PRZODU SIDE VIEW AXONOMETRIC VIEW VUE LATÉRALE PERSPECTIVE SEITENANSICHT PERSPEKTIVE VISTA LATERAL...
- Page 21 GROUND REQUIREMENTS / PRÉ-REQUIS AU SOL / BODEN-VORAUSSETZUNGEN / REQUISITOS DEL SUELO / REQUISITI DEL TERRENO / WYMAGANIA DOTYCZĄCE PODŁOŻA Min 4100mm A good foundation is one of the most important things to guarantee the safety and durability of your garden shed.
- Page 22 WOODLIFE GARDEN 4X3 TOIT PLAT 3870.0mm 4854.0mm 4854.0mm 2930.0mm Frame out the installation area by using chalk. Check the leveling before starting the installation process – the foundation is key to guarantee the safety and the durability of your garden shed(s).
- Page 23 COLUMN POSITION VIEW / POSITION DES COLONNES / POSITION DER SÄULEN / POSICIÓN DE LAS COLUMNAS / POSIZIONI DELLE COLONNE / UMIEJSCOWIENIE KOLUMN Respect the above spacing when installing the columns. Veuillez respecter l’espacement ci-dessus pour l’installation des colonnes. Bitte beachten Sie bei der Montage der Säulen die oben genannten Abstände. Respeta el espacio anterior para instalar las columnas.
- Page 24 WOODLIFE GARDEN 4X3 TOIT PLAT Left rear Right rear column column Colonne Colonne arrière gauche arrière droite Hintere linke Hintere rechte Spalte Spalte Columna Columna trasera trasera izquierda derecha Colonna Colonna posteriore posteriore sinistra destra Kolumna tylna Kolumna tylna lewa...
- Page 25 Fix the door frame with the connection acc. and fasten with the hexagon key. The hinges are in front of the frame. Assemblez les cadres de porte grâce aux connecteurs de porte et la clé Allen. Les charnières doivent être à l’avant du cadre.
- Page 26 WOODLIFE GARDEN 4X3 TOIT PLAT Install the wall panel one by one. We suggest that you install them equally to each unit so that the whole frame becomes stable. Installez la première ligne de lame murale sur chaque pan de mur et procédez de la même façon pour les autres.
- Page 27 Install the wall panels according to the picture shown above. Installez les lames murales comme illustré ci-dessus. Befestigen Sie die Wandbretter wie oben gezeigt. Instala los tablones de pared como se muestra arriba. Installare i pannelli a parete come mostrato sopra. Zainstaluj panele ścienne, jak pokazano powyżej.
- Page 28 WOODLIFE GARDEN 4X3 TOIT PLAT Put the vent kits upon the 10th board of the wall panel back side - put the short wall panel as per in the picture. Mettez les grilles de ventilation au dessus de la 10ème lame à l’arrière de l’abri. Entourez les ventilations de lames murales plus courtes comme présenté...
- Page 29 265mm Fixing the L bracket to the beams, put all beams into plugs, and adjust the position of each beam. The beam should extend the front wall panel 265 mm. Keep the extension as acute as possible. Fixez les connecteurs de poutre en L aux poutres. Positionnez les poutres dans les serre-poutres et ajustez la position.
- Page 30 WOODLIFE GARDEN 4X3 TOIT PLAT Put outer beams and fix with L brackets and screws. The position of the inner opening of the side beam should be 650 mm away from the beam. Fixez le cadre extérieur de toit latéral aux poutres grâce aux connecteurs de poutre en L. Chaque extrémité du cadre doit se trouver à...
- Page 31 Fix the outer frames of the front and the back with the L brackets. Screw the connecting rail between the last beam and the column. Fixez ensuite les cadres extérieurs de toit frontal et arrière grâce aux connecteurs en L. Vissez le rail de connexion entre la dernière poutre et la colonne.
- Page 32 WOODLIFE GARDEN 4X3 TOIT PLAT J + K Position the first roof panel (gray side out) on the beams. Make sure that the top of the wall panel is close to the center beam so that the top of the wall panel is close to the center beam. Screw the panel onto each of the beams, with the exception of the exterior side roof frame.
- Page 33 One by one, install the other panels. The next roof panel must always cover two corrugations of the previous roof panel. Un par un, installez les autres panneaux de toit. Le panneau de toit suivant doit toujours recouvrir deux ondulations du panneau de toit précédent. Installieren Sie nacheinander die anderen Dachpaneele.
- Page 34 WOODLIFE GARDEN 4X3 TOIT PLAT Position the gutters and insert the corner into the spacing between the panel and the exterior roof frame. Place the last row of screws and the exterior side of the roof frame into the panels. Position the gutter end and seal with glue using the caulking gun and the cover.
- Page 35 Install the gutter downspouts (purchased separately) 75mm. Using the caulking gun, create a joint between the roof panel and the front and rear outer roof frame. Installez la descente de gouttière (vendue en option) 75mm. A l’aide d’un pistolet, créez un joint entre le panneau de toit et le cadre de toit extérieur frontal et arrière.
- Page 36 WOODLIFE GARDEN 4X3 TOIT PLAT Now install the door – Fit the double door using the hinges. Test the opening/closing of the door and adjust if necessary. As soon as the positioning is convenient for you, screw the door frame to the back of the wall panel.
- Page 37 Insert, one after the other, the roof covers between the roof panel and the wall panel. With the help of the caulking gun, create a seal at the base, around the windows and the doors to insulate from rain (as shown in red).
- Page 38 GARDEN...
Need help?
Do you have a question about the 17350 and is the answer not in the manual?
Questions and answers