Table of Contents
Advertisement
Quick Links
OPERATION MANUAL OF TPMS SENSOR
MODEL: TMSS6A3
Thank you for choosing our TPMS. This guide instructs the technician how to properly
mount and dismount a Baolong Huf TPMS snap-in sensor.
Introduction of TMSS6A3
TMSS6A3 is the transmitting module in TPMS. Its working frequency is 315MHz;
Receiver Low frequency : 125KHz; supply:Battery;Radio frequency uses the FSK
modulation and Machester encoding mode;Antenna type:Monopole antenna,antenna
Gain:-3.7dB~-3.4dB;cable loss:3.12dB.The communication mode between WARDKS and
receiving module is RF wireless communication. The module detects pressure and
temperature inner the tire periodically and sends these information via RF output circuit to
the receiving module. One can manually detect data inner tire by LF wake-up tools. Install it
on the rim together with cycle valve.
PART ONE MOUNTING AND DISMOUNTING OF TRANSMITTER
1. Mounting of Transmitter
1.1 Identify Transmitter
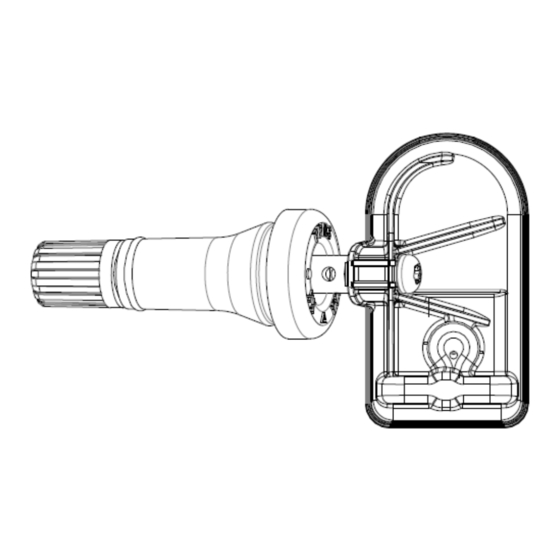
Check whether the prepared sensor is the same with the image below.
Note: Only plastic or aluminum caps, aluminum valves and nickel plated valve cores can be
used when replaced.
Self -lock Screw
①
Electronal Module
②
1
Advertisement
Table of Contents

Summary of Contents for Baolong TMSS6A3
- Page 1 Baolong Huf TPMS snap-in sensor. Introduction of TMSS6A3 TMSS6A3 is the transmitting module in TPMS. Its working frequency is 315MHz; Receiver Low frequency : 125KHz; supply:Battery;Radio frequency uses the FSK modulation and Machester encoding mode;Antenna type:Monopole antenna,antenna Gain:-3.7dB~-3.4dB;cable loss:3.12dB.The communication mode between WARDKS and...
- Page 2 1.2 Before the transmitter is installed, the rim around the hole must be cleaned with a cloth. ① 1.3 Remove the Self-lock Screw , insert the valve stem Inside the ty re Outside the ty re through the rim hole from inside. ①...
- Page 3 found, put on the valve cap○ . If unsuccessful, try again. 1.8 Dynamically balance the wheel before it is placed back on the vehicle. 2. Dismounting of Transmitter 2.1 Deflate the tyre and remove the wheel weights from the rim. Push the tyre bead away from the rim. Make sure to always set the bead breaker at least 90 degrees from the valve stem to avoid damaging the electronic module.
- Page 4 Owner’s Manual. All components are covered for one year following the date of purchase. If the warranty period specified in local law exceeds the period provided by Baolong Huf, the former will supersede the latter.
- Page 5 prepaid. The owner is responsible for any labor and installation charges. The warranty does not include any further obligation whatsoever, including but not limited to actual installation of the replacement unit on the customer’s vehicle. All other Warranties, expressed or implied, are disclaimed. All collateral agreements, which purport to modify this limited warranty, are of no effect.
- Page 6 Gewerbestraße 40 D-75015 Bretten NOTE:Baolong Huf Shanghai Electronics Co.,Ltd. reserves the right to change the contents of this manual at any time without notice. The information contained in this manual is propriet ary and must not be reproduced without prior written consent from Baolong Huf Shanghai Electronics Co.,Ltd.


Need help?
Do you have a question about the TMSS6A3 and is the answer not in the manual?
Questions and answers