Table of Contents
Advertisement
Available languages
Available languages
Quick Links
https://tehnoteka.rs
Uputstvo za upotrebu
FOX televizor 32AOS411C
Tehnoteka je online destinacija za upoređivanje cena i karakteristika bele tehnike,
potrošačke elektronike i IT uređaja kod trgovinskih lanaca i internet prodavnica u Srbiji.
Naša stranica vam omogućava da istražite najnovije informacije, detaljne karakteristike
i konkurentne cene proizvoda.
Posetite nas i uživajte u ekskluzivnom iskustvu pametne kupovine klikom na link:
https://tehnoteka.rs/p/fox-televizor-32aos411c-akcija-cena/
Advertisement
Chapters
Table of Contents

Related Manuals for Fox 10AOS41/C


Summary of Contents for Fox 10AOS41/C
- Page 1 Uputstvo za upotrebu FOX televizor 32AOS411C Tehnoteka je online destinacija za upoređivanje cena i karakteristika bele tehnike, potrošačke elektronike i IT uređaja kod trgovinskih lanaca i internet prodavnica u Srbiji. Naša stranica vam omogućava da istražite najnovije informacije, detaljne karakteristike i konkurentne cene proizvoda.
- Page 2 Model:10AOS41/ C 2 / 106...
- Page 3 3 / 106...
-
Page 4: Table Of Contents
Table Of Contents Safety Information............ Important Safety Precautions......... TV Bracket assemble .......... 4 TV Buttons And Terminal Interface .......... External Device Connection Diagram ........Install And Connect TV ..........TV Stand Installation Instructions ..................8 TV MENU Setup Wizard . -
Page 7: Tv Bracket Assemble
F ix t he T V o n the w all 1.First,put the TV on the table smoothly and put some soft cloth on the table to avoid scratching the screen. 2.User the screw driver to take off the screws which are fixed on the bottom stand (the direction of the arrow, refer to the ptoto1).And take off the bottom stand(please take off the screws and bottom stand carefully). -
Page 8: Tv Buttons And Terminal Interface
AV input INPUT External AV Signal Input and VIDEO Right/Left Audio Inputs. HDMI Input(HDMI1,2,3) USB Input Connect to a HDMI output Connect to your USB device. HDMI connection on your external device. ANT 75/RF Connection OPTICAL Connect to the antenna/cable TV Digital Audio Output. -
Page 11: Tv Menu
Setup Wizard The system setting will appear when you open the TV on the first time.Please set according to the on-screen guide.Press OK button to start the setup. Press button to select the language. ▼ ▲ Press ◄ / ► button to choose the country. - Page 12 Press ◄ / ► button to select Time zone. Press ◄ / ► button to select Home/Store mode. Press ◄ / ► button to select Set your TV network.
- Page 13 Press ◄ / ► button to select Connect the TV assistant. Press ◄ / ► button to select Set Password(Default password is 1234). Press ◄ / ► button to select TV viewing guide. Press button to choose the way you watch TV programs or source: Home page/DTV/ATV/ ▼...
-
Page 14: Home Page
Home page button to select Home page in Setup Wizard or press ◄ / ► button to select Home in the Press ▼ ▲ menu o nput . - Page 15 SETTINGS Press ▼ ▲ / ◄ / ► button to select Setting,and press OK button to enter the System Setting. Press ◄ / ► button to select Network/Time/Commen/System Info. Network Press ◄ / ► button to select Network.
- Page 16 Time Press ◄ / ► button to select Time. Press button to select Auto Attach/Time Zone/Daylight Saving/Time Edit/Date Format/ ▼ ▲ 24 Hours/Screen saver time/Sleep Timer. Auto Attach Get the current time and date automatically. Time Zone Set the current time zone. Daylight Saving Set the daylight saving Auto/On/Off.
- Page 17 Common Press ◄ / ► button to to select Common. Press button to select Language/Input Method/WallPaper/System Recovery/ ▼ ▲ The device name/HDR. Language Set the current display language.The default language is English. Input Method Set the remote controller input method. WallPaper Set the Wallpaper.
- Page 18 System Info Press ◄ / ► button to to select System Info.
-
Page 19: Media
Media Press / ◄ / ► button to select Media on the Home page or press MEDIA button on the ▼ ▲ remote,and press OK button to enter enter the Media Center. Press ◄ / ► button to select All/Video/Audio/Image. Video Press button to select Video or All,and press... - Page 20 Aspect Ratio Press ▼ ▲ button to select Aspect Ratio. Audio Track Press▼ ▲ button to select Audio Track and press OK button to select. Subtitle Track Press ▼ / ▲ button to select Subtitle Track and press OK button to select close. Encoding Standard Press ▼...
- Page 21 Audio Press button to select Audio or All,and press /◄ / ► button to select Music. ▼ ▲ ▼ ▲ Play List Press button to select Play List and press OK button to display all available audios. ▼ ▲ Play Mode Press ▼...
-
Page 22: Input
Input Press /◄ / ► button to select More under the “WISDOM SHARE” on the Home page. ▼ ▲ Press ◄ / ► button to select DTV/ATV/AV1/AV2/YPBPR/HDMI1/HDMI2/HDMI3. Or press Menu button,and press ◄ / ► button to select Source. Press button to select the input source you want. -
Page 23: Tv Setting
TV Setting ress MENU button to enter the TV Setting. ress ◄ ► button to highlight the desired menu icon , and press OK button to select. ( Optional:Home/Source/Picture/Sound/Channel/Lock/Common/Advance) - Page 24 Picture ress MENU button to enter the main menu. Press ◄ ► button to select the Picture. Press OK button to enter the sub-menu. Press button to select Picture Mode/Contrast/Brightness/Color/Sharpness/Backlight/Noise Reduction/ Aspect Ratio/Color Temp/More Settings. Press MENU or EXIT button to quit.
- Page 25 icture Mode Highlight the item and press OK button to enter the sub-menu, that shows the picture mode you can choose button to select Standard/Dynamic/Vivid/ nergy Saving/User. Press ◄ / ► Standard Produces a standard image. Dynamic Enhance the contrast ,color and clarity of the screen, so that the picture in the dynamic will balance the color.
- Page 26 Color Temp Adjust the overall color of the image. Press ▼ ▲ button to select Color Temp. Press ◄ / ► button to select Cool/Normal/Warm. Cool The picture is in favor of green-blue and less red. The whole color is in favor of light. The picture is more fresh and elegant.
- Page 27 Sound MENU utt e te t e t selec es OK utt elec de S u ut Bass e le Bala ce A ul t es MENU EXIT utt ound Mode elec elec ta da d us c e s/ se ta da ala ced cu sta ces...
- Page 28 Bass Adjust t e l e ue c s u ds. ess▼ ▲ utt elec B djust Treble Adjust t e e ue c s u ds. ess▼ ▲ utt elec e le djust Balance Bala ce t select Bala ce djust t select A t selec...
- Page 29 More Settings te t e su - e u ess▼ ▲ utt elec e Sett ess O Digital Audio Output ta Aud ut ut t select t selec SPDIF Delay t select t selec Surround t select S u d. t selec Back Adjust...
- Page 30 Channel ress MENU button to enter the main menu. Press ◄ ► button to select Channel. Press OK button to enter the sub-menu. Press button to select Scan/Channel List. Press MENU or EXIT button to quit. Scan Press ▼ button to select Scan.Press OK button to enter the sub-menu. ▲...
- Page 31 Auto Scan Automatic search can search for effective program channel automatically. Press ▼ button to select Auto Scan, then press OK button to start auto search ▲ If you want to stop searching, press EXIT or MENU button to stop searching. Analog Manual Scan Analog manual search can search for effective simulation program channel manually.
- Page 32 Channel List View all of the existing programs. Press button to select Channel List. Press OK button to enter the sub-menu. Press ▼ ▲ button to select All/Favorite. Press ▼ button to select All.Press MENU button to edit the program. ▲...
- Page 33 Press button to select Antenna Type/Scan/Signal Information/Subitle/Channel List/EPG/CI Card. Press MENU or EXIT button to quit. Antenna Type Press ▼ button to select Antenna Type.Press ◄ ► button to select Air/Cable/Satellite. ▲ Scan Press ▼ button to select Scan.Press OK button to enter the sub-menu. ▲...
- Page 34 Auto Scan Automatic search can search for effective program channel automatically. Press ▼ button to select Auto Scan, then press OK button to start auto search ▲ If you want to stop searching, press EXIT or MENU button to stop searching. Press button to select LCN.
- Page 35 Digital Manual Scan Digital manual search can search for effective simulation program channel manually. Press button to select Digital Manual Scan , and press OK button to enter the sub- menu. Press EXIT or MENU button to quit. Signal Information Press button to select Signal Information...
- Page 36 Press ▼ ▲ button to select All/Favorite/DTV/Radio/Encrypt/HD/Free/Data. Press ▼ ▲ button to select All.Press MENU button to edit the program. (Optional:Favorite/Delete/Skip.) If the program is selected as an analog signal, the program can be renamed. Favorite Press ▼ button to select Favorite.Press MENU button to edit the Favorite Channel.
- Page 37 DVB-S In DTV source,set the Antenna Type as Satellite.(It only available with DVB-S funtion.) Press button to select Antenna Type/Scan/Signal Information/Subtitle/Channel List/EPG/CI Card. Press MENU or EXIT button to quit. Antenna Type Press ▼ ▲ button to select Antenna Type.Press ◄...
- Page 38 Start Auto Tuning All LNBs Press button to select and press OK button to start scan to search programs. Signal Information Press button to select Signal Information and press OK button to view. Subtitle Press button to select Subtitle .Press ENTER& button to select.
- Page 39 Press ▼ ▲ button to select All/Favorite/DTV/Radio/Data/Encrypt/HD/Free/Astra1. Press ▼ ▲ button to select All.Press MENU button to edit the program. (Optional:Move/Top/Favorite/Delete/Skip.) Favorite Press ▼ ▲ button to select Favorite.Press MENU button to edit the Favorite Channel. (Optional:Favorite/Delete.) ATV/DTV/Radio/Encrypt/HD/Free/Data/Astra1 are type of program. Astra1 only availabl hen adding the Astra1 n the...
- Page 40 Lock ress MENU button to enter the main menu. Press ◄ ► button to select Lock. Press OK button to input password to enter the sub-menu.(Default password is 1234) Press button to select Change Password/System Lock/ Key Lock. ▼ ▲ Change Password .Press ENTER button to Press...
- Page 41 Common ress MENU button to enter the main menu. Press ◄ ► button to select Common. Press OK button to enter the sub-menu. Press button to select PVR Setting/Timer Settingsr/B lue Screen/Teletext/ ▼ ▲ Audio Language 1st/Audio Language 2nd/Subtitle Language 1st/Subtitle Language 2nd/ HDMI CEC Setup/Store Mode/Hotel Mode/MenuReset.
- Page 42 OSD Timer Press button to select OSD Timer. Press ◄ ► button to select Off/5sec/ sec/30sec/40sec. Autostandby Timer Press button to select Autostandby Timer. / 4hour /5hour. Press ◄ ► button to select Off/ 3hour Sleep Timer Press button to select Sleep Timer. Press ◄...
- Page 43 Blue Screen Set the background color to blue when there is no input signal. Press button to select Blue Screen.Press ◄ ► button to select On/Off. Teletext Press button to select Teletext. Press ◄ ► button to select Arabic/East/West Euro/Farsi/Russian Audio Language 1st .Press ENTER&...
- Page 44 HDMI CEC Setup Press ▼ button to select HDMI CEC Setup. ▲ Press OK button to enter the sub-menu. Press ▼ ▲ button to select CEC/TV Auto Power On/Device Auto Power Off/Device List. Note: All the Options are available only when the select Press ▼...
- Page 45 Hotel Mode ode. Press ▼ ▲ button to select Hotel Press OK button to enter the sub-menu. Hotel Mode Press ▼ ▲button to select Hotel Mode, and then press◄ ► button to select ON/OFF. Other menu only available on Hotel Mode set “ON” Source Lock Press ▼...
- Page 46 Export To USB Insert an USB device, and press ▼ ▲button to select Export To USB, and then press OK button to export data. Restore From USB Insert an USB device, and press ▼ ▲button to select Restore From USB, and then press OK button to restore data from USB.
- Page 47 Store mode Press ▼ button to select Store mode.Press ◄ / ► to select On/Off. ▲ Menu Reset Recall the default setting. Press button to select Menu Reset. ▼ ▲ Press OK button to enter the sub-menu. Advance Press MENU button to enter the main menu. Press ◄...
-
Page 48: Help
48 / 106... -
Page 49: Specifications
Specifications 24” 31W/36W/40W 32” 32W/40W/56W 60W/70W/76W/90W 39”/40” 42” 65W/67W/70W/90W 43” 70W/80W/90W 50” 108/100W/120W 55” 110W/ 118W/ 135W 58” 120W/ 135W/ 160W 65”/ 70”/ 75” 160W/180W/195W/250W LIFE TIME : 60,000 Hrs Operation Frequency Transmitting Power WiFi 2400~2483.5 Less Than 100mW Manufactured under license from Dolby Laboratories. Dolby,Dolby Audio,and the double-D symbol are trademarks of Dolby Laboratories Licensing Corporation. -
Page 50: Remote Controller
50 / 106... - Page 51 51 / 106...
- Page 52 SUGGESTION To make it more convenient for base installation and to avoid any risk of scratches and damage, we advise you using the type of PH2 screwdriver. WARNING Never place a television set in an unstable location. A television set may fall, causing serious personal injury or death.
- Page 53 53 / 106...
- Page 54 MODEL: 40AOS410C 54 / 106...
- Page 55 55 / 106...
- Page 56 SADRŽAJ Upustvo za in instalaciju postolja TV MENU Čarobnjak za podešavanje Početna stranica Mediji Ulaz TV Podešavanja Pomoc Specifikacija Daljinski Upravljač 56 / 106...
- Page 57 57 / 106...
- Page 58 58 / 106...
- Page 59 NAPOMENA UKOLIKO PROGRAM PRATITE PUTEM KABLOVSKE TELEVIZIJE PROVERITE DA LI JE PROPISNO IZVEDENO UZEMLjENjE I IZJEDNAČAVANjE POTENCIJALA NA KABLU VAŠEG KABLOVSKOG OPERATERA. ZA OVE INFORMACIJE KONTAKTIRAJTE VAŠEG KABLOVSKOG OPERATERA. 59 / 106...
- Page 60 TV dugmici: Napomena: Ključna uputstva su naveden u nastavku. Displej/Sakrij taster ikone: kada se ikonica ne pojavljuje pritisnite taster,ikonica će se pojaviti kao slika prikazana gore, automatski se isključuje nakon 5 sekundi ne aktivnosti. Icon selection: Short press the button, move the loop to the right, select the icon. Izbor ikona: Kratko pritisnite dugme, pomerite udesno, izaberite ikonu.
- Page 61 61 / 106...
-
Page 62: Upustvo Za In Instalaciju Postolja
62 / 106... -
Page 63: Tv Menu
Čarobnjak za podešavanje Podešavanje sistema će se pojaviti kada prvi put uključite TV. Obavite podešavanje u skladu sa vodičem na ekranu. Pritisnite taster OK da biste započeli podešavanje. Pritisnite taster ▼ / ▲ da izaberete jezik. Pritisnite taster ◄ / ► da izaberete državu. - Page 64 Pritisnite taster ◄ / ► da izaberete Vremensku zonu Pritisnite taster ◄ / ► da izaberete režim Početna/Prodavnica. Pritisnite taster ◄ / ► da izaberete Podesite svoju TV mrežu.
- Page 65 Pritisnite taster ◄ / ► da izaberete Povežite TV pomoćnika. Pritisnite taster ◄ / ► da izaberete Postavite lozinku (podrazumevana lozinka je 1234). Pritisnite dugme ◄ / ► da izaberete Vodič za gledanje TV-a. Pritisnite dugme ▼ / ▲ da izaberete način na koji gledate TV programe ili izvor: Početna stranica/DTV/ATV/ AV1/AV2/HDMI1/HDMI2/HDMI3.
-
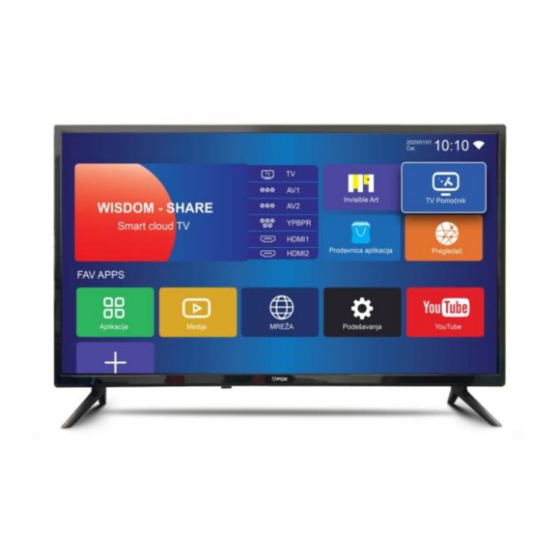
Page 66: Početna Stranica
Početna stranica Pritisnite taster ▼ / ▲ da izaberete Početnu stranicu u Čarobnjaku za podešavanje ili pritisnite taster ◄ / ► da izaberete Početnu stranicu u meniju TV ulaza. - Page 67 PODEŠAVANJA Pritisnite taster ▼ / ▲ / ◄ / ► da izaberete Podešavanja, a zatim pritisnite taster OK kako biste ušli u Podešavanja sistema. Pritisnite taster ◄ / ► da izaberete Mreža/Vreme/Opšte/Informacije o sistemu. Mreža Pritisnite taster ◄ / ► da izaberete Mrežu.
- Page 68 Vreme Pritisnite taster ◄ / ► da izaberete Vreme. Pritisnite taster ▼ / ▲ da izaberete Auto Attach/Time Zone/Daylight Saving/Time Edit/Date Format/ 24 Hours/Screen saver time/Sleep Timer. Automatski dobijte trenutno vreme i datum. Auto Attach Podesite trenutnu vremensku zonu. Time Zone Podesite letnje računanje vremena Automatsko/Uključeno/Isključeno.
- Page 69 Opšte Pritisnite taster ◄ / ► da izaberete Opšte. Pritisnite taster da izaberete Language/Input Method/WallPaper/System Recovery/ ▼ ▲ The device name/HDR. Language Podesite trenutni jezik prikaza. Podrazumevani jezik je engleski. Podesite metod unosa daljinskog upravljača. Input Method Postavite pozadinu. WallPaper Sistem oporavka u prvobitno stanje.
- Page 70 Informacije o sistemu Pritisnite taster ◄ / ► da izaberete Informacije o sistemu.
-
Page 71: Mediji
Mediji Pritisnite taster ▼ / ▲ / ◄ / ► da izaberete Medije na početnoj stranici ili pritisnite taster MEDIA na daljinskom upravljaču i pritisnite taster OK kako biste ušli u Media centar. Pritisnite taster ◄ / ► da izaberete Sve/Video/Audio/Slika. Video Pritisnite taster ▼... - Page 72 Raspon aspekta Pritisnite taster ▼ / ▲ da izaberete Raspon aspekta. Audio zapis Pritisnite taster ▼ / ▲ da izaberete Audio zapis i pritisnite taster OK da biste ga izabrali. Traka sa titlovima Pritisnite taster ▼ / ▲ da izaberete Traku sa titlovima i pritisnite taster OK da biste je izabrali.
- Page 73 Audio Pritisnite taster ▼ / ▲ da izaberete Audio ili Sve, a zatim pritisnite taster ▼ / ▲ /◄ / ► da biste izabrali Muziku. Play List Pritisnite taster ▼ / ▲ da izaberete Play List-u i pritisnite taster OK da prikažete sve dostupne audio zapise. Play Mode Pritisnite taster ▼...
-
Page 74: Ulaz
Ulaz Pritisnite taster ▼ / ▲ /◄ / ► da izaberete Više pod “WISDOM SHARE” na Početnoj stranici. Pritisnite taster ◄ / ► da izaberete DTV/ATV/AV1/AV2/YPBPR/HDMI1/HDMI2/HDMI3. Ili pritisnite taster Meni i pritisnite taster ◄ / ► da izaberete Izvor. Pritisnite taster ▼ / ▲ da izaberete izvor ulaza koji želite. Pritisnite taster OK da biste ušli u meni. -
Page 75: Tv Podešavanja
TV Podešavanja Pritisnite taster MENI kako biste ušli u TV Podešavanja. Pritisnite taster ◄ / ► da biste obeležili željenu ikonicu menija, a zatim pritisnite taster OK da biste je izabrali. (Opcionalno: Početna/Izvor/Slika/Zvuk/Kanal/Zaključavanje/Opšte/Napredno) - Page 76 Slika Pritisnite taster MENI da uđete u glavni meni. Pritisnite taster ◄ / ► da izaberete Sliku. Pritisnite taster OK da uđete u podmeni. Pritisnite taster ▼ / ▲ da izaberete Režim slike/Kontrast/ Raspon aspekta/Temperatura boje/Više podešavanja. Pritisnite taster MENI ili EXIT kako biste izašli.
- Page 77 Režim slike Označite stavku i pritisnite taster OK da biste ušli u podmeni, koji prikazuje režim slike koji možete izabrati. da izaberete Standard/Dynamic/Vivid/Energy Saving/User. Pritisnite taster ◄ / ► Proizvodi standardnu sliku. Standard Dynamic Poboljšava kontrast, boju i jasnoću ekrana, tako da će slika u Dynamic režimu uravnotežiti boju.
- Page 78 Temperatura boje Podesite sveobuhvatnu boju slike. Pritisnite taster ▼ / ▲ da izaberete Temperaturu boje. Pritisnite taster ◄ / ► da izaberete Cool/ Normal/ Warm. Cool Slika je u korist zeleno-plave i manje crvene boje. Celokupna boja je u korist svetlosti. Slika je svežija i elegantnija. Normal Slika ne daje prednost nijednoj boji.
- Page 79 Zvuk Pritisnite taster MENI da uđete u glavni meni. Pritisnite taster ◄ / ► da izaberete Zvuk. Pritisnite taster OK da uđete u podmeni. Pritisnite taster ▼ / ▲ da izaberete Sound Mode/Sound Out/Bass/Treble/Balance/AVC/Mulit-Track Sound /More Settings. Pritisnite taster MENI ili EXIT da biste izašli. Režim zvuka Pritisnite taster...
- Page 80 Podesite zvukove niske frekvencije. Pritisnite taster ▼ / ▲ da izaberete Bas. Pritisnite taster ◄ / ► da biste ga podesili. Visoki tonovi Podesite zvukove visoke frekvencije. Pritisnite taster ▼ / ▲ da izaberete Visoke tonove. Pritisnite taster ◄ / ► da biste ih podesili. Balans Balansirani levi i desni kanali.
- Page 81 Više podešavanja Pritisnite taster ▼ / ▲ da izaberete Više podešavanja. Pritisnite taster OK kako biste ušli u podmeni. Digital Audio Output Pritisnite taster ▼ / ▲ da izaberete Digital Audio Output. Pritisnite taster ◄ / ► da izaberete Isključeno/PCM/RAV. SPDIF Delay Pritisnite taster ▼...
- Page 82 Kanal Pritisnite taster MENI da uđete u glavni meni. Pritisnite taster ◄ / ► kako biste izabrali Kanal. Pritisnite taster OK da uđete u podmeni. Pritisnite taster ▼ / ▲ da izaberete Skeniranje/Lista kanala. Pritisnite taster MENI ili EXIT da biste izašli. Skeniranje Pritisnite taster ▼...
- Page 83 Automatsko skeniranje Automatska pretraga može automatski tražiti efektivnu listu programskih kanala. Pritisnite taster ▼ / ▲ da izaberete Automatsko skeniranje, a zatim pritisnite taster OK kako biste pokrenuli automatsku pretragu. Ako želite da prekinete pretragu, pritisnite taster EXIT ili MENI da biste zaustavili pretragu. Analogno ručno skeniranje Analogna ručna pretraga može ručno tražiti kanal efektivnog simulacionog programa.
- Page 84 Lista kanala Pogledajte sve postojeće programe. Pritisnite taster ▼ / ▲ da izaberete Listu kanala. Pritisnite taster OK da uđete u podmeni. Pritisnite taster ▼ / ▲ kako biste izabrali Sve/Omiljeno. Pritisnite taster ▼ / ▲ da izaberete Sve. Pritisnite taster MENI kako biste uredili program. (Opcionalno: Pomeri/Na vrh/Omiljeno/Preimenuj/Izbriši/Preskoči.) Ako je program izabran u vidu analognog signala, program se može preimenovati.
- Page 85 Pritisnite taster ▼ / ▲ da izaberete Tip antene/Skeniranje/Informacije o signalu/Titl/Lista kanala/EPG/CI kartica. Pritisnite taster MENI ili EXIT kako biste izašli. Tip antene Pritisnite taster ▼ / ▲ da izaberete Tip antene. Pritisnite taster ◄ / ► da izaberete Air/Cable/Satellite. Skeniranje Pritisnite taster ▼...
- Page 86 Automatsko skeniranje Automatska pretraga može automatski tražiti efektivnu listu programskih kanala. Pritisnite taster ▼ / ▲ da izaberete Automatsko skeniranje, a zatim pritisnite taster OK kako biste pokrenuli automatsku pretragu. Ako želite da prekinete pretragu, pritisnite taster EXIT ili MENI da biste zaustavili pretragu. Pritisnite taster ▼...
- Page 87 Digitalno ručno skeniranje Digitalna ručna pretraga može ručno tražiti kanal efektivnog simulacionog programa. Pritisnite taster ▼ / ▲ da izaberete Digitalno ručno skeniranje i pritisnite taster OK da biste ušli u podmeni. Pritisnite taster EXIT ili MENI da biste zaustavili pretragu Informacije o signalu Pritisnite taster ▼...
- Page 88 Pritisnite taster ▼ / ▲ da izaberete All/Favorite/DTV/Radio/ Encrypt/HD/Free/Data. Pritisnite taster ▼ / ▲ da izaberete Sve. Pritisnite taster MENI da biste uredili program. (Opcionalno: Omiljeno/Izbriši/Preskoči.) Ako je program izabran u vidu analognog signala, program se može preimenovati. Omiljeno Pritisnite taster ▼ / ▲ da izaberete Omiljeno. Pritisnite taster MENI da uredite omiljeni kanal. (Opcionalno: Omiljeno/Izbriši.) ATV/DTV/Radio/Encrypt/HD/Free/Data su vrsta programa.
- Page 89 DVB-S U DTV izvoru, podesite tip antene kao satelit. (Dostupan je samo sa DVB-S funkcijom.) Pritisnite taster ▼ / ▲ da izaberete Tip antene/Skeniranje/Informacije o signalu/Titl/Lista kanala/EPG/CI kartica. Pritisnite taster MENI ili EXIT da biste izašli. Tip antene Pritisnite taster ▼ / ▲ da izaberete Tip antene. Pritisnite taster ◄ / ► da izaberete Air/Cable/Satellite. Skeniranje Pritisnite taster ▼...
- Page 90 Pokretanje automatskog podešavanja svih LNB-ova Pritisnite taster ▼ / ▲ da izaberete i pritisnite taster OK kako biste započeli skeniranje za pretragu programa. Informacije o signalu Pritisnite taster ▼ / ▲ da izaberete Informacije o signalu. Pritisnite taster ENTER&▼ / ▲ da izaberete prikaz. Titl Pritisnite taster ▼...
- Page 91 Pritisnite taster ▼ / ▲ da izaberete All/Favorite/DTV/Radio/Data/Encrypt/HD/Free/Astra1. Pritisnite taster ▼ / ▲ da izaberete Sve. Pritisnite taster MENI kako biste uredili program. (Opcionalno: Pomeri/Na vrh/Omiljeno/Izbriši/Preskoči.) Omiljeno Pritisnite taster ▼ / ▲ da izaberete Omiljeno. Pritisnite taster MENI da uredite omiljeni kanal. (Opcionalno: Omiljeno/Izbriši.) ATV/DTV/Radio/Encrypt/HD/Free/Data/Astra1 su vrste programa.
- Page 92 Zaključavanje Pritisnite taster MENI da uđete u glavni meni. Pritisnite taster ◄ / ► da izaberete Zaključavanje. Pritisnite taster OK da unesete lozinku za ulazak u podmeni. (Podrazumevana lozinka je 1234). Pritisnite taster ▼ / ▲ da izaberete Promena lozinke/Zaključavanje sistema/Zaključavanje tastera. Promena lozinke Pritisnite taster ▼...
- Page 93 Opšte Pritisnite taster MENI da uđete u glavni meni. Pritisnite taster ◄ / ► da izaberete Opšte. Pritisnite taster OK da uđete u podmeni. Pritisnite taster ▼ / ▲ da izaberete PVR Setting/Timer Settings/Blue Screen/Teletext/ Audio Language 1./Audio Language 2./ Subtitle Language 1./ Subtitle Language 2./ HDMI CEC Setup/ Store Mode/Hotel Mode/MenuReset.
- Page 94 OSD tajmer Pritisnite taster ▼ / ▲ da izaberete OSD tajmer. Pritisnite taster ◄ / ► da izaberete Isključeno/5sec/15sec/30sec/40sec. Tajmer automatskog mirovanja Pritisnite taster ▼ / ▲ da izaberete Tajmer automatskog mirovanja. Pritisnite taster ◄ / ► da izaberete Isključeno/3 sata/4 sata/5 sati. Tajmer za režim spavanja Pritisnite taster ▼...
- Page 95 Plavi ekran Postavite boju pozadine na plavu kada nema ulaznog signala. Pritisnite taster ▼ / ▲ da izaberete Plavi ekran. Pritisnite taster ◄ / ► da izaberete Uključeno/Isključeno. Teletext Pritisnite taster ▼ / ▲ da izaberete Teletext. Pritisnite taster ◄ / ► da izaberete arapski/istočni/zapadni evropski/farsi/ruski. Audio jezik 1 Pritisnite taster ▼...
- Page 96 HDMI CEC podešavanje Pritisnite taster ▼ / ▲ da izaberete HDMI CEC podešavanje. Pritisnite taster OK da uđete u podmeni. Pritisnite taster ▼ / ▲ da izaberete CEC/TV automatsko uključivanje/automatsko isključivanje uređaja/Lista uređaja. Napomena: Sve opcije su dostupne samo kada je CEC uključen . Pritisnite taster ▼...
- Page 97 Hotelski režim Pritisnite taster ▼ / ▲ da izaberete Hotelski režim. Pritisnite taster OK da uđete u podmeni. Hotelski režim Pritisnite taster ▼ /▲ da izaberete Hotelski režim, a zatim pritisnite taster ◄/ ► da izaberete UKLJUČENO/ISKLJUČENO. Drugi meni dostupan samo u Hotelskom režimu postavljenom na “UKLJUČENO”. Zaključavanje izvora Pritisnite taster ▼...
- Page 98 Izvoz na USB Umetnite USB uređaj i pritisnite taster ▼ /▲ da izaberete Izvoz na USB, a zatim pritisnite taster OK kako biste izvezli podatke. Vrać anje sa USB-a Umetnite USB uređaj i pritisnite taster ▼ /▲ da izaberete Vraćanje sa USB -a, a zatim pritisnite taster OK kako biste vratili podatke sa USB-a.
- Page 99 Režim prodavnice Pritisnite taster ▼ / ▲ da izaberete Režim prodavnice. Pritisnite ◄ / ► da izaberete Uključeno/Isključeno. Resetovanje menija Povraćaj podrazumevanih podešavanja. Pritisnite taster ▼ / ▲ da izaberete Reset menija. Pritisnite taster OK da uđete u podmeni. Napredno Pritisnite taster MENI da uđete u glavni meni.
-
Page 100: Pomoc
Pomo Proverite da li je kabl za napajanje TV-a uključen. Ukoliko I dalje nema struje isključite Nema struje ga I nakon 60 sek. uključite ponovo. Moguće je da se prikaže dvostruka slika ili fantomska slika ako postoji visoka zgrada ili planina u blizini. -
Page 101: Specifikacija
Veličina ekrana Potrošnja električne energije Dodaci 24” 31W/36W/40W 32” 32W/40W/56W 60W/70W/76W/90W 39”/40” Uputstvo za upotrebu x1 Daljinski upravljač x1 65W/67W/70W/90W 42” Naponski kabl x1 AAA Baterija x2 70W/80W/90W 43” 50” 100W/108W/120W 55” 110W/118W/135W 58” 120W/135W/160W 65”/70”/75” 160W/180W/195W/250W Vek trajanja: 60.000 sati Operation Frequency Transmitting Power WiFi... -
Page 102: Daljinski Upravljač
Daljinski Upravljač 8. ENTER: Potvrda odabira. 9. EXIT: Pritisnuti za izlazak iz menija. 10. DISPLAY: Pritisnuti da se pokaže izvor slike i broj kanala. 11. VOL+: Pojačati zvuk. 12. REFERSH: Osvežiti stranicu. 13. HOLD: Zadržati trenutni display. 14. VOL-: Smanjiti zvuk. 15. - Page 103 PREDLOG Kako bi se osnovna instalacija učinila jednostavnijom i kako bi se izbegao bilo kakav rizik od ogrebotina i oštećenja, savetujemo da koristite odvijač tipa PH2. UPOZORENJE Nikada ne postavljajte TV uređaj na nestabilno mesto. TV uređaj može pasti i dovesti do teških telesnih povreda ili smrti.
- Page 104 104 / 106...
- Page 105 И 035 22 105 / 106...
- Page 106 Ovaj dokument je originalno proizveden i objavljen od strane proizvođača, brenda FOX, i preuzet je sa njihove zvanične stranice. S obzirom na ovu činjenicu, Tehnoteka ističe da ne preuzima odgovornost za tačnost, celovitost ili pouzdanost informacija, podataka, mišljenja, saveta ili izjava sadržanih u ovom dokumentu.
Need help?
Do you have a question about the 10AOS41/C and is the answer not in the manual?
Questions and answers