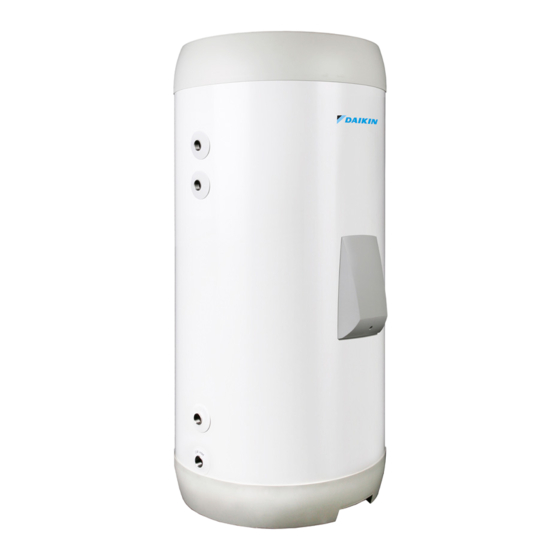
Daikin EKHWS 150D3V3 Series Installation Manual

Daikin EKHWS 150D3V3 Series Installation Manual

Domestic hot water tank with option kit for air to water heat pump system
Table of Contents

Advertisement

Quick Links

Installation manual
Domestic hot water tank with option kit for air to
water heat pump system
EKHWS▲150D3V3▼
EKHWS▲180D3V3▼
EKHWS▲200D3V3▼
EKHWS▲250D3V3▼
EKHWS▲300D3V3▼
Installation manual
Domestic hot water tank with option kit for air to water heat pump
English
▲= , , 1, 2, 3, ..., 9, A, B, C, ..., Z
▼= , , 1, 2, 3, ..., 9
system

Advertisement

Table of Contents
loading
Need help?

Need help?

Do you have a question about the EKHWS 150D3V3 Series and is the answer not in the manual?

Questions and answers

Subscribe to Our Youtube Channel

Summary of Contents for Daikin EKHWS 150D3V3 Series

  • Page 1 Installation manual Domestic hot water tank with option kit for air to water heat pump system EKHWS▲150D3V3▼ EKHWS▲180D3V3▼ EKHWS▲200D3V3▼ EKHWS▲250D3V3▼ EKHWS▲300D3V3▼ Installation manual Domestic hot water tank with option kit for air to water heat pump English ▲= , , 1, 2, 3, …, 9, A, B, C, …, Z ▼= , , 1, 2, 3, …, 9 system...
  • Page 2: Table Of Contents

    Table of contents 11 Troubleshooting Table of contents 11.1 Overview: Troubleshooting............15 11.2 Precautions when troubleshooting ..........15 11.3 Solving problems based on symptoms........15 1 General safety precautions 11.3.1 Symptom: No water flow from hot taps ......15 About the documentation ............11.3.2 Symptom: The water from the hot taps is cold.....
  • Page 3: For The Installer

    Corrosion of copper pipes or soldered parts may cause leaks, fire or other damage to the equipment. ONLY use the refrigerant to leak. accessories, optional equipment and spare parts made or approved by Daikin unless otherwise specified. 1.2.3 Water WARNING If applicable.
  • Page 4: Specific Installer Safety Instructions

    2 Specific installer safety instructions WARNING NOTICE If NOT factory installed, a main switch or other means for Precautions when laying power wiring: disconnection, having a contact separation in all poles providing full disconnection under overvoltage category  III condition, MUST be installed in the fixed wiring. WARNING ▪...
  • Page 5: About The Documentation

    Maintenance and service (see "10 Maintenance and Daikin website (publicly accessible). service" [ 4  14]) ▪ The full set of latest technical data is available on the Daikin Business Portal (authentication required). DANGER: RISK OF ELECTROCUTION DANGER: RISK OF BURNING/SCALDING About the box...
  • Page 6: To Remove The Accessories From The Domestic Hot Water Tank

    5 About the units and options 4.1.2 To remove the accessories from the Code Description domestic hot water tank European Kit Hot Water Stainless steel tank 1 Remove the accessories supplied with the domestic hot water tank. Indication of storage capacity in litres Series 1×...
  • Page 7: Preparing Water Piping

    6 Preparation ▪ The domestic hot water tank is designed for indoor installation ▪ Domestic hot water tank – Disinfection. In case of limited only and for ambient temperatures ranging from 0~35°C. consumption of domestic hot water, e.g. at holiday residences or at houses that are occasionally not occupied, the domestic hot ▪...
  • Page 8: Safety Device Requirements

    7 Installation WARNING Opening the units ALWAYS use multicore cable for power supply cables. 7.2.1 To open the switch box cover of the 6.4.2 Safety device requirements domestic hot water tank The booster heater in the domestic hot water tank is equipped with a thermal protector (setting 85°C).
  • Page 9: To Fill The Domestic Hot Water Tank

    7 Installation 7.4.4 To fill the domestic hot water tank 1 Open every hot water tap in turn to purge air from the system pipe work. 2 Open the cold water supply valve. 3 Close all water taps after all air is purged. 4 Check for water leaks.
  • Page 10: Connecting The Electrical Wiring

    7 Installation 4 Route the booster heater power supply cable (coming from INFORMATION K3M) and the thermistor cable through the switch box board as The jumper is factory‑set to apply for installation in shown in the illustration below. accordance with configurations E1 and E2. 5 Connect the earth wire of the booster heater power supply 5 Put the knob on the motor in a 12 o'clock position and push the cable to the switch box earthing screw (located next to the...
  • Page 11: To Connect The Electrical Wiring To The Outdoor Unit

    7 Installation 2 Mount the contactor K3M and terminal block X4M. Fix the 10 11a contactor with the 2 contactor fixing screws supplied. Fix the terminal block with the 2 tapping screws supplied. 3 Install the jumper wire from the accessory bag in between terminals X2M/7 and X2M/8.
  • Page 12: To Connect The Electrical Wiring On The Domestic Hot Water Tank

    7 Installation ▪ Insert the thermistor into the opening. >50 mm 5 4 3 L N Y L N Y ▪ Push the thermistor against metal tank wall to ensure thermal contact. ▪ Fix the thermistor with insulation tape to guarantee that the thermal contact cannot break.
  • Page 13: Finishing The Domestic Hot Water Tank Installation

    8 Commissioning 8 Fix the cable(s) using the cable clamp at the bottom of the tank to ensure strain relief. 9 Install the switch box cover. ▪ Route the thermistor cable in a conduit to the thermistor Finishing the domestic hot water inserting tube located above the tank switch box.
  • Page 14: Checklist During Commissioning

    9 Hand-over to the user The system is properly earthed and the earth terminals WARNING are tightened. ▪ Before carrying out any maintenance or repair activity, The fuses or locally installed protection devices are ALWAYS switch off the circuit breaker on the supply installed according to this document, and have NOT been panel, remove the fuses or open the protection devices bypassed.
  • Page 15: Troubleshooting

    11 Troubleshooting Chemical disinfection 11.3 Solving problems based on If the applicable legislation requires a chemical disinfection in symptoms specific situations, involving the domestic hot water tank, please be aware that the domestic hot water tank is a stainless steel cylinder 11.3.1 Symptom: No water flow from hot taps containing an aluminium anode.
  • Page 16: 12 Disposal

    Technical data ▪ A subset of the latest technical data is available on the regional Daikin website (publicly accessible). ▪ The full set of latest technical data is available on the Daikin Business Portal (authentication required). X13A 13.1...
  • Page 17 Optional equipment Equipment made or approved by Daikin that can be combined with the product according to the instructions in the accompanying documentation. Field supply Equipment NOT made by Daikin that can be combined with product according instructions accompanying documentation.
  • Page 20 4P510672-1 C 0000000- 4P510672-1C 2023.02 Verantwortung für Energie und Umwelt...

Table of Contents