
Subscribe to Our Youtube Channel
Related Manuals for CombiSteel 7485.0150

Summary of Contents for CombiSteel 7485.0150
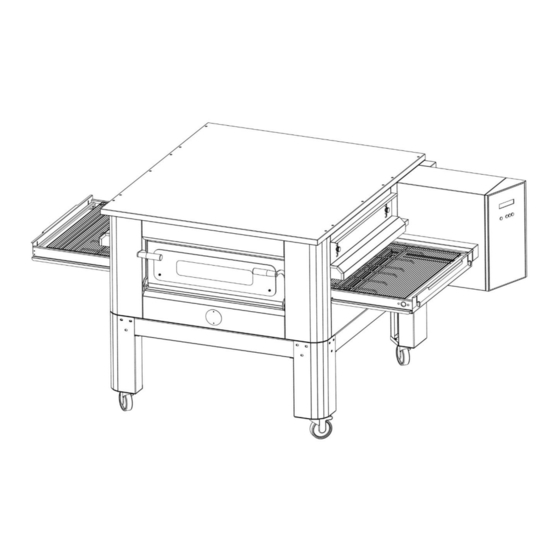
- Page 1 INSTRUCTION MANUAL FOR USE AND MAINTENANCE TUNNEL CONVEYOR OVEN 7485.0150/7485.0155 7485.0160/7485.0165 ENGLISH...
- Page 2 INDEX 1– RATING PLATE 1.1– Rating plate p. 4 2– GENERAL INFORMATION 2.1- The importance of the manual p. 4 2.2- Status of “turned off oven” p. 4 2.3- Warranty p. 4 3– TECHNICAL FEATURES 3.1– Technical data p. 5 3.2—Destination of use p.
- Page 3 INDEX 8- SPARE PARTS 8.1– Spare parts ovens p. 18 8.2– Exploded view p. 19 9– ELETRIC EQUIPMENT 9.1– Wiring diagrams TUNNEL 7485.0150 & 7485.0155 p. 20 9.2– Wiring diagrams TUNNEL 7485.0160 & 7485.0165 p. 21...
-
Page 4: Rating Plate
1—RATING PLATE 1.1– RATING PLATE The rating plate consists of a gray lable applied on the back of the oven. The plate bears in readable and indelible way the following data: - Name of the manufacturer; - Serial number; - Electric power (kW/A); - Electric voltage and frequency (Volt/Hz);... -
Page 5: Technical Data
3—TECHNICAL FEATURES 3.1 TECHNICAL DATA Unit of measurement 7485.0150 7485.0155 7485.0160 7485.0165 Weight without support Overall dimens 1425 x 985 1860 x 1210 x 2070x1320 x 2250 x 1560 x without supp. x 450 Support dimentions 600 x 865 x... -
Page 6: Destination Of Use
3—TECHNICAL FEATURES 3.2- DESTINATION OF USE The foreseen use for which this oven has been designed and produced is the following: FORESEEN USE: PIZZA BAKING, GRATINATING GASTRONOMY PRODUCTS AND HEATING OF FOODSTUFF IN BAKING PANS. THE OVEN CAN BE USED EXCLUSIVELY BY AN AUTHORIZED OPERATOR (USER) THIS APPLIANCE IS NOT INTENDED FOR USE BY PERSONS (INCLUDING CHILDREN) -
Page 7: Handling And Positioning
4—INSTALLATION 4.2– HANDLING AND POSITIONING Use a forklift or a trans pallet with suitable capacity lift the small hoods up. Wrap the forks with smooth material and insert them in the cooking chamber (Fig.1). Place the oven on the stand lean on the edges (Fig.2). 4.3–... -
Page 8: Electric Connection
4—INSTALLATION 4.4- ELECTRIC CONNECTION THE CONNECTION TO THE MAIN POWER SUPPLY MUST BE EXCLUSIVELY CARRIED OUT BY AN AUTHORIZED TECHNICIAN (ELECTRICIAN) ABLE TO SATISFY THE TECHNICAL AND PROFESSIONAL REQUIREMENTS STATED BY THE REGULATIONS IN FORCE IN THE COUNTRY OF USE. THIS TECHNICIAN MUST ISSUE A DECLARATION OF CONFORMITY THE INSTALLATION CARRIED OUT. -
Page 9: Use And Functioning
5- USE AND FUNCTIONING 5.1- COMMAND PANEL Oven switch on - off key Parameters value decrease key Programming access key Parameters value increase key... - Page 10 5- USE AND FUNCTIONING 5.2- KEYPAD KEYS/LED MANAGEMENT The board includes connection to a 4 functions keypad. The functions the 4 keys should have are indicated in the figure below : Logical switch on/off of the control unit (passage from OFF status to functioning mode).
- Page 11 5- USE AND FUNCTIONING 5.4– PRESET The board is reset by pressing, during switch on, all 4 buttons. Preset is confirmed by signaling it on the display with: “Preset Complete”. At this point the board must be switched off and switched back on again. NB: preset is also possible from the technical menu (see relevant chapter).
- Page 12 5- USE AND FUNCTIONING 5.6– CHANGING TEMPERATURE AND TIME PARAMETERS pressing key, the relevant symbol for net movement and the baking time are NO longer visible; instead, the two SET POINT temperatures are displayed for the Top and Bottom probe. The temperature of the top probe flashes and using the increase and decrease keys you can change the values from a minimum of 1 degree to a maximum of 320°C.
-
Page 13: Over Temperature
5- USE AND FUNCTIONING 5.8– PROBE ERROR MANAGEMENT OVER TEMPERATURE On reaching the over temperature value set in the technical menu, the display indicates the following: In the second row, the temperature read value is displayed. The Over Temperature value is NOT settable and is set to 490°C . PROBE IN OPEN CIRCUIT o SHORT CIRCUIT If the probe was in “Open”... - Page 14 5- USE AND FUNCTIONING To change the current time or minutes, day of the week. To change autostart enabling. 2.7(Visible if Autostart is enabled) To change the advance switch on time for the day selected. The range of minutes varies from 00..59 , while the hours range varies from 00,..,23,--. Where -- also inhibits the minutes field and disables the autostart for the day selected.
- Page 15 5- USE AND FUNCTIONING To go from one parameter to another, use the "increase" and "decrease" keys. Settable parameters: Language Preset Exit To change one of the parameters, press ENTER and then use the increase/decrease keys. To exit the technical menu, move up to EXIT and press ENTER. Description of parameters.
- Page 16 Cooking time and coking temperature are extremely variables. They depend on several variables and they can not be stated by the manufactures of the oven. Here after some suggestions for user’s reference only. 7485.0150 Pizza Diameter Productivity: average per hour *...
-
Page 17: Maintenance
6– MAINTENANCE BEFORE PERFORMING ANY TYPE OF MAINTENANCE INTERVENTION, IT IS COMPULSORY TO DISCONNECT THE PLUG OF THE OVEN FROM THE POWER SUPPLY OUTLET. 6.1– CLEANING Cleaning must be carried out daily in compliance with hyenic and sanitary rules in force. Cleaning of chamber: Disconnect the oven from the main power by switching off the main switch;... -
Page 18: Spare Parts
8—SPARE PARTS 8.1— SPARE PARTS OVENS Components list DESCRIPTION 7485.0150 7485.0155 7485.0160 7485.0165 Tempered glass 5V010032 5V010031 5V010031 5V010033 Hood adjustment knob 5P100052 5P100052 5P100052 5P100052 Lower heating element 5R050482 5R050491 5R050490 5R050493 Upper heating element 5R050483 5R050481 5R050480 5R050493... -
Page 19: Exploded View
8 — SPARE PARTS 8.2 – EXPLODED VIEW :... -
Page 20: Electric Equipment
9-ELECTRIC EQUIPMENT 9.1– WIRING DIAGRAMS TUNNEL 7485.0150 & 7485.0155 HEATING ELEMENTS BOTTOM 7485.0150 N°2 1500W N°2 2200W 7485.0155 N°2 2800W N°2 4100W... - Page 21 9-ELECTRIC EQUIPMENT 9.2- WIRING DIAGRAMS TUNNEL 7485.0160 & 7485.0165 HEATING ELEMENTS BOTTOM 7485.0160 N°2 3600W N°2 5400W 7485.0165 N°2 6000W N°2 6000W...
Need help?
Do you have a question about the 7485.0150 and is the answer not in the manual?
Questions and answers