Table of Contents
Advertisement
Quick Links
Advertisement
Table of Contents

Related Manuals for Sakar 28290


Summary of Contents for Sakar 28290
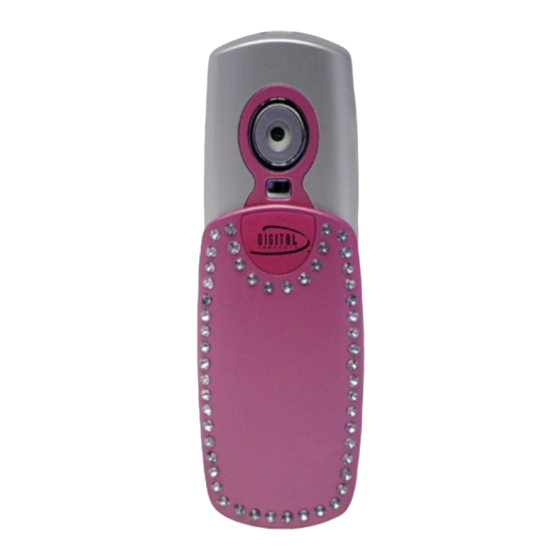
- Page 1 28290 / 28292 Digital Camera Owner’s Manual © 2007 Sakar International, Inc. All rights reserved. Windows and the Windows logo are registered trademarks of Microsoft Corporation. All other trademarks are the property of their respective companies.
-
Page 2: Table Of Contents
Key Features ...4 What your digital camera includes: ...4 Computer System Requirements for Windows...5 A Quick Look at your Digital Camera ...6 Main Icons on the LCD Screen...6 Preparing Your Camera for Use...7 Software Installation: Photags Express and WebCam Express...8 Camera Operation...11... - Page 3 Maintenance of Your Digital Camera……………………………………………………………………………..…28 Technical Support ………………………………………………………………………………………………..…...28 Sakar Warranty Card ……………………………………………………………………………………………..…..29 Technical Specifications …………………………………………………………………………………………...…30...
-
Page 4: Key Features
Introduction Thank you for purchasing the 28290 / 28292 Digital Camera. Please read this manual carefully FIRST in order to get the most out of your digital camera. Key Features PC Cam resolutions 640 x480 pixels (VGA), 320 x240pixels (QVGA). -
Page 5: Computer System Requirements For Windows
Computer System Requirements for Windows Windows 2000 and XP Pentium II 300 MHz, MD Athion 300 MHz,or a Celeron 400MHz or higher 128MB RAM 100MB free hard drive space CD-ROM drive Available USB port 16-bit Color display with 1024*768 resolution... -
Page 6: A Quick Look At Your Digital Camera
A Quick Look at your Digital Camera Main Icons on the LCD Screen... -
Page 7: Preparing Your Camera For Use
Remaining number of photos available to shoot Battery power lever Delete one photo Delete all photos Preparing Your Camera for Use Your camera is powered by a built-in lithium battery and is powered through USB connection to your PC. If the camera has insufficient battery power, the automatically turn off after sixty seconds. -
Page 8: Software Installation: Photags Express And Webcam Express
Software Installation: Photags Express and WebCam Express NOTE: Before attempting to install the software, make sure that you do not have the camera’s USB cable attached to your computer. This will affect the install process and can cause a failed installation of the camera software and drivers. - Page 9 Please review the license terms and click the “Agree” button to continue. Let the “PhoTags Express” installer create the folder where the program will be installed to, and then click “Install”.
- Page 10 Click “Finish” to let the “PhoTags Express” installer finish the installation program. This will automatically launch the Install shield for the Camera driver. Click “Next” to continue.
-
Page 11: Camera Operation
Once the driver has finished installing you will have to restart your computer. Congratulations!! You have successfully installed the “PhoTags Express”, the “WebCam Express” software and the Camera driver. Camera Operation... -
Page 12: Lithium Battery
Power on Slide the Charger/Camera switch on the side of the camera to Camera status. Press the Power/Menu button once to turn on your camera. The LCD screen will light up and the camera will sound a beep to confirm that the camera is on and ready for use. Power off Press and hold the beeps and then switch off. -
Page 13: Camera Modes
NOTE: The camera batteries must be recharged for at least four hours on the first use. In order to conserve battery power, if the camera is not used for 60 seconds, the camera will automatically enter energy save mode. Camera Modes Your camera has two main Modes: Camera Mode and Playback Mode. -
Page 14: Playback Mode
Delete One Photo Press the Power/Menu button repeatedly until the Press the Shutter/Confirm button within 3 seconds that the screen will flash and press Shutter/Confirm Button again to delete all photos in the Camera memory. Delete All Photos Press the Power/Menu button repeatedly until the Press the Shutter/Confirm button within 3 seconds 2 times delete all photos in the camera memory. -
Page 15: Transferring Images To Your Pc
Note: in order to access Playback mode, there must be photos in the camera memory. If there are no photos in the camera memory you will not be able to access the Playback mode. You will need to take photos first in order to view them afterwards in Playback. -
Page 16: Manual Photo Download
Manual Photo Download: Get photos manually using “PhoTags Express”? Use the “PhoTags Express” program to import the photos from your camera. Plug one end of the USB cable into the USB slot on your camera. Plug the other end of the USB cable into a USB port on your computer. Your camera will automatically be turned on. - Page 17 Double-click the “PhoTags Express” icon that appears on your desktop to launch the “PhoTags Express” program. Click on the “Get Photos” button on the Main Menu. The “Get Photos Wizard - Device Selection” window will appear. Select the “913D camera” driver from the list of Active Devices.
- Page 18 Custom Copy: This mode is used to manually select the photos you wish to copy to your computer. Select the "Custom" copy method radial button. Click "Next" to continue. Set the batch operations for the photos you are getting. Add Active Captions to your pictures.
- Page 19 Choose where to place your photos. Click the “Finish” button to transfer the photos from your camera to the computer to the location you selected. A download box will appear showing you the progress of the pictures downloading to your computer.
-
Page 20: Using Your Camera As A Webcam
All of the pictures you imported will appear in the “Select photos” main window. Express Copy Method: Select the “Express” radial button option if you wish to have all the images transferred to the PC without the option of Adding Active Captions to your pictures at this stage. With this copy method you only choose where to place your photos. -
Page 21: Using Your Camera As A Webcam
Using Your Camera as a Webcam Make sure the Camera is in the Camera Mode. Connect the camera to the computer via the USB port. With the “WebCam Express” software you installed, you can capture short movies called AVI files. These can be saved directly to your computer .The length of time you can record an AVI while the camera is connected to your computer will vary, depending on how much hard drive space you will use to save the file (please note that these AVI files take up a lot of hard drive space). - Page 22 (To add audio to your video, plug a microphone into your computer) Click the “Capture” button to start recording the video. The recording elapse time will appear under the video. Click “Pause” to hold the recording. To continue recording click the “Capture” button again.
-
Page 23: Capturing Photos
To end the recording, click the “Stop” button. The videos will be automatically saved into a default directory (My Documents/ My Pictures/ My WebCam). Capturing Photos: You can also take snapshots with your Webcam. Your Webcam NEEDS to be connected at all times to the computer in order to capture the photos. There are 2 methods to capture and save photos taken with your WebCam Express software. - Page 24 You may now edit this photo by opening the "Photags Express application. From the Main Menu select the “Select Photos” mode, and from the directory tree on the left of the thumbnails screen, select the My WebCam folder where the photo has been saved. Method 2 –...
- Page 25 The photo will be saved automatically as a jpeg picture in the My Documents/ My Pictures/ My WebCam folder on your computer. You may now edit your photos with the “Photags Express” software application by selecting the “Photags Express” icon on the desktop, and from Main Menu that appears select the “Select Photos” mode.
-
Page 26: Everything You Need To Get The Most Of Your Photos And More
NOTE: In order to use this Webcam you must make sure that you have YAHOO MESSENGER Ver 5.5 or later. Start Yahoo messenger. Select the “Tools” listing on the top of the toolbar. Go to the drop down menu and select the listing for “Start My Webcam”. -
Page 27: Everything You Need To Get The Most Of Your Photos And More
Everything you need to get the most of your photos and MORE The “Photags Express” software that is installed on your computer allows you to edit existing photos that you have on your computer as well as the photos that you have captured with your Webcam using “WebCam Express”: Click the “Photags Express”... - Page 28 Manage your photos by creating countless unique photo collections without duplicating any photos. Burn CD’s of any folders for backup and storage. Enhance your photos; Auto Enhance, Crop, Correct Red Eye, Manually Adjust and add Special Effects. Add Active Captions- add Text Captions, Frames, Shapes, Keywords… and more that can be viewed or hidden any time.
-
Page 29: Maintenance Of Your Digital Camera
Once you purchase the “Workshop projects” they will be automatically activated in the software. Maintenance of Your Digital Camera Your digital camera is a delicate instrument- please handle it with care. Technical Support For technical support issues please visit our website at www.sakarhelp.com. You can find manuals, software and FAQ’s at the website. -
Page 30: Sakar Warranty Card
Sakar Warranty Card This warranty covers for the original consumer purchaser only and is not transferable. Products that fail to function properly UNDER NORMAL USAGE, due to defects in material or workmanship. Your product will be repaired at no charge for parts or labor for a period of one year. -
Page 31: Technical Specifications
, and (2) this device must accept any interference received, including interference that may cause undesired operation. Caution: changes or modifications not expressly approved by the party responsible for compliance could void the user's authority to operate the equipment. Digital Camera CMOS sensor 1/6`f=3.0 F=28 640*480(VGA), 320*240 (QVGA) - Page 32 NOTE: This equipment has been tested and found to comply with the limits for a Class B digital device, pursuant to Part 15 of the FCC Rules, These limits are designed to provide reasonable protection against harmful interference in a residential installation. This equipment generates. Uses and can radiate radio frequency energy and, if not installed and used in accordance with instructions.
Need help?
Do you have a question about the 28290 and is the answer not in the manual?
Questions and answers