Table of Contents
Advertisement
TABLE OF CONTENTS
QUICK START
KEYS AND FEATURES
INTRODUCTION
1. LET'S GET STARTED!
1.1 First, Install the Batteries/Optional AC-DC adapter
1.2 Ready to Play? Here's How to Move!
1.3 Now It's the Computer's Turn
1.4 Change Your Mind? Take Back!
INTRODUCTION
We'd like to welcome you to the exciting world of computer
chess! Whether you're just starting to learn about this great
game or you're already a seasoned player, using your new
chess computer will give you the opportunity to discover so
much more about chess than you ever thought possible! Take
a look through this manual to get an overview of your
computer's capabilities-all the special features and modes,
all the unique options and playing levels. And take advantage
of them over time, one by one! You'll have great fun-and
you'll never look at chess the same way again!
Your computer knows all the rules of chess-and it will
never cheat! For those of you who haven't played before, we
have included a brief overview of the rules to get you started.
For more detailed information, why not visit your local library,
where you're sure to find lots of interesting chess books!
1. LET'S GET STARTED!
1.1
First, Install the Batteries/Optional AC-DC adapter
Your computer runs on six "C" (Type AM2/R14) batteries.
Insert the batteries into the compartment in the base of the
unit, making sure to observe the correct polarity. Use fresh
alkaline batteries for longer battery life!
If you would rather not power your unit with batteries, you
may purchase an optional AC-DC adapter. Please use only
the adapter specified in Section 7.3. Using any other adapter
could damage the computer and will invalidate your warranty.
Please also read the precautionary information regarding
adapter use in Section 7.2. When using an adapter, first plug
it into a wall outlet, and then into your computer.
Important: To ensure that the computer's memory con-
tents are not lost, keep good batteries installed in the unit
even when you are using an AC-DC adapter.
Turn the computer on by pressing GO/STOP, and a beep
will signal that the game is ready to play. If the computer fails
to respond (static discharge may cause it to lock up), use a
paper clip or another sharp object to press down into the hole
marked ACL in the base of the unit for at least one second.
This will reset the computer.
Tip: To conserve energy and extend battery life, turn on
the Auto Power Down option (see Section 5.1).
1.2
Ready to Play? Here's How to Move!
Okay, now it's time to start a game! It's so easy-just follow
these steps:
a. Press GO/STOP to turn the computer on, if you haven't
already done so.
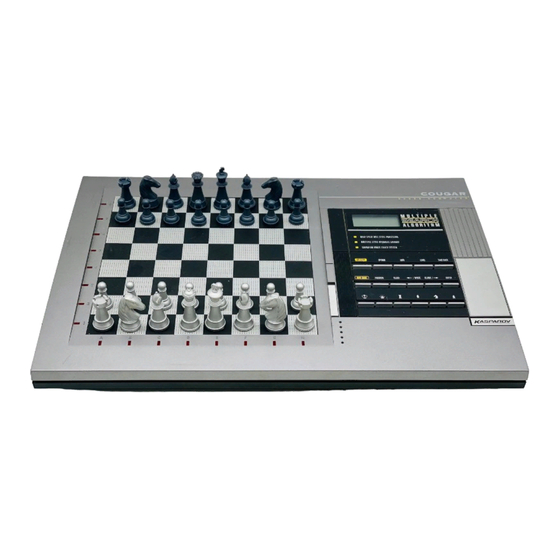
b. Press NEW GAME to reset the computer for a new
game of chess. Set up the pieces in their starting posi-
tions, with the White pieces nearest to you, as shown in
the Quick Start .
c. To make a move, lightly press down on the piece you
want to move until you hear a beep and two board lights
turn on to indicate that square. The sensory board will
recognize your piece automatically. Don't believe it?
Just look at the display window, which is suddenly full of
information-it shows your piece, along with the piece
color and the square you just pressed!
d. Take that piece and gently press it down on the square
to which you are moving. You'll hear a second beep as
the computer confirms your move. That's it-you've just
made your first move of the game! Next, it's Black's
turn-and the computer will make its first move.
You'll notice that the computer often moves instantly at the
beginning of a game, instead of taking time to think. This is
because it is playing from memory, using a built-in "book" of
opening moves (for more information, see Section 2.7).
1.3
Now It's the Computer's Turn
When the computer makes its move, it beeps and turns on
two board lights indicating the square of the piece it wants to
move. It also shows its full move in the display window.
Check it out-you'll see the from and to squares of the
computer's move, along with the color and type of piece it is
moving. Notice that the from square is flashing in the display.
Press the indicated piece down on the from square until you
hear a beep. The to square is now flashing in the display-
move that same piece to the indicated to square and press it
down to complete the computer's move. And it's your turn
again...
Take a look at "MAKING THE COMPUTER'S MOVE:
AN EXAMPLE!" for a how-to illustration!
By the way, while you're thinking about your next move,
notice that the chess piece symbols are displayed, one by
one, counting "up" from pawn to King. This means the built-in
chess clock is in normal mode, counting your elapsed time. If
the Countdown Clock is activated, as described in Section
5.1, the displayed symbols will reverse direction. You'll find
details on all the chess clock features in Section 4.3!
1.4
Change Your Mind? Take Back!
When you're playing chess against this computer, nothing
is "set in stone"-you can change your mind or decide to play
a different move whenever you want! When it's your turn to
move, simply press TAKE BACK. The display shows the
1
Advertisement
Table of Contents

Related Manuals for Saitek Cougar


Summary of Contents for Saitek Cougar
-
Page 1: Table Of Contents
TABLE OF CONTENTS QUICK START KEYS AND FEATURES INTRODUCTION 1. LET’S GET STARTED! 1.1 First, Install the Batteries/Optional AC-DC adapter 1.2 Ready to Play? Here’s How to Move! 1.3 Now It’s the Computer’s Turn 1.4 Change Your Mind? Take Back! 1.5 Game Over? Why Not Play Again! 1.6 Too Easy/Hard? Change the Level! 2. -
Page 2: Game Over? Why Not Play Again
move to be taken back, with the original to square flashing and indicated by board lights. Press the piece down gently on the indicated square, and the computer shows you where that piece came from by flashing that display and using board lights to point to that square. -
Page 3: Changing Sides With The Computer
interrupt it any time! Simply press ENTER while the computer is thinking, and it will stop and play the best move it has found so far. This feature can be handy on the higher levels, where the computer can take a long time to move, and on the Infinite Level, where the computer thinks indefinitely unless you stop it. -
Page 4: Normal Playing Levels (Squares A1-B7)
USE THIS CHART TO SELECT A PLAYING LEVEL! LEVEL Press LEVEL to enter Level Mode. Next, select your level, using the chart below. There are two ways to do this. • Cycle through the levels until your level is displayed: Press BLACK/>... -
Page 5: Tournament Levels (Squares C1-C8)
board positions and let the computer analyze them for you. It will think for hours or even days on end, trying to come up with the best possible move! And don’t forget to watch the computer as it thinks—take advantage of the unique Rotating Display feature described in Section 5.3! 3.3 Tournament Levels (Squares C1-C8) LEVEL... -
Page 6: Info Mode: Watch The Computer Think
Since these Self-Adaptive Weak Levels are meant espe- cially for beginners, however, here the computer will set its playing strength to a deliberately weakened setting of about – 350 ELO on the lowest level (H1). On the other end, Level H8 matches the player’s strength by putting the ELO difference at zero. -
Page 7: Move Count/Game Moves
• Remaining time for White (Blitz/Tournament Levels only) • Remaining time for Black (Blitz/Tournament Levels only) Press </WHITE to cycle backwards and see previous displays again. Press CLEAR to return to the normal clock display. The clocks stop whenever you take back a move, or set up a new position. -
Page 8: Playing Mode Options (Squares A2-H2)
moves or when an illegal move or keypress is made, or when NEW GAME is set. c. Silent Mode (Square C1) On:+SIL Off:-SIL Normally, the computer always beeps when it has found its move. For completely silent operation, turn on Silent Mode. d. -
Page 9: Rotating Display Options (Squares A3-H3)
THE BASICS OF OPTION MODE: HERE’S HOW! OPTION Press repeatedly to select a Mode: x1 = OPERATION MODE (Auto...) x2 = PLAYING MODE (SEL...) x3 = ROTATING DISPLAY MODE (rd:1...) x4 = BRONSTEIN CLOCK (bron...) x5 = back to OPERATION MODE... Next, select your option(s), using the chart below. -
Page 10: Bronstein Clock Options (Square A4)
When requested information is not available, the display will show a series of dashes (– – – – –). For complete descriptions of these options and details on exactly how to interpret the displays, see Section 4. 5.4 Bronstein Clock Options (Square A4) On the Blitz and Tournament levels, you have a fixed amount of time for each game, and the remaining time de- creases as you think. -
Page 11: Technical Details
the piece down on its original square, pick it up, and then press it down on the new square. As you do this, the display will show a minus sign (–) for the first square, and a plus sign (+) for the second square. •... -
Page 12: Troubleshooting Guide
SYMPTOMS The computer doesn’t react, • Batteries are not installed correctly. behaves erratically, or “freezes” during a game. • Batteries are weak or bad. • Static discharge or an electrical disturbance has caused a lock-up. The display is difficult to read. •...
Need help?
Do you have a question about the Cougar and is the answer not in the manual?
Questions and answers