Table of Contents
Advertisement
Available languages
Available languages
Quick Links
BEDIENUNGSANLEITUNG
VIELEN DANK, DASS SIE SICH FÜR EIN PRODUKT VON BLUEPALM ENTSCHIEDEN
Diese Bedienungsanleitung gibt es in folgenden Sprachen
DEUTSCH
ENGLISH
NUR FÜR DAS SERVICECENTER
Reparaturanweisungen für Geräte die R290 enthalten
Mobiles Klimagerät
Portable Air Conditioner
BP-PAC9000FW
HERZLICHEN GLÜCKWUNSCH!
HABEN.
S. 1
Seite 2 – 15
Seite 16 – 30
Seite 31 – 36
Advertisement
Table of Contents

Subscribe to Our Youtube Channel
Related Manuals for BLUEPALM BP-PAC9000FW


Summary of Contents for BLUEPALM BP-PAC9000FW
- Page 1 BEDIENUNGSANLEITUNG Mobiles Klimagerät Portable Air Conditioner BP-PAC9000FW HERZLICHEN GLÜCKWUNSCH! VIELEN DANK, DASS SIE SICH FÜR EIN PRODUKT VON BLUEPALM ENTSCHIEDEN HABEN. Diese Bedienungsanleitung gibt es in folgenden Sprachen Seite 2 – 15 DEUTSCH Seite 16 – 30 ENGLISH NUR FÜR DAS SERVICECENTER Seite 31 –...
- Page 2 Wenden Sie sich für eventuelle Reparaturen des Geräts, des Netzsteckers oder Kabels stets und ausschließlich an vom Hersteller autorisierte Kundendienststellen. Die Kundendienststellen können Sie online unter www.bluepalm.at abrufen. ● Entfernen Sie die Verpackung und stellen sicher, dass das Klimagerät nicht beschädigt ist. Im Zweifelsfall verwenden Sie das Klimagerät nicht und kontaktieren Sie die Servicestelle oder Ihren Händler.
- Page 3 Benutzen Sie das Klimagerät nicht in der Nähe von Wasser oder starker Feuchtigkeit, z.B. im feuchten Keller, neben Schwimmbecken, Badewanne oder Dusche. Achten Sie darauf, dass kein Wasser in das Gerät eindringt. Stellen Sie keine schweren oder heißen Gegenstände auf das Gerät und decken Sie das Gerät nie ab. Stecken Sie niemals Finger, Stifte oder andere Gegenstände in das Gerät und achten Sie darauf, dass Luftein- und -auslass niemals blockiert werden.
- Page 4 Händler, bei dem das Produkt gekauft wurde. KONFORMITÄTSERKLÄRUNG Hiermit bestätigen wir, dass dieser Artikel den grundlegenden Anforderungen, Vorschriften und Richtlinien der EU entspricht. Die ausführliche Konformitätserklärung können Sie jederzeit unter folgendem Link einsehen: www.bluepalm.at.at/downloads/doc/bp-pac9000fw.pdf Irrtümer und technische Änderungen vorbehalten. www.bluepalm.at S. 4...
-
Page 5: Schematische Darstellung
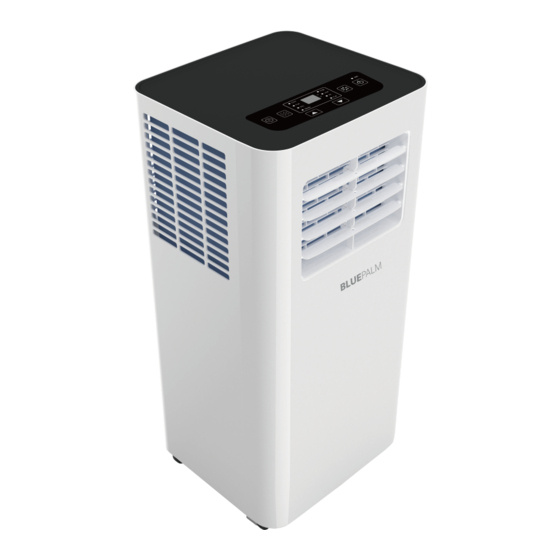
SCHEMATISCHE DARSTELLUNG 1 Tragegriff 2 Lufteintrittgitter 3 Bedienfeld 4 Lenkrollen 5 Einstellbare Lüftungsklappen 6 Abluft 7 Wasserablauf 8 Lufteintrittgitter INSTALLATION UND EINSTELLUNG • Achtung: Bevor Sie das mobile Klimagerät zum ersten Mal verwenden, lassen Sie es mindestens zwei Stunden lang stehen. •... - Page 6 Installation des Abluftschlauchs • Schrauben Sie den Abluftschlauch (mit Adapter) an die Abluftöffnung an der Rückseite des Gerätes (im Gegenuhr- zeigersinn, Abb. 1). Abb.1 Fenster Einschub-Set Montage Öffnen Sie das Fenster zur Hälfte und bringen Sie das Fenster Einschub-Set am Fens- terrahmen an (siehe Abbildungen 2 und 3).
- Page 7 Klimagerät installieren Stellen Sie das Gerät mit montiertem Abluftschlauch in die Nähe vom Fenster. Beachten Sie da- bei den Mindestabstand von 50 cm zwischen dem Gerät und den angrenzenden Wänden oder Gegen- ständen (Abb. 4). Hinweise: • Das flache Ende des Abluftschlauchs muss ord- nungsgemäss eingerastet sein.
- Page 8 BEDIENFELD UND FERNBEDIENUNG Bedienfeld & Fernbedienung Wifi 1) Ein/Aus-Taste • Zum ein- und ausschalten des Gerätes. 2) Einstellung der Ventilatorgeschwindigkeit • Im Kühlen- oder Lüfter-Modus, um den Betrieb mit hoher oder niedriger Windgeschwindigkeit einzustellen. • Im Modus Trocknen kann die Taste nicht verwendet werden, niedrigste...
-
Page 9: Kühlen-Modus
• Nach dem Tastendruck blinkt die Anzeige; die Zeiteinstellung erfolgt durch das Betäti gen der Auf- und Ab-Tasten. • Das Zeiteinstellungsfenster liegt zwischen 1 und 24 Stunden und die Anpassung erfolgt in Intervallen von 1 Stunde. 7) °C/°F-Taste o Zum Anpassen der Temperaturskala zwischen °C und °F. 8) SLEEP-Taste o Drücken Sie diese Taste, um den SLEEP-Modus wählen. - Page 10 Timer • Wenn sich das Gerät im Schlafmodus befindet, drücken Sie die TIMER-Taste, um das automatische Einschaltprogramm (von 1 bis 24 Stunden) zu aktivieren, die TIMER-Kon trollleuchte geht an. Das Display blinkt. • Wenn das Klimagerät eingeschaltet ist, drücken Sie die TIMER-Taste, um das automatische Abschaltprogramm zu aktivieren, die TIMER-Kontrollleuchte geht an und das Display blinkt.
-
Page 11: Reinigung Und Wartung
Ständige Entleerung • Nur einsetzbar im Kühlen- und Ent- feuchten-Modus. • Schrauben Behälterablassdeckel ab und öffnen Sie den Bodenablaufstopfen. • Schliessen Ende Entwässerungsschlauches an die Abflussöffnung an • Legen Sie das andere Schlauchende in einen Eimer. REINIGUNG UND WARTUNG Schalten Sie das Gerät vor Reinigung- und Wartungsarbeiten aus und ziehen Sie den Stecker aus der Steckdose. -
Page 12: Störungsbehebung
VERSTAUUNG • Schrauben Sie die Abdeckung des Ablaufs auf, öffnen Sie die Kappe. Lassen Sie das ganze Restwasser in ein Becken ab oder schwenken Sie das Gerät leicht nach hinten, um das Wasser in einen Behälter zu leiten. • Lassen Sie das Gerät im FAN-Modus (lüften) einen halben Tag lang in einem warmen und trockenen Raum laufen, um Schimmelbildung im Gerät zu verhindern. - Page 13 • Versuchen Sie nicht, das Gerät selbst zu zerlegen, oder zu reparieren. Unqualifiziertem Reparaturversuche am Gerät können zu schweren Körperverletzungen oder erhebli- chem Sachschaden führen und jegliche Garantieansprüche würden erlöschen. • Sollten Probleme auftreten, die unbekannt sind oder die empfohlene Lösung nicht funktionieren, kontaktieren Sie bitte eine Fachkraft.
- Page 14 • Wenn das Gerät in der App als „online“ angezeigt wird, kann es über die App gesteuert werden. • Wenn das Gerät „offline“ ist, kann es über die App eingeschalten werden. Die Anwendung funktioniert auch mit Amazon Alexa und Google Assistant Technische Informationen BP-PAC9000FW Artikelnummer Kühlleistung 9.000BTU 960W Max.
-
Page 15: Garantie
Mit diesem Qualitätsprodukt von BLUEPALM haben Sie eine Entscheidung für Innovation, Langlebigkeit und Zuverlässigkeit getroffen. Für dieses BLUEPALM Gerät gewähren wir eine Garantiezeit von 2 Jahren ab Kaufdatum gültig in Österreich! Sollten in diesem Zeitraum wider Erwarten dennoch Servicearbeiten an Ihrem Gerät notwendig sein, garantieren wir Ihnen hiermit eine kostenlose Reparatur (Ersatzteile und Arbeitszeit) oder (nach Ermessen der Firma Schuss) das Produkt auszutauschen. - Page 16 For any repairs to the device, power plug or cable, always and exclusively contact authorized service centers. The customer service centers can be accessed online at www.bluepalm.at. ● Remove the packaging and make sure the air conditioner is not damaged. If in doubt, do not use the air conditioner and contact the service center or your seller.
- Page 17 Maintain the air conditioner in good condition by caring for and cleaning the unit. The air filter should be cleaned at least once a week. Store the device vertically in a safe place, dry and out of the reach of children, when not in use. Do not cover the device with plastic packaging.
- Page 18 We hereby confirm that this article complies with the essential requirements, regulations and directives of the EU. The detailed declaration of conformity can be viewed at any time under the following link: www.bluepalm.at.at/downloads/doc/bp-pac9000fw.pdf Errors and technical changes reserved. www.bluepalm.at S. 18...
-
Page 19: Installation And Adjustment
SCHEMATIC REPRESENATION 1. Handle 2. Air inlet grid 3. Control panel 4. Castor 5. Adjustable slats 6. Exhaust air 7. Water drainage 8. Air inlet grid INSTALLATION AND ADJUSTMENT • Warning: before using the mobile air conditioner, let it stand straight for at least two hours. - Page 20 Installing the exhaust pipe • Screw the exhaust pipe (exhaust fitting end) into the exhaust port on the rear panel (counterclockwise). Figure 1 Installing the window sealing plate assembly • Open the window to the half and mount the window sealing plate to the window frame (as shown in Figure 2 and 3);...
- Page 21 Installing the unit • Move the machine with installed exhaust pipe and fittings towards the window. Distance between the unit and adjacent walls or other objects shall be least 50 cm (as shown in Fig. 4). Notes: • The flat end of the exhaust pipe joints must be snapped into place.
-
Page 22: Control Panel And Remote
CONTROL PANEL AND REMOTE Control panel & Remote control Wifi 1) Power key • Press the key to turn on or turn off the machine. 2) Fan speed selection key • In cooling and air supply mode, press the key to se lect high or low wind speed operation. - Page 23 5) Timer key • In the case of power on, press the key for OFF time; in the case of power off, press the key for ON time. • Press the key, when the time symbol flashes, press Up and Down key to select the required timing value.
-
Page 24: Drainage Instructions
Timer • When the unit is in standby, first press TIMER button to go to delay stop setting (from 1h to 24h), until the indicator LED lights. The display will blink. • When the air conditioner is running, press the TIMER button, the timer indicator LED is on, and the display will blink. -
Page 25: Cleaning And Maintenance
Continuos drainage • Only applicable in cooling and dehu- midification modes. • Unscrew the drainage cover, and open the water plug. • Set the drainage pipe into the water outlet. • Connect the drainage pipe to a bucket. CLEANING AND MAINTENANCE Before cleaning and maintenance, turn off the machine and unplug. -
Page 26: Troubleshooting
STORAGE • Unscrew the drainage cover, open the water plug and discharge the water from the water compartment into a water container or slightly tilt the unit backwards to dis- charge the water into a container. • Keep the appliance running on FAN mode for half a day in a warm room to dry the appliance inside and prevent mold formation. - Page 27 • Do not repair or disassemble the air conditioner by yourself. Unqualified repair will lead to failure of the warranty card, and may cause damage to users or their properties. • If problems not listed in the table occur or recommended solutions do not work, seek for professional advice.
- Page 28 3. Ensure the device’s indicator light flashes (2 times per second) and tap “Confirm light is flashing”. 4. Select Wi-Fi network (note: network must be 2.4Ghz) and enter the password. The device will connect to the app. 5. After successfully configuring the devices, the smart AC will be shown on the home screen.
- Page 29 Technical information Item no. BP-PAC9000FW Cooling performance 9.000Btu 960W Max. power consumption Input voltage 220-240V~ Frequency 50Hz Refrigerant/capacity/GWP R290/0.195kg/3 EER energy efficiency Energy efficiency class Air circulation 330m³/h Noise level (sound power level) 65dB Weight 25kg Measruments 325x295x702mm Contact addresses for further information...
-
Page 30: Warranty
By purchasing a BLUEPALM quality product you have acquired an innovative, long lasting and reliable item. For this BLUEPALM device we grant a warranty of 2 years from the date of purchase, valid in Austria only. In the unlikely event that service work is required on your device in this period we warrant free repair (spare parts and labour) or (subject to Schuss’s decision) to replace the product. -
Page 31: General Instructions
WICHTIG! Diese Anweisungen sind nur für das Servicecenter! Der Service bzw. die Reparatur darf nur von einem qualifizierten Kältemitteltechniker, dem es erlaubt ist das R290-Kältemittel handzuhaben, durchgeführt werden. Versuchen Sie daher niemals das Gerät selbst zu reparieren oder das Gehäuse zu öffnen, dies führt zum sofortigen Verlust des Garantieanspruchs. -
Page 32: Repairs To Sealed Components
No person carrying out work in relation to a refrigeration system which involves exposing any pipe work that contains or has contained flammable refrigerant shall use any sources of ignition in such a manner that it may lead to the risk of fire or explosion. - Page 33 Check that cabling will not be subject to wear, corrosion, excessive pressure, vibration, sharp edges or any other adverse environmental effects. The check shall also take into account the effects of aging or continual vibration from sources such as compressors or fans. 5 DETECTION OF FLAMMABLE REFRIGERANTS Under no circumstances shall potential sources of ignition be used in the searching for or detection of refrigerant leaks.
- Page 34 recovery process is supervised at all times by a competent person; recovery equipment and cylinders conform to the appropriate standards. Pump down refrigerant system, if possible. If a vacuum is not possible, make a manifold so that refrigerant can be removed from various parts of the system.
- Page 35 Unventilated – (see Clause GG.2) Safety of the appliance does not depend on ventilation of the housing. Switching off the appliance or opening of the housing has no significant effect on the safety. Nevertheless, it is possible that leaking refrigerant may accumulate inside the enclosure and flammable atmosphere will be released when the enclosure is opened.
- Page 36 Remove the refrigerant. If the recovery is not required by national regulations, drain the refrigerant to the outside. Take care that the drained refrigerant will not cause any danger. In doubt, one person should guard the outlet. Take special care that drained refrigerant will not float back into the building. Evacuate the refrigerant circuit.
Need help?
Do you have a question about the BP-PAC9000FW and is the answer not in the manual?
Questions and answers