Table of Contents
Advertisement
Quick Links
Advertisement
Table of Contents

Related Manuals for INFINITY3DP New X1


Summary of Contents for INFINITY3DP New X1
- Page 2 Operating outside these limits may result in decreased print quality of your models. 3. NEW X1 generates high temperatures as the nozzle can reach up to 300°C (572°F) and the build plate up to 100°C (212°F) that can cause injury.
- Page 3 TABLE OF CONTENTS Page 3 SPECIFICATIONS Page 4 DIAGRAM Page 6 INSTALLATION Page 9 QUICK START Page 11 PANEL...
- Page 4 Germany, igus Chainflex® Flexible Cables Emergency Recovery Power-Loss Recovery Filament Diameter 1.75 mm (0.068”) Supported Filament PLA/ABS/Nylon/Carbon-Nylon/PETG/PC/PVA/Glass Wool Filled PP/Flexible Flexible Material Printable (Shore 50A material) Connectivity SD card /USB Power Input 100-240VAC, 320W Slicer Cura Infinity3DP Edition Net Weight 11kg / 24 Ibs...
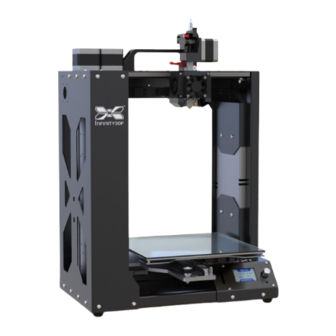
- Page 5 PANEL 1. Filament Rack 6. LCD Panel 2. Direct Extruder 7. Belt Tensioner of X Axis 3. Heat Bed 8. Power Interface 4. USB Interface 9. Power Switch 10.Belt Tensioner of Y Axis 5. SD card slot...
-
Page 6: Included Accessories
PANEL Included Accessories 1. SD Card 2. Build Plate (Glass) 3. Binder Clip 4. Hexagon Screwdriver 5. Cleaning Brush (Steel) 6. Glue Stick 7. Power Cord 8. USB Type B Cable 9. Filament Rack... -
Page 7: Fan Speed
※The glass plate, with red tape indicates the place for binder clips, is the print surface for prints. 2. Slightly glue on build plate for improving the print adhesion. 3. Plug the power cable in the wall socket and connect to the NEW X1. 4. Control > Set Temp > Nozzle / Bed Place it and wait till the instructed temperature, it’s about to start your print! -
Page 8: Loading Filament
PANEL LOADING FILAMENT STEP 5 ※Be aware of the operation is during heating procedure. A. Place the filament onto the filament rack. Press the clip on the extruder module till the release button up. Insert and push the sharp-pointed tip of filament slightly until it comes out of the nozzle. D. -
Page 9: Nozzle Replacement
PANEL NOZZLE REPLACEMENT ※Please ensure having the cool-down nozzle and power off the X1 before operating the process. A. Unplug the fan and nozzle cable/connectors carefully . B. Remove the fan module . C. Press the RED lever. D. Grab the nozzle bottom, slightly pull out at a 30° angle. E. - Page 10 Please loading PLA for your initial tested print. circle.gcode STEP 2 START TO PRINT 2. NEW X1 will prepare itself by heating up the nozzle and build plate. when reached to the instructed temperature, the build plate will automatically level to a designated height.
- Page 11 PANEL STEP 3 COMPLETION 3. When the print finished, wait for the build plate cooling down and back to home position; take the print and build plate out of X1 then grab the print from it. ※Once take apart the print from “heating build plate”, there would be possible injure or print defect.
-
Page 12: Print Status
PANEL MAIN MENU PRINT STATUS Print Speed Fan Speed Z:243.47 N1: 26° Print File moai-new.gcode Nozzle Z Axis Height Temperature TIME: 00:00 Time HB: 27° N2: X Print Status Heat Bed Temperature Print Procedure Menu Tree Main Menu Prepare Print From SD Control About Printer .gcode...
Need help?
Do you have a question about the New X1 and is the answer not in the manual?
Questions and answers