Table of Contents
Advertisement
Quick Links
Wet/Dry Vacuums
Owner's Manual
This unit is intended for commercial use.
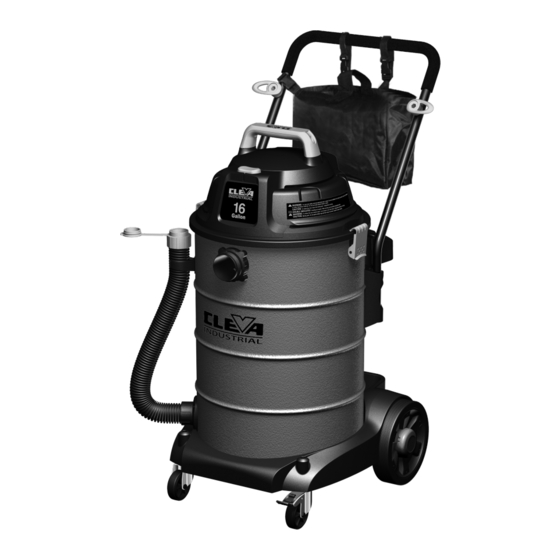
16 Gallon Industrial (Commercial)
Wet/Dry Vacuum
Model No. VK1611SIWDT
FOR YOUR SAFETY
Read and understand this manual before use.
Keep this manual for future reference.
www.cleva-na.com
Cleva North America, Inc.
Conforms to UL
Standard UL1017
Greenville, SC 29607
Certified to CSA STD
866-384-8432
C22.2 No.243-10
Advertisement
Table of Contents

Subscribe to Our Youtube Channel
Related Manuals for Cleva VK1611SIWDT


Summary of Contents for Cleva VK1611SIWDT
- Page 1 Wet/Dry Vacuums Owner’s Manual This unit is intended for commercial use. 16 Gallon Industrial (Commercial) Wet/Dry Vacuum Model No. VK1611SIWDT FOR YOUR SAFETY Read and understand this manual before use. Keep this manual for future reference. www.cleva-na.com Cleva North America, Inc.
-
Page 2: Table Of Contents
/ invoice will act as proof of purchase. Contact Cleva at 866-384-8432 for any warranty inquiries. Do not return a failed unit to the place of purchase or service center. Any charges for the shipping of a Cleva unit under warranty are purchaser’s responsibility unless Cleva requests such return in writing. -
Page 3: Safety Instructions And Warnings
Safety is a combination of common sense, staying alert and knowing how your vacuum works. Use this Wet/Dry Vac only as described in this manual. To reduce the risk of personal injury or damage to your Vac, use only CLEVA recommended accessories. For commercial use, SAVE THIS MANUAL FOR FUTURE REFERENCE. -
Page 4: Double Insulation Instructions
DOUBLE INSULATION INSTRUCTIONS This Wet/Dry Vac is double-insulated, eliminating the need for a separate grounding system. Use only identical replacements parts. Read the instructions for Servicing Double-Insulated Wet/Dry Vacs before servicing. Use this Wet/Dry Vac as described in this manual. Observe the following warnings that appear on the motor housing of your Wet/Dry Vac. -
Page 5: Extension Cord
EXTENSION CORDS When using an extension cord with your Wet/Dry Vac refer to the following table to determine the required A.W.G. wire size. Before using the cleaner make sure the power cord and extension cord are in good working conditions. Make repairs or replacements before using the vacuum cleaner. Only use extension cords that are rated for outdoor use. -
Page 6: Unpacking And Checking Carton Contents
UNPACKING AND CHECKING CARTON CONTENTS Remove entire contents of carton. Check each item against the carton contents list. Carton contents lists Description........QTY. Vac Assembly........Push/Pull Handle........Drain Hose........... Crevice Nozzle........Air Regulator Handle......Extension Wands (1)......Extension Wands (2)......Hose............. -
Page 7: General Assembly Instructions
GENERAL ASSEMBLY INSTRUCTIONS A Philips head screw driver is required. WARNING: DO NOT PLUG IN POWER CORD TO POWER OUTLET, MAKE SURE PLUG IS DISCONNECTED BEFORE ASSEMBLING THE WET/DRY VAC. UNPACKING YOUR WET/DRY VACUUM & GENERAL ASSEMBLY 1. Verify that the power cord is disconnected from the outlet. (fig. 1) 2. -
Page 8: Dry Vacuuming Operation
9. Fit collection bag flange onto the inlet stub, taking care not to damage the bag. (fig. 10) 10. For wet vacuuming: the supplied washable cartridge filter can be used for wet pick-up OR if cartridge filter is dirty, remove it and place supplied foam sleeve over filter cage for wet pick-up. (Fig. - Page 9 1. Verify that the power cord is disconnected from the outlet. (fig. 1) 2. In order to prepare your vacuum for dry vacuuming, verify that the cartridge filter is securely mounted. With power head removed and in upside down position, make sure the filter is pushed in until it stops against the power head and the retainer are installed.
-
Page 10: Liquid Vacuuming Operation
LIQUID VACUUM OPERATION LIQUID VACUUMING NOTE: This vacuum comes equipped with a washable cartridge filter capable of being used for wet pick-up. However, if the washable cartridge if full of dirt, it is better to remove it and use the supplied foam filter. -
Page 11: Maintenance
IMPORTANT! When vacuuming large quantities of liquids, do not immerse the nozzle completely in the liquid; leave a gap at the tip of the nozzle opening to allow air inflow. The machine is fitted with a float valve that stops the suction action when the container reaches its maximum capacity. -
Page 12: Installing & Cleaning Foam Sleeve Filter
Installing Cartridge Filter 1. Verify that the power cord is disconnected from the outlet. (fig. 1) 2. Remove power head and place in upside down position. 3. Install the cartridge filter over the filter cage and carefully push filter in until it stops against the power head. -
Page 13: When To Change Filters
WHEN TO CHANGE FILTERS Change the collection bag When the collection bag is 3/4 full, it MUST be replaced. Excessive over filling of this bag makes it difficult to remove from the vacuum tank and can result in breakage and spills. When collection bag becomes 3/4 full, turn off vacuum and slowly remove the collection bag from the tank until the opening in the collection bag is clear of the tank. -
Page 14: Parts -Exploded View
PARTS -EXPLODED VIEW VK1611SIWDT Manual Parts List Key Number Drawing Number Description Quantity Key Number Drawing Number Description Quantity Handle Hose VK01SR.A0.01 FV5804.01.00 Power Head Extension Wand (1) VK51SR.10.00 FV5943.01.20 Float Extension Wand (2) TVQTZS.03.YZ FV5943.01.01 Filter Cage Air Regulator Handle VI02SR.10.06... - Page 15 NOTES...
Need help?
Do you have a question about the VK1611SIWDT and is the answer not in the manual?
Questions and answers