Table of Contents
Advertisement
Quick Links
Advertisement
Table of Contents

Related Manuals for KickAss KABTRYSHUNT


Summary of Contents for KickAss KABTRYSHUNT
- Page 1 ® 12V BATTERY MONITOR WITH 500A SHUNT USER MANUAL KABTRYSHUNT V0.8...
-
Page 2: Table Of Contents
- - - - - - - - - - - - - - - - - - - - - - - - - - -- - - - - - - - - - - - - - - - WHY KICKASS? -
Page 3: Why Kickass
WITH 500A SHUNT WHY KICKASS? KickAss is focussed on bringing the luxury of home to the outdoors. Your one stop shop for 12V products. All of our products are designed to be plug and play for the ultimate camping experience. -
Page 4: Included Parts
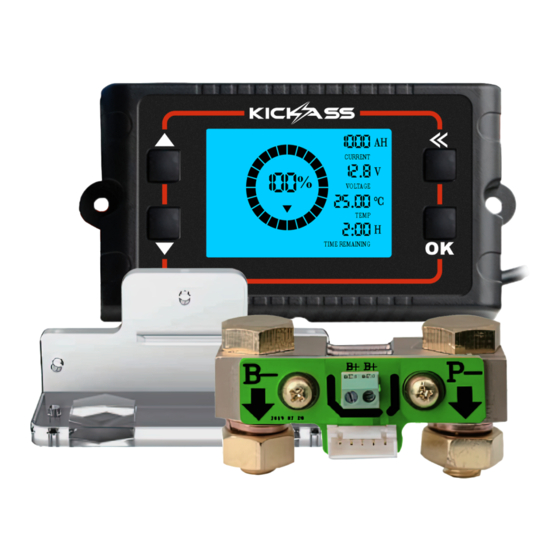
INCLUDED PARTS 500A Shunt with M8 Bolts Battery Monitor Display B+ Wire (Shunt power and voltage sensing) Shunt Holder 5m Battery Temperature Sensor Mounting Screws Shunt Data and Power Cable OPTIONAL ACCESSORIES KA recommends using the 5M (RDU) extension cable to remotely mount your Battery Monitor Display. -
Page 5: Product Overview
PRODUCT OVERVIEW SOC Display with Instantaneous Current Energy Ring Draw (+ or -) Battery Voltage Up Button Back Button Down Button OK Button Temperature Time Remaining to Full/Empty Charge/Discharge Battery SPECIFICATIONS Description Parameter Working Voltage Range 10-30V DC Working current (backlight on) ~100 mA Standby current (backlight off) ~1-2 mA... -
Page 6: Installation
INSTALLATION Fitting Shunt Assembly The shunt can be connected to a battery in two ways, bolted directly to the negative battery terminal or connected via a short wire to the negative terminal. Option 1 - Direct to Battery 1. To bolt the shunt directly to the battery terminal, remove the bolts from the shunt assembly and discard the shunt holder. - Page 7 INSTALLATION Connecting Display to the Shunt Assembly The Battery Monitor Display can be connected to the Shunt, with the provided cables. To do this firstly connect the data cable to the shunt assembly by plugging in the small white 5 pin connector, now connect the two round black connectors to join the display and shunt together.
-
Page 8: Setup
SETUP Initial Setup 1000 CURRENT 12.8 Before powering any system loads, the display must be calibrated VOLTAGE 25.00 °C to 100% SOC. Do this by ensuring your battery bank is fully TEMP 2:00 TIME REMAINING charged and the display is showing 100%. To manually calibrate the SOC, press and hold the UP arrow for 3 seconds. - Page 9 Recommended Values for Different Battery Types Battery Type CALCIUM LITHIUM *Total rated capacity of battery bank. For example: A single @ 120Ah battery: CAP= 120Ah, 2x battery @ 120Ah: CAP= 240AH (refer to 14.1V 14.4-14.7V 14.7V 14.7V 14.4-14.6V charger spec) 50%-60% of CAP 10.8V 10.5V...
-
Page 10: Operation
OPERATION Backlight The LCD is fitted with a backlight, when charging the backlight will remain on to indicate the battery is receiving charge. When in standby or discharging, the backlight will remain off. The backlight can be turned on by pressing the OK button, it will then turn off after 5 minutes. Alarm The alarm will sound when the capacity of the battery goes below the set value.
Need help?
Do you have a question about the KABTRYSHUNT and is the answer not in the manual?
Questions and answers