Carl's Place Pro Enclosure Kit Assembly Instructions & User Manual
Hide thumbs
Also See for Pro Enclosure Kit:
- Assembly instructions & user manual (17 pages) ,
- Assembly instructions & user manual (20 pages)
Advertisement
Quick Links
Advertisement

Related Manuals for Carl's Place Pro Enclosure Kit


Summary of Contents for Carl's Place Pro Enclosure Kit
- Page 1 Pro Enclosure Kit Assembly Instructions & User Manual Get it digitally.
-
Page 2: Materials List
Thank you for purchasing a golf simulator impact screen and enclosure kit from Carl’s Place! In this guide you will find everything you need to complete your kit assembly, plus a few tips to help you make the best use of it. Materials List Ball bungees Foam Layout Sheet... -
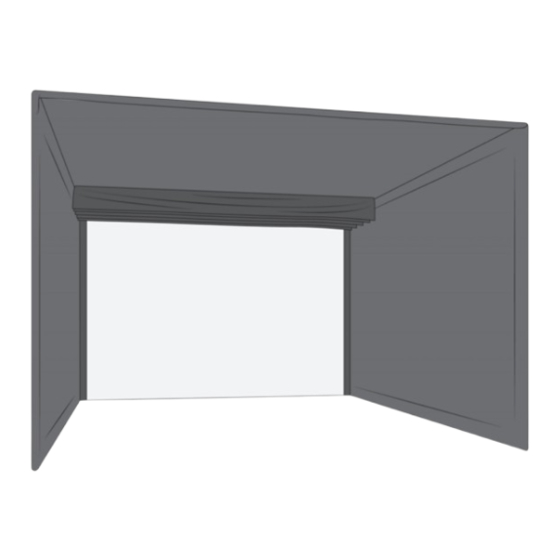
Page 3: Assembly Overview
Pliers • Cutting tool • Step Ladder (8-ft recommended) • Optional. A friend who owes you a favor Assemble Frame 2. Attach Ceiling Panel 3. Attach Wall Panels 4. Attach Impact Screen Pro Enclosure Kit C-Series Assembly Manual - V07... - Page 4 Assemble Frame Using the Frame Assembly Sheet included in this manual, construct your frame. If you bought a pipe kit from Carl’s Place, simply insert the pipes fully into the connectors and tighten with 6mm Hex. If you did not buy a pipe kit from Carl’s Place, you must source your own pipes, cut to the specifications shown on the Frame Assembly Sheet.
- Page 5 3. Wrap the loop end around the pipe. 4. Hook it over the ball to secure. For zip ties: Wrap tie around frame and secure tie end into head. 2. Push tab to loosen, if necessary. Pro Enclosure Kit C-Series Assembly Manual - V07...
- Page 6 Only at the four corners use ball bun- gees to attach the ceiling to the frame. Use two bungees in each corner grom- met (one in each direction). With the panel attached in the corners, and centered, switch to using zip ties. Insert a zip tie through each grommet and gently secure it around the pipe.
- Page 7 (as you face the screen) 4. Blue – left-hand wall (as you face the screen) Connect the flaps in the center of the ceiling panel using the hook and loop fasteners. Pro Enclosure Kit C-Series Assembly Manual - V07...
- Page 8 Optional: For a more professional look, rotate the head of the zip tie to the back and top of the enclosure. You’ll minimize any bumps under the flaps. You can also cut the tails off the zip ties at this time. Attach Ceiling Panel Flaps Starting at the corners, fold the...
- Page 9 Hang the baffles with the matte side facing the front of the enclosure and stretch them to the top of the frame using one bungee on each side. Zip-ties can be used to apply extra tension if needed. Pro Enclosure Kit C-Series Assembly Manual - V07...
- Page 10 Attach Wall Panels The wall panels are marked with colored tabs. The red colored tab marks the panel for the right wall (as you face the screen). The blue colored tab marks the left wall. Pictured example shows the right wall panel. Before attaching the wall panels, orient the panels so that: The sleeved edges are closest to the bottom and front pipes 2.
- Page 11 Slide the bottom sleeved edge of the wall panel onto the bottom pipe. Place a block of wood under the frame to prop it up while sliding the sleeve on. Pro Enclosure Kit C-Series Assembly Manual - V07...
- Page 12 Then, slide the front sleeved edge of the wall panel upward onto the front vertical pipe. Once the wall panel material is over both the bottom and front pipes, re-install the “L” fitting. Tighten the connector, then attach the hook-and-loop fasteners that wrap around corner.
- Page 13 Smooth the fabric on the front pipe upward. Then tighten the zip tie for a smooth front edge. Pro Enclosure Kit C-Series Assembly Manual - V07...
- Page 14 Repeat by installing the second wall panel. Attach Wall Panel Flaps It is important to attach the wall panels flaps in the right order. First, from inside the enclo- sure, secure the wall panel flaps to the ceiling panel using the hook-and-loop fasteners.
- Page 15 Check the fit. If you need to make adjustments to achieve a smooth corner, do so now. Pro Enclosure Kit C-Series Assembly Manual - V07...
- Page 16 Attach the Impact Screen Orient the impact screen with the Carl’s Place logo in the top left. Attach the impact screen to the frame, beginning with 2 ball bungees in each of the top corners. Face the ball of the bungee to the back. Simplified to show detail.
- Page 17 Use a pliers to hold the cable and prevent it from spinning, while using ” Hex key to tighten the receiver. Do not overtighten. Pro Enclosure Kit C-Series Assembly Manual - V07...
- Page 18 Secure each of the bottom grommets of the screen with a zip tie. Wrap the zip tie under and around the bottom pipe, held in place by the exposed receiver end. These 2 bottom zip ties can be pulled tight. Add zip ties to the remaining grommets, tightening only enough to maintain an even...
- Page 19 Videos. Rave reviews. Or even recommendations. More of a social creature? Tag us and throw a quick #mycarlsplace on your post. We just may feature your golf simulator in our next campaign. Pro Enclosure Kit C-Series Assembly Manual - V07...
- Page 20 Anything else we can help you with? info@carlofet.com (608) 352-0002, Monday-Friday, 8am-4pm CT Customers who do not follow the assembly, instructions and tips in this manual increase their risk of injury. Take proper safety precautions to protect ceilings, walls, windows, cars and neighboring homes.
Need help?
Do you have a question about the Pro Enclosure Kit and is the answer not in the manual?
Questions and answers