Glow-worm Hideaway 40B FF Instructions For Use Manual
Balanced fanned flue boiler
Hide thumbs
Also See for Hideaway 40B FF:
Table of Contents
Advertisement
Quick Links
Installation and Servicing
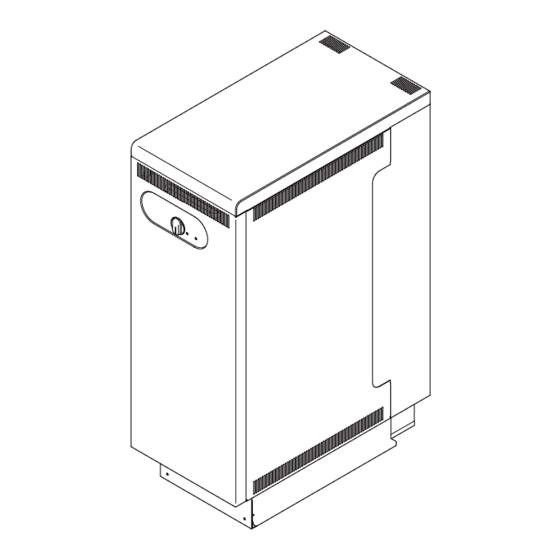
Hideaway 40B FF
G.C. No. 41-047-32
Hideaway 50B FF
G.C. No. 41-047-33
Hideaway 60B FF
G.C. No. 41-047-34
Balanced Fanned Flue Boiler
This is a Cat I
Reference in these instructions to British Standards and Statutory
Regulations/Requirements apply only to the United Kingdom.
For Ireland the rules in force must be used.
The instructions consist of three parts, User, Installation and Servicing Instructions, which includes the Guarantee Registration
Card. The instructions are an integral part of the appliance and must, to comply with the current issue of the Gas Safety
(Installation and Use) Regulations, be handed to the user on completion of the installation.
Thank you for installing a new Glow-worm appliance in your home.
Glow-worm appliances' are manufactured to the very highest standard so we are pleased
In the centre pages are to be found your Guarantee Registration Card, which we recommend you complete and
If this card is missing you can obtain a copy or record your registration by telephoning the Heatcall Customer
Our Guarantee gives you peace of mind plus valuable protection against breakdown by covering the cost of:
❏
✔
All replacement parts
❏
✔
All labour charges
❏
✔
All call-out charges
One Contact Local Service
Instructions for Use
To b e l e f t w i t h t h e u s e r
Appliance
2H
Guarantee Registration
to offer our customers' a Comprehensive First Year Guarantee.
return as soon as possible.
Service number 01773 828100.
REGISTER YOUR GLOW-WORM APPLIANCE
FOR 1ST YEAR GUARANTEE PROTECTION
CALL 0208 247 9857
Customer Services:
Tel: (01773) 828100
Fax: (01773) 828070
Hepworth Heating Ltd.,
Nottingham Road, Belper, Derbyshire. DE56 1JT
General/Sales enquiries:
Tel: (01773) 824141 Fax: (01773) 820569
221956D.03.02
Advertisement
Chapters
Table of Contents

Related Manuals for Glow-worm Hideaway 40B FF


Summary of Contents for Glow-worm Hideaway 40B FF
- Page 1 Guarantee Registration Thank you for installing a new Glow-worm appliance in your home. Glow-worm appliances' are manufactured to the very highest standard so we are pleased to offer our customers' a Comprehensive First Year Guarantee. In the centre pages are to be found your Guarantee Registration Card, which we recommend you complete and return as soon as possible.
-
Page 2: Table Of Contents
Important Information TESTING AND CERTIFICATION This boiler is tested and certificated for for safety and performance. It is therefore important that no alteration is made to the boiler, without permission, in writing, from Hepworth Heating Ltd. Any alteration not approved by Hepworth Heating Ltd., could invalidate the certification, boiler warranty and may also infringe the current issue of the Statutory Requirements, see Section 1.3. - Page 3 The frequency of servicing will depend upon The Glow-worm Hideaway B FF series are balanced fanned the particular installation conditions and usage, but in general flue boilers. They provide heating and if required, an indirect once a year should be enough.
- Page 4 Instructions for Use To Turn the Appliance On Turn the electrical supply on to the boiler and check that all BOILER remote controls are calling for heat. TEMPERATURE Turn the boiler temperature control clockwise to any position CONTROL between “0” and "Max", see diagram 1. "Max"...
-
Page 5: General Data
1 General Data GAS CONNECTION WATER CONNECTIONS Rc1 reduced NOTE: The boiler casing can be in. B.S.P.T.) with DISTRIBUTOR TUBE to set at two heights, in. B.S.P.T.) (pumped return) MAX. and MIN. WATER CONNECTIONS Rc1 (1in. B.S.P.T.) GENERAL DIMENSIONS - given in millimetres Diagram 1.1 700 558 294 384 555 442 Max 900/... - Page 6 1 General Data 1.3 Statutory Requirements The installation of this appliance must be carried out by a competent person and must be in accordance with the relevant requirements of the current issue of: Manufacturer’s instructions supplied. The Gas Safety (Installation and Use) Regulations, Building Regulations, Local Water Company Bye-laws, The Building Standards (Scotland) Regulations, (applicable in Scotland), Health and Safety at Work Act, Control of Substances Hazardous...
- Page 7 1 General Data 1.7 Boiler Location This boiler is not suitable for outside installation. WORKTOP 320 MIN. The boiler casing can be fitted at two heights. Refer to diagram 1.5. The boiler is assembled at the factory with the control box and heat shield fitted in the lower position.
-
Page 8: Water Systems
2 Water Systems 2.1 Water Pressure Head REFER TO BS 5546 The boiler shall only be connected to a cistern water supply with 22mm VENT a minimum head of 1metre (3ft3in) and a maximum head of 15mm COLD FEED 27metres (90ft) which has an open vent in the system. The working pressure must be within the range 0.1bar to 2.7bar INDIRECT (1.3 to 39lbftin... -
Page 9: Flue And Ventilation
3 Flue and Ventilation The flue must be installed in accordance with the rules in force in the countries of destination. 3.1 Terminal Position The minimum acceptable siting dimensions for the terminal from obstruction, other terminals and ventilation openings are shown in diagram 3.1. -
Page 10: Installation
4 Installation INCREASE TO 30mm IF A FLUE COLLAR IS ADDED FLUE & AIR DUCT LENGTH = A + 15 + 3 FLUE MINIMUM MINIMUM MAXIMUM PACKS WALL FLUE FLUE THICKNESS LENGTH LENGTH REAR STD. REAR NOTE : IF IT IS NECESSARY TO CUT THE DUCTS TO ACHIEVE THE "FLUE LENGTH"... - Page 11 4 Installation Fit the self adhesive foam seal provided in the flue pack around 4.3 Flue Hole Cutting the air duct at the position shown in diagram 4.6. Mark out the flue centre, see diagram 4.2, then cut a hole for the Make sure that the ductings do not slope down towards the flue using, preferably, a 115mm minimum core drill.
- Page 12 4 Installation 4.6 Water Connections - Gravity Domestic and Pumped Heating ALTERNATIVE HEATING OR Fit suitable fittings into the boiler tappings, see diagram 4.7. DOMESTIC Make sure that all pipes are taken backwards and will clear the HOT WATER casings, see diagram 1.1. FLOW Heating flow: Any one of the four upper connections may be used.
- Page 13 4 Installation 4.9 Casing Brackets 4.8 Pipework Fit the two upper and two front casing brackets shown in When the front tappings are used, it is essential that any diagram 4.12, using the No.8 screws provided. pipework or fittings do not project more than shown in diagram 4.10.
- Page 14 4 Installation 4.10 Side In-fill Panel (If required) 4.11 Side Casings A side in-fill panel is supplied with the boiler, which can be fitted Fit the side casings by locating their lugs into the appropriate at the rear of the left or right hand side casing but can be slot in the boiler plinth, see diagram 4.14, depending on the discarded if the water connections are made on both sides of required height, there are two options, see section 1.7.
- Page 15 4 Installation 4.12 Flue / Boiler Connection Remove the three self-tapping screws from the lower part of the "LOW" control box support bracket, see diagram 4.16. WING NUT position Undo the wing nut that secures the top of the heat shield and "HIGH"...
- Page 16 4 Installation 4.13 Water & Gas connections FLUE DUCT Replace fan access door, heat shield and control box. EXTENSION Note: When replacing the fan access door make sure the lip at PIECE the top of door fits into and behind the slotted bracket located at the top of the boiler.
-
Page 17: Electrical Wiring
5 Electrical Wiring SECURING CONTROL BOX SCREWS COVER TERMINAL BLOCK TERMINAL BLOCK CONNECTIONS CONTROL BOILER TEMPERATURE CONTROL Diagram 5.1 5.1 Control Box Access Remove control box cover by undoing the four securing screws (two on control box, two on the heat shield) and lift off, see diagram 5.1. -
Page 18: Commissioning
6 Commissioning The ignition system will operate to light the boiler. After a pre- IMPORTANT NOTE set time if ignition has not taken place the boiler will shutdown. The WARNING NOTICE attached to the front casing must only To re-start the lighting sequence, turn the boiler temperature be removed by the user control to “O”, then fully clockwise to “Max”. - Page 19 10 minutes after the burner has lit, making sure that all other gas burning appliances and pilot lights are off. The gas rates: Hideaway 40B FF : 1.7m /h (49ft Hideaway 50B FF : 2.1m /h (60ft Hideaway 60B FF : 2.5m...
-
Page 20: Instructions To User
7 Instructions to the User Instruct and demonstrate the safe and efficient operation of the boiler, heating system and domestic hot water system. Advise the user, that to ensure the continued efficient and safe operation of the boiler, it is recommended that it is checked and serviced at regular intervals. - Page 21 8 Servicing Note: When replacing the fan access door make sure the lip at the top of door fits into and behind the slotted bracket located at the top of the boiler. Note: To ease removal of the right hand baffle from the heat exchanger, remove both silicone tubes from the air pressure switch.
- Page 22 8 Servicing 8.2 Boiler Flueways 8.4 Service Checks Remove flueway baffles noting that there are 1 centre and 2 Inspect the spark electrode and clean and replace as necessary, side flueway baffles, see diagram 8.8. see diagram 8.12. Place a sheet of paper in the combustion chamber to catch any Check the condition of the side and rear insulation panels in the flue debris.
-
Page 23: Fault Finding
8 Servicing ELECTRODE SPARK GAP = 3.6 SECURING SCREW GRAPHITE BURNER COATED INJECTOR NUT(2) Diagram 8.12 Diagram 8.11 9 Fault Finding IMPORTANT. On completion of the Fault Finding task which has required the breaking and remaking of the electrical connections, the continuity, polarity, short circuit and resistance to earth checks must be repeated using a suitable multimeter. - Page 24 9 Fault Finding 9.1 Electrical BOILER TEMPERATURE Gain access to the control box, refer to the relevant paragraph CONTROL in section 6.1, then remove the control box cover, refer to section 5.1. Refer to: Boiler Fault Finding, see diagram 9.1, Fault Finding Wiring Diagram, see diagram 9.3, Pictorial Wiring Diagram, see diagram 9.4.
- Page 25 9 Fault Finding NEON KEY (see P.C.B) PRESSURE SWITCH NEON 1 = = MAINS ON NEON 2 = = DEMAND ON NEON 3 = = FAN RUNNING NEON 4 = = BURNER LIT = SAFETY NEON 5 = TEMPERATURE LIMITER NEON 6 = = FLAME FAILURE CONTROL...
-
Page 26: Replacement Parts
10 Replacement of Parts IMPORTANT NOTES Carefully pull the boiler temperature control knob away from the P.C.B. REMEMBER, When replacing a part on this appliance, use only spare parts that you can be assured conform to the safety and Disconnect the electrical plugs from the control board (PCB) performance specification that we require. - Page 27 10 Replacement of Parts 10.5 Solenoid 10.10 Insulation Remove front panel to gain access, see section 6.8. Refer to the relevant paragraphs of the servicing section to remove the burner from combustion chamber. Remove the electrical plug from the multifunctional control and remove the securing screw and then the solenoid assembly, Sides see diagram 10.4.
-
Page 28: Spare Parts
11 Spare Parts 11.1 Part Identification The key number in diagram 11.1 and the first column of the list will help identify the spare part. 11.2 Ordering When ordering any spare part please quote the part number and the description from the list together with the model name and serial number information from the data label. - Page 29 2000225144B.09.03 Instructions for Use Installation and Servicing To b e l e f t w i t h t h e u s e r Hideaway 80B FF G.C. No. 41-047-35 Balanced Fanned Flue Boiler Hepworth Heating Ltd., Nottingham Road, Belper, Derbyshire. DE56 1JT...
- Page 30 Guarantee Registration Thank you for installing a new Glow-worm appliance in your home. Glow-worm appliances are manufactured to the very highest standard so we are pleased to offer our customers a Comprehensive First Year Guarantee. We recommend you complete and return as soon as possible your guarantee registration return literature, supplied in the document envelope.
- Page 31 Contents The instructions consist of three parts, User, Installation and Servicing Instructions, which includes the Guarantee Registration Card. The instructions are an integral part of the appliance and must, to comply with the current issue of the Gas Safety (Installation and Use) Regulations, be handed to the user on completion of the installation. CONTENTS DESCRIPTION SECTION...
- Page 32 Important Information Gas safety (Installation and use) Regulations Electrical Supply In your interests and that of gas safety, it is the law that ALL gas WARNING: This boiler must be earthed. appliances are installed and serviced by a competent person in All system components shall be of an approved type and shall accordance with the above regulations.
-
Page 33: Appliance Introduction
If in doubt, consult your servicing company. Appliance Introduction Introduction The Glow-worm Hideaway B FF series are Balanced fanned The installation of this boiler must be carried out by a competent person in accordance with the rules in force in the countries of flue boilers. -
Page 34: Maintenance And Servicing
The boiler casing can be cleaned with a damp cloth, followed by by Hepworth Heating Ltd. a dry cloth to polish. If a part is required contact Heatcall (Glow-worm’s own service Do not use abrasive or solvent cleaners. organisation) using the telephone number on the inside front cover of this booklet. -
Page 35: Instructions For Use
Instructions for Use To Turn the Appliance On BOILER Turn the electrical supply on to the boiler and check that all remote controls are calling for heat. TEMPERATURE CONTROL Turn the boiler temperature control clockwise to any position between “0” and "Max", see diagram 1. "Max"... -
Page 36: General Data
1 General Data GAS CONNECTION WATER CONNECTIONS Rc1 reduced NOTE: The boiler casing can be in. B.S.P.T.) with DISTRIBUTOR TUBE to set at two heights, in. B.S.P.T.) (pumped return) WATER CONNECTIONS MAX. and MIN. Rc1 (1in. B.S.P.T.) MAX. MIN. GENERAL DIMENSIONS - given in millimetres Diagram 1.1 1.3 Statutory Requirements Important Notice... - Page 37 1 General Data 1.5 Gas Supply To floor The gas installation shall be in accordance with the relevant level standards. In GB this is BS6891. In IE this is the current edition of I.S.813 "Domestic Gas MAX.900 Installations". MIN. 860 The supply from the governed meter must be of adequate size to provide a steady inlet working pressure of 20mbar (8in wg) at the boiler.
- Page 38 1 General Data 1.8 Heating System Controls 1.7 Boiler Location The heating system should have installed: a programmer and This boiler is not suitable for outside installation. room thermostat controlling the boiler. The boiler casing can be fitted at two heights. Refer to Thermostatic radiator valves may be installed, however they diagram 1.3.
-
Page 39: Water Systems
2 Water Systems The installation of the boiler must comply with the requirements When using in an existing system take special care to drain the of the current issue of BS6798, in Ireland, refer also to the entire system, including the radiators, then thoroughly clean out current edition of I.S.813 "Domestic Gas Installations". -
Page 40: Flue And Ventilation
3 Flue and Ventilation The flue must be installed in accordance with the rules in force The terminal must be exposed to the external air, the position allowing free passage of air across it at all times. in the countries of destination. Car ports or similar extensions of a roof only, or a roof and one 3.1 Terminal Position wall, require special consideration with respect to any openings,... -
Page 41: Installation
4 Installation INCREASE TO 30mm IF A FLUE COLLAR IS ADDED FLUE & AIR DUCT LENGTH = A + 15 + 3 MINIMUM MINIMUM MAXIMUM FLUE WALL FLUE FLUE PACKS THICKNESS LENGTH LENGTH REAR STD. REAR NOTE : IF IT IS NECESSARY TO CUT THE DUCTS TO ACHIEVE THE "FLUE LENGTH"... - Page 42 4 Installation Fit the self adhesive foam seal provided in the flue pack around 4.3 Flue Hole Cutting the air duct at the position shown in diagram 4.1. Mark out the flue centre, see diagram 4.2, then cut a hole for the Make sure that the ductings do not slope down towards the flue using, preferably, a 115mm minimum core drill.
- Page 43 4 Installation 4.6 Water Connections - Gravity Domestic and Pumped Heating ALTERNATIVE HEATING OR Fit suitable fittings into the boiler tappings, see diagram 4.7. DOMESTIC Make sure that all pipes are taken backwards and will clear the casings, see diagram 1.1. HOT WATER FLOW NOTE:...
- Page 44 4 Installation 4.8 Pipework 4.9 Casing Brackets When the front tappings are used, it is essential that any Fit the two upper and two front casing brackets shown in pipework or fittings do not project more than shown in diagram diagram 4.12, using the No.8 screws provided.
- Page 45 4 Installation 4.10 Side In-fill Panel (if required) 4.11 Side Casings A side in-fill panel is supplied with the boiler, which can be fitted Fit the side casings by locating their lugs into the appropriate at the rear of the left or right hand side casing but can be slot in the boiler plinth, see diagram 4.13, depending on the discarded if the water connections are made on both sides of required height, there are two options, see section 1.7.
- Page 46 4 Installation 4.12 Flue / Boiler Connection Remove the three self-tapping screws from the lower part of the control box support bracket, see diagram 4.16. Undo the wing nut that secures the top of the heat shield and carefully hinge down control box and heat shield, see diagram ACCESS 4.16.
- Page 47 4 Installation 4.13 Water and Gas connections Replace fan access door, heat shield and control box. Note: When replacing the fan access door make sure the lip at the top of door fits into and behind the slotted bracket located at the top of the boiler.
-
Page 48: Electrical Wiring
5 Electrical Wiring CONTROL SECURING SCREWS COVER TERMINAL TERMINAL BLOCK BLOCK CONNECTIONS CONTROL BOILER TEMPERATURE CONTROL Diagram 5.1 5.1 Control Box Access Remove control box cover by undoing the four securing screws CABLE (two on control box, two on the heat shield) and lift off, see CLAMP diagram 5.1. -
Page 49: Commissioning
6 Commissioning operate to light the boiler. After a pre-set time if ignition has not IMPORTANT NOTE taken place the boiler will shutdown. The WARNING NOTICE attached to the front casing must only To re-start the lighting sequence, turn the boiler temperature be removed by the user control to “O”, then fully clockwise to “Max”. - Page 50 6 Commissioning the ‘Burner On’ indicator going out and the lighting sequence 6.7 Adjustment - Fully Pumped Open Vented starting up, as follows: System 1. Fan starts. When commissioning the system the boiler should first be fired 2. Spark ignition operates for 10 seconds. on full service, that is, central heating and domestic hot water.
-
Page 51: Instructions To The User
7 Instructions to the User Instruct and demonstrate the safe and efficient operation of the boiler, heating system and domestic hot water system. Advise the user, that to ensure the continued efficient and safe operation of the boiler, it is recommended that it is checked and serviced at regular intervals. - Page 52 8 Servicing Note: When replacing the fan access door make sure the lip at the top of door fits into and behind the slotted bracket located at the top of the boiler. Refer to diagram 8.7. Remove the electrical connections from the fan by pulling the insulation boots only.
- Page 53 8 Servicing 8.4 Service Checks 8.2 Boiler Flueways Inspect the spark electrode and clean and replace as necessary, Remove flueway baffles noting that there are 2 centre and 2 see diagram 8.12. side flueway baffles, see diagram 8.8. Check the condition of the side and rear insulation panels in the Place a sheet of paper in the combustion chamber to catch any combustion chamber.
-
Page 54: Fault Finding
8 Servicing ELECTRODE SPARK GAP = 3.6 SECURING GRAPHITE SCREW COATED BURNER NUT(2) INJECTOR Diagram 8.12 Diagram 8.11 9 Fault Finding IMPORTANT. On completion of the Fault Finding task which has required the breaking and remaking of the electrical connections, the continuity, polarity, short circuit and resistance to earth checks must be repeated using a suitable multimeter. - Page 55 9 Fault Finding MAINS SUPPLY BOILER TEMPERATURE 230v ~ 50Hz CONTROL bk BLACK br BROWN YELLOW BLUE GREY PURLPLE FUSE TYPE 3.15A Diagram 9.2 9.1 Electrical Gain access to the control box, refer to the relevant paragraph in section 8.1, then remove the control box cover, refer to section 5.1.
- Page 56 9 Fault Finding BOILER PILOT FAULT FINDING Diagram 9.4 2000225144B...
-
Page 57: Replacement Of Parts
10 Replacement of Parts IMPORTANT NOTES Disconnect the thermistor electrical plug from the control board (P.C.B) slightly bending back the retaining latch to allow REMEMBER, When replacing a part on this appliance, use only withdrawal, see diagram 10.2. spare parts that you can be assured conform to the safety and performance specification that we require. - Page 58 10 Replacement of Parts 10.3 Electrode 10.8 Air Pressure Switch Refer to the relevant paragraphs of Section 8 servicing to Remove front panel to gain access, see section 6.8. remove the burner from combustion chamber. Refer to the relevant paragraphs of Section 8 servicing to To remove the electrode, unscrew from the retaining bracket, remove the burner from combustion chamber.
-
Page 59: Spare Parts
11 Spare Parts 11.1 Part Identification 11.2 Ordering The key number in diagram 11.1 and the first column of the list When ordering any spare part please quote the part number will help identify the spare part. and the description from the list together with the model name and serial number information from the data label. - Page 60 Because of our constant endeavour for improvement, details may vary slightly from those shown in these instructions. 2000225144B...
- Page 61 Guarantee Registration Thank you for installing a new Glow-worm appliance in your home. Glow-worm appliances' are manufactured to the very highest standard so we are pleased to offer our customers' a Comprehensive First Year Guarantee. In the centre pages are to be found your Guarantee Registration Card, which we recommend you complete and return as soon as possible.
- Page 62 Important Information TESTING AND CERTIFICATION This boiler is tested and certificated for safety and performance. It is therefore important that no alteration is made to the boiler, without permission, in writing, from Hepworth Heating Ltd. Any alteration not approved by Hepworth Heating Ltd., could invalidate the certification, boiler warranty and may also infringe the current issue of the Statutory Requirements, see Section 1.3.
- Page 63 The frequency of servicing will depend upon The Glow-worm Hideaway B FF series are balanced fanned the particular installation conditions and usage, but in general flue boilers. They provide heating and if required, an indirect once a year should be enough.
- Page 64 Instructions for Use To Turn the Appliance On BOILER Turn the electrical supply on to the boiler and check that all TEMPERATURE remote controls are calling for heat. The fan will operate. CONTROL It should be noted that this is a fanned flue appliance and fan operation may be heard.
-
Page 65: General Data
1 General Data GAS CONNECTION WATER CONNECTIONS Rc1 reduced NOTE: The boiler casing can be in. B.S.P.T.) with DISTRIBUTOR TUBE to set at two heights, in. B.S.P.T.) (pumped return) MAX. and MIN. WATER CONNECTIONS Rc1 (1in. B.S.P.T.) GENERAL DIMENSIONS - given in millimetres Diagram 1.1 700 558 294 350 555 442 Max 900/... - Page 66 1 General Data 1.3 Statutory Requirements The installation of this appliance must be carried out by a competent person and must be in accordance with the relevant requirements of the current issue of: Manufacturer’s instructions supplied. The Gas Safety (Installation and Use) Regulations, Building Regulations, Local Water Company Bye-laws, The Building Standards (Scotland) Regulations, (applicable in Scotland), Health and Safety at Work Act, Control of Substances Hazardous...
- Page 67 1 General Data 1.7 Boiler Location WORKTOP OR This boiler is not suitable for outside installation. FIXTURE The boiler casing can be fitted at two heights. Refer to diagram 1.4. The boiler is assembled at the factory with the control box and heat shield fitted in the lower position.
-
Page 68: Water Systems
2 Water Systems 2.1 Water Pressure Head REFER TO BS 5546 The boiler shall only be connected to a cistern water supply with a minimum head of 1metre (3ft3in) and a maximum head of 22mm VENT 27metres (90ft) which has an open vent in the system. 15mm COLD FEED The working pressure must be within the range 0.1bar to 2.7bar (1.3 to 39lbftin... - Page 69 3 Flue and Ventilation The flue must be installed in accordance with the rules in force in the countries of destination. 3.1 Terminal Position The minimum acceptable siting dimensions for the terminal from obstruction, other terminals and ventilation openings are shown in diagram 3.1.
-
Page 70: Installation
4 Installation *INCREASE TO 30mm IF A FLUE COLLAR IS ADDED FLUE & AIR DUCT LENGTH = A + 15 + 3 FLUE MINIMUM MINIMUM MAXIMUM PACKS WALL FLUE FLUE THICKNESS LENGTH LENGTH REAR STD. REAR NOTE : IF IT IS NECESSARY TO CUT THE DUCTS TO ACHIEVE THE "FLUE LENGTH"... - Page 71 4 Installation Make sure that the ductings do not slope down towards the 4.3 Flue Hole Cutting boiler. Mark out the flue centre, see diagram 4.2, then cut a hole for the Make good around the flue outside after installation of the boiler. flue using, preferably, a 115mm minimum core drill.
- Page 72 4 Installation 4.6 Water Connections - Gravity Domestic and ALTERNATIVE Pumped Heating HEATING OR Fit suitable fittings into the boiler tappings, see diagram 4.7. DOMESTIC HOT WATER Make sure that all pipes are taken backwards and will clear the casings, see diagram 1.1. FLOW (Thermistor Heating flow: Any one of the two upper connections may be...
- Page 73 4 Installation 4.9 Pipework It is essential that any pipework or fittings do not project more than shown in diagram 4.10. Do not route any pipework, water or gas, across the front of the combustion chamber cover. The gas pipework must be along the left hand side of the boiler. 4.10 Casing Brackets Fit the two upper and two front casing brackets shown in diagram 4.11, using the No.8 screws provided.
- Page 74 4 Installation 4.11 Side In-fill Panel (if required) 4.12 Side Casings A side in-fill panel is supplied with the boiler, which can be fitted Fit the side casings by locating their lugs into the appropriate at the rear of the left or right hand side casing but can be slot in the boiler plinth, see diagram 4.13, depending on the discarded if the water connections are made on both sides of required height, there are two options, see section 1.7.
- Page 75 4 Installation 4.13 Flue / Boiler Connection Remove the three self-tapping screws from the lower part of the "LOW" control box support bracket, see diagram 4.15. WING NUT position Undo the wing nut that secures the top of the heat shield and "HIGH"...
- Page 76 4 Installation 4.14 Water & Gas connections FLUE DUCT Replace fan access door, heat shield and control box. EXTENSION PIECE Note: When replacing the fan access door make sure the lip at the top of door fits into and behind the slotted bracket located at the top of the boiler.
-
Page 77: Electrical Wiring
5 Electrical Wiring SECURING CONTROL BOX SCREWS COVER TERMINAL BLOCK TERMINAL BLOCK CONNECTIONS CONTROL BOILER TEMPERATURE CONTROL Diagram 5.1 5.1 Control Box Access Remove control box cover by undoing the four securing screws (two on control box, two on the heat shield) and lift off, see diagram 5.1. -
Page 78: Commissioning
6 Commissioning The ignition system will operate to light the boiler. The boiler will IMPORTANT NOTE have three attempts at ignition before lockout. Ignition lockout The WARNING NOTICE attached to the front casing must only is indicated by 'Reset' neon being "ON" and the 'Burner on' neon be removed by the user flashing. - Page 79 6 Commissioning With the burner alight, turn the gas service cock “Off”, see 6.7 Adjustment - Fully Pumped Open Vented diagram 6.1. System After a short period the burner will go out. When commissioning the system the boiler should first be fired The correct working of the flame supervision is shown by the on full service, that is, central heating and domestic hot water.
-
Page 80: Instructions To User
7 Instructions to the User Instruct and demonstrate the safe and efficient operation of the boiler, heating system and domestic hot water system. Advise the user, that to ensure the continued efficient and safe operation of the boiler, it is recommended that it is checked and serviced at regular intervals. - Page 81 8 Servicing Note: When replacing the fan access door make sure the lip at the top of door fits into and behind the slotted bracket located at IGNITION, SENSING & the top of the boiler. EARTH LEADS Remove the electrical connections from the fan by pulling the insulation boots only.
- Page 82 8 Servicing 8.4 Service Checks 8.2 Boiler Flueways Inspect the ignition and sensing electrodes and clean and Remove flueway baffles noting that there are 3 centre and 2 replace as necessary, see diagram 8.12. side flueway baffles, see diagram 8.8. Check the condition of the side and rear insulation panels in the Place a sheet of paper in the combustion chamber to catch any combustion chamber.
-
Page 83: Fault Finding
8 Servicing ELECTRODE SPARK GAP = 3.6 SECURING SCREW GRAPHITE COATED BURNER NUT(2) INJECTOR Diagram 8.12 Diagram 8.11 9 Fault Finding IMPORTANT. On completion of the Fault Finding task which has required the breaking and remaking of the electrical connections, the continuity, polarity, short circuit and resistance to earth checks must be repeated using a suitable multimeter. - Page 84 9 Fault Finding 9.1 Electrical BOILER TEMPERATURE Gain access to the control box, refer to the relevant paragraph CONTROL in section 6.1, then remove the control box cover, refer to section 5.1. Refer to: Boiler Fault Finding, see diagram 9.1, Fault Finding Wiring Diagram, see diagram 9.3, Pictorial Wiring Diagram, see diagram 9.4.
- Page 85 9 Fault Finding KEY TO TERMINAL BLOCK BROWN PURPLE PRESSURE BLUE YELLOW SWITCH = LIVE (Switched) GREEN/YELLOW = NEUTRAL GREY WHITE = EARTH MAIN BLACK CONTROL IGNITION VALVE ELECTRODE SENSING ELECTRODE THERMISTOR P.C.B (CONTROL BOARD) 3.15A MAINS SUPPLY FUSE 230V~50Hz BURNER LIT OVERHEAT INDICATOR...
-
Page 86: Replacement Parts
10 Replacement of Parts Important notes Disconnect the electrical plugs from the control board (PCB) slightly bending back the retaining latches to allow withdrawal, REMEMBER, When replacing a part on this appliance, use only see diagram 10.2. spare parts that you can be assured conform to the safety and performance specification that we require. - Page 87 10 Replacement of Parts 10.5 Solenoid 10.10 Insulation Remove front panel to gain access, see section 6.8. Refer to the relevant paragraphs of the servicing section to remove the burner from combustion chamber. Remove the electrical plug from the multifunctional control and remove the securing screw and then the solenoid assembly, Sides see diagram 10.4.
-
Page 88: Spare Parts
11 Spare Parts 11.1 Part Identification 11.2 Ordering The key number in diagram 11.1 and the first column of the list When ordering any spare part please quote the part number will help identify the spare part. and the description from the list together with the model name and serial number information from the data label.
Need help?
Do you have a question about the Hideaway 40B FF and is the answer not in the manual?
Questions and answers