Table of Contents
Advertisement
Installation and Servicing
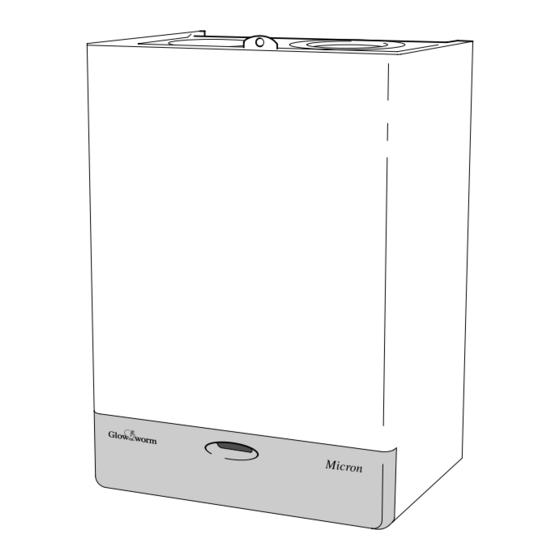
Micron
40FF
G.C. No. 41-047-17
Fanned Flue Boiler
This is a Cat I
Reference in these instructions to British Standards and Statutory
Regulations/Requirements apply only to the United Kingdom.
For Ireland the rules in force must be used.
The instructions consist of three parts, User, Installation and Servicing Instructions, which includes the Guarantee Registration
Card. The instructions are an integral part of the appliance and must, to comply with the current issue of the Gas Safety
(Installation and Use) Regulations, be handed to the user on completion of the installation.
Glow-worm appliances' are manufactured to the very highest standard so we are pleased
In the centre pages are to be found your Guarantee Registration Card, which we recommend you complete and
If this card is missing you can obtain a copy or record your registration by telephoning the Heatcall Customer
Our Guarantee gives you peace of mind plus valuable protection against breakdown by covering the cost of:
All replacement parts
All labour charges
All call-out charges
One Contact Local Service
Instructions for Use
T o b e l e f t w i t h t h e u s e r
Appliance
2H
Guarantee Registration
Thank you for installing a new Glow-worm appliance in your home.
to offer our customers' a Comprehensive First Year Guarantee.
return as soon as possible.
Service number 01773 828100.
REGISTER YOUR GLOW-WORM APPLIANCE
FOR 1ST YEAR GUARANTEE PROTECTION
CALL 0208 247 9857
Customer Services:
Tel: (01773) 828100
Fax: (01773) 828070
Hepworth Heating Ltd.,
Nottingham Road, Belper, Derbyshire. DE56 1JT
General/Sales enquiries:
Tel: (01773) 824141 Fax: (01773) 820569
221899A.03.01
Advertisement
Table of Contents

Related Manuals for Glow-worm Micron 40FF


Summary of Contents for Glow-worm Micron 40FF
-
Page 1: Instructions For Use
Guarantee Registration Thank you for installing a new Glow-worm appliance in your home. Glow-worm appliances' are manufactured to the very highest standard so we are pleased to offer our customers' a Comprehensive First Year Guarantee. In the centre pages are to be found your Guarantee Registration Card, which we recommend you complete and return as soon as possible. -
Page 2: Table Of Contents
Important Information TESTING AND CERTIFICATION This boiler is tested and certificated to EN483 for safety and performance. It is therefore important that no alteration is made to the boiler, without permission, in writing, from Hepworth Heating Ltd. Any alteration not approved by Hepworth Heating Ltd., could invalidate the certification, boiler warranty and may also infringe the current issue of the Statutory Requirements. - Page 3 Instructions for Use Introduction All CORGI Registered Installers carry a CORGI ID card, and have a registration number. Both should be recorded in your Please read these instructions and follow them carefully for the boiler Logbook. You can check your installer is CORGI registered safe and economical use of your boiler.
- Page 4 Installation - 1 General TOP / SIDE FLUE OPTION WATER CONNECTIONS REAR 22mm COPPER PIPE FLUE OPTION GAS CONNECTION in. BSPT) MODEL 40FF 262 75 102 360 139 500 68 100 104 68 108 STD/EXD. EASYFIT STD/EXD. EASYFIT All dimensions are given in millimetres Diagram 1.1 Important Notice The value is used in the UK Government’s Standard Assessment...
-
Page 5: Boiler Clearances
HEPWORTH HEATING LTD., BELPER,DERBYS. DE56 1JT A draining tap must be provided at the lowest points of the 458111 MICRON 40FF system which will allow the entire system and hot water cylinder TYPE C 230V 50Hz 66W Fused at 3A to be drained. -
Page 6: Flue And Ventilation
1 General 1.14 Boilers in a Compartment TABLE 1. Where the installation of the boiler will be in an unusual position, TOTAL DRY WEIGHT the current issue of BS6798 gives detailed guidance on these 36.4 kg (80lb) (Including Terminal) requirements. 29.7 kg (65.34lb) LIFT WEIGHT An existing cupboard or compartment modified for the purpose... -
Page 7: Water Systems
2 Flue and Ventilation 2.3 Terminal Guard A terminal guard is required if persons could come into contact with the terminal or the terminal could be subject to damage. If a terminal guard is required, it must be positioned to provide a minimum of 50mm clearance from any part of the terminal and be central over the terminal, see diagram 2.2. - Page 8 3 Water Systems 3.9 Sealed Water Systems 3.15 Filling a Sealed Water System The installation should comply with the appropriate requirements Provision for filling the system at low level must be made. of the current issue of BS4814, BS5449, BS6759, BS6798 and The installation should comply with the appropriate requirements BS7074 Part 1 and 2.
-
Page 9: Flue And Appliance Preparation
4 Flue and Appliance Preparation STD/EXTD TOP OUTLET FLUE PACK 'X' plus 19mm (RH) FLUE LENGTH FLUE LENGTH 15mm 155mm (LH) = flue length MAX 840mm (extd.) MAX 840mm (extd.) 15mm MAX 570mm (std/Easyfit) EASYFIT MAX 570mm (std/Easyfit) 'X' plus 47mm (RH) SCREW 140mm* (must include 50mm min. - Page 10 4 Flue and Appliance Preparation NOTE : Make sure that the ductings do not slope down towards the boiler. 4.1 Flue Position and Length Determine flue application, length and terminal position before starting. OPTIONAL Refer to diagram 4.1. FLUE If you are using a Flue Bend or a Vertical Flue Kit, please follow COLLAR the instructions supplied with the kit.
- Page 11 FOAM SEAL fitted. This is not fitted for any other flue type/arrangement. Note: There are two restrictors in the loose items pack, use the one stamped “A” for the Micron 40FF. Q-35mm Take the terminal restrictor and position the clamping bracket...
-
Page 12: Boiler Installation
5 Boiler Installation 5.1 Unpacking VIEW ON Open the carton, check the items supplied against the boiler COVER TOP pack contents list on the carton flap. 5.2 Boiler Preparation CASE SECURING With the boiler still in the bottom tray, remove the casing front SCREWS cover. - Page 13 5 Boiler Installation Note: Remove the electrical connections by pulling insulation MOUNTING boots only. BRACKET Remove the securing screw at the front, see diagram 5.5. The fan assembly may now be slid forward. Rear Flue fixing Fit the fan elbow and secure with jubilee clip to the fan outlet, do not tighten yet, see diagram 5.7.
- Page 14 5 Boiler Installation 5.5 Gas Connection REAR FLUE FIXING Make the gas connection to the Rc in gas service cock, see diagram 6.2. The whole of the gas installation, including the meter, should be inspected, tested for soundness and purged in accordance with the current issue of BS6891.
- Page 15 5 Boiler Installation 1. Test insulation resistance to earth. 5.8 Pump Connection 2. Test earth continuity and short circuit of all cables. The pump must be connected to the external controls. 3. Test the polarity of the mains. 5.9 Testing The installer is requested to advise and give guidance to the user of the controls scheme used with the boiler.
-
Page 16: Commissioning
6 Commissioning Important Note : The warning notice attached to the Isolate the boiler from the electrical supply. front of the boiler casing must only be removed by Loosen the burner pressure test point screw and connect a the user. suitable pressure gauge, see diagram 6.2. -
Page 17: Instructions To The User
6 Commissioning The gas rates shown in Table 2 are for guidance only, dependent 6.4 Testing - Electrical on the heat setting. Turn the boiler temperature control knob fully clockwise to the Turn the temperature control knob fully anticlockwise to “0”. maximum setting, which is about 82 C (180 Isolate from the electrical supply. -
Page 18: Servicing
8 Servicing REMEMBER, When replacing a part on this appliance, use only SAMPLING spare parts that you can be assured conform to the safety and POINT performance specification that we require. Do not use reconditioned or copy parts that have not been clearly authorised by Hepworth Heating Ltd. -
Page 19: Fault Finding
8 Servicing Clean the heat exchanger flueways with a suitable stiff brush. Remove the paper together with any debris. SCREW 8.4 Injector With the burner removed the injector can be inspected and cleaned as necessary, see diagram 8.5. For cleaning do not use a wire or sharp instrument on the hole. If removed, use a little suitable sealant on the external thread when refitting to make sure a gas tight seal is made. - Page 20 9 Fault Finding Before carrying out fault finding, ensure that gas, electricity and water are available at the boiler. Ensure that any external controls are calling for heat and circuit water is cold. If overheat neon lit - check water system for overheating, reset by turning temperature control knob off and on. If neon 6 is lit flame failure has occured.
- Page 21 9 Fault Finding NEON KEY (see P.C.B) PRESSURE SWITCH NEON 1 = = MAINS ON NEON 2 = = DEMAND ON NEON 3 = = FAN RUNNING NEON 4 = = BURNER LIT = SAFETY NEON 5 = TEMPERATURE LIMITER CONTROL NEON 6 = = FLAME FAILURE...
-
Page 22: Replacement Of Parts
10 Replacement of Parts Important Notes Note. Replacement of parts must only be carried out by a competent person. Before replacing any parts isolate the boiler from the electrical supply and turn the gas supply off at the gas service cock, see diagram 6.2. - Page 23 10 Replacement of Parts Carefully pull the control knob and extension piece away from 10.11 Air Pressure Switch, Part No.227032 the PCB. - diagram 10.6 Carefully pull the board away from its supports. Gain Access as Section 5.2. Disconnect the electrical plugs by slightly bending back the Remove the air pressure tube and electrical connections from retaining latches to allow withdrawal.
-
Page 24: Spare Parts
10 Replacement of Parts 10.12 Fan, Part No. 227033 - diagram 10.7 Refer to Section 5.3. If top outlet installation: Remove air deflector, or it may just be IMPORTANT: swung back by loosening the securing screws, to enable fan REMOVE ELECTRICAL CONNECTIONS assembly to be removed, see diagram 8.7 and Section 5.3.
Need help?
Do you have a question about the Micron 40FF and is the answer not in the manual?
Questions and answers