
Related Manuals for Emerson Bettis 2000 Series


Summary of Contents for Emerson Bettis 2000 Series
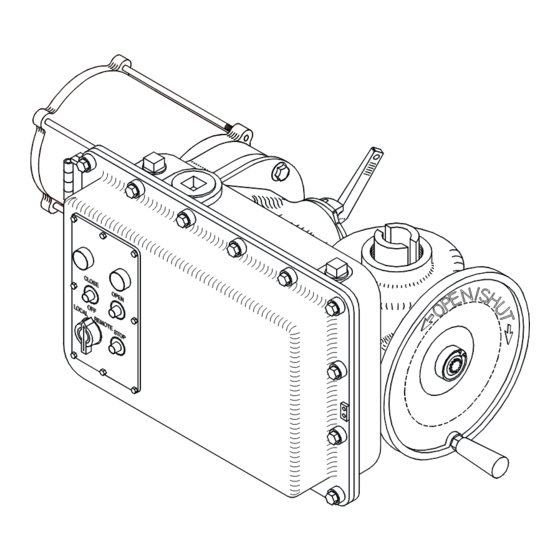
- Page 1 Installation and Maintenance Manual E2K-401-0918 Rev. 1 September 2018 Bettis 2000 Series E1195 MCP (Product Discontinued)
-
Page 3: Table Of Contents
Installation and Maintenance Manual Table of Contents E2K-401-0918 Rev. 1 September 2018 Table of Contents Section 1: Storage Instructions Short Term Storage ..................1 Long Term Storage ..................1 Do ......................... 2 Don't ......................2 Lubrication ....................2 Maintenance ....................3 Pressure Relief .................... - Page 4 Table of Contents Installation and Maintenance Manual September 2018 E2K-401-0918 Rev. 1 Section 6: MDPI and Potentiometer Gear Box P/N 1030 Description ....................16 N Number ....................16 Calibration ....................16 MDPI and POT ..................... 17 Potentiometer Only ..................17 Gear System to Field Mount MDPI ...............
-
Page 5: Section 1: Storage Instructions
Installation and Maintenance Manual Section 1: Storage Instructions E2K-401-0918 Rev. 1 September 2018 Section 1: Storage Instructions Short Term Storage (Stored at job site less than one year from shipment) Actuator should be stored in the recommended mounting position. The motor should be horizontal and Electrical Enclosure either horizontal or vertical. -
Page 6: Don't
Section 1: Storage Instructions Installation and Maintenance Manual September 2018 E2K-401-0918 Rev. 1 Do follow proper storage procedures. Improper storage will void warranty. DANGER: Do check for proper motor rotation. If valve goes wrong direction when button is pushed, you have no torque or limit protection. Either incoming power or motor wiring must be reversed. -
Page 7: Maintenance
Installation and Maintenance Manual Section 1: Storage Instructions E2K-401-0918 Rev. 1 September 2018 Maintenance At least once a year a check should be made of your Bettis actuator. Disconnect all electrical power to actuator. Open Electrical Enclosure. Inspect and tighten all electrical connections. Visually inspect for any electrical or mechanical damage. -
Page 8: Section 2: Assembly To Valves
Section 2: Assembly to Valves Installation and Maintenance Manual September 2018 E2K-401-0918 Rev. 1 Section 2: Assembly to Valves Threaded Valve Stem Figure 2 Stem Nut Installation (Multi-Turn) Unscrew Locknut (55) holding Bronze Stem Nut (54) and remove Stem Nut and Key (52). -
Page 9: Thrust Spool Installation (Multi-Turn)
Installation and Maintenance Manual Section 2: Assembly to Valves E2K-401-0918 Rev. 1 September 2018 2.1.0.1 Mounting Screws If Bettis supplied adaption, the mounting screws are included. If the adaption to the valve was the responsibility of others, the mounting screws are not furnished by Bettis. Screws thru adapter MUST engage a minimum of one screw diameter deep into Bettis actuator base. -
Page 10: Spline Bushing (Quarter-Turn)
Section 2: Assembly to Valves Installation and Maintenance Manual September 2018 E2K-401-0918 Rev. 1 2.1.2 Spline Bushing (Quarter-Turn) Bettis removable Spline Bushing allows easy adaption to valve shaft diameter and Key. Actuator may be rotated with respect to the valve shaft for unexpected or awkward field installations. - Page 11 Installation and Maintenance Manual Section 2: Assembly to Valves E2K-401-0918 Rev. 1 September 2018 Loosen both Locknuts (46) and back out the two Stopbolts (86) to allow the valve to close and open fully. Insure Electrical Travel Limit Switches have been properly adjusted (see appropriate section of this manual), proceed as follows: Run the actuator electrically to the full Closed position.
-
Page 12: Section 3: Mcp And Electrical Hook Up
Section 3: MCP and Electrical Hook Up Installation and Maintenance Manual September 2018 E2K-401-0918 Rev. 1 Section 3: MCP and Electrical Hook Up Modular Control Package - MCP Electrical components are Bettis factory assembled, wired and tested as a module, with three possible MCP configurations. -
Page 13: Electrical Hook Up
Installation and Maintenance Manual Section 3: MCP and Electrical Hook Up E2K-401-0918 Rev. 1 September 2018 FULL FRAME – Reversing Contactor with the addition of electronic plugin modules. Figure 6 Full MCP Frame Stop Pushbutton Close Pushbutton Selector Switch Torque Switches Open Pushbutton Limit Switch Contacts Pilot Lamps... -
Page 14: Section 4: Geared Rotary Limit Switch Setting Instructions
Section 4: Geared Rotary Limit Switch Setting Instructions Installation and Maintenance Manual September 2018 E2K-401-0918 Rev. 1 Section 4: Geared Rotary Limit Switch Setting Instructions Before making any switch setting: Move valve to mid-position using handwheel. Phase the power (motor) voltage and make sure that open contactor moves valve Open and Close contactor moves valve Closed. - Page 15 Installation and Maintenance Manual Section 4: Geared Rotary Limit Switch Setting Instructions E2K-401-0918 Rev. 1 September 2018 Disengage spring loaded spur gear — Push Disengage Shaft (2) in Fig. 8 down, then rotate 90° so that shaft is captured in down position. This disengages limit switch gears from the spring loaded gear pinion assembly.
-
Page 16: To Set Close Lmit Switch (Lsc)
Section 4: Geared Rotary Limit Switch Setting Instructions Installation and Maintenance Manual September 2018 E2K-401-0918 Rev. 1 IMPORTANT: To insure that spur gears have engaged properly, lightly jiggle all adjusting shafts (1) with screwdriver back and forth; proper engagement has been made if all shafts will not turn. If all shafts do not lock in place, the limit switch setting will be lost when valve is moved. -
Page 17: Section 5: Torque Switch Tsc And Tso Setting
Installation and Maintenance Manual Section 5: Torque Switch TSC and TSO Setting E2K-401-0918 Rev. 1 September 2018 Section 5: Torque Switch TSC and TSO Setting Description Bettis Torque Switch senses mechanical over load in Close (TSC) or Open (TSO) direction. Worm is supported with bi-directional disc spring stack. -
Page 18: Adjust With Screwdriver
Section 5: Torque Switch TSC and TSO Setting Installation and Maintenance Manual September 2018 E2K-401-0918 Rev. 1 Adjust with Screwdriver The only tool required for torque adjustment is a screwdriver. To change setting: push screwdriver down about 1/16" and rotate. Figure 11 Approximate Torque Spring Chart See Bettis supplied specification sheet for approximate torque spring settings. -
Page 19: To Set Open Torque Switch (Tso)
Installation and Maintenance Manual Section 5: Torque Switch TSC and TSO Setting E2K-401-0918 Rev. 1 September 2018 DANGER Reverse voltage phasing removes torque switch protection from reversing contractor valve damage could occur. If phasing has not been checked, do so before proceeding. Back valve away from Close position with handwheel and test electrically, using Close controls. -
Page 20: Section 6: Mdpi And Potentiometer Gear Box P/N 1030
Section 6: MDPI and Potentiometer Gear Box P/N 1030 Installation and Maintenance Manual September 2018 E2K-401-0918 Rev. 1 Section 6: MDPI and Potentiometer Gear Box P/N 1030 Description Mechanical Dial Position Indicator, MDPI, Part No. 1030 is a precision assembly of gears, shafts, bearings and slip-clutch designed to drive Position Indication arrow and/or Potentiometers. -
Page 21: Mdpi And Pot
Installation and Maintenance Manual Section 6: MDPI and Potentiometer Gear Box P/N 1030 E2K-401-0918 Rev. 1 September 2018 MDPI and POT Move valve to Close position. Manually rotate MDPI arrow to indicate Close. Calibration is complete. Open valve to check that MDPI arrow goes to Open, indicating that N is correct for full valve travel. -
Page 22: Part No. 1030 - Change
Section 6: MDPI and Potentiometer Gear Box P/N 1030 Installation and Maintenance Manual September 2018 E2K-401-0918 Rev. 1 Install the 1030 assembly on top of the P/N 4118 plate, making sure that the P/N 9052- engages in the slot in bottom of the 1030 assembly. Secure the P/N 1030 with the (3) P/N 7058 screws. -
Page 23: Section 7: Wiring Diagram
Installation and Maintenance Manual Section 7: Wiring Diargram Symbols for MCP E2K-401-0918 Rev. 1 September 2018 Section 7: Wiring Diagram Symbols for MCP Figure 16 Potentiometer 1K OHM CLOSE Pot. Slider is geared to Valve Position and “In-step” at all times. Figure 17 Transformer 120V... - Page 24 Section 7: Wiring Diargram Symbols for MCP Installation and Maintenance Manual September 2018 E2K-401-0918 Rev. 1 Figure 23 Pushbuttons N.O. CLOSE OPEN Momentary N.O. Contact connects control voltage to reversing contactor coils. Seal-in contacts Cs and Os on contactor allow actuator to go to extremes of travel without continued holding down of button.
- Page 25 Installation and Maintenance Manual Section 7: Wiring Diargram Symbols for MCP E2K-401-0918 Rev. 1 September 2018 Figure 29 Reversing Contractor Showing Open and Close coils, Mechanical Interlock, and Electrical Interlock Contacts Oi & Ci. Figure 30 Nuisance Trip To prevent (TSO) contact tripping when valve has been jammed closed – LSC contact allows valve to open slightly.
- Page 26 Section 7: Wiring Diargram Symbols for MCP Installation and Maintenance Manual September 2018 E2K-401-0918 Rev. 1 Figure 34 Grounds Earth Chassis Figure 35 Overload Heater Figure 36 Contact N.C. Figure 37 Contact N.O. Figure 38 Selector Switch N.C. and N.O. Double Break Hand Auto Local...
- Page 27 Installation and Maintenance Manual Section 7: Wiring Diargram Symbols for MCP E2K-401-0918 Rev. 1 September 2018 Figure 40 3 Phase Motor Figure 41 Single Phase Motor P, Q & R Figure 42 Single Phase Motor Multi-Turn & M/MGs Motor Thermal Overload Protection Shown. Wiring Diagram Symbols for MCP...
-
Page 28: Section 8: Troubleshooting
Section 8: Troubleshooting Installation and Maintenance Manual September 2018 E2K-401-0918 Rev. 1 Section 8: Troubleshooting Symptom Probable Cause Corrective Action Check Fuse and Replace Blown Control Fuse as necessary Refer to appropriate wiring Motor will not Run Open in Control Circuit diagram and check for continuity Insulation Resistance... - Page 29 Installation and Maintenance Manual Section 8: Troubleshooting E2K-401-0918 Rev. 1 September 2018 Replace Packing (O-ring, Leakage through Conduit neoprene grommet, etc.) Entry as necessary Moisture in Electrical Electrical Enclosure is not Inspect and replace O-ring Enclosure properly sealed if necessary Check Circuit continuity Space Heater Inoperable for Heater...
- Page 31 P. R. China Székesfehérvár 8000 T +86 22 8212 3300 Hungary The Emerson logo is a trademark and service mark of Emerson Electric Co. T +36 22 53 09 50 Bettis is a mark of one of the Emerson family of companies.
Need help?
Do you have a question about the Bettis 2000 Series and is the answer not in the manual?
Questions and answers